Unity3D游戏开发之如何用U3D截图的技能培训
2014-10-15 14:49
435 查看
欢迎来到企业培训教育专区,这里有很多我们致力于打造业内培训、学习第一品牌
今天我们来做点简单的东西,做个什么呢?答案就是截屏。如图,下面是收集的部分截图:
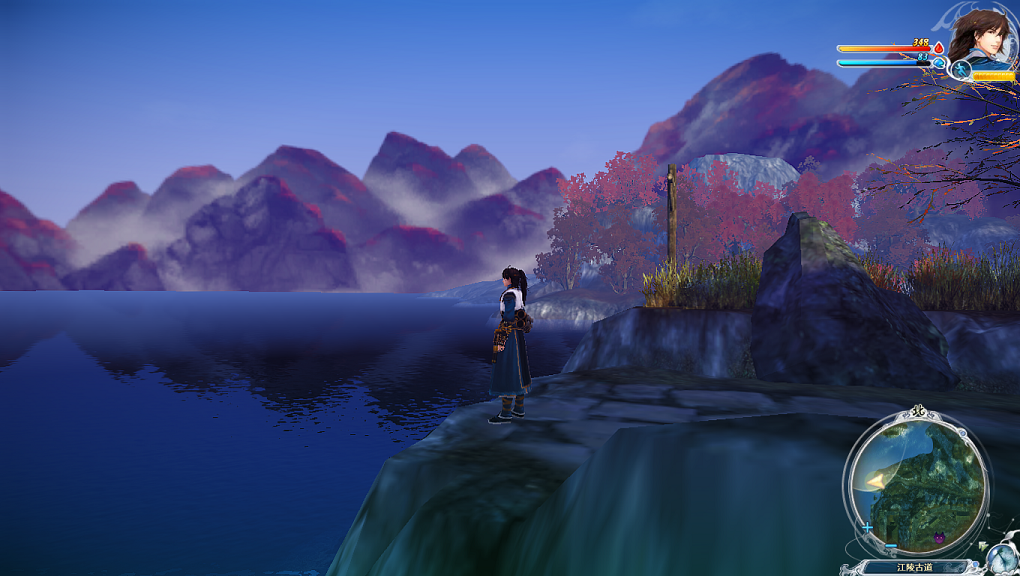
好了,欣赏完美丽的风景,下面我们就来一起学习在Unity3D实现截屏,先给出实现截屏的三种实现方式:
[csharp] view plaincopyprint?
/// <summary>
/// 使用Application类下的CaptureScreenshot()方法实现截图
/// 优点:简单,可以快速地截取某一帧的画面、全屏截图
/// 缺点:不能针对摄像机截图,无法进行局部截图
/// </summary>
/// <param name="mFileName">M file name.</param>
private void CaptureByUnity(string mFileName)
{
Application.CaptureScreenshot(mFileName,0);
}
/// <summary>
/// 根据一个Rect类型来截取指定范围的屏幕
/// 左下角为(0,0)
/// </summary>
/// <param name="mRect">M rect.</param>
/// <param name="mFileName">M file name.</param>
private IEnumerator CaptureByRect(Rect mRect,string mFileName)
{
//等待渲染线程结束
yield return new WaitForEndOfFrame();
//初始化Texture2D
Texture2D mTexture=new Texture2D((int)mRect.width,(int)mRect.height,TextureFormat.RGB24,false);
//读取屏幕像素信息并存储为纹理数据
mTexture.ReadPixels(mRect,0,0);
//应用
mTexture.Apply();
//将图片信息编码为字节信息
byte[] bytes = mTexture.EncodeToPNG();
//保存
System.IO.File.WriteAllBytes(mFileName, bytes);
//如果需要可以返回截图
//return mTexture;
}
private IEnumerator CaptureByCamera(Camera mCamera,Rect mRect,string mFileName)
{
//等待渲染线程结束
yield return new WaitForEndOfFrame();
//初始化RenderTexture
RenderTexture mRender=new RenderTexture((int)mRect.width,(int)mRect.height,0);
//设置相机的渲染目标
mCamera.targetTexture=mRender;
//开始渲染
mCamera.Render();
//激活渲染贴图读取信息
RenderTexture.active=mRender;
Texture2D mTexture=new Texture2D((int)mRect.width,(int)mRect.height,TextureFormat.RGB24,false);
//读取屏幕像素信息并存储为纹理数据
mTexture.ReadPixels(mRect,0,0);
//应用
mTexture.Apply();
//释放相机,销毁渲染贴图
mCamera.targetTexture = null;
RenderTexture.active = null;
GameObject.Destroy(mRender);
//将图片信息编码为字节信息
byte[] bytes = mTexture.EncodeToPNG();
//保存
System.IO.File.WriteAllBytes(mFileName,bytes);
//如果需要可以返回截图
//return mTexture;
}
}
接下来,我们来调用这三个方法实现一个简单的截图的例子:
[csharp] view plaincopyprint?
//定义图片保存路径
private string mPath1;
private string mPath2;
private string mPath3;
//相机
public Transform CameraTrans;
void Start()
{
//初始化路径
mPath1=Application.dataPath+"\\ScreenShot\\ScreenShot1.png";
mPath2=Application.dataPath+"\\ScreenShot\\ScreenShot2.png";
mPath3=Application.dataPath+"\\ScreenShot\\ScreenShot3.png";
}
//主方法,使用UGUI实现
void OnGUI()
{
if(GUILayout.Button("截图方式1",GUILayout.Height(30))){
CaptureByUnity(mPath1);
}
if(GUILayout.Button("截图方式2",GUILayout.Height(30))){
StartCoroutine(CaptureByRect(new Rect(0,0,1024,768),mPath2));
}
if(GUILayout.Button("截图方式3",GUILayout.Height(30))){
//启用顶视图相机
CameraTrans.camera.enabled=true;
//禁用主相机
Camera.main.enabled=false;
StartCoroutine(CaptureByCamera(CameraTrans.camera,new Rect(0,0,1024,768),mPath3));
}
}
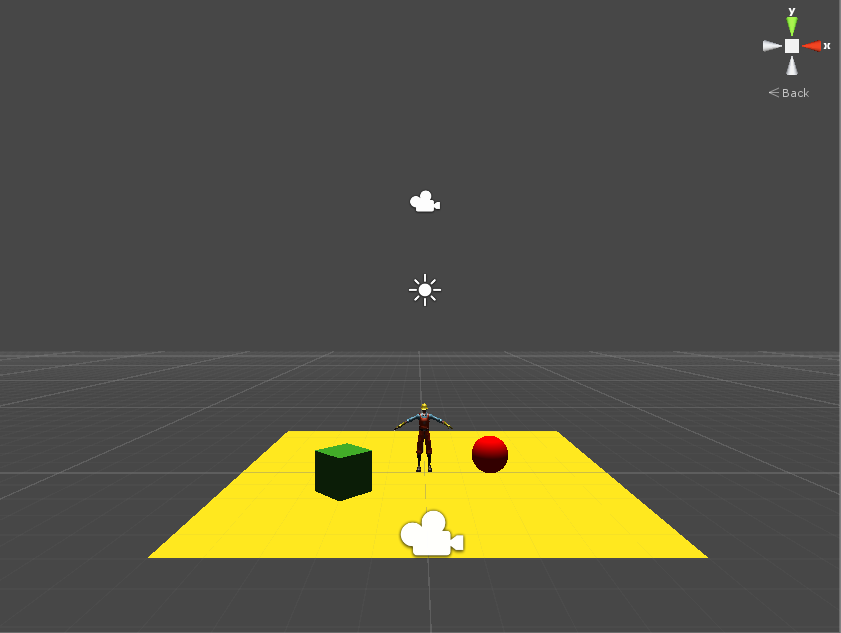
在第三中截图方式中,在场景里放了一个名为TopCamera的摄像机,它垂直向下投影到游戏场景里,这样可以使玩家看到场景的顶视图。这里我们用这个相机来测试第三个方法,此时需要先激活该相机。场景设置如图:
我们下面来看三种方法截图的效果:
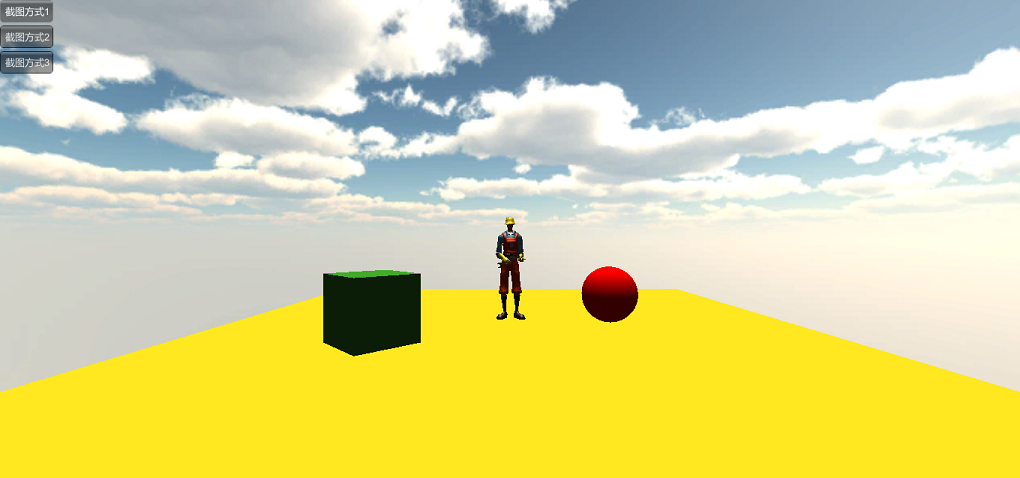
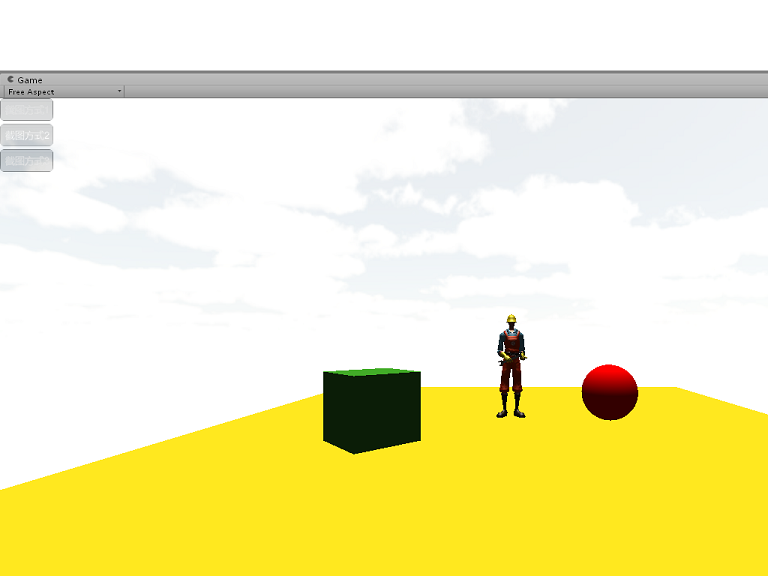
从截图的效果来看,第一种方法的效果是最好的,不过定制化是个问题。第二种方法效果一般吧,感觉这里TextureFormat没有选好吧。第三种效果基本达到了想要的要求,不过摄像机的投影范围似乎没有设计好。这里我们发现第二张截图会把编辑器的窗口渲染到里面,认为是程序运行的时候,即使将Game窗口放到最大,仍然会受到窗口的影响,后来就把程序编译成可执行文件,不过程序运行完之后,却没有找到对应的截图。后来查找了官方的API才知道原因是这样的:
Contains the path to the game data folder (Read Only).
The value depends on which platform you are running on:
Unity Editor: <path to project folder>/AssetsMac player: <path to player app bundle>/ContentsiPhone player: <path
to player app bundle>/<AppName.app>/DataWin player: <path to executablename_Data folder>Web player: The absolute url to the player
data file folder (without the actual data file name)Flash: The absolute url to the player data file folder (without the actual data file name)Note that the string returned on a PC will use a forward slash as a folder separator
显然,我们从这里可以知道Application.datapath在不同的平台上对应的位置。对于可执行(.exe,Windows平台)的文件,它对应在和应用程序对应的一个文件夹里,例如可执行文件的名字叫做UnityGame,那么对应的位置就是UnityGame_Data这个文件啦。所以问题应该是出在没有在这里建一个ScreenShot的文件夹,希望大家以后做相关项目的时候注意一下吧。好了,这就是今天的内容了,希望大家喜欢啊。
今天我们来做点简单的东西,做个什么呢?答案就是截屏。如图,下面是收集的部分截图:
好了,欣赏完美丽的风景,下面我们就来一起学习在Unity3D实现截屏,先给出实现截屏的三种实现方式:
[csharp] view plaincopyprint?
/// <summary>
/// 使用Application类下的CaptureScreenshot()方法实现截图
/// 优点:简单,可以快速地截取某一帧的画面、全屏截图
/// 缺点:不能针对摄像机截图,无法进行局部截图
/// </summary>
/// <param name="mFileName">M file name.</param>
private void CaptureByUnity(string mFileName)
{
Application.CaptureScreenshot(mFileName,0);
}
/// <summary>
/// 根据一个Rect类型来截取指定范围的屏幕
/// 左下角为(0,0)
/// </summary>
/// <param name="mRect">M rect.</param>
/// <param name="mFileName">M file name.</param>
private IEnumerator CaptureByRect(Rect mRect,string mFileName)
{
//等待渲染线程结束
yield return new WaitForEndOfFrame();
//初始化Texture2D
Texture2D mTexture=new Texture2D((int)mRect.width,(int)mRect.height,TextureFormat.RGB24,false);
//读取屏幕像素信息并存储为纹理数据
mTexture.ReadPixels(mRect,0,0);
//应用
mTexture.Apply();
//将图片信息编码为字节信息
byte[] bytes = mTexture.EncodeToPNG();
//保存
System.IO.File.WriteAllBytes(mFileName, bytes);
//如果需要可以返回截图
//return mTexture;
}
private IEnumerator CaptureByCamera(Camera mCamera,Rect mRect,string mFileName)
{
//等待渲染线程结束
yield return new WaitForEndOfFrame();
//初始化RenderTexture
RenderTexture mRender=new RenderTexture((int)mRect.width,(int)mRect.height,0);
//设置相机的渲染目标
mCamera.targetTexture=mRender;
//开始渲染
mCamera.Render();
//激活渲染贴图读取信息
RenderTexture.active=mRender;
Texture2D mTexture=new Texture2D((int)mRect.width,(int)mRect.height,TextureFormat.RGB24,false);
//读取屏幕像素信息并存储为纹理数据
mTexture.ReadPixels(mRect,0,0);
//应用
mTexture.Apply();
//释放相机,销毁渲染贴图
mCamera.targetTexture = null;
RenderTexture.active = null;
GameObject.Destroy(mRender);
//将图片信息编码为字节信息
byte[] bytes = mTexture.EncodeToPNG();
//保存
System.IO.File.WriteAllBytes(mFileName,bytes);
//如果需要可以返回截图
//return mTexture;
}
}
接下来,我们来调用这三个方法实现一个简单的截图的例子:
[csharp] view plaincopyprint?
//定义图片保存路径
private string mPath1;
private string mPath2;
private string mPath3;
//相机
public Transform CameraTrans;
void Start()
{
//初始化路径
mPath1=Application.dataPath+"\\ScreenShot\\ScreenShot1.png";
mPath2=Application.dataPath+"\\ScreenShot\\ScreenShot2.png";
mPath3=Application.dataPath+"\\ScreenShot\\ScreenShot3.png";
}
//主方法,使用UGUI实现
void OnGUI()
{
if(GUILayout.Button("截图方式1",GUILayout.Height(30))){
CaptureByUnity(mPath1);
}
if(GUILayout.Button("截图方式2",GUILayout.Height(30))){
StartCoroutine(CaptureByRect(new Rect(0,0,1024,768),mPath2));
}
if(GUILayout.Button("截图方式3",GUILayout.Height(30))){
//启用顶视图相机
CameraTrans.camera.enabled=true;
//禁用主相机
Camera.main.enabled=false;
StartCoroutine(CaptureByCamera(CameraTrans.camera,new Rect(0,0,1024,768),mPath3));
}
}
在第三中截图方式中,在场景里放了一个名为TopCamera的摄像机,它垂直向下投影到游戏场景里,这样可以使玩家看到场景的顶视图。这里我们用这个相机来测试第三个方法,此时需要先激活该相机。场景设置如图:
我们下面来看三种方法截图的效果:
从截图的效果来看,第一种方法的效果是最好的,不过定制化是个问题。第二种方法效果一般吧,感觉这里TextureFormat没有选好吧。第三种效果基本达到了想要的要求,不过摄像机的投影范围似乎没有设计好。这里我们发现第二张截图会把编辑器的窗口渲染到里面,认为是程序运行的时候,即使将Game窗口放到最大,仍然会受到窗口的影响,后来就把程序编译成可执行文件,不过程序运行完之后,却没有找到对应的截图。后来查找了官方的API才知道原因是这样的:
Description
Contains the path to the game data folder (Read Only).The value depends on which platform you are running on:
Unity Editor: <path to project folder>/AssetsMac player: <path to player app bundle>/ContentsiPhone player: <path
to player app bundle>/<AppName.app>/DataWin player: <path to executablename_Data folder>Web player: The absolute url to the player
data file folder (without the actual data file name)Flash: The absolute url to the player data file folder (without the actual data file name)Note that the string returned on a PC will use a forward slash as a folder separator
显然,我们从这里可以知道Application.datapath在不同的平台上对应的位置。对于可执行(.exe,Windows平台)的文件,它对应在和应用程序对应的一个文件夹里,例如可执行文件的名字叫做UnityGame,那么对应的位置就是UnityGame_Data这个文件啦。所以问题应该是出在没有在这里建一个ScreenShot的文件夹,希望大家以后做相关项目的时候注意一下吧。好了,这就是今天的内容了,希望大家喜欢啊。

相关文章推荐
- Unity3D游戏开发之如何截屏的技能培训
- unity3d游戏开发之简单的透明shader技能培训
- Unity3D游戏开发之实现血条技能培训
- Unity3D游戏开发之Lua的技能培训
- unity3d游戏开发之简单的透明shader技能培训
- Unity3D游戏开发之实现血条组件技能培训
- Unity3D游戏开发之网络游戏服务器架构设计培训(如何做一名主程)
- Unity3d游戏开发之如何使用烘焙贴图(二)
- 没有开发过Web应用如何掌握相应的技能
- unity3D游戏开发之浅谈如何提高游戏生命力
- 软件开发中心IT项目经理技能高级认证培训平台
- unity3d游戏开发之讲解如何使用NGUI制作表单
- unity3D游戏开发之边锋(杭州)聘:游戏策划/设计/U3D/测评/文案等
- 作为开发人员 如何快速提高自身技能
- 开发者是如何提升技能水平的 发表于1小时前| 770次阅读| 来源SquareSpace| 1 条评论| 作者Denis Gobo 开源程序员博客代码编程经验分享 摘要:作为一个技术开发人员,不断的学
- 做个犀利的码农:如何持续培养/更新自己的开发技能
- 【unity3d游戏开发之疑难杂症】Unity3d工程如何与MonoDevelop工具进行调试
- Unity3D游戏开发之刀光剑影特效如何实现
- 【专题六】虚拟化实施人才和培训的瓶颈如何解决? ――虚拟化人才逆势抢手 5项技能最关键
- 做个犀利的码农:如何持续培养/更新自己的开发技能