Centos上PostgreSQL9.3的安装
2014-09-12 14:34
447 查看
系统环境
CentOS release 6.2(Final) 64bit PostgreSQL版本:9.3.5 分别使用rpm、源码包、yum的安装方式进行安装1、安装PostgreSQL
a.rpm安装
1.检查PostgreSQL是否已经安装
[root@localhost ~]#rpm -qa|grep postgresql 如果有检查到已经安装的包,使用rpm –e将其卸载 2.rpm的下载安装
在http://yum.postgresql.org/9.3/redhat/rhel-6.2-x86_64/下载 以下是直接安装,安装的时候需要注意顺序 [root@localhost ~]#rpm -ivh http://yum.postgresql.org/9.3/redhat/rhel-6.2-x86_64/postgresql93-libs-9.3.5-1PGDG.rhel6.x86_64.rpm [root@localhost ~]#rpm -ivh http://yum.postgresql.org/9.3/redhat/rhel-6.2-x86_64/postgresql93-9.3.5-1PGDG.rhel6.x86_64.rpm [root@localhost ~]#rpm -ivh http://yum.postgresql.org/9.3/redhat/rhel-6.2-x86_64/postgresql93-server-9.3.5-1PGDG.rhel6.x86_64.rpm

3.初始化、启动PostgreSQL数据库
[root@localhost ~]#/etc/init.d/postgresql-9.3 initdb [root@localhost ~]#/etc/init.d/postgresql-9.3 start

4.添加为开机启动
[root@localhost ~]#chkconfig postgresql-9.3 on [root@localhost ~]#chkconfig --list postgresql-9.3

5.进入到PostgreSQL数据库
安装好PostgreSQL数据库之后,会默认创建一个postgres账户,作为管理PostgreSQL的用户

默认密码是空,可以添加一个密码,执行以下语句 postgres=# alteruser postgres with password '123456'; postgres=# select *from pg_shadow ; 查看

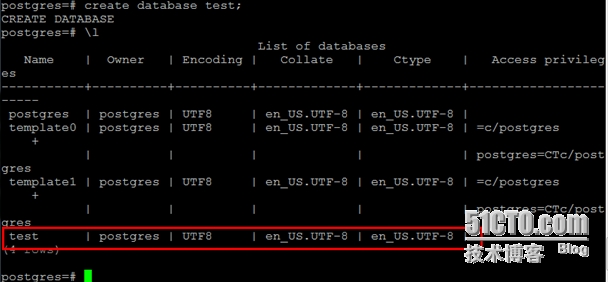
使用\l可以查看当前数据库中有哪些 创建数据库test postgres=# createdatabase test;
进入到test数据库 postgres=# \c test

在test中创建一张表,表名testdb,并且插入一行数据 test=# create tabletestdb (name text,no integer); test=# insert intotestdb values ('sugar',9);

使用\q命令可以退出数据库. 6.对PostgreSQL进行配置使得可以远程访问 配置文在/var/lib/pgsql/9.3/data目录下,修改pg_hba.conf和postgresql.conf(修改前记得备份,虽然操作比较小,养成好习惯) cp /var/lib/pgsql/9.3/data/postgresql.conf postgresql.conf.bak vi /var/lib/pgsql/9.3/data/postgresql.conf 将#listen_addresses= 'localhost'前 的注释改为listen_addresses= '*'

修改认证配置文件pg_hba.conf,把要连接至PostgreSQL服务器上的IP货IP地址段写入到该文件,保存退出。 cp /var/lib/pgsql/9.3/data/pg_hba.conf pg_hba.conf.bak vi /var/lib/pgsql/9.3/data/pg_hba.conf

重启数据库使其生效,然后连接进行测试 [root@localhost ~]#/etc/init.d/postgresql-9.3 restart [root@localhostdata]# psql -h 192.168.233.136 -U postgres

7.需要注意的是:在防火墙中开放5432端口,关闭selinux。
b.源码包安装
http://ftp.postgresql.org/pub/source/v9.3.5/
1.下载源码包、解压、编译并安装。
[root@localhostsrc]# wget http://ftp.postgresql.org/pub/source/v9.3.5/postgresql-9.3.5.tar.gz [root@localhostsrc]# tar zxvf postgresql-9.3.5.tar.gz
[root@localhostsrc]# cd postgresql-9.3.5
按照解压目录下INSTALL文件进行安装

[root@localhostpostgresql-9.3.5]# ./configure
Configure时碰到以下的问题,
configure:error: readline library not found

根据提示,说是readline的问题,使用yum install readline安装后再次Configure还是出现问题,虽然后面有提示使用--without-readline可以安装,但是为了以后使用方便,还是解决下。看提示,说是readline的库文件没有找到,猜测可能是readline-devel没有安装,于是再次yum install readline-devel进行安装。
安装完成之后,再次Configure,问题没有出现。
[root@localhostpostgresql-9.3.5]# gmake

gmake完成,可以进行安装
[root@localhostpostgresql-9.3.5]# gmake install

PostgreSQL编译安装完成,可以进行配置。
2.设置环境变量
[root@localhost ~]#vi .bash_profile [root@localhost ~]#source .bash_profile

在PATH=$PATH:$HOME/bin后面加上:/usr/local/pgsql/bin 3.添加用户postgres
[root@localhost ~]#useradd postgres 在这里可以选择更改下用户的目录,也就是将挡墙的/home/postgres更改为PostgreSQL安装的目录:/usr/local/pgsql 3.1 [root@localhost ~]# vi/etc/passwd 将postgres:x:506:507::/home/postgres:/bin/bash 改为postgres:x:506:507::/usr/local/pgsql:/bin/bash
把.bash_profile移动到/usr/local/pgsql下,修改其权限
[root@localhost~]# cp .bash_profile /usr/local/pgsql/
[root@localhostpgsql]# chown postgres.postgres .bash_profile
[root@localhost~]# rm -rf /home/postgres/
4.初始化数据库
首先创建data目录 [root@localhost ~]#mkdir /usr/local/pgsql/data [root@localhost ~]#chown postgres /usr/local/pgsql/data [root@localhost ~]#su – postgres 初始化数据库 -bash-4.1$/usr/local/pgsql/bin/initdb -D /usr/local/pgsql/data/

5.配置相关操作
进入到/usr/local/src/postgresql-9.3.5 cd /usr/local/src/postgresql-9.3.5 复制contrib/start-scripts下的linux文件到etc/init.d/下并命名为postgres,
[root@localhostpostgresql-9.3.5]# cp contrib/start-scripts/linux /etc/init.d/postgresql
现在就可以使用service打开数据库了
[root@localhost~]# service postgresql start
将postgresql服务添加到开机启动

6.创建数据库的操作记录文件
[root@localhost~]# touch /usr/local/pgsql/.pgsql_history
[root@localhost~]# chown postgres.postgres /usr/local/pgsql/.pgsql_history
[root@localhost~]# ls -l /usr/local/pgsql/.pgsql_history

7.创建测试数据库
[root@localhost~]# su – postgres
-bash-4.1$/usr/local/pgsql/bin/createdb test
-bash-4.1$/usr/local/pgsql/bin/psql test

编译安装PostgreSQL到这里就完成了
c.yum安装
直接使用yum安装时,版本比较低,还是8.4版本的
[root@nothing~]# yum install postgresql

可以通过安装pgdg-centos93-9.3-1.noarch.rpm来安装最新的PostgreSQL数据库,依旧在以下的网站下载
http://yum.postgresql.org/9.3/redhat/rhel-6.2-x86_64/
[root@nothing~]# wget http://yum.postgresql.org/9.3/redhat/rhel-6.2-x86_64/pgdg-centos93-9.3-1.noarch.rpm
[root@nothing~]# rpm -ivh pgdg-centos93-9.3-1.noarch.rpm
接下来继续使用yum安装
[root@nothing~]# yum install postgresql93 postgresql93-server postgresql93-contrib

初始化,启动数据库
[root@nothing~]# /etc/init.d/postgresql-9.3 initdb
[root@nothing~]# /etc/init.d/postgresql-9.3 start

连接数据库
[root@nothing~]# su – postgres
-bash-4.1$psql

yum安装PostgreSQL到这里就完成了。
参考链接:http://www.cnblogs.com/mchina/archive/2012/06/06/2539003.html
本文出自 “相守姑娘说” 博客,请务必保留此出处http://sugarlovecxq.blog.51cto.com/6707742/1551578
CentOS release 6.2(Final) 64bit PostgreSQL版本:9.3.5 分别使用rpm、源码包、yum的安装方式进行安装1、安装PostgreSQL
a.rpm安装
1.检查PostgreSQL是否已经安装
[root@localhost ~]#rpm -qa|grep postgresql 如果有检查到已经安装的包,使用rpm –e将其卸载 2.rpm的下载安装
在http://yum.postgresql.org/9.3/redhat/rhel-6.2-x86_64/下载 以下是直接安装,安装的时候需要注意顺序 [root@localhost ~]#rpm -ivh http://yum.postgresql.org/9.3/redhat/rhel-6.2-x86_64/postgresql93-libs-9.3.5-1PGDG.rhel6.x86_64.rpm [root@localhost ~]#rpm -ivh http://yum.postgresql.org/9.3/redhat/rhel-6.2-x86_64/postgresql93-9.3.5-1PGDG.rhel6.x86_64.rpm [root@localhost ~]#rpm -ivh http://yum.postgresql.org/9.3/redhat/rhel-6.2-x86_64/postgresql93-server-9.3.5-1PGDG.rhel6.x86_64.rpm
3.初始化、启动PostgreSQL数据库
[root@localhost ~]#/etc/init.d/postgresql-9.3 initdb [root@localhost ~]#/etc/init.d/postgresql-9.3 start
4.添加为开机启动
[root@localhost ~]#chkconfig postgresql-9.3 on [root@localhost ~]#chkconfig --list postgresql-9.3
5.进入到PostgreSQL数据库
安装好PostgreSQL数据库之后,会默认创建一个postgres账户,作为管理PostgreSQL的用户
默认密码是空,可以添加一个密码,执行以下语句 postgres=# alteruser postgres with password '123456'; postgres=# select *from pg_shadow ; 查看
使用\l可以查看当前数据库中有哪些 创建数据库test postgres=# createdatabase test;
进入到test数据库 postgres=# \c test
在test中创建一张表,表名testdb,并且插入一行数据 test=# create tabletestdb (name text,no integer); test=# insert intotestdb values ('sugar',9);
使用\q命令可以退出数据库. 6.对PostgreSQL进行配置使得可以远程访问 配置文在/var/lib/pgsql/9.3/data目录下,修改pg_hba.conf和postgresql.conf(修改前记得备份,虽然操作比较小,养成好习惯) cp /var/lib/pgsql/9.3/data/postgresql.conf postgresql.conf.bak vi /var/lib/pgsql/9.3/data/postgresql.conf 将#listen_addresses= 'localhost'前 的注释改为listen_addresses= '*'
修改认证配置文件pg_hba.conf,把要连接至PostgreSQL服务器上的IP货IP地址段写入到该文件,保存退出。 cp /var/lib/pgsql/9.3/data/pg_hba.conf pg_hba.conf.bak vi /var/lib/pgsql/9.3/data/pg_hba.conf
重启数据库使其生效,然后连接进行测试 [root@localhost ~]#/etc/init.d/postgresql-9.3 restart [root@localhostdata]# psql -h 192.168.233.136 -U postgres
7.需要注意的是:在防火墙中开放5432端口,关闭selinux。
b.源码包安装
http://ftp.postgresql.org/pub/source/v9.3.5/
1.下载源码包、解压、编译并安装。
[root@localhostsrc]# wget http://ftp.postgresql.org/pub/source/v9.3.5/postgresql-9.3.5.tar.gz [root@localhostsrc]# tar zxvf postgresql-9.3.5.tar.gz
[root@localhostsrc]# cd postgresql-9.3.5
按照解压目录下INSTALL文件进行安装
[root@localhostpostgresql-9.3.5]# ./configure
Configure时碰到以下的问题,
configure:error: readline library not found
根据提示,说是readline的问题,使用yum install readline安装后再次Configure还是出现问题,虽然后面有提示使用--without-readline可以安装,但是为了以后使用方便,还是解决下。看提示,说是readline的库文件没有找到,猜测可能是readline-devel没有安装,于是再次yum install readline-devel进行安装。
安装完成之后,再次Configure,问题没有出现。
[root@localhostpostgresql-9.3.5]# gmake
gmake完成,可以进行安装
[root@localhostpostgresql-9.3.5]# gmake install
PostgreSQL编译安装完成,可以进行配置。
2.设置环境变量
[root@localhost ~]#vi .bash_profile [root@localhost ~]#source .bash_profile
在PATH=$PATH:$HOME/bin后面加上:/usr/local/pgsql/bin 3.添加用户postgres
[root@localhost ~]#useradd postgres 在这里可以选择更改下用户的目录,也就是将挡墙的/home/postgres更改为PostgreSQL安装的目录:/usr/local/pgsql 3.1 [root@localhost ~]# vi/etc/passwd 将postgres:x:506:507::/home/postgres:/bin/bash 改为postgres:x:506:507::/usr/local/pgsql:/bin/bash
把.bash_profile移动到/usr/local/pgsql下,修改其权限
[root@localhost~]# cp .bash_profile /usr/local/pgsql/
[root@localhostpgsql]# chown postgres.postgres .bash_profile
[root@localhost~]# rm -rf /home/postgres/
4.初始化数据库
首先创建data目录 [root@localhost ~]#mkdir /usr/local/pgsql/data [root@localhost ~]#chown postgres /usr/local/pgsql/data [root@localhost ~]#su – postgres 初始化数据库 -bash-4.1$/usr/local/pgsql/bin/initdb -D /usr/local/pgsql/data/
5.配置相关操作
进入到/usr/local/src/postgresql-9.3.5 cd /usr/local/src/postgresql-9.3.5 复制contrib/start-scripts下的linux文件到etc/init.d/下并命名为postgres,
[root@localhostpostgresql-9.3.5]# cp contrib/start-scripts/linux /etc/init.d/postgresql
现在就可以使用service打开数据库了
[root@localhost~]# service postgresql start
将postgresql服务添加到开机启动
6.创建数据库的操作记录文件
[root@localhost~]# touch /usr/local/pgsql/.pgsql_history
[root@localhost~]# chown postgres.postgres /usr/local/pgsql/.pgsql_history
[root@localhost~]# ls -l /usr/local/pgsql/.pgsql_history
7.创建测试数据库
[root@localhost~]# su – postgres
-bash-4.1$/usr/local/pgsql/bin/createdb test
-bash-4.1$/usr/local/pgsql/bin/psql test
编译安装PostgreSQL到这里就完成了
c.yum安装
直接使用yum安装时,版本比较低,还是8.4版本的
[root@nothing~]# yum install postgresql
可以通过安装pgdg-centos93-9.3-1.noarch.rpm来安装最新的PostgreSQL数据库,依旧在以下的网站下载
http://yum.postgresql.org/9.3/redhat/rhel-6.2-x86_64/
[root@nothing~]# wget http://yum.postgresql.org/9.3/redhat/rhel-6.2-x86_64/pgdg-centos93-9.3-1.noarch.rpm
[root@nothing~]# rpm -ivh pgdg-centos93-9.3-1.noarch.rpm
接下来继续使用yum安装
[root@nothing~]# yum install postgresql93 postgresql93-server postgresql93-contrib
初始化,启动数据库
[root@nothing~]# /etc/init.d/postgresql-9.3 initdb
[root@nothing~]# /etc/init.d/postgresql-9.3 start
连接数据库
[root@nothing~]# su – postgres
-bash-4.1$psql
yum安装PostgreSQL到这里就完成了。
参考链接:http://www.cnblogs.com/mchina/archive/2012/06/06/2539003.html
本文出自 “相守姑娘说” 博客,请务必保留此出处http://sugarlovecxq.blog.51cto.com/6707742/1551578

相关文章推荐
- 如何在CentOS 7/6.5/6.4 下安装PostgreSQL 9.3 与 phpPgAdmin
- CentOS 6.5安装PostgreSQL9.3.5时报错: jade: Command not found
- CentOS&Debian平台下编译安装PostgreSQL9.3
- Linux CentOS 7 安装PostgreSQL 9.3(发行版本)
- CentOS 安装 PostgreSQL 9.3
- CentOS7下安装postgresql9.3+
- centos6.5 yum安装postgresql9.3
- Centos上PostgreSQL9.3的安装
- centos 操作系统 安装 postgresql-9.4 postgresql-9.3
- centos6.3下postgresql-9.3安装记录
- CentOS下安装PostgreSQL
- CentOS 安装postgreSQL9.1
- CentOS 6.3下安装Postgresql_9.2.1数据库
- 安装仓库CentOS下安装PostgreSQL
- centos 下安装postgresql
- centos5.8安装postgresql以及python模块psycopg2
- CentOS 6.3 Minimal 源码安装 PostgreSQL 9.2.3
- centos 64 位系统安装postgresql odbc 方法
- CentOS 6.4 安装 Postgresql-9.2.4
- Centos6.3 下安装postgresql9.1.5和postgis1.5.5(左脑版)