【安卓笔记】带自定义属性的view控件
2014-08-07 14:20
441 查看
开发中经常需要自定义view控件或者组合控件,某些控件可能需要一些额外的配置。比如自定义一个标题栏,你可能需要根据不同尺寸的手机定制不同长度的标题栏,或者更常见的你需要配置标题栏的背景,这时候,你就会考虑到你写的view的扩展性问题,通常情况下,我们可以为这个自定义的标题栏加上一些setXXX方法,供外界调用,设置其颜色、长度等属性。但是我们都知道,在使用系统控件时,我们大多数情况下并不需要在代码中配置控件,而仅仅只需在布局文件中对控件宽、高、颜色等进行配置,这样做的好处就将UI与业务逻辑解耦,使代码更加清晰。
自定义带属性的view控件在实现上非常简单,下面介绍步骤:
1.编写attrs属性文件。android在默认情况下并没有attrs.xml,我们需要手动在values目录下新建一个这样的文件。文件根结点是resources,子节点叫declare-styleable,比如下面就是一个attrs文件:
<?xml version="1.0" encoding="utf-8"?>
<resources>
<declare-styleable name="myview">
<attr name="radius" format="integer"></attr>
<attr name="color" format="color"></attr>
</declare-styleable>
</resources>
这个属性文件提供了一个叫myview的属性集,里面有两个属性,一个是integer类型的radius(半径),另一个是color类型的color,这两个属性将来在自定义view中要使用。
2.编写自定义view。
这个想必大家都不陌生,我这里就来一个最简单的自定义view,画圆。
这里面的逻辑非常简单,需要注意的是这个getConfig方法,这个方法内部通过context和AttributeSet构造了一个TypedArray对象,这是个数组容器,里面存放的就是自定义属性和对应的值。该对象向外界暴露了一系列get方法,用于获取不同类型的属性值。TypedArray用完之后务必回收。
3.编写布局文件,使用上面的自定义的view。
需要注意的是,要想使用自定义属性,必须先加上命名空间,否则android不认识这些自定义属性。命名控件一般规则是 xmlns:[attrs中declare-styleable的name] =
"http://schemas.android.com/apk/res/包名",
4.在activity中通过setContentView找到布局。
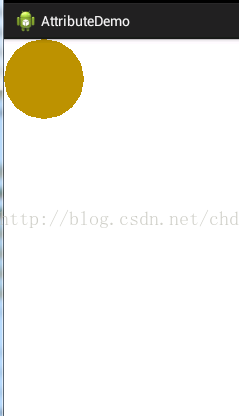
显示效果:
自定义带属性的view控件在实现上非常简单,下面介绍步骤:
1.编写attrs属性文件。android在默认情况下并没有attrs.xml,我们需要手动在values目录下新建一个这样的文件。文件根结点是resources,子节点叫declare-styleable,比如下面就是一个attrs文件:
<?xml version="1.0" encoding="utf-8"?>
<resources>
<declare-styleable name="myview">
<attr name="radius" format="integer"></attr>
<attr name="color" format="color"></attr>
</declare-styleable>
</resources>
这个属性文件提供了一个叫myview的属性集,里面有两个属性,一个是integer类型的radius(半径),另一个是color类型的color,这两个属性将来在自定义view中要使用。
2.编写自定义view。
这个想必大家都不陌生,我这里就来一个最简单的自定义view,画圆。
package com.example.attributedemo;
import android.content.Context;
import android.content.res.TypedArray;
import android.graphics.Canvas;
import android.graphics.Color;
import android.graphics.Paint;
import android.graphics.Paint.Style;
import android.util.AttributeSet;
import android.view.View;
public class MyView extends View
{
private Paint mPaint = null;

/**
* 圆颜色
*/
private int mColor;
/**
* 圆半径
*/
private int mRadius;

/**
* 默认颜色
*/
private static final int DEFAULT_COLOR = Color.RED;
/**
* 默认半径
*/
private static final int DEFAULT_RADIUS = 50;

public MyView(Context context)
{
super(context);
mColor = DEFAULT_COLOR;
mRadius = DEFAULT_RADIUS;
init();
}
public MyView(Context context, AttributeSet attrs)
{
super(context, attrs, 0);
getConfig(context, attrs);
init();
}
/**
* 初始化画笔
*/
private void init()
{
mPaint = new Paint();
mPaint.setStrokeWidth(1);
mPaint.setStyle(Style.FILL);

mPaint.setColor(mColor);
}

/**
* 从xml中获取配置信息
*/
private void getConfig(Context context,AttributeSet attrs)
{
//TypedArray是一个数组容器用于存放属性值
TypedArray ta = context.obtainStyledAttributes(attrs,R.styleable.myview);

mRadius = ta.getInt(R.styleable.myview_radius, DEFAULT_RADIUS);
mColor = ta.getColor(R.styleable.myview_color, DEFAULT_COLOR);
//用完务必回收容器
ta.recycle();
}

@Override
protected void onDraw(Canvas canvas)
{
//画一个圆
canvas.drawCircle(mRadius, mRadius, mRadius, mPaint);
}
}这里面的逻辑非常简单,需要注意的是这个getConfig方法,这个方法内部通过context和AttributeSet构造了一个TypedArray对象,这是个数组容器,里面存放的就是自定义属性和对应的值。该对象向外界暴露了一系列get方法,用于获取不同类型的属性值。TypedArray用完之后务必回收。
3.编写布局文件,使用上面的自定义的view。
RelativeLayout xmlns:android="http://schemas.android.com/apk/res/android"
xmlns:myview="http://schemas.android.com/apk/res/com.example.attributedemo"
android:layout_width="match_parent"
android:layout_height="match_parent" >
<com.example.attributedemo.MyView
android:layout_width="200dp"
android:layout_height="200dp"
myview:radius="40"
myview:color="#bc9300" />
</RelativeLayout>
需要注意的是,要想使用自定义属性,必须先加上命名空间,否则android不认识这些自定义属性。命名控件一般规则是 xmlns:[attrs中declare-styleable的name] =
"http://schemas.android.com/apk/res/包名",
4.在activity中通过setContentView找到布局。
显示效果:

相关文章推荐
- 安卓笔记——自定义HorizontalScrollView控件(实现QQ5.0侧滑结果)
- 安卓学习笔记--- Android自定义View(CustomCalendar-定制日历控件)
- 【安卓笔记】自定义view之组合控件
- 安卓开发笔记——自定义HorizontalScrollView控件(实现QQ5.0侧滑效果)
- 自定义控件(视图)28期笔记06:自定义控件之 自定义属性
- 【安卓笔记】WebView控件使用
- 安卓中自定义view控件代替radiogroup实现颜色渐变效果的写法
- Xcode控件使用笔记四:UITableView-自定义Cell
- 自定义View笔记-圆形控件View的绘制
- iOS 用xib自定义view控件 debug笔记
- Android笔记--简单的自定义View之自绘控件
- 安卓自定义VIEW控件用到RadialGradient径向渐变效果时报错 Exception raised during rendering: 3
- Android开发学习笔记-自定义TextView属性模版
- Android基础控件——TextView的跑马灯效果、变量赋值、字体属性、超链接、Activity跳转、字体加粗、自定义字体
- 安卓开发之自定义动画控件BatteryView(电池加载动画)
- LW教你自定义安卓控件之LoadingView
- 安卓笔记:安卓控件属性大全
- 带自定义属性的view控件
- 自定义安卓控件错误 Custom view MySwitchBtn is not using the 2- or 3-argument View constructors; XML attribute
- 安卓学习笔记之自定义ViewGroup