任意不规则形状的图片剪裁
2014-07-13 12:15
423 查看
转自:http://blog.csdn.net/lexiaoyao20/article/details/6607225
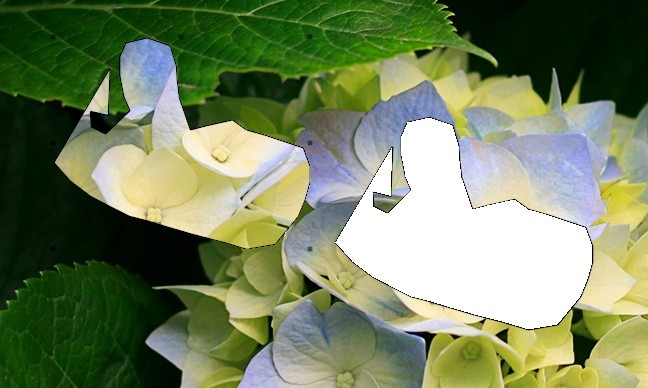
原理:根据选择的区域(区域的选择需要用到GraphicsPath),根据区域可以得到这部分区域的边境矩形,从而不需要循环整张图片,只需要循环边境矩形,将矩形中的选择区域复制到另一种图片,这样大大提高了效率。根据选择的区域,可以得到复制出位于GraphicsPath中的这部分图片,同时设置这部分图片为透明,同时还要设置另一种图片不在GraphicsPath内的区域为透明,这样看起来的效果就是从图片中扣出来的一样,意思和PhotoShop的套索工具差不多。
说得有点晕了,还是看效果图吧:(左边是剪裁出来的图)
下面说说关键的代码。
方法一:像素级的处理,循环整张图片,一个一个像素复制出来,效率比较低。
[csharp] view
plaincopy
/// <summary>
/// 图片剪裁(像素级的处理,效率比较低)
/// </summary>
/// <param name="bitmap">原图</param>
/// <param name="path">选择的路径</param>
/// <param name="outputBitmap">输出的图片(即剪裁出来的图片)</param>
/// <returns></returns>
public static Bitmap BitmapCrop(Bitmap bitmap, GraphicsPath path, out Bitmap outputBitmap)
{
RectangleF rect = path.GetBounds();
int left = (int)rect.Left;
int top = (int)rect.Top;
int width = (int)rect.Width;
int height = (int)rect.Height;
Bitmap image = (Bitmap)bitmap.Clone();
outputBitmap = new Bitmap(width, height);
for (int i = left; i < left + width; i++)
{
for (int j = top; j < top + height; j++)
{
//判断坐标是否在路径中
if (path.IsVisible(i, j))
{
//复制原图区域的像素到输出图片
outputBitmap.SetPixel(i - left , j - top , image.GetPixel(i, j));
//设置原图这部分区域为透明
image.SetPixel(i, j, Color.FromArgb(0, image.GetPixel(i, j)));
}
else
{
outputBitmap.SetPixel(i - left, j - top, Color.FromArgb(0, 255, 255, 255));
}
}
}
bitmap.Dispose();
return image;
}
方法二:将图片锁定在内存中,在内存处理,效率得到提升。
[csharp] view
plaincopy
/// <summary>
/// 剪裁选定区域的图片
/// </summary>
/// <param name="bitmap">原图</param>
/// <param name="path">用户选定的区域</param>
/// <param name="outputBitmap">剪裁出来的图(输出图)</param>
/// <returns></returns>
public static Bitmap BitmapCrop(Bitmap bitmap, GraphicsPath path, out Bitmap outputBitmap)
{
Rectangle rect = Rectangle.Round(path.GetBounds());
outputBitmap = new Bitmap(rect.Width, rect.Height);
if (bitmap == null) return null;
Bitmap bmp = (Bitmap)bitmap.Clone();
bitmap.Dispose();
BitmapData data = bmp.LockBits(rect,
ImageLockMode.ReadWrite, bmp.PixelFormat);
BitmapData outData = outputBitmap.LockBits(new Rectangle(0, 0, rect.Width, rect.Height),
ImageLockMode.ReadWrite, PixelFormat.Format32bppArgb);
unsafe
{
byte* q = (byte*)outData.Scan0;
int offset = outData.Stride - rect.Width * 4;
int PixelSize = 4;
for (int y = rect.Top; y < rect.Top + rect.Height; y++)
{
//每一行内存中的位置
byte* row = (byte*)data.Scan0 + ((y - rect.Top) * data.Stride);
for (int x = rect.Left; x < rect.Left + rect.Width; x++)
{
//判断坐标点是否在路径中
//在路径中,则复制原图这部分给输出图,同时设置原图这部分透明
//坐标点和内存中值的对应
if (path.IsVisible(x, y))
{
q[0] = row[(x - rect.Left) * PixelSize];
q[1] = row[(x - rect.Left) * PixelSize + 1];
q[2] = row[(x - rect.Left) * PixelSize + 2];
q[3] = row[(x - rect.Left) * PixelSize + 3];
row[(x - rect.Left) * PixelSize + 3] = 0;
}
else //不在路径中,则设置输出图这部分为透明
{
q[3] = 0;
}
q += 4;
}
q += offset;
}
}
bmp.UnlockBits(data);
outputBitmap.UnlockBits(outData);
return bmp;
}
注意:因为有不安全代码,所以要设置项目的属性 ->生成,勾选允许不安全代码。

相关文章推荐
- 任意不规则形状的图片剪裁 .
- 任意不规则形状的图片剪裁
- Android中绘制圆角矩形图片及任意形状图片
- 提取图片中任意形状的区域
- 提取图片中任意形状的区域
- 提取图片中任意形状的区域
- 提取图片中任意形状的区域(我的简单修改及代码)
- OpenCV_提取图片中任意形状的区域
- 提取图片中任意形状的区域(我的简单修改及代码)
- 0行代码实现任意形状图片展示--android-anyshape
- Android 之 不规则形状图片
- 在ios中特定形状剪裁图片的实现
- Android中绘制圆角矩形图片及任意形状图片
- Android-->圆角图片,圆角任意View,圆角父布局Layout(任意形状的View且超简洁实现)
- Android中绘制圆角矩形图片及任意形状图片
- 【Android】0行代码实现任意形状图片展示--android-anyshape
- html5 canvas实现不规则形状图片触发事件
- OpenCV_提取图片中任意形状的区域
- (转载)OpenCV_提取图片中任意形状的区域
- 利用svg合成任意形状的图片