linux运维自动化之puppet简单应用(二)
2014-05-18 21:26
816 查看
上篇博客介绍了在单机环境下的puppet应用,这次我们基于C/S模式来介绍下puppet!
一、实验环境
三台主机时间同步:
三台主机可以相互解析:
二、master端的配置
1、安装puppet-server
puppet软件包
2、配置模板
创建模板目录:
files/ : 文件存储目录
manifests/ : 清单存储目录
templates/ : 模板存储目录
创建清单文件:
创建是需要的配置文件:
创建模板文件:
将服务器端的配置信息输入puppet.conf文件中
创建节点文件:
创建后端主机节点文件:
启动master服务:

三、客户机端的配置
这里只以node1.gulong.com这个主机做演示
1、安装puppet客户端软件:
2、修改puppet.conf配置文件
3、启动puppet
四、签署证书并测试
1、在服务器端所有此命令,查看申请签署的证书请求:
2、使用此命令签署:
也可以编辑配置文件,使之自动签署:
3、签署完成后,查看客户端是否自动安装nginx
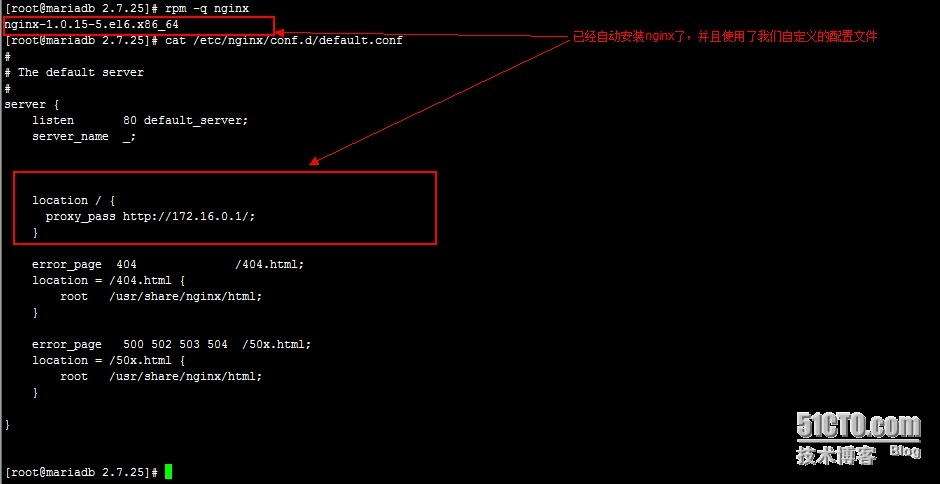
从图看出,已经自动安装nginx了!
4、puppet kick功能实现
puppet客户端默认每30分钟很服务器通讯一次,但是有时,我们希望服务器能够给客户端紧急推送一些事务,于是就有了puppet kick。
1、编辑客户端配置文件/etc/puppet/puppet.conf
2、在客户端编辑或创建新文件/etc/puppet/namespaceauth.conf,包含下面内容
3、在客户端编辑文件auth.conf,添加如下内容
客户端重启puppet
4、在服务器端运行推送命令
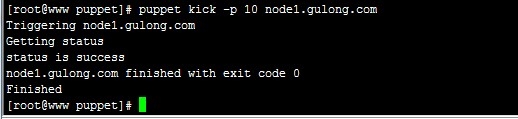
5、在客户端查看配置文件是否改变
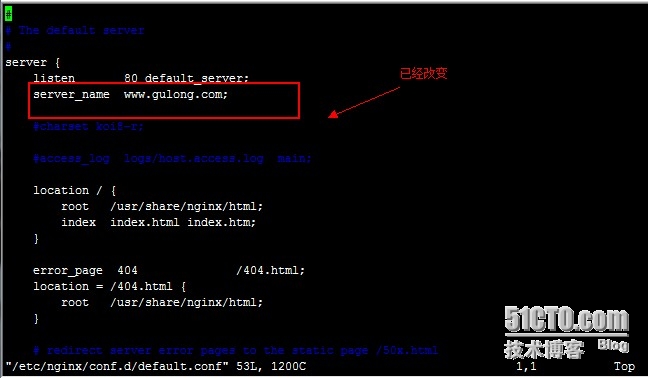
从上图看出,已经推送成功!
5、安装配置puppet-dashboard
1、安装puppet-dashboard包
2、安装rake

解决方法:此错误是网络故障,连不了外网,可以通过修改默认网关等方法来连接外网!
3、数据库授权
4、修改dashboard配置文件
dashboard的配置文件为/usr/share/puppet-dashboard/config/database.yml,修改如下参数
5、为dashboard导入依赖的数据表

出现上图即为导入成功!
6、测试服务器是否能正常工作
默认其监听于3000/tcp端口,现在可以通过此端口访问相应的服务了。
现在就可以在页面中添加节点和类文件!
至此,puppet的c/s模式应用已经介绍完毕,不足之处,请多加指点!
一、实验环境
| 服务器角色 | IP地址 | 安装软件 | 主机名 |
| 服务器端 | 172.16.8.1 | puppet-server | www.gulong.com |
| 客户机端 | 172.16.8.2 | puppet | node1.gulong.com |
| 客户机端 | 172.16.8.3 | puppet | node2.gulong.com |
#ntpdate 172.16.0.1
三台主机可以相互解析:
# vim /etc/hosts
172.16.8.1 www.gulong.com
172.16.8.2 node1.gulong.com
172.16.8.3 node2.gulong.com
二、master端的配置
1、安装puppet-server
puppet软件包
[root@www 2.7.25]# yum -y install facter-1.7.3-1.el6.x86_64.rpm puppet-server-2.7.25-1.el6.noarch.rpm
2、配置模板
创建模板目录:
[root@www 2.7.25]# cd /etc/puppet/modules/
[root@www modules]# mkdir -pv nginx/{files,manifests,templates}注:files/ : 文件存储目录
manifests/ : 清单存储目录
templates/ : 模板存储目录
创建清单文件:
[root@www modules]# cd nginx/manifests/
[root@www manifests]# vim init.pp
//添加如下:
class nginx {
package {'nginx':
ensure => present,
}
file {'nginx.conf':
ensure => file,
content => template('nginx/nginx.conf.erb'),
path    => '/etc/nginx/nginx.conf',
require => Package['nginx'],
mode    => '0644',
}
}

[root@www manifests]# vim web.pp
//添加如下:
class nginx::web inherits nginx {
file {'web.conf':
ensure =>file,
source =>"puppet:///modules/nginx/web.conf",
path   =>'/etc/nginx/conf.d/default.conf',
require => Package['nginx'],
mode    => '0644',
notify => Service ['nginx'],
}
service {'nginx':
ensure => true,
enable => true,
restart => '/etc/init.d/nginx reload',
require => File['nginx.conf','web.conf'],
}
}

[root@www manifests]# vim proxy.pp
//添加如下:
class nginx::proxy inherits nginx {
file {'web.proxy.conf':
ensure =>file,
source =>"puppet:///modules/nginx/web.proxy.conf",
path   =>'/etc/nginx/conf.d/default.conf',
require => Package['nginx'],
mode    => '0644',
notify => Service ['nginx'],
}
service {'nginx':
ensure => true,
enable => true,
restart => '/etc/init.d/nginx reload',
require => File['nginx.conf','web.proxy.conf'],
}
}
创建是需要的配置文件:
[root@www manifests]# cd ../files/
[root@www files]# vim web.conf
//添加如下:
#
# The default server
#
server {
listen       80 default_server;
server_name  www.gulong.com;
location / {
root   /usr/share/nginx/html;
index  index.html index.htm;
}
error_page  404              /404.html;
location = /404.html {
root   /usr/share/nginx/html;
}
error_page   500 502 503 504  /50x.html;
location = /50x.html {
root   /usr/share/nginx/html;
}

}

[root@www files]# vim web.proxy.conf
//添加如下:
#
# The default server
#
server {
listen       80 default_server;
server_name  _;
location / {
proxy_pass http://172.16.0.1/; }
error_page  404              /404.html;
location = /404.html {
root   /usr/share/nginx/html;
}
error_page   500 502 503 504  /50x.html;
location = /50x.html {
root   /usr/share/nginx/html;
}
}
创建模板文件:
[root@www files]# cd ../templates/
[root@www templates]# vim nginx.conf.erb
//添加如下:
# For more information on configuration, see:
#   * Official English Documentation: http://nginx.org/en/docs/ #   * Official Russian Documentation: http://nginx.org/ru/docs/ user              nginx;
worker_processes  <%= @processorcount %>;
error_log  /var/log/nginx/error.log;
#error_log  /var/log/nginx/error.log  notice;
#error_log  /var/log/nginx/error.log  info;
pid        /var/run/nginx.pid;
events {
worker_connections  1024;
}
http {
include       /etc/nginx/mime.types;
default_type  application/octet-stream;
log_format  main  '$remote_addr - $remote_user [$time_local] "$request" '
'$status $body_bytes_sent "$http_referer" '
'"$http_user_agent" "$http_x_forwarded_for"';
access_log  /var/log/nginx/access.log  main;
sendfile        on;
#tcp_nopush     on;
#keepalive_timeout  0;
keepalive_timeout  65;
#gzip  on;
# Load config files from the /etc/nginx/conf.d directory
# The default server is in conf.d/default.conf
include /etc/nginx/conf.d/*.conf;
}
将服务器端的配置信息输入puppet.conf文件中
[root@www templates]# puppet master --genconfig >> /etc/puppet/puppet.conf
创建节点文件:
[root@www nginx]# cd /etc/puppet/manifests/
[root@www manifests]# vim site.pp
//添加如下:
import "*.gulong.com.pp"   //表示所有以gulong.com.pp结尾的清单都加载进来
创建后端主机节点文件:
[root@www manifests]# vim node1.gulong.com.pp
//添加如下:
node 'node1.gulong.com' {
include nginx::proxy
}

[root@www manifests]# vim node2.gulong.com.pp
//添加如下:
node 'node2.gulong.com' {
include nginx::web
}
启动master服务:
[root@www manifests]# service puppetmaster start
三、客户机端的配置
这里只以node1.gulong.com这个主机做演示
1、安装puppet客户端软件:
[root@mariadb 2.7.25]# yum -y install facter-1.7.3-1.el6.x86_64.rpm puppet-2.7.25-1.el6.noarch.rpm
2、修改puppet.conf配置文件
[root@mariadb 2.7.25]# vim /etc/puppet/puppet.conf
//在[agent]段添加如下:
server = www.gulong.com
3、启动puppet
[root@mariadb 2.7.25]# service puppet start
四、签署证书并测试
1、在服务器端所有此命令,查看申请签署的证书请求:
[root@www manifests]#  puppet cert list
"node1.gulong.com" (C9:E5:D1:BD:8A:5F:58:A2:A8:7B:CB:F5:C5:30:81:5A)
2、使用此命令签署:
[root@www manifests]# puppet cert sign node1.gulong.com
也可以编辑配置文件,使之自动签署:
[root@www manifests]# echo "*.gulong.com" > /etc/puppet/autosign.conf
3、签署完成后,查看客户端是否自动安装nginx
从图看出,已经自动安装nginx了!
4、puppet kick功能实现
puppet客户端默认每30分钟很服务器通讯一次,但是有时,我们希望服务器能够给客户端紧急推送一些事务,于是就有了puppet kick。
1、编辑客户端配置文件/etc/puppet/puppet.conf
[root@mariadb 2.7.25]# echo "listen=true" >> /etc/puppet/puppet.conf
2、在客户端编辑或创建新文件/etc/puppet/namespaceauth.conf,包含下面内容
[puppetrunner]
allow *.gulong.com
3、在客户端编辑文件auth.conf,添加如下内容
path    /run
method  save
auth    any
allow   www.gulong.com
客户端重启puppet
[root@mariadb puppet]# service puppet restart
4、在服务器端运行推送命令
//为了演示效果,先修改下node1.gulong.com.pp
[root@www puppet]# vim manifests/node1.gulong.com.pp
//修改如下:
node 'node1.gulong.com' {
include nginx::web
}

[root@www puppet]# puppet kick -p 10 node1.gulong.com
5、在客户端查看配置文件是否改变
[root@mariadb puppet]# vim /etc/nginx/conf.d/default.conf
从上图看出,已经推送成功!
5、安装配置puppet-dashboard
1、安装puppet-dashboard包
[root@localhost ~]# cd 2.7.25/
[root@localhost 2.7.25]# yum -y install puppet-dashboard-1.2.23-1.el6.noarch.rpm
2、安装rake
[root@localhost 2.7.25]# gem install rake可能会出现以下错误:
解决方法:此错误是网络故障,连不了外网,可以通过修改默认网关等方法来连接外网!
3、数据库授权
[root@localhost 2.7.25]#yum -y install mysql mysql-server
[root@localhost 2.7.25]# service mysqld start
[root@localhost 2.7.25]#mysql
mysql> create database dbdb character set utf8;
mysql> grant all on dbdb.* to 'dbuser'@'172.16.%.%' identified by 'dbpass';
mysql> grant all on dbdb.* to 'dbuser'@'www.gulong.com' identified by 'dbpass';
mysql> flush privileges;
4、修改dashboard配置文件
dashboard的配置文件为/usr/share/puppet-dashboard/config/database.yml,修改如下参数
production:
host: 172.16.8.1
database: dbdb
username: dbuser
password: dbpass
encoding: utf8
adapter: mysql
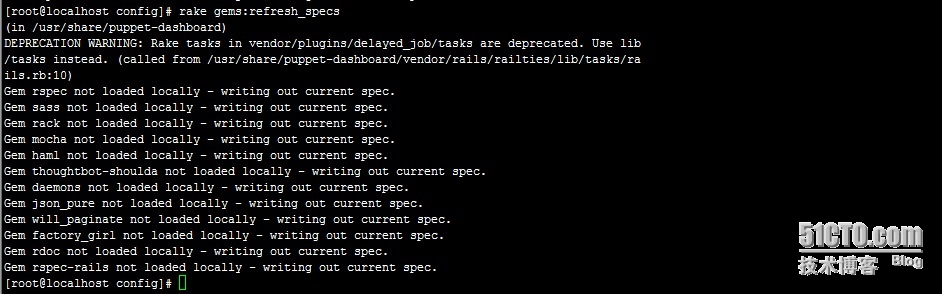
5、为dashboard导入依赖的数据表
[root@localhost 2.7.25]# cd /usr/share/puppet-dashboard/config/
[root@localhost config]# rake gems:refresh_specs
[root@localhost config]# rake RAILS_ENV=production db:migrate
出现上图即为导入成功!
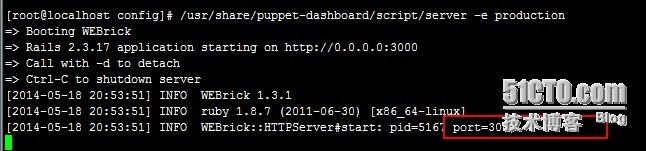
6、测试服务器是否能正常工作
[root@localhost 2.7.25]# /usr/share/puppet-dashboard/script/server -e production
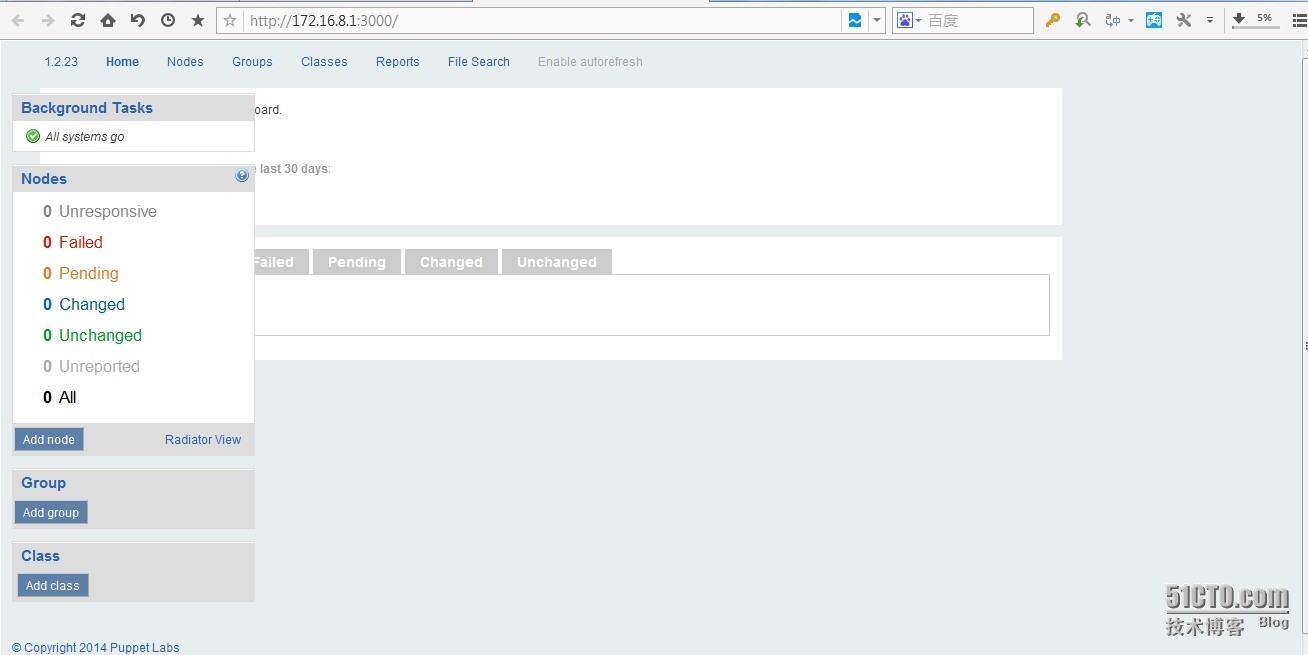
默认其监听于3000/tcp端口,现在可以通过此端口访问相应的服务了。
现在就可以在页面中添加节点和类文件!
至此,puppet的c/s模式应用已经介绍完毕,不足之处,请多加指点!

相关文章推荐
- linux运维自动化之puppet简单应用(一)
- 自动化运维平台puppet的高级应用
- 运维自动化之puppet基础应用解析
- puppet、Ansible、SaltStack 自动化运维工具简单对比
- 自动化运维工具Ansible架构部署应用及playbooks简单应用
- 自动化运维工具之puppet简单实用
- 容易的linux自动化运维工具之安装部署和应用实例(四)
- linux运维学习之自动化运维工具Puppet
- 自动化运维平台puppet的高级应用
- 自动化运维平台puppet的高级应用
- 运维自动化之puppet基础应用解析(经典版) 推荐
- 自动化运维工具之ansible的简单应用
- Linux下FTP服务器原理简介及简单应用
- linux运维之puppet安装
- Linux下安装tar.gz应用的简单步骤
- 【转】linux dd 的简单应用
- vim插件:perl-support 在windows下的安装和应用,和linux下 的安装(非常简单)
- 自动化运维工具puppet学习笔记之基础篇
- Linux下FTP服务器原理简介及简单应用
- Linux下FTP服务器原理简介及简单应用