VMware下Ubuntu10.0.4安装全过程(图解)
2014-04-09 10:49
253 查看
演示版本:VMware 7.0英文版+Ubuntu10.04 Desktop
首先创建虚拟机文件
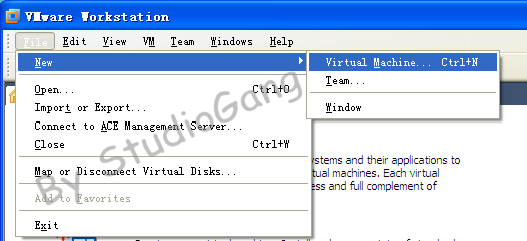
1、File——New——Virtual Machine
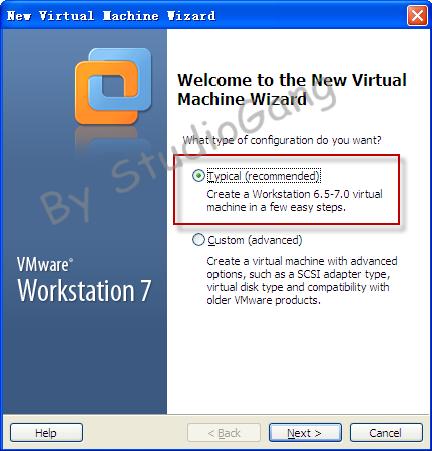
2、选择“Custom”以经典模式安装
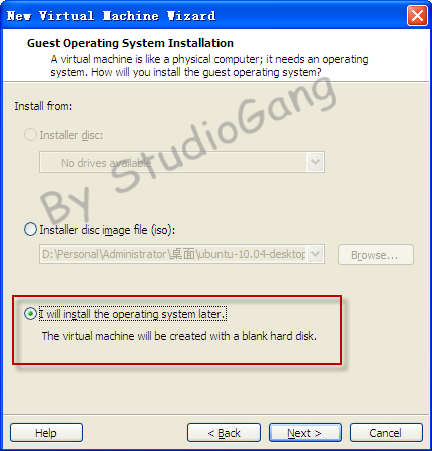
3、选择第三项“I will install the operating system later”,如果这里选择第二项将会进行easyinstall的安装模式,可能会造成键盘无法输入的Bug.
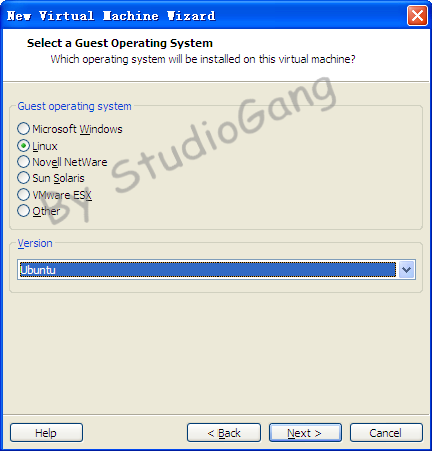
4、选择要安装操作系统的类型
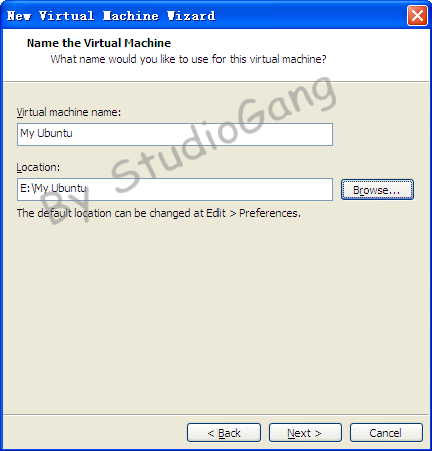
5、输入虚拟机的名称和存放的位置
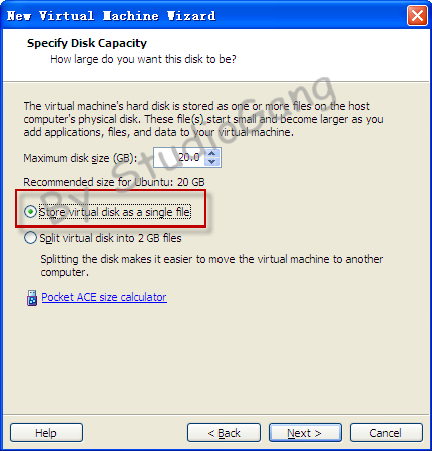
6、磁盘空间划分为20G,这里选择”Store virtual disk as a single file“
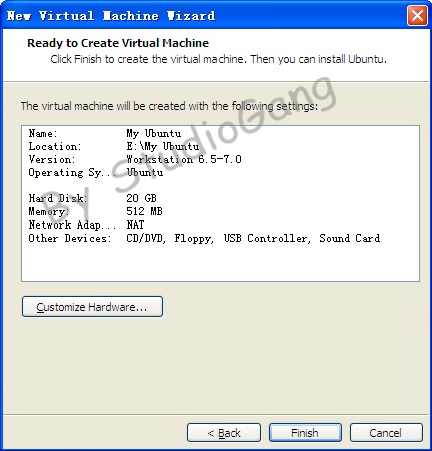
7、完成虚拟机文件的配置。
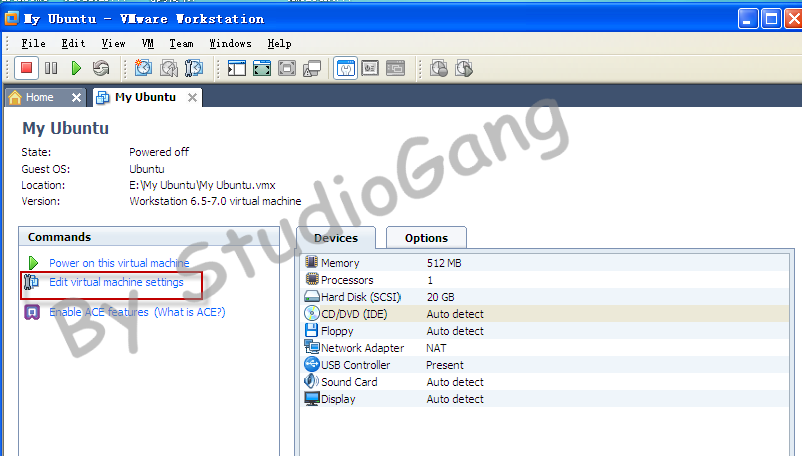
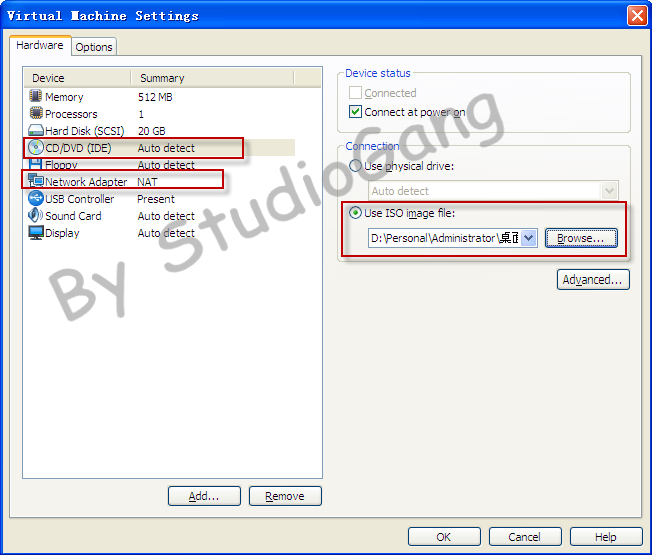
在安装操作系统前,我们要对虚拟机进行简单的配置:Edit virtual machine settings
在CD里挂接安装的镜像文件,网络连接方式我这里选择的是NAT方式
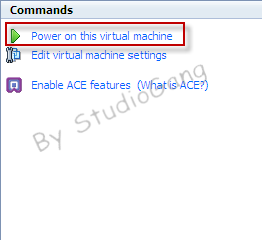
完成配置后,点击”Power on this virtual machine“启动虚拟机的电源
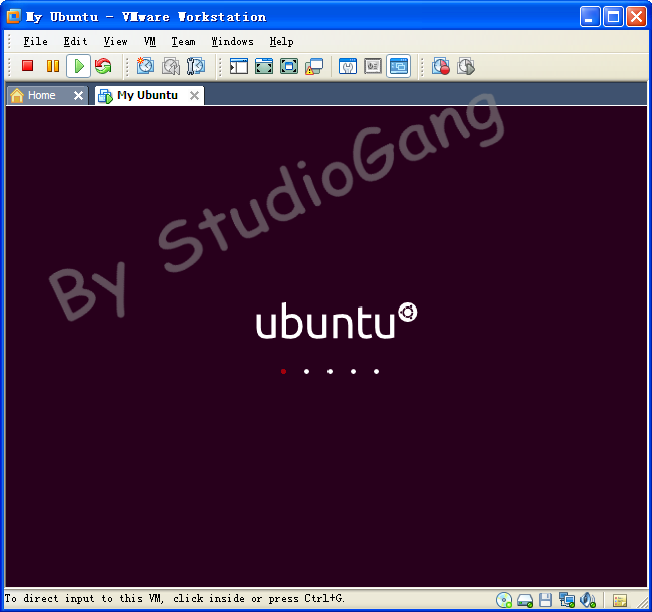
开始进入Ubuntu的安装界面
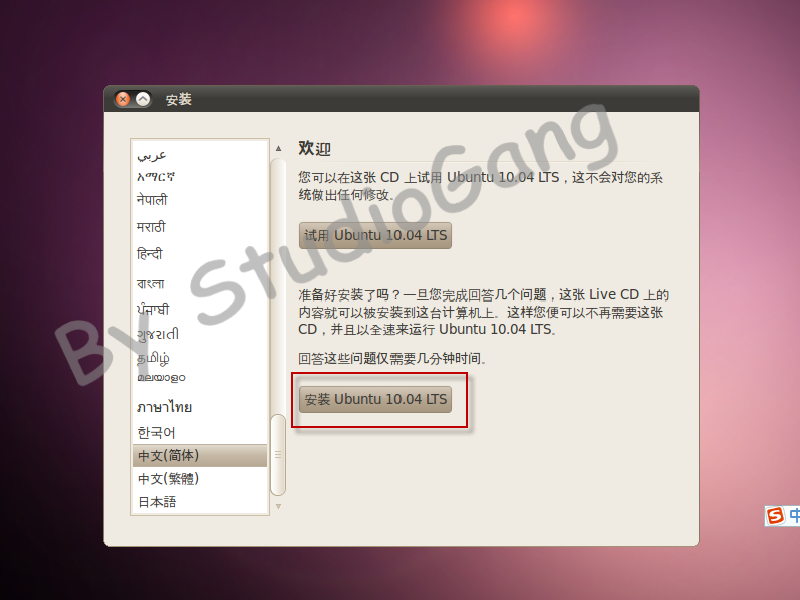
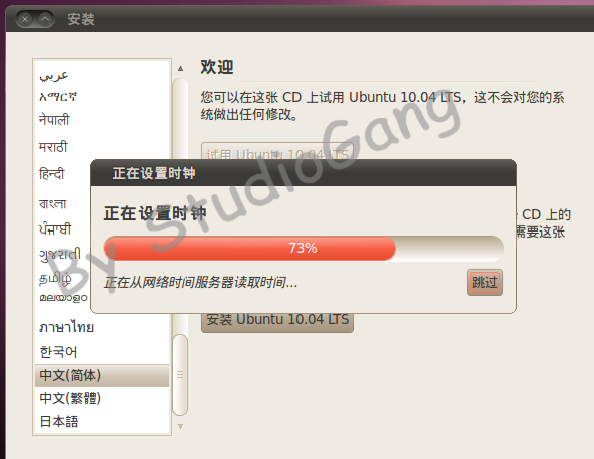
安装语言选择中文简体吧,根据个人喜好。点击“安装Ubuntu 10.04 LTS”
自动设置时钟时间
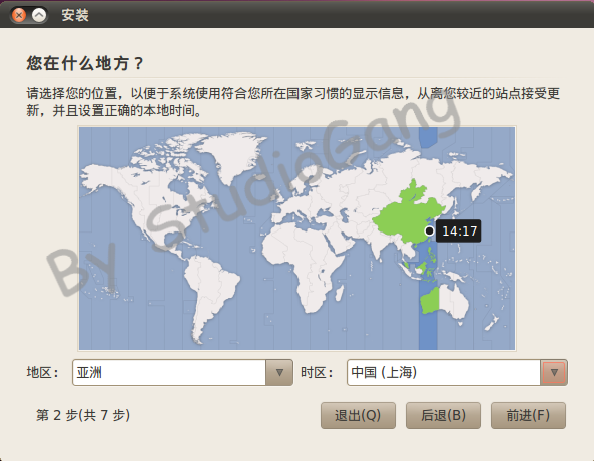
地址位置的选择
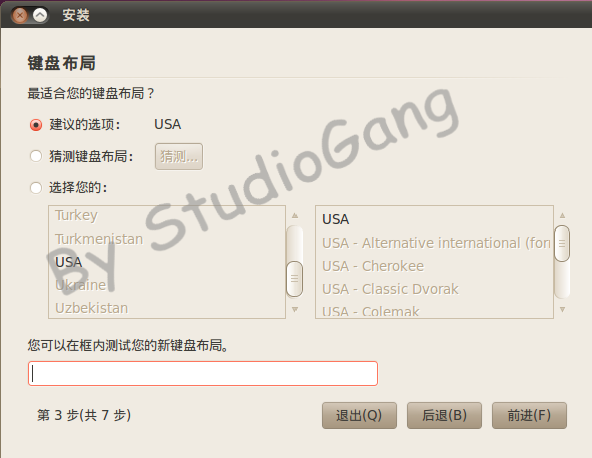
键盘布局的选择,就用默认的
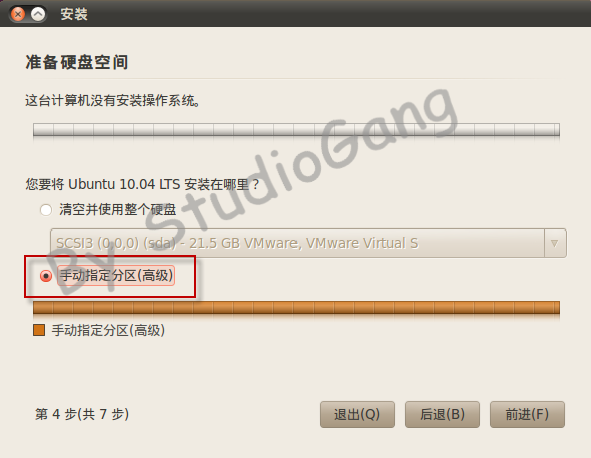
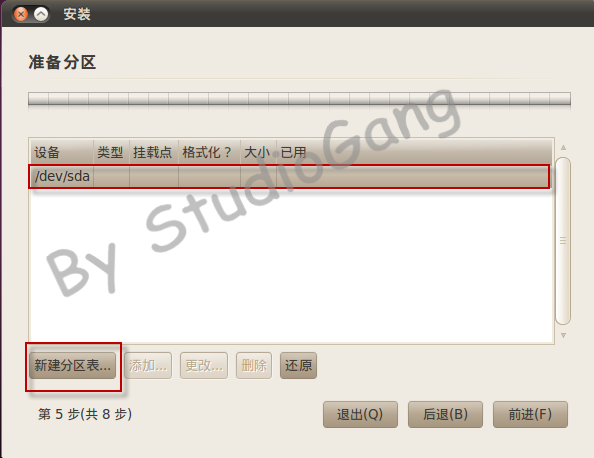
这里选择“手动指定分区(高级)”,不建议选择第一项
选中/dev/sda,点击“新建分区表”
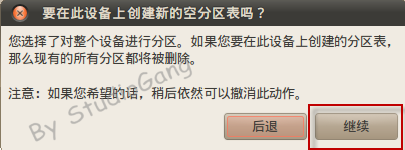
弹出提示窗口,选择“继续”
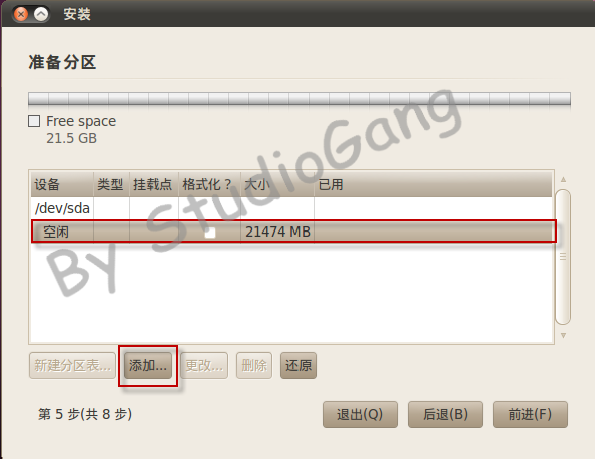
选中“空闲”磁盘,点击“添加”
创建一个5G的主分区,挂接在 / 下

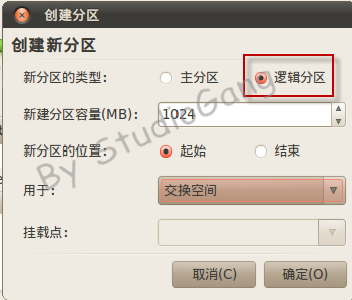
创建一个1G的交换分区
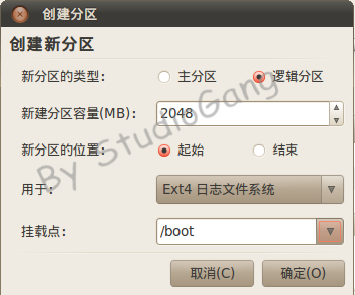
创建一个2G的逻辑分区挂接在/boot下
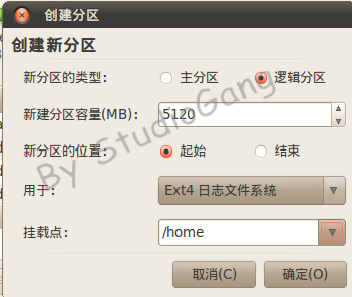
创建一个5G的逻辑分区挂接在/home下
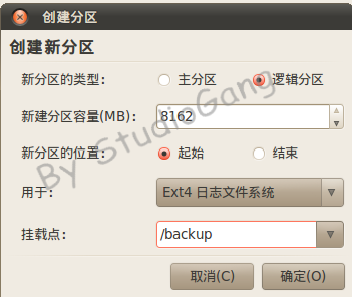
创建一个备份的逻辑分区 挂接在/backup下
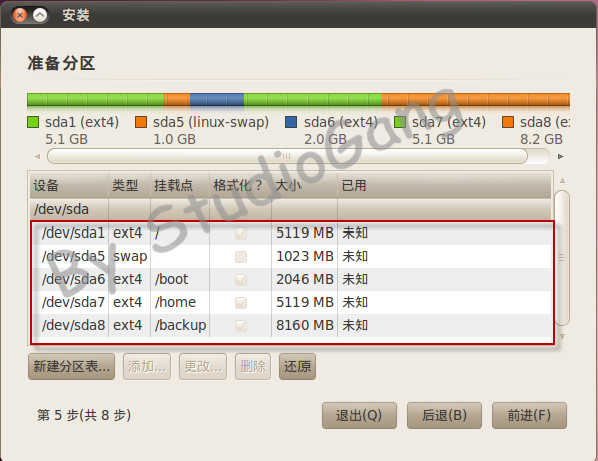
所有的分区都已经创建完毕
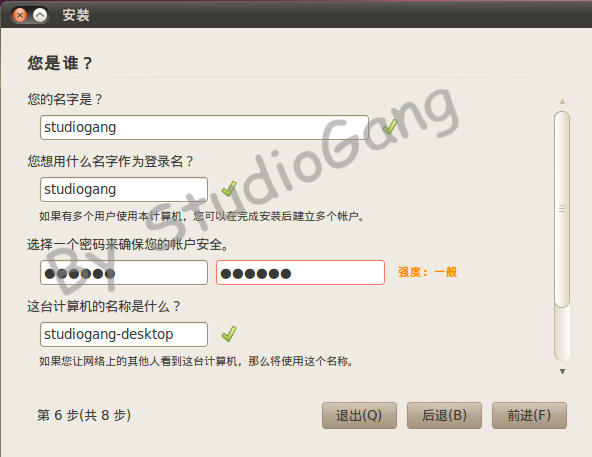
输入用户名和密码
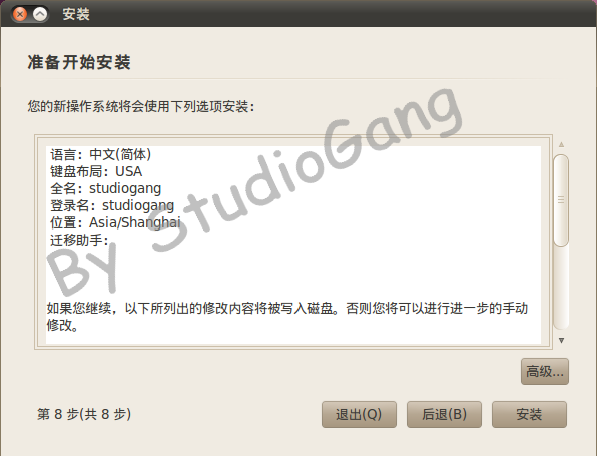
准备开始安装
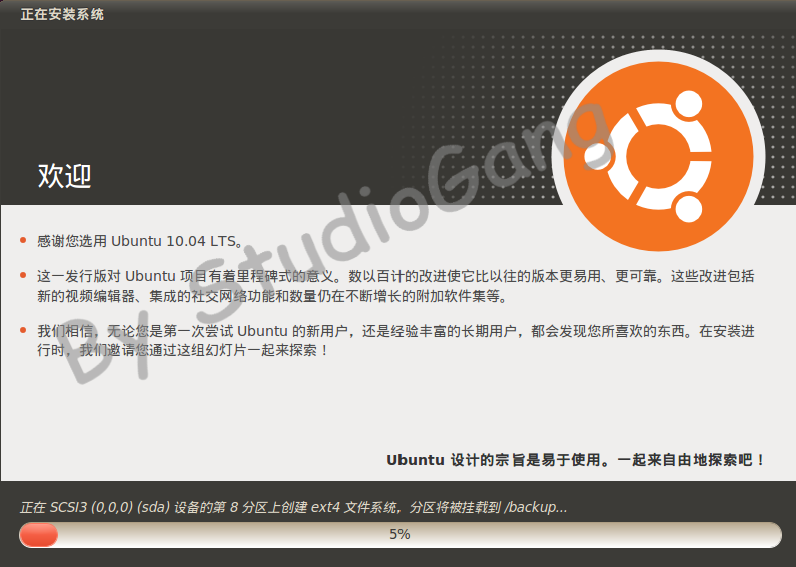
安装过程中
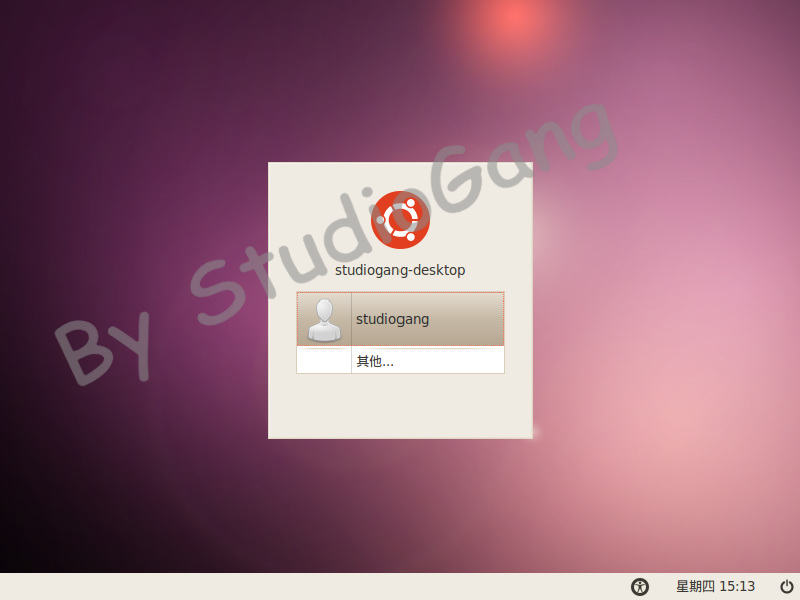
安装过后重启进入Ubuntu的登录界面,至此VMware下Ubuntu的安装过程全部结束。
本文出自 “StudioGang'S Blog” 博客,请务必保留此出处http://studiogang.blog.51cto.com/505887/386574
首先创建虚拟机文件
1、File——New——Virtual Machine
2、选择“Custom”以经典模式安装
3、选择第三项“I will install the operating system later”,如果这里选择第二项将会进行easyinstall的安装模式,可能会造成键盘无法输入的Bug.
4、选择要安装操作系统的类型
5、输入虚拟机的名称和存放的位置
6、磁盘空间划分为20G,这里选择”Store virtual disk as a single file“
7、完成虚拟机文件的配置。
在安装操作系统前,我们要对虚拟机进行简单的配置:Edit virtual machine settings
在CD里挂接安装的镜像文件,网络连接方式我这里选择的是NAT方式
完成配置后,点击”Power on this virtual machine“启动虚拟机的电源
开始进入Ubuntu的安装界面
安装语言选择中文简体吧,根据个人喜好。点击“安装Ubuntu 10.04 LTS”
自动设置时钟时间
地址位置的选择
键盘布局的选择,就用默认的
这里选择“手动指定分区(高级)”,不建议选择第一项
选中/dev/sda,点击“新建分区表”
弹出提示窗口,选择“继续”
选中“空闲”磁盘,点击“添加”
创建一个5G的主分区,挂接在 / 下
创建一个1G的交换分区
创建一个2G的逻辑分区挂接在/boot下
创建一个5G的逻辑分区挂接在/home下
创建一个备份的逻辑分区 挂接在/backup下
所有的分区都已经创建完毕
输入用户名和密码
准备开始安装
安装过程中
安装过后重启进入Ubuntu的登录界面,至此VMware下Ubuntu的安装过程全部结束。
本文出自 “StudioGang'S Blog” 博客,请务必保留此出处http://studiogang.blog.51cto.com/505887/386574

相关文章推荐
- VMware下Ubuntu10.0.4安装全过程(图解)
- VMware下Ubuntu10.0.4安装全过程(图解)
- Win7下用VMware 8安装Ubuntu 12.04详细过程图解(学习教程之二)
- 用VMware 8安装Ubuntu 12.04详细过程(图解)
- 用VMware 8安装Ubuntu 12.04详细过程(图解)
- 【转载】用VMware 8安装Ubuntu 12.04详细过程(图解)
- 用VMware 9安装Ubuntu 12.04具体过程(图解)
- 用VMware 8安装Ubuntu 12.04详细过程(图解)
- 用VMware 8安装Ubuntu 12.04详细过程图解
- 用VMware 8安装Ubuntu 12.04详细过程(图解)
- 【原创】用VMware 8安装Ubuntu 12.04详细过程(图解)
- 用VMware 8安装Ubuntu 12.04具体过程(图解)
- 用VMware 8安装Ubuntu 12.04详细过程(图解)
- 用VMware 9安装Ubuntu 12.04具体过程(图解)
- 用VMware 8安装Ubuntu 12.04详细过程图解
- 用VMware 8安装Ubuntu 12.04详细过程(图解)
- 用VMware10安装Ubuntu 14详细过程(图解)
- 用VMware 8安装Ubuntu 12.04详细过程(图解)
- 【ubuntu】用VMware 8安装Ubuntu 12.04详细过程(图解)
- 用VMware 安装Ubuntu详细过程(图解)