Installing OpenCV 2.4.1 in Ubuntu 12.04 LTS
2014-04-07 19:22
323 查看
latest Long Term Support version of Ubuntu(12.04 LTS) is out and a new version of OpenCV was released as well. This means that now is a great opportunity to update my OpenCV installation guide to the latest versions, Ubuntu 12.04 LTS and OpenCV 2.4.1.
We are going to setup OpenCV to use the new Qt highgui interface, which is much better than the simple highgui interface. Also, we will install OpenCV with support for OpenGL, as well as reading and writing videos, access to a webcam, Python, C and C++ interfaces,
and Intel Threading Building Blocks (TBB).
OK, so the first step is to make sure that everything in the system is updated and upgraded:
Now, you need to install many dependencies, such as support for reading and writing image files, drawing on the screen, some needed tools, etc… This step is very easy, you only need to write the following command in the Terminal:
Time to get the OpenCV 2.4.1 source code:
Now we have to generate the Makefile by using cmake. In here we can define which parts of OpenCV we want to compile. Since we want to use Python, TBB, OpenGL, Qt, work with videos, etc, here is where we need to set that. Just execute the following line at the
terminal to create the appropriate Makefile. Note that there are two dots at the end of the line, it is an argument for the cmake program and it means the parent directory (because we are inside the build directory, and we want to refer to the OpenCV directory,
which is its parent).
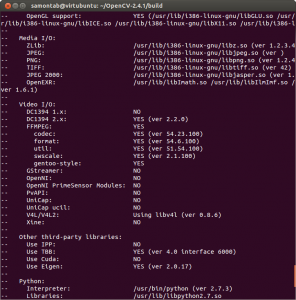
Check that the above command produces no error and that in particular it reports FFMPEG as YES. If this is not the case you will not be able to read or write videos. Also, check that Python, TBB, OpenGL, V4L, OpenGL and Qt are detected.
If anything is wrong, go back, correct the errors by maybe installing extra packages and then run cmake again. You should see something similar to this:
Now, you are ready to compile and install OpenCV 2.4.1:
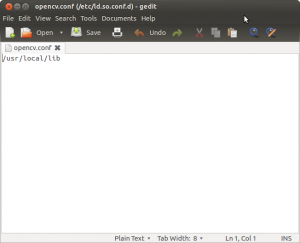
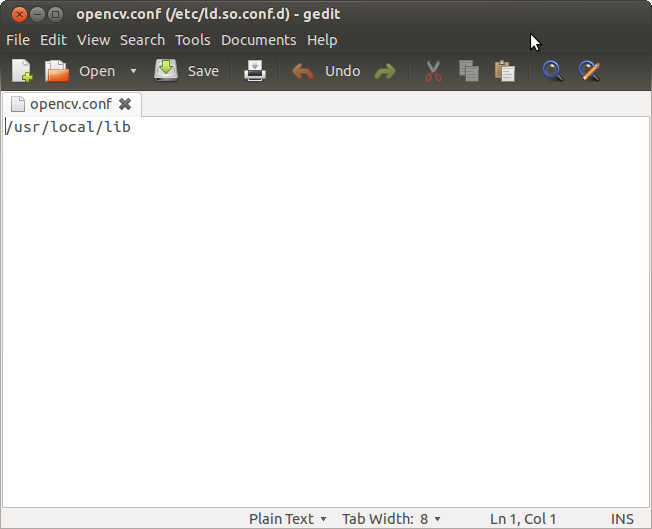
Now you have to configure OpenCV. First, open the opencv.conf file with the following code:
Add the following line at the end of the file(it may be an empty file, that is ok) and then save it:
Run the following code to configure the library:
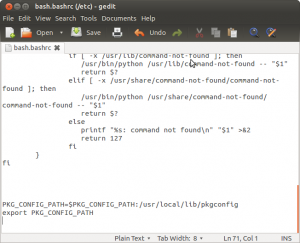
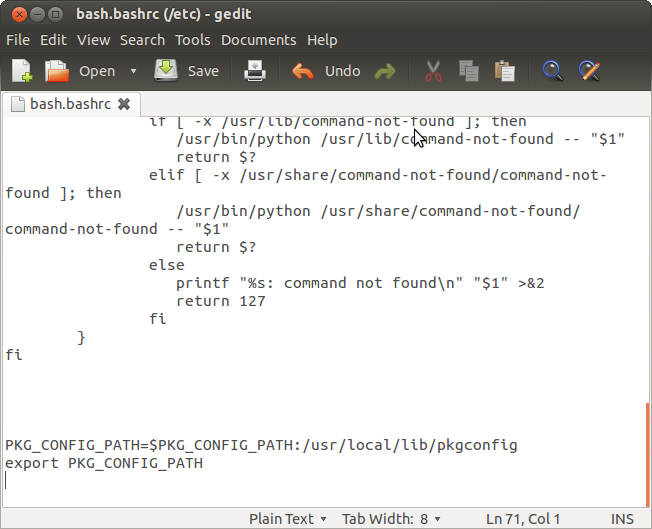
Now you have to open another file:
Add these two lines at the end of the file and save it:
Finally, close
the console and open a new one, restart the computer or logout and then login again. OpenCV will not work correctly until you do this.
Now you have OpenCV 2.4.1 installed in your computer with Python, TBB, OpenGL, video, and Qt support.
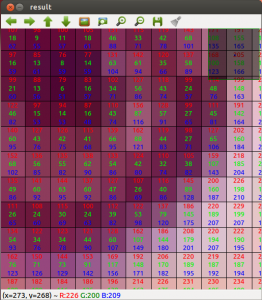
Check out the cool Qt interface which provides image viewing capabilities with zoom, as well as the ability to save the current image with just one click.
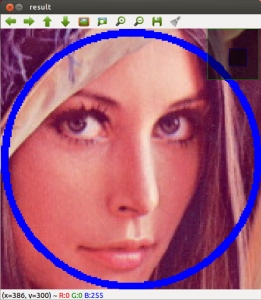
If you zoom in enough, you can see the RGB (or intensity) values for each pixel.
Now let’s build some samples included in OpenCV:
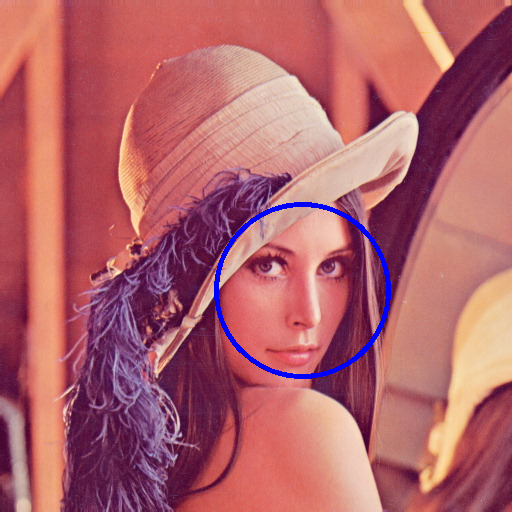
Now we are ready to run the examples:


Posted in Image
Processing, Open
Source, Programming.
We are going to setup OpenCV to use the new Qt highgui interface, which is much better than the simple highgui interface. Also, we will install OpenCV with support for OpenGL, as well as reading and writing videos, access to a webcam, Python, C and C++ interfaces,
and Intel Threading Building Blocks (TBB).
OK, so the first step is to make sure that everything in the system is updated and upgraded:
1 | sudo apt-get update |
2 | sudo apt-get upgrade |
1 | sudo apt-get install build-essential libgtk2.0-dev libjpeg-dev libtiff4-dev libjasper-dev libopenexr-dev cmake python-dev python-numpy python-tk libtbb-dev libeigen2-dev yasm libfaac-dev libopencore-amrnb-dev libopencore-amrwb-dev libtheora-dev libvorbis-dev libxvidcore-dev libx264-dev libqt4-dev libqt4-opengl-dev sphinx-common texlive-latex-extra libv4l-dev libdc1394-22-dev libavcodec-dev libavformat-dev libswscale-dev |
1 | cd ~ |
2 | wgethttp://downloads.sourceforge.net/project/opencvlibrary/opencv-unix/2.4.1/OpenCV-2.4.1. tar .bz2 |
3 | tar -xvf OpenCV-2.4.1. tar .bz2 |
4 | cd OpenCV-2.4.1 |
terminal to create the appropriate Makefile. Note that there are two dots at the end of the line, it is an argument for the cmake program and it means the parent directory (because we are inside the build directory, and we want to refer to the OpenCV directory,
which is its parent).
1 | mkdir build |
2 | cd build |
3 | cmake -D WITH_TBB=ON -D BUILD_NEW_PYTHON_SUPPORT=ON -D WITH_V4L=ON -D INSTALL_C_EXAMPLES=ON -D INSTALL_PYTHON_EXAMPLES=ON -D BUILD_EXAMPLES=ON -D WITH_QT=ON -D WITH_OPENGL=ON .. |
If anything is wrong, go back, correct the errors by maybe installing extra packages and then run cmake again. You should see something similar to this:

Now, you are ready to compile and install OpenCV 2.4.1:
1 | make |
2 | sudo make install |
1 | sudo gedit /etc/ld.so.conf.d/opencv.conf |
1 | /usr/ local /lib |
Run the following code to configure the library:
1 | sudo ldconfig |
1 | sudo gedit /etc/ bash .bashrc |
1 | PKG_CONFIG_PATH=$PKG_CONFIG_PATH:/usr/ local /lib/pkgconfig |
2 | export PKG_CONFIG_PATH |
Finally, close
the console and open a new one, restart the computer or logout and then login again. OpenCV will not work correctly until you do this.
Now you have OpenCV 2.4.1 installed in your computer with Python, TBB, OpenGL, video, and Qt support.
Check out the cool Qt interface which provides image viewing capabilities with zoom, as well as the ability to save the current image with just one click.
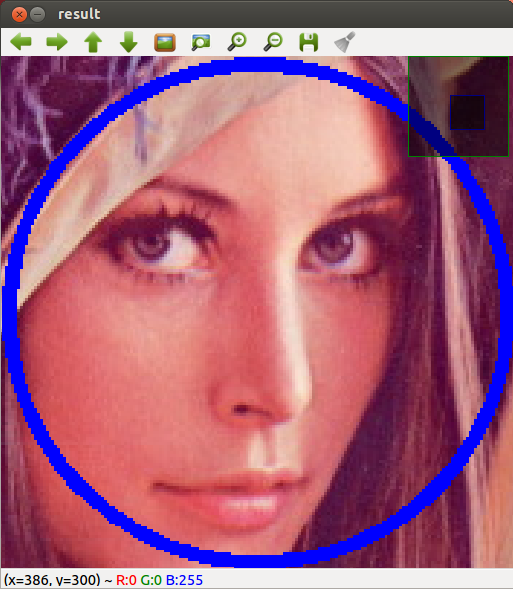
If you zoom in enough, you can see the RGB (or intensity) values for each pixel.

Now let’s build some samples included in OpenCV:
1 | cd ~/OpenCV-2.4.1/samples/c |
2 | chmod +x build_all.sh |
3 | ./build_all.sh |
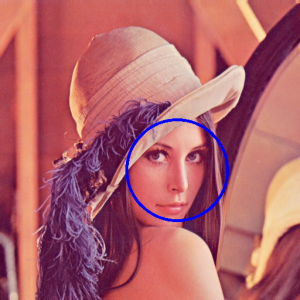
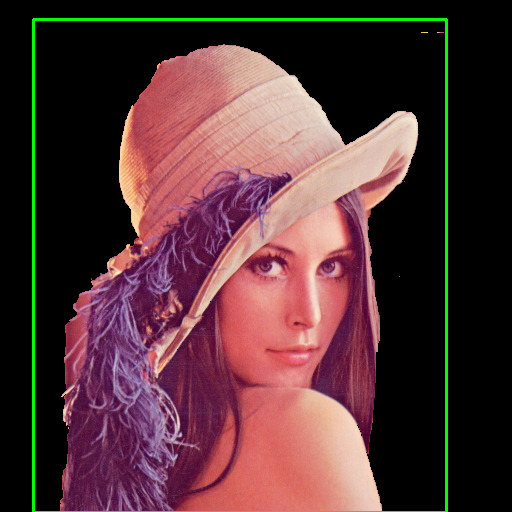
1 | ./facedetect --cascade= "/usr/local/share/OpenCV/haarcascades/haarcascade_frontalface_alt.xml" --scale=1.5 lena.jpg |
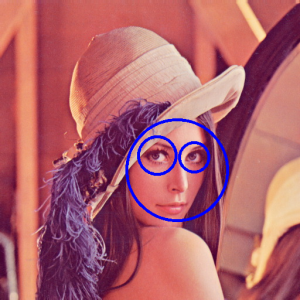
1 | ./facedetect --cascade= "/usr/local/share/OpenCV/haarcascades/haarcascade_frontalface_alt.xml" --nested-cascade= "/usr/local/share/OpenCV/haarcascades/haarcascade_eye.xml" --scale=1.5 lena.jpg |

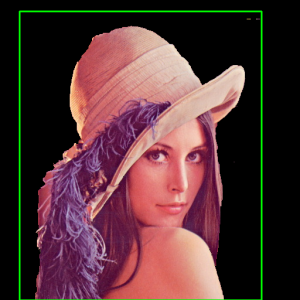
1 | ~/OpenCV-2.4.1/build/bin/grabcut ~/OpenCV-2.4.1/samples/cpp/lena.jpg |
1 | ~/OpenCV-2.4.1/build/bin/calibration_artificial |

1 | python ~/OpenCV-2.4.1/samples/python2/turing.py |

Posted in Image
Processing, Open
Source, Programming.

相关文章推荐
- Installing OpenCV 2.4.1 in Ubuntu 12.04 LTS
- Installing OpenCV 2.4.1 in Ubuntu 12.04 LTS
- Installing OpenCV 2.4.1 in Ubuntu 12.04 LTS
- Installing OpenCV 2.4.1 in Ubuntu 12.04 LTS
- Installing OpenCV 2.4.1 in Ubuntu 12.04 LTS ( ubuntu下安装opencv) (尝试成功)
- Installing OpenCV 2.4.1 in Ubuntu 12.04 LTS
- Open virtual effects in Ubuntu 12.04LTS
- Installing OpenStack on Ubuntu 12.04 LTS in 10 Minutes
- LXC in Ubuntu 12.04 LTS by Stéphane Graber
- Install Wireshark in Ubuntu 12.04 LTS Precise Pangolin 64bit
- 在 Ubuntu 12.04 LTS 上安装 OpenCV 2.4.1
- ubuntu 12.04 LTS 内核为3.2 忘记密码
- ubuntu 12.04 LTS 安装配置JDK1.6.0_45
- Ubuntu 12.04 LTS 更新源方法(加快获取软件的速度,查找某些包是否存在,更新某些常用软件)
- 虚拟机安装Ubuntu 12.04 出现提示“Ubuntu is running in low-graphics mode?”
- (转)Ubuntu 12.04 LTS安装VMware Tools实现linux和window 互相复制:无法找到kernel header path的问题
- ubuntu 12.04 LTS 手动安装 flash player步骤[转]
- Ubuntu 12.04 LTS 的安装
- ubuntu 12.04 LTS 发布
- 尝鲜Ubuntu Server 12.04 LTS