android自定义控件(七) onMeasure() 测量尺寸
2014-03-28 15:37
507 查看
http://blog.csdn.net/ethan_xue/article/details/7401163
上次讲的自定义控件刷新点屏幕的任意地方都会刷新,而且在xml里自定义控件下面放一个textview的话,这个TextView是显示不出来的,不只这个,以前的几个自定义控件都是
为什么呢?今天来讲下onMeasure()
在自定义刷新控件的基础上重写onMeasure方法
根据上一篇自定义组件修改
注释在代码里
[html]
view plaincopy
<LinearLayout xmlns:android="http://schemas.android.com/apk/res/android"
android:orientation="vertical"
android:layout_width="fill_parent"
android:layout_height="wrap_content"
>
<xue.test.CusView3
android:id="@+id/cusview3"
android:layout_width="wrap_content"
android:layout_height="wrap_content"
>
</xue.test.CusView3>
<TextView
android:layout_width="wrap_content"
android:layout_height="wrap_content"
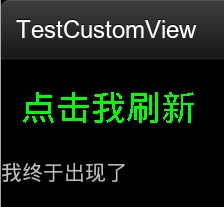
android:text="我终于出现了" />
</LinearLayout>
这里的TextView无法显示,想要显示的话,要测量控件的大小
[java]
view plaincopy
public class CusView3 extends View {
private int color = 0;
private String text = "点击我刷新";
private Paint mPaint;
private int mAscent;
public CusView3(Context context, AttributeSet attrs) {
super(context, attrs);
mPaint = new Paint();
mPaint.setStyle(Style.FILL);
mPaint.setTextSize(35.0f);
setPadding(20, 60, 0, 0); //设置padding
}
@Override
protected void onDraw(Canvas canvas) {
super.onDraw(canvas);
if (color > 2) {
color = 0;
}
switch (color) {
case 0:
mPaint.setColor(Color.GREEN);
break;
case 1:
mPaint.setColor(Color.RED);
break;
case 2:
mPaint.setColor(Color.BLUE);
break;
default:
break;
}
canvas.drawText(text, getPaddingLeft(), getPaddingTop(), mPaint);
}
public void changeColor() {
color++;
}
/**
* 比onDraw先执行
*
* 一个MeasureSpec封装了父布局传递给子布局的布局要求,每个MeasureSpec代表了一组宽度和高度的要求。
* 一个MeasureSpec由大小和模式组成
* 它有三种模式:UNSPECIFIED(未指定),父元素部队自元素施加任何束缚,子元素可以得到任意想要的大小;
* EXACTLY(完全),父元素决定自元素的确切大小,子元素将被限定在给定的边界里而忽略它本身大小;
* AT_MOST(至多),子元素至多达到指定大小的值。
*
* 它常用的三个函数:
* 1.static int getMode(int measureSpec):根据提供的测量值(格式)提取模式(上述三个模式之一)
* 2.static int getSize(int measureSpec):根据提供的测量值(格式)提取大小值(这个大小也就是我们通常所说的大小)
* 3.static int makeMeasureSpec(int size,int mode):根据提供的大小值和模式创建一个测量值(格式)
*/
@Override
protected void onMeasure(int widthMeasureSpec, int heightMeasureSpec) {
setMeasuredDimension(measureWidth(widthMeasureSpec), measureHeight(heightMeasureSpec));
}
private int measureWidth(int measureSpec) {
int result = 0;
int specMode = MeasureSpec.getMode(measureSpec);
int specSize = MeasureSpec.getSize(measureSpec);
if (specMode == MeasureSpec.EXACTLY) {
// We were told how big to be
result = specSize;
} else {
// Measure the text
result = (int) mPaint.measureText(text) + getPaddingLeft() + getPaddingRight();
if (specMode == MeasureSpec.AT_MOST) {
// Respect AT_MOST value if that was what is called for by
// measureSpec
result = Math.min(result, specSize);// 60,480
}
}
return result;
}
private int measureHeight(int measureSpec) {
int result = 0;
int specMode = MeasureSpec.getMode(measureSpec);
int specSize = MeasureSpec.getSize(measureSpec);
mAscent = (int) mPaint.ascent();
if (specMode == MeasureSpec.EXACTLY) {
// We were told how big to be
result = specSize;
} else {
// Measure the text (beware: ascent is a negative number)
result = (int) (-mAscent + mPaint.descent()) + getPaddingTop() + getPaddingBottom();
if (specMode == MeasureSpec.AT_MOST) {
// Respect AT_MOST value if that was what is called for by
// measureSpec
result = Math.min(result, specSize);
}
}
return result;
}
}
效果图
代码 http://download.csdn.net/detail/ethan_xue/4178423
上次讲的自定义控件刷新点屏幕的任意地方都会刷新,而且在xml里自定义控件下面放一个textview的话,这个TextView是显示不出来的,不只这个,以前的几个自定义控件都是
为什么呢?今天来讲下onMeasure()
在自定义刷新控件的基础上重写onMeasure方法
根据上一篇自定义组件修改
注释在代码里
[html]
view plaincopy
<LinearLayout xmlns:android="http://schemas.android.com/apk/res/android"
android:orientation="vertical"
android:layout_width="fill_parent"
android:layout_height="wrap_content"
>
<xue.test.CusView3
android:id="@+id/cusview3"
android:layout_width="wrap_content"
android:layout_height="wrap_content"
>
</xue.test.CusView3>
<TextView
android:layout_width="wrap_content"
android:layout_height="wrap_content"
android:text="我终于出现了" />
</LinearLayout>
这里的TextView无法显示,想要显示的话,要测量控件的大小
[java]
view plaincopy
public class CusView3 extends View {
private int color = 0;
private String text = "点击我刷新";
private Paint mPaint;
private int mAscent;
public CusView3(Context context, AttributeSet attrs) {
super(context, attrs);
mPaint = new Paint();
mPaint.setStyle(Style.FILL);
mPaint.setTextSize(35.0f);
setPadding(20, 60, 0, 0); //设置padding
}
@Override
protected void onDraw(Canvas canvas) {
super.onDraw(canvas);
if (color > 2) {
color = 0;
}
switch (color) {
case 0:
mPaint.setColor(Color.GREEN);
break;
case 1:
mPaint.setColor(Color.RED);
break;
case 2:
mPaint.setColor(Color.BLUE);
break;
default:
break;
}
canvas.drawText(text, getPaddingLeft(), getPaddingTop(), mPaint);
}
public void changeColor() {
color++;
}
/**
* 比onDraw先执行
*
* 一个MeasureSpec封装了父布局传递给子布局的布局要求,每个MeasureSpec代表了一组宽度和高度的要求。
* 一个MeasureSpec由大小和模式组成
* 它有三种模式:UNSPECIFIED(未指定),父元素部队自元素施加任何束缚,子元素可以得到任意想要的大小;
* EXACTLY(完全),父元素决定自元素的确切大小,子元素将被限定在给定的边界里而忽略它本身大小;
* AT_MOST(至多),子元素至多达到指定大小的值。
*
* 它常用的三个函数:
* 1.static int getMode(int measureSpec):根据提供的测量值(格式)提取模式(上述三个模式之一)
* 2.static int getSize(int measureSpec):根据提供的测量值(格式)提取大小值(这个大小也就是我们通常所说的大小)
* 3.static int makeMeasureSpec(int size,int mode):根据提供的大小值和模式创建一个测量值(格式)
*/
@Override
protected void onMeasure(int widthMeasureSpec, int heightMeasureSpec) {
setMeasuredDimension(measureWidth(widthMeasureSpec), measureHeight(heightMeasureSpec));
}
private int measureWidth(int measureSpec) {
int result = 0;
int specMode = MeasureSpec.getMode(measureSpec);
int specSize = MeasureSpec.getSize(measureSpec);
if (specMode == MeasureSpec.EXACTLY) {
// We were told how big to be
result = specSize;
} else {
// Measure the text
result = (int) mPaint.measureText(text) + getPaddingLeft() + getPaddingRight();
if (specMode == MeasureSpec.AT_MOST) {
// Respect AT_MOST value if that was what is called for by
// measureSpec
result = Math.min(result, specSize);// 60,480
}
}
return result;
}
private int measureHeight(int measureSpec) {
int result = 0;
int specMode = MeasureSpec.getMode(measureSpec);
int specSize = MeasureSpec.getSize(measureSpec);
mAscent = (int) mPaint.ascent();
if (specMode == MeasureSpec.EXACTLY) {
// We were told how big to be
result = specSize;
} else {
// Measure the text (beware: ascent is a negative number)
result = (int) (-mAscent + mPaint.descent()) + getPaddingTop() + getPaddingBottom();
if (specMode == MeasureSpec.AT_MOST) {
// Respect AT_MOST value if that was what is called for by
// measureSpec
result = Math.min(result, specSize);
}
}
return result;
}
}
效果图
代码 http://download.csdn.net/detail/ethan_xue/4178423

相关文章推荐
- Android自定义控件系列七:详解onMeasure()方法中如何测量一个控件尺寸(一)
- android自定义控件(七) onMeasure() 测量尺寸
- Android自定义控件系列:详解onMeasure()方法中如何测量一个控件尺寸(一)
- android自定义控件(七) onMeasure() 测量尺寸
- Android自定义控件系列七:详解onMeasure()方法中如何测量一个控件尺寸(一)
- Android自定义控件系列七:详解onMeasure()方法中如何测量一个控件尺寸(一)
- android自定义控件(七) onMeasure() 测量尺寸
- Android自定义控件系列七:详解onMeasure()方法中如何测量一个控件尺寸(一)
- Android自定义控件系列八:详解onMeasure()(二)--利用onMeasure测量来实现图片拉伸永不变形,解决屏幕适配问题
- Android自定义控件系列八:详解onMeasure()(二)--利用onMeasure测量来实现图片拉伸永不变形,解决屏幕适配问题
- Android自定义控件系列八:详解onMeasure()(二)--利用onMeasure测量来实现图片拉伸永不变形,解决屏幕适配问题
- Android自定义控件系列八:详解onMeasure()(二)--利用onMeasure测量来实现图片拉伸永不变形,解决屏幕适配问题
- Android自定义控件系列八:详解onMeasure()(二)--利用onMeasure测量来实现图片拉伸永不变形,解决屏幕适配问题
- Android自定义控件系列八:详解onMeasure()(二)--利用onMeasure测量来实现图片拉伸永不变形,解决屏幕适配问题
- Android 自定义控件之测量(onMeasure)初步
- android onMeasure测量过程中MeasureSpec学习
- Android开发之自定义控件(一)---onMeasure详解
- Android自定义控件的onMeasure和onLayout
- (转)Android自定义View(三、深入解析控件测量onMeasure)
- Android 自定义控件高度设置onMeasure方法