创建类似于iTunes的窗口
2014-03-21 20:34
134 查看
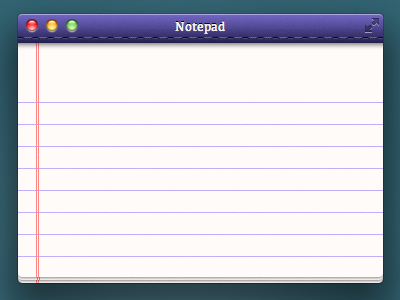
INAppStoreWindow
Title
bar and traffic light customization for NSWindow
INAppStoreWindowis
an NSWindow subclass that was originally developed to mimic the appearance of the main window in the Mac App Store application introduced in OS X 10.6.6.
The MAS application has since transitioned away from this design, but
INAppStoreWindowis
still being actively developed to provide extensive additional customization options for
NSWindowtitle
bars.

Features of INAppStoreWindow:
No private API usage and Mac App Store friendly.
Fully customizable title bar view -- add subviews (toolbars, buttons, etc.) and block based drawing for custom backgrounds
Adjustable title bar height
Customization of the traffic light/fullscreen buttons for all button states.
Customization of the window title text.
Works on OS X versions 10.6-10.9
Compatible with full screen mode in OS X 10.7+
All
of these great apps are using INAppStoreWindow in production!
Usage
ARC
INAppStoreWindownow
requires ARC to compile. If your project does not use ARC, compile
INAppStoreWindow.mwith
the
-fobjc-arclinker
flag.
Basic
Configuration
Using INAppStoreWindowis
as easy as changing the class of the
NSWindowin
Interface Builder, or simply by creating an instance of
INAppStoreWindowin
code (if you're doing it programmatically). I've included a sample project demonstrating how to use
INAppStoreWindow.
NOTE: The title bar height is set to the standard window title height by default. You must set the 'titleBarHeight' property in order to increase the height of the title bar.
Some people seem to be having an issue where the title bar height property is not set properly when calling the method on an NSWindow without typecasting it to the INAppStoreWindow class. If you are experiencing this issue, do something like this (using a window
controller, for example):
INAppStoreWindow *aWindow = (INAppStoreWindow*)[windowController window];
aWindow.titleBarHeight = 60.0;
Adding
buttons and other controls to the title bar
Adding controls and other views to the title bar is simple. This can be done either programmatically or through Interface Builder. Here are examples of both methods:Programmatically
// This code places a 100x100 button in the center of the title bar view
NSView *titleBarView = self.window.titleBarView;
NSSize buttonSize = NSMakeSize(100.f, 100.f);
NSRect buttonFrame = NSMakeRect(NSMidX(titleBarView.bounds) - (buttonSize.width / 2.f), NSMidY(titleBarView.bounds) - (buttonSize.height / 2.f), buttonSize.width, buttonSize.height);
NSButton *button = [[NSButton alloc] initWithFrame:buttonFrame];
[button setTitle:@"A Button"];
[titleBarView addSubview:button];
Interface Builder
NOTE: Even though the content layout for the title bar can be done in Interface Builder, you still need to use the below code to display the view created in IB in the title bar.
// self.titleView is a an IBOutlet to an NSView that has been configured in IB with everything you want in the title bar
self.titleView.frame = self.window.titleBarView.bounds;
self.titleView.autoresizingMask = NSViewWidthSizable | NSViewHeightSizable;
[self.window.titleBarView addSubview:self.titleView];
Centering
the traffic light and full screen buttons
The vertical centering of the traffic light and full screen buttons can be controlled through two properties: centerTrafficLightButtonsand
centerFullScreenButton.
The traffic light buttons are vertically centered by default.
Hiding
the title bar in fullscreen
You can tell INAppStoreWindow to hide when entering fullscreen mode, and reappear on exit. Just set the property hideTitleBarInFullScreenin
order to hide it.
Padding
the traffic lights and fullscreen buttons
The left padding of the traffic lights can be adjusted with trafficLightButtonsLeftMarginand
the right padding of the fullscreen button can be adjusted with
fullScreenButtonRightMargin.
Hiding
the baseline (divider line between the titlebar and the content view)
The baseline divider can be hidden by setting showsBaselineSeparatorto
NO,
the default value is
YES.
Customizing
traffic lights buttons
In order to customize these buttons, you would use INWindowButtonclass.
You must create a separate instance for each button and provide your graphics for each state of the button. Currently the following states are supported:
Active
Active in not main window
Inactive (disabled)
Rollover
Pressed
Please refer to
INWindowButton.hheader
documentation for more details.
Customizing
window's title appearance
You can enable title drawing by setting showsTitleproperty
to
YES.
For NSDocument based apps, you can enable drawing the document proxy icon by setting
showsDocumentProxyIconproperty
to
YES.
You can adjust appearance using
titleTextColor,
inactiveTitleTextColor,
titleTextShadow,
and
inactiveTitleTextShadowproperties.
Also, you can enable title drawing in fullscreen by setting
showsTitleInFullscreenproperty
to
YES.
Using
your own drawing code
A lot of time and effort has gone into making the custom titlebar in INAppStoreWindow function just right, it would be a shame to have to re-implement all this work just to draw your own custom title bar. So INAppStoreWindow has a titleBarDrawingBlockproperty
that can be set to a block containing your own drawing code!
[self.window setTitleBarDrawingBlock:^(BOOL drawsAsMainWindow, CGRect drawingRect, CGPathRef clippingPath){
// Custom drawing code!
}];
This block gets passed some useful parameters like if the window is the main one(
drawsAsMainWindow),
the drawing rect of the title bar(
drawingRect),
and a pre-made clipping path with rounded corners at the top(
clippingPath).
Setting
the title bar colors
If you just want to adjust the color of the title bar without drawing the whole thing yourself, there are a few properties to help you do so:self.window.titleBarStartColor = [NSColor colorWithCalibratedWhite: 0.6 alpha: 1.0]; self.window.titleBarEndColor = [NSColor colorWithCalibratedWhite: 0.9 alpha: 1.0]; self.window.baselineSeparatorColor = [NSColor colorWithCalibratedWhite: 0.2 alpha: 1.0]; self.window.inactiveTitleBarEndColor = [NSColor colorWithCalibratedWhite: 0.95 alpha: 1.0]; self.window.inactiveTitleBarStartColor = [NSColor colorWithCalibratedWhite: 0.8 alpha: 1.0]; self.window.inactiveBaselineSeparatorColor = [NSColor colorWithCalibratedWhite: 0.4 alpha: 1.0];
Extensions
Additional extensions for INAppStoreWindoware
provided in the Extensions folder.
NSDocument+INAppStoreWindowFixes
Add this category to your project to fix title bar layout for document based apps in response to -[NSDocument updateChangeCount:]. This fix was separated from the main
INAppStoreWindowcodebase
because it swizzles methods on
NSDocument.
INTitlebarView+CoreUIRendering
Add this category to your project to use CoreUI to render the system default title bar gradient, noise texture, and baseline separator. This will provide the most accurate visual results. You should only add this category to your projectif you intend to release outside the App Store!
If you use this category you must define the preprocessor symbol
INAPPSTOREWINDOW_NO_COREUIwith
a value of 1 in the build configuration for your Mac App Store version in order to exclude this code because ituses private APIs and will result in rejection if included in a Mac App Store submission.
When CoreUI rendering is not available, INAppStoreWindow will emulate the rendering of the system title bar as closely as possible.

相关文章推荐
- 创建类似于输入法窗口的非激活窗口
- 创建类似于输入法窗口的非激活窗口--续
- 创建类似于输入法窗口的非激活窗口
- 创建类似于输入法窗口的非激活窗口
- 一个关于如何创建类似于QQ客户端聊天窗口的模拟小项目
- 再议“创建类似于输入法窗口的非激活窗口”
- 创建类似于输入法窗口的非激活窗口
- <转载>Win32控制台工程中创建窗口
- Cocoa系列教学一:使用代码创建窗口
- unity 创建一个可拖到的窗口
- php+js+mysql设计的仿webQQ-<6>JS创建聊天窗口
- Android应用程序窗口(Activity)的运行上下文环境(Context)的创建过程分析
- 使用Qt创建透明盒不规则窗口的方法
- 如何在工作线程中创建窗口?
- 在创建窗口句柄之前,不能在控件上调用 Invoke 或 BeginInvoke。
- win32创建窗口及其消息循环
- PB datawindows 动态创建数据窗口
- 52.java编程思想——创建窗口和程序片 程序片限制
- 三论在C++类中实现Windows窗口的创建
- IOS开发创建开发证书及发布App应用(七)——在iTunes创建填写应用基本信息