运维机试必考题--源码搭建LNMP环境
2014-02-28 16:57
148 查看
LNMP环境的搭建是每个linux运维人员必会的基本技能,在运维机试中,源码搭建LNMP几乎成了必考题。由此可知,熟悉源码搭建LNMP环境一个考量一个运维工程师是否及格的重要指标。本人将自己在机试过程中的步骤贴出来,希望可以帮到大家,顺利找到好工作。测试机IP:192.168.3.216
测试平台:rhel6.3
相关软件:mysql-5.6.16.tar.gz nginx-1.3.1.tar.gz php-5.4.13.tar.gz
1、先关闭防火墙。

4、安装Mysql。
5、安装PHP。
10、测试是否可以连上mysql。

整个LNMP环境已经搭建完成,不懂的可以留言,谢谢。
测试平台:rhel6.3
相关软件:mysql-5.6.16.tar.gz nginx-1.3.1.tar.gz php-5.4.13.tar.gz
1、先关闭防火墙。
[root@localhost ~]# service iptables stop
[root@localhost ~]# setenforce 0
2、安装相关依赖包。
#yum -y install wget gcc-c++ ncurses ncurses-devel cmake make perl bison openssl openssl-devel gcc* libxml2 libxml2-devel curl-devel libjpeg* libpng* freetype* pcre-devel3、安装Nginx。软件统一放在:/usr/local/src/
[root@localhost src]# tar xf nginx-1.3.1.tar.gz
[root@localhost src]# cd nginx-1.3.1
[root@localhost nginx-1.3.1]# ./configure --prefix=/usr/local/nginx
[root@localhost nginx-1.3.1]# make && make install
[root@localhost nginx-1.3.1]# cd /usr/local/nginx/
[root@localhost nginx]# ls
conf  html  logs  sbin
1)Nginx第一种启动方法:
[root@localhost nginx]# sbin/nginx -t
nginx: the configuration file /usr/local/nginx/conf/nginx.conf syntax is ok
nginx: configuration file /usr/local/nginx/conf/nginx.conf test is successful
[root@localhost nginx]# /usr/local/nginx/sbin/nginx -t
nginx: the configuration file /usr/local/nginx/conf/nginx.conf syntax is ok
nginx: configuration file /usr/local/nginx/conf/nginx.conf test is successful
[root@localhost nginx]# sbin/nginx
[root@localhost nginx]# netstat -anlp |grep :80
tcp        0      0 0.0.0.0:80                  0.0.0.0:*                   LISTEN      2253/nginx
2)Nginx第二种启动方法:(推荐)
[root@localhost nginx]# vim /etc/init.d/nginx
#!/bin/sh
#
# nginx - this script starts and stops the nginx daemon
#
# chkconfig:   - 85 15
# description:  Nginx is an HTTP(S) server, HTTP(S) reverse \
#               proxy and IMAP/POP3 proxy server
# processname: nginx
# config:      /etc/nginx/nginx.conf
# config:      /etc/sysconfig/nginx
# pidfile:     /var/run/nginx.pid
# Source function library.
. /etc/rc.d/init.d/functions
# Source networking configuration.
. /etc/sysconfig/network
# Check that networking is up.
[ "$NETWORKING" = "no" ] && exit 0
nginx=""/usr/local/nginx/sbin/nginx
prog=$(basename $nginx)
NGINX_CONF_FILE="/usr/local/nginx/conf/nginx.conf"
[ -f /etc/sysconfig/nginx ] && . /etc/sysconfig/nginx
lockfile=/var/lock/subsys/nginx
make_dirs() {
# make required directories
user=`nginx -V 2>&1 | grep "configure arguments:" | sed 's/[^*]*--user=\([^ ]*\).*/\1/g' -`
options=`$nginx -V 2>&1 | grep 'configure arguments:'`
for opt in $options; do
if [ `echo $opt | grep '.*-temp-path'` ]; then
value=`echo $opt | cut -d "=" -f 2`
if [ ! -d "$value" ]; then
# echo "creating" $value
mkdir -p $value && chown -R $user $value
fi
fi
done
}
start() {
[ -x $nginx ] || exit 5
[ -f $NGINX_CONF_FILE ] || exit 6
make_dirs
echo -n $"Starting $prog: "
daemon $nginx -c $NGINX_CONF_FILE
retval=$?
echo
[ $retval -eq 0 ] && touch $lockfile
return $retval
}
stop() {
echo -n $"Stopping $prog: "
killproc $prog -QUIT
retval=$?
echo
[ $retval -eq 0 ] && rm -f $lockfile
return $retval
}
restart() {
configtest || return $?
stop
sleep 1
start
}
reload() {
configtest || return $?
echo -n $"Reloading $prog: "
killproc $nginx -HUP
RETVAL=$?
echo
}
force_reload() {
restart
}
configtest() {
$nginx -t -c $NGINX_CONF_FILE
}
rh_status() {
status $prog
}
rh_status_q() {
rh_status >/dev/null 2>&1
}
case "$1" in
start)
rh_status_q && exit 0
$1
;;
stop)
rh_status_q || exit 0
$1
;;
restart|configtest)
$1
;;
reload)
rh_status_q || exit 7
$1
;;
force-reload)
force_reload
;;
status)
rh_status
;;
condrestart|try-restart)
rh_status_q || exit 0
;;
*)
echo $"Usage: $0 {start|stop|status|restart|condrestart|try-restart|reload|force-reload|configtest}"
exit 2
esac 而后为此脚本赋予执行权限:[root@localhost nginx]# chmod +x /etc/init.d/nginx将Nginx的服务加入服务列表:
[root@localhost nginx]# chkconfig --add nginx并且将Nginx设为开机启动:
[root@localhost nginx]# chkconfig nginx on启动Nginx,并测试:
[root@localhost nginx]# service nginx start
Starting nginx:                                            [  OK  ]
[root@localhost nginx]# netstat -anlp | grep :80
tcp        0      0 0.0.0.0:80                  0.0.0.0:*                   LISTEN      2338/nginx da
打开浏览器进行测试:
4、安装Mysql。
[root@localhost src]# groupadd mysql
[root@localhost src]# useradd -r -g mysql mysql
[root@localhost nginx]# cd /usr/local/src/
[root@localhost src]# ls
mysql-5.6.16.tar.gz  nginx-1.3.1  nginx-1.3.1.tar.gz  php-5.4.13.tar.gz
[root@localhost src]# tar xf mysql-5.6.16.tar.gz
[root@localhost src]# cd mysql-5.6.16
[root@localhost mysql-5.6.16]#cmake . -DCMAKE_INSTALL_PREFIX=/usr/local/mysql
[root@localhost mysql-5.6.16]# make && make install
[root@localhost mysql-5.6.16]#chown -R mysql.mysql /usr/local/mysql
[root@localhost mysql-5.6.16]#cd /usr/local/mysql/scripts/
[root@localhost scripts]#./mysql_install_db --user=mysql --basedir=/usr/local/mysql --datadir=/usr/local/mysql/data #指定mysql数据文件的存放位置
[root@localhost scripts]#cd /usr/local/mysql/support-files/
[root@localhost support-files]#cp mysql.server /etc/rc.d/init.d/mysql
[root@localhost support-files]#cp my-default.cnf /etc/my.cnf
[root@localhost support-files]#chkconfig --add mysql
[root@localhost support-files]#chkconfig mysql on
[root@localhost support-files]# service mysql start
Starting MySQL.......                                      [  OK  ]
[root@localhost support-files]# ln -s /usr/local/mysql/bin/* /usr/bin/
[root@localhost support-files]# mysql
Welcome to the MySQL monitor.  Commands end with ; or \g.
Your MySQL connection id is 1
Server version: 5.6.16 Source distribution
Copyright (c) 2000, 2014, Oracle and/or its affiliates. All rights reserved.
Oracle is a registered trademark of Oracle Corporation and/or its
affiliates. Other names may be trademarks of their respective
owners.
Type 'help;' or '\h' for help. Type '\c' to clear the current input statement.
mysql>
注:mysql的安装比较简单,不作详细的解释。
5、安装PHP。
[root@localhost support-files]#cd /usr/local/src/
[root@localhost src]# tar xf php-5.4.13.tar.gz
[root@localhost src]# cd php-5.4.13
[root@localhost php-5.4.13]#./configure --prefix=/usr/local/php\
--enable-fpm\   #必须制定这个参数,执行后会生成可执行的fpm ATPI
--with-mysql=/usr/local/mysql/\  #指定mysql的安装路径
--with-mysqli=/usr/local/mysql/bin/mysql_config\  #这两参数是为了整合mysql
--with-gd  #php连接gd库,要确认系统已安装libpng跟libpng-devel包
[root@localhost php-5.4.13]#make && make install
[root@localhost php-5.4.13]#cp /usr/local/php/etc/phpfpm.conf.default  /usr/local/php/etc/php-fpm.conf
[root@localhost php-5.4.13]# /usr/local/php/sbin/php-fpm
[root@localhost php-5.4.13]# netstat -anlp | grep php-fpm
tcp        0      0 127.0.0.1:9000              0.0.0.0:*                   LISTEN      28511/php-fpm
unix  3      [ ]         STREAM     CONNECTED     159323 28511/php-fpm
unix  3      [ ]         STREAM     CONNECTED     159322 28511/php-fpm
6、整合Nginx。Ninx整合PHP其实很简单,启用在nginx的配置文件nginx.conf里面子带有加载PHP的内容,如下:
[root@localhost php-5.4.13]# vim /usr/local/nginx/conf/nginx.conf
location ~ \.php$ {
root           html;
fastcgi_pass   127.0.0.1:9000;
fastcgi_index  index.php;
fastcgi_param SCRIPT_FILENAME  /usr/local/nginx/html$fastcgi_script_name;#这里指定一下php程序的放置目录。
include        fastcgi_params;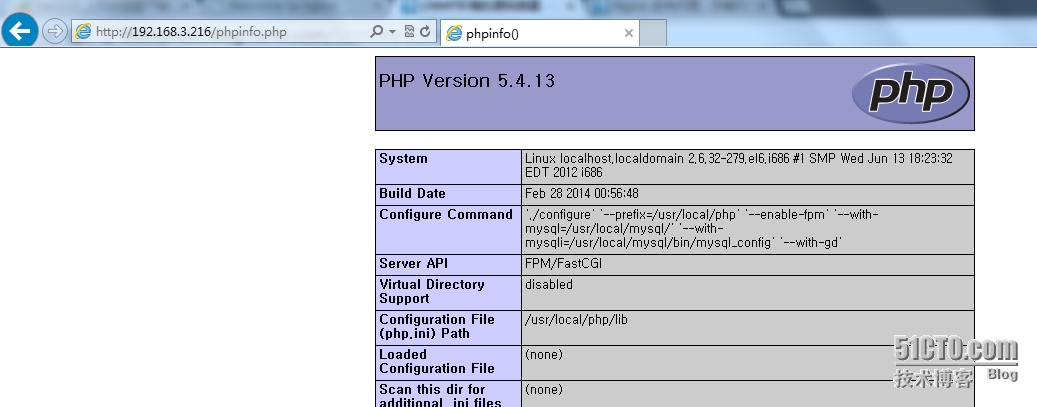
}7、在我们指定的php程序的放置目录/usr/local/nginx/html/下新建一个简单的php程序.[root@localhost php-5.4.13]#vim /usr/local/nginx/html/phpinfo.php <?php phpinfo (); ?>8、重启Nginx。
[root@localhost php-5.4.13]# service nginx reload nginx: the configuration file /usr/local/nginx/conf/nginx.conf syntax is ok nginx: configuration file /usr/local/nginx/conf/nginx.conf test is successful Reloading nginx: [ OK ]9、打开浏览器:http://IP/phpinfo.php
10、测试是否可以连上mysql。
root@localhost php-5.4.13]# vim /usr/local/nginx/html/index.php
<?php
$link=mysql_connect('localhost','root',''); #本机登陆,root身份,密码为空。
if ($link)
echo "Successfuly";
else
echo "Faile";
mysql_close();
?>11、打开浏览器测试http://IP/index.php整个LNMP环境已经搭建完成,不懂的可以留言,谢谢。

相关文章推荐
- Centos6.5下源码搭建lnmp环境
- lnmp的环境的搭建及应用(源码)
- 搭建lnmp环境(nginx1.9.15-源码)
- 源码搭建lnmp环境
- centos下源码搭建lnmp环境
- 搭建lnmp环境(php7.1.8-源码)
- 直播源码怎样搭建直播系统LNMP环境——PHP配置
- Linux下源码搭建LNMP环境
- 从零搭建LNMP环境(一) - 编译源码安装PHP
- 源码编译搭建LNMP环境
- 源码搭建 LNMP环境
- lnmp环境搭建(源码安装)
- 源码搭建LNMP环境
- 源码搭建LNMP基础环境
- 源码编译安装,搭建LNMP环境(Linux+Nginx+MySQL+PHP)
- 源码搭建LNMP环境
- 源码搭建lnmp环境
- LNMP(Linux+Nginx+Mysql+PHP---源码)环境搭建
- CentOS7最小化安装下源码编译搭建LAMP, LNMP环境及搭建discuz论坛
- Ubuntu 14.04 LNMP源码编译环境搭建 Nginx-1.9.1 PHP-5.6.9 Mariadb-10.0.19 完整教程