LNMP的源码包搭建与测试
2014-01-26 18:38
176 查看
LNMP的源码包搭建与测试
实验环境:
CentOS6.4 32位系统
VMware workstation 10
php-5.4.24.tar.bz2
mysql-5.5.15-linux2.6-i686.tar.gz
nginx-1.0.11.tar.gz
nginx因其并发链接请求数的原因,经常被用于反向代理。
在Apache时代与php的结合靠模块,而nginx靠的是fastcgi,默认是监听头在本机的9000端口上,可
以通过配置修改,fastcgi有自己的进程,并且可以手动指定启动的子进程,而这些子进程有相应的
管理者,叫fpm,他们的安装顺序应该是先安装MySQL或nginx,然后才是php然后才由php去产生
fastcgi
在安装开始之前,我们可以先根据这几大软件的依赖或调用关系来推测出安装的先后顺序,它们为先安装nginx或数据库,然后再是php,然后由php内的fastcgi来完成他们之间的结合
我们以MySQL的绿色软件包为例,
主要步骤为:
shell> groupadd mysql
shell> useradd -r -g mysql mysql
shell> cd /usr/local
shell> tar zxvf /path/to/mysql-VERSION-OS.tar.gz
shell> ln -s full-path-to-mysql-VERSION-OS mysql
shell> cd mysql
shell> chown -R mysql .
shell> chgrp -R mysql .
shell> scripts/mysql_install_db --user=mysql
shell> chown -R root .
shell> chown -R mysql data
# Next command is optional
shell> cp support-files/my-medium.cnf /etc/my.cnf
shell> bin/mysqld_safe --user=mysql &
# Next command is optional
shell> cp support-files/mysql.server /etc/init.d/mysql.server

[root@www local]# ln -s mysql-5.5.15-linux2.6-i686/ mysql
[root@www local]# cd ./mysql
[root@www mysql]# ls
bin data include lib mysql-test scripts sql-bench
COPYING docs INSTALL-BINARY man README share support-files
[root@www mysql]# vim INSTALL-BINARY
[root@www mysql]# groupadd mysql
[root@www mysql]# useradd -r -g mysql mysql
[root@www mysql]# cd /usr/local/mysql
[root@www mysql]# chown -R mysql .
[root@www mysql]# chgrp -R mysql .
[root@www ~]# cd /usr/local/
[root@www local]# ln -s mysql-5.5.15-linux2.6-i686 mysql
[root@www mysql]# chgrp -R mysql .
[root@www mysql]# chown -R mysql .
[root@www mysql]# scripts/mysql_install_db --user=mysql
Installing MySQL system tables...
OK
[root@www mysql]# ll data/mysql/
total 0
[root@www mysql]# chown -R root .
[root@www mysql]# chown -R mysql data/
[root@www mysql]# cp support-files/mysql.server /etc/init.d/mysqld
cp: overwrite `/etc/init.d/mysqld'? y
[root@www mysql]# chmod a+x /etc/init.d/mysqld
[root@www mysql]# service mysqld start
Starting MySQL... SUCCESS!
[root@www mysql]# service mysqld stop
Shutting down MySQL. SUCCESS!
[root@www mysql]# cp support-files/my-medium.cnf /etc/my.cnf
cp: overwrite `/etc/my.cnf'? y (如果以前安装过MySQL,当然是要覆盖的)
在此我们是利用软件包中的配置参考文件完成MySQL的配置文件生成工作
在这时我们会看到关于初始化MySQL数据库授权表的时候,是没有报错的,但我们在去具体目录查看的时候并没有那些数据表,但在官方的安装文件中,我们的步骤并没有出错,而在64位的系统测试中并没有发现这种情况。
解决办法是在上述步骤完成之后,重新把目录下的所有者及所属组改回MySQL之后再重新执行原始表生成语句(在其他步骤执行并不可以,这个暂时还没有查到有关的解释和说明)
[root@www mysql]# chgrp -R mysql .
[root@www mysql]# chown -R mysql .
[root@www mysql]# scripts/mysql_install_db --user=mysql
Installing MySQL system tables...
OK
Filling help tables...
OK
[root@www mysql]# cd data/mysql
[root@www mysql]# ll
total 988

在MySQL成功启动之后,我们可以
在data目录下还有一个以主机名字为名,.err为后缀的日志文件,如图:

[root@www mysql]# hostname
www.tyedus.com
[root@www mysql]# netstat -tupln|grep 3306
tcp 0 0 0.0.0.0:3306 0.0.0.0:* LISTEN
6805/mysqld
[root@www mysql]# service mysqld status
SUCCESS! MySQL running (6805)
[root@www mysql]# chkconfig --add mysqld
[root@www mysql]# chkconfig mysqld on
[root@www mysql]#


对MySQL的管理工具如果是rpm安装 的话会在/usr/bin/下找到他们,而我们的绿色软件包都在它
的/bin目录下,所以我们为了以后的管理方便,要将这些路径重新加入到系统的搜索路径中去,所以
修改etc/profile 文件

同样的,对于库文件,我们也要加入到系统的能够识别的目录中去,他们的指定目录分别是/lib
和/usr/lib/,但我们又不可能将这些库全都拷过去,所以方法就是编辑系统控制动态库加载的一个配
置文件,在这个文件下利用一个配置文件将路径加进去,如下编辑/etc/ld.so.conf.d/下的随意的
一个.conf 文件

[root@www lib]# vim /etc/ld.so.conf.d/mysql.conf
[root@www lib]# ldconfig
[root@www lib]# ldconfig -pv |grep mysql
libtcmalloc_minimal.so.0 (libc6) => /usr/local/mysql/lib/libtcmalloc_minimal.so.0
libmysqlclient_r.so.16 (libc6) => /usr/lib/mysql/libmysqlclient_r.so.16
libmysqlclient.so.18 (libc6) => /usr/local/mysql/lib/libmysqlclient.so.18
libmysqlclient.so.16 (libc6) => /usr/lib/mysql/libmysqlclient.so.16
libmysqlclient.so (libc6) => /usr/local/mysql/lib/libmysqlclient.so

[root@www lib]# vim /etc/man.config
[root@www lib]# man mysql
然后我们将man手册将如系统路径变量中去,并测试,如图:


编译配置并安装nginx

[root@localhost ~]# tar -zxvf nginx-1.0.11.tar.gz -C /usr/local/src
[root@localhost ~]# cd /usr/local/src/nginx-1.0.11/
[root@localhost nginx-1.0.11]# ./configure \
> --conf-path=/etc/nginx/nginx.conf \
> --error-log-path=/var/log/nginx/error.log \
> --http-log-path=/var/log/nginx/access.log \
> --pid-path=/var/run/nginx/nginx.pid \
> --lock-path=/var/lock/nginx.lock \
> --user=nginx \
> --group=nginx \
> --with-http_ssl_module \
> --with-http_flv_module \
> --with-http_stub_status_module \
> --with-http_gzip_static_module \
> --http-client-body-temp-path=/var/tmp/nginx/client/ \
> --http-proxy-temp-path=/var/tmp/nginx/proxy/ \
> --http-fastcgi-temp-path=/var/tmp/nginx/fcgi/ \
> --with-pcre
[root@localhost nginx-1.0.11]# make && make install
[root@localhost sbin]# ./nginx -t
nginx: the configuration file /etc/nginx/nginx.conf syntax is ok
nginx: configuration file /etc/nginx/nginx.conf test is successful
[root@localhost sbin]# pwd
/usr/local/nginx/sbin
在所需的软件安装完之后,剩下的就是完成php与nginx的结合工作,
你可以将sapi/fpm/php-fpm.conf拷贝到安装目录下的/etc目录中并命名为php-fpm.conf,也可以将安装目录下的/etc下的php-fpm.conf.default改为php-fpm.conf,这个文件的内容大家可以去了解一下,但不需要改(/usr/local/php/etc/php-fpm.conf)
下面我们测试一下我们的nginx能不能去调用php,先编译一个页面文件,并告诉nginx在接到php请求的时候应该怎么做(编写配置文件)
加入index.php后在以后的location项,将其打开(~表示区分大小写 \.php表示根目录下的php$表示行尾
并在fastcgi_param后将/scripts$符以前的改为站点主目录


可能会遇到如下的故障
故障的排除
[root@localhost html]# service nginx start
the nginx is starting...nginx: [emerg] invalid number of arguments in "fastcgi_param" directive in /etc/nginx/fastcgi_params:12
fail
方法:禁用/etc/nginx/fastcgi_params下的第12行
测试数据库调度
[root@localhost html]# netstat -tupln |grep 3306
tcp 0 0 0.0.0.0:3306 0.0.0.0:* LISTEN 2407/mysqld
编写如下图所示的连接数据库指令,测试

结果

然后停下数据库再测试:
[root@localhost xcache-3.1.0]# service mysqld stop
Shutting down MySQL. SUCCESS!

建立一个数据库的管理的网站页面进行测试:
[root@localhost ~]# unzip phpMyAdmin-4.1.5-all-languages.zip
[root@localhost ~]# mv phpMyAdmin-4.1.5-all-languages /usr/local/nginx/html/
[root@localhost ~]# cd /usr/local/nginx/html/
[root@localhost html]# mv phpMyAdmin-4.1.5-all-languages/ phpmyadmin

网站功能正常
php的加速测试,本次测试使用xcache
解压xcache并编译安装使他能成为php的一个加速模块
[root@localhost html]# cd /usr/local/src/xcache-3.1.0/
[root@localhost xcache-3.1.0]# /usr/local/php/bin/phpize
Configuring for:
PHP Api Version: 20121113
Zend Module Api No: 20121212
Zend Extension Api No: 220121212
[root@localhost xcache-3.1.0]# ./configure --enable-xcache --with-php-config=/usr/local/php/bin/php-config
[root@localhost xcache-3.1.0]# make && make install


[root@localhost xcache-3.1.0]# cat xcache.ini >>/usr/local/php.ini
[root@localhost xcache-3.1.0]# vim /usr/local/php.ini

[root@localhost xcache-3.1.0]# service php-fpm restart
Gracefully shutting down php-fpm . done
Starting php-fpm done
[root@localhost xcache-3.1.0]# service nginx restart
the nginx is stoping...ok
the nginx is starting...ok
重启php-fpm服务及nginx服务,并清空浏览器缓存
继续编辑和先前步骤同样的测试页面,测试

可以看到我们以前配置编译的mysqli也正常


他的管理页面

实验环境:
CentOS6.4 32位系统
VMware workstation 10
php-5.4.24.tar.bz2
mysql-5.5.15-linux2.6-i686.tar.gz
nginx-1.0.11.tar.gz
nginx因其并发链接请求数的原因,经常被用于反向代理。
在Apache时代与php的结合靠模块,而nginx靠的是fastcgi,默认是监听头在本机的9000端口上,可
以通过配置修改,fastcgi有自己的进程,并且可以手动指定启动的子进程,而这些子进程有相应的
管理者,叫fpm,他们的安装顺序应该是先安装MySQL或nginx,然后才是php然后才由php去产生
fastcgi
在安装开始之前,我们可以先根据这几大软件的依赖或调用关系来推测出安装的先后顺序,它们为先安装nginx或数据库,然后再是php,然后由php内的fastcgi来完成他们之间的结合
我们以MySQL的绿色软件包为例,
主要步骤为:
shell> groupadd mysql
shell> useradd -r -g mysql mysql
shell> cd /usr/local
shell> tar zxvf /path/to/mysql-VERSION-OS.tar.gz
shell> ln -s full-path-to-mysql-VERSION-OS mysql
shell> cd mysql
shell> chown -R mysql .
shell> chgrp -R mysql .
shell> scripts/mysql_install_db --user=mysql
shell> chown -R root .
shell> chown -R mysql data
# Next command is optional
shell> cp support-files/my-medium.cnf /etc/my.cnf
shell> bin/mysqld_safe --user=mysql &
# Next command is optional
shell> cp support-files/mysql.server /etc/init.d/mysql.server
[root@www local]# ln -s mysql-5.5.15-linux2.6-i686/ mysql
[root@www local]# cd ./mysql
[root@www mysql]# ls
bin data include lib mysql-test scripts sql-bench
COPYING docs INSTALL-BINARY man README share support-files
[root@www mysql]# vim INSTALL-BINARY
[root@www mysql]# groupadd mysql
[root@www mysql]# useradd -r -g mysql mysql
[root@www mysql]# cd /usr/local/mysql
[root@www mysql]# chown -R mysql .
[root@www mysql]# chgrp -R mysql .
[root@www ~]# cd /usr/local/
[root@www local]# ln -s mysql-5.5.15-linux2.6-i686 mysql
[root@www mysql]# chgrp -R mysql .
[root@www mysql]# chown -R mysql .
[root@www mysql]# scripts/mysql_install_db --user=mysql
Installing MySQL system tables...
OK
[root@www mysql]# ll data/mysql/
total 0
[root@www mysql]# chown -R root .
[root@www mysql]# chown -R mysql data/
[root@www mysql]# cp support-files/mysql.server /etc/init.d/mysqld
cp: overwrite `/etc/init.d/mysqld'? y
[root@www mysql]# chmod a+x /etc/init.d/mysqld
[root@www mysql]# service mysqld start
Starting MySQL... SUCCESS!
[root@www mysql]# service mysqld stop
Shutting down MySQL. SUCCESS!
[root@www mysql]# cp support-files/my-medium.cnf /etc/my.cnf
cp: overwrite `/etc/my.cnf'? y (如果以前安装过MySQL,当然是要覆盖的)
在此我们是利用软件包中的配置参考文件完成MySQL的配置文件生成工作
在这时我们会看到关于初始化MySQL数据库授权表的时候,是没有报错的,但我们在去具体目录查看的时候并没有那些数据表,但在官方的安装文件中,我们的步骤并没有出错,而在64位的系统测试中并没有发现这种情况。
解决办法是在上述步骤完成之后,重新把目录下的所有者及所属组改回MySQL之后再重新执行原始表生成语句(在其他步骤执行并不可以,这个暂时还没有查到有关的解释和说明)
[root@www mysql]# chgrp -R mysql .
[root@www mysql]# chown -R mysql .
[root@www mysql]# scripts/mysql_install_db --user=mysql
Installing MySQL system tables...
OK
Filling help tables...
OK
[root@www mysql]# cd data/mysql
[root@www mysql]# ll
total 988
在MySQL成功启动之后,我们可以
在data目录下还有一个以主机名字为名,.err为后缀的日志文件,如图:
[root@www mysql]# hostname
www.tyedus.com
[root@www mysql]# netstat -tupln|grep 3306
tcp 0 0 0.0.0.0:3306 0.0.0.0:* LISTEN
6805/mysqld
[root@www mysql]# service mysqld status
SUCCESS! MySQL running (6805)
[root@www mysql]# chkconfig --add mysqld
[root@www mysql]# chkconfig mysqld on
[root@www mysql]#
对MySQL的管理工具如果是rpm安装 的话会在/usr/bin/下找到他们,而我们的绿色软件包都在它
的/bin目录下,所以我们为了以后的管理方便,要将这些路径重新加入到系统的搜索路径中去,所以
修改etc/profile 文件
同样的,对于库文件,我们也要加入到系统的能够识别的目录中去,他们的指定目录分别是/lib
和/usr/lib/,但我们又不可能将这些库全都拷过去,所以方法就是编辑系统控制动态库加载的一个配
置文件,在这个文件下利用一个配置文件将路径加进去,如下编辑/etc/ld.so.conf.d/下的随意的
一个.conf 文件
[root@www lib]# vim /etc/ld.so.conf.d/mysql.conf
[root@www lib]# ldconfig
[root@www lib]# ldconfig -pv |grep mysql
libtcmalloc_minimal.so.0 (libc6) => /usr/local/mysql/lib/libtcmalloc_minimal.so.0
libmysqlclient_r.so.16 (libc6) => /usr/lib/mysql/libmysqlclient_r.so.16
libmysqlclient.so.18 (libc6) => /usr/local/mysql/lib/libmysqlclient.so.18
libmysqlclient.so.16 (libc6) => /usr/lib/mysql/libmysqlclient.so.16
libmysqlclient.so (libc6) => /usr/local/mysql/lib/libmysqlclient.so
[root@www lib]# vim /etc/man.config
[root@www lib]# man mysql
然后我们将man手册将如系统路径变量中去,并测试,如图:
编译配置并安装nginx
[root@localhost ~]# tar -zxvf nginx-1.0.11.tar.gz -C /usr/local/src
[root@localhost ~]# cd /usr/local/src/nginx-1.0.11/
[root@localhost nginx-1.0.11]# ./configure \
> --conf-path=/etc/nginx/nginx.conf \
> --error-log-path=/var/log/nginx/error.log \
> --http-log-path=/var/log/nginx/access.log \
> --pid-path=/var/run/nginx/nginx.pid \
> --lock-path=/var/lock/nginx.lock \
> --user=nginx \
> --group=nginx \
> --with-http_ssl_module \
> --with-http_flv_module \
> --with-http_stub_status_module \
> --with-http_gzip_static_module \
> --http-client-body-temp-path=/var/tmp/nginx/client/ \
> --http-proxy-temp-path=/var/tmp/nginx/proxy/ \
> --http-fastcgi-temp-path=/var/tmp/nginx/fcgi/ \
> --with-pcre
[root@localhost nginx-1.0.11]# make && make install
[root@localhost sbin]# ./nginx -t
nginx: the configuration file /etc/nginx/nginx.conf syntax is ok
nginx: configuration file /etc/nginx/nginx.conf test is successful
[root@localhost sbin]# pwd
/usr/local/nginx/sbin
在所需的软件安装完之后,剩下的就是完成php与nginx的结合工作,
你可以将sapi/fpm/php-fpm.conf拷贝到安装目录下的/etc目录中并命名为php-fpm.conf,也可以将安装目录下的/etc下的php-fpm.conf.default改为php-fpm.conf,这个文件的内容大家可以去了解一下,但不需要改(/usr/local/php/etc/php-fpm.conf)
下面我们测试一下我们的nginx能不能去调用php,先编译一个页面文件,并告诉nginx在接到php请求的时候应该怎么做(编写配置文件)
加入index.php后在以后的location项,将其打开(~表示区分大小写 \.php表示根目录下的php$表示行尾
并在fastcgi_param后将/scripts$符以前的改为站点主目录
可能会遇到如下的故障
故障的排除
[root@localhost html]# service nginx start
the nginx is starting...nginx: [emerg] invalid number of arguments in "fastcgi_param" directive in /etc/nginx/fastcgi_params:12
fail
方法:禁用/etc/nginx/fastcgi_params下的第12行
测试数据库调度
[root@localhost html]# netstat -tupln |grep 3306
tcp 0 0 0.0.0.0:3306 0.0.0.0:* LISTEN 2407/mysqld
编写如下图所示的连接数据库指令,测试
结果
然后停下数据库再测试:
[root@localhost xcache-3.1.0]# service mysqld stop
Shutting down MySQL. SUCCESS!
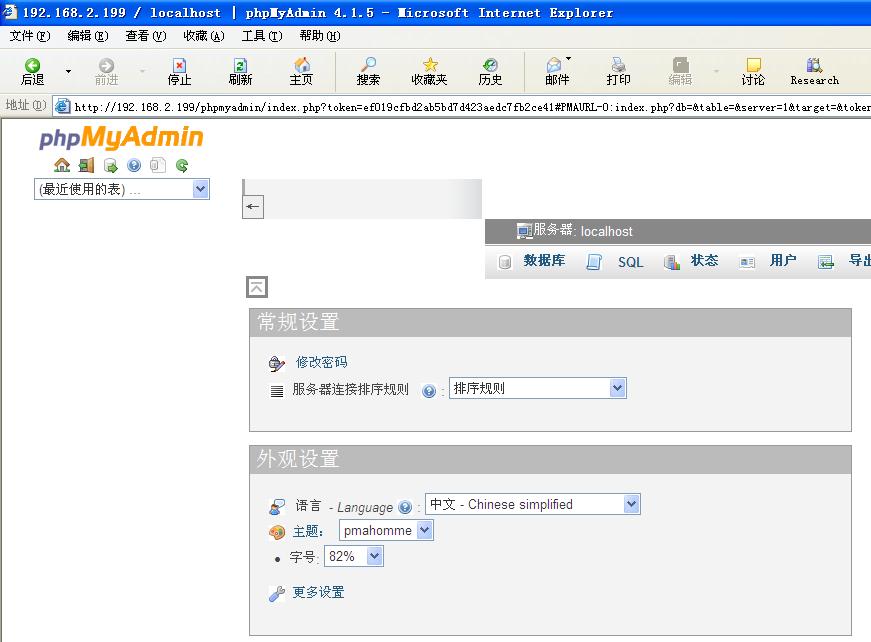
建立一个数据库的管理的网站页面进行测试:
[root@localhost ~]# unzip phpMyAdmin-4.1.5-all-languages.zip
[root@localhost ~]# mv phpMyAdmin-4.1.5-all-languages /usr/local/nginx/html/
[root@localhost ~]# cd /usr/local/nginx/html/
[root@localhost html]# mv phpMyAdmin-4.1.5-all-languages/ phpmyadmin
网站功能正常
php的加速测试,本次测试使用xcache
解压xcache并编译安装使他能成为php的一个加速模块
[root@localhost html]# cd /usr/local/src/xcache-3.1.0/
[root@localhost xcache-3.1.0]# /usr/local/php/bin/phpize
Configuring for:
PHP Api Version: 20121113
Zend Module Api No: 20121212
Zend Extension Api No: 220121212
[root@localhost xcache-3.1.0]# ./configure --enable-xcache --with-php-config=/usr/local/php/bin/php-config
[root@localhost xcache-3.1.0]# make && make install
[root@localhost xcache-3.1.0]# cat xcache.ini >>/usr/local/php.ini
[root@localhost xcache-3.1.0]# vim /usr/local/php.ini
[root@localhost xcache-3.1.0]# service php-fpm restart
Gracefully shutting down php-fpm . done
Starting php-fpm done
[root@localhost xcache-3.1.0]# service nginx restart
the nginx is stoping...ok
the nginx is starting...ok
重启php-fpm服务及nginx服务,并清空浏览器缓存
继续编辑和先前步骤同样的测试页面,测试
可以看到我们以前配置编译的mysqli也正常
他的管理页面

相关文章推荐
- lnmp环境搭建完全手册(四)——lnmp搭建(源码安装)
- 用源码轻松搭建LNMP !
- Cent OS 中LNMP 环境源码搭建
- lnmp环境搭建(源码)
- CentOS7最小化安装下源码编译搭建LAMP, LNMP环境及搭建discuz论坛
- 基于RHEL5的源码编译搭建LNMP架构 推荐
- LVS源码分析小插曲二---一台PC搭建LVS测试环境
- 源码搭建LNMP基础环境
- 利用源码搭建lnmp
- (三)lnmp环境的搭建:mysql源码安装
- lnmp 环境搭建 (源码)
- 高性能web服务器nginx(三)之源码搭建LNMP
- HP gen8 服务器快速搭建Centos 7 + lnmp 测试环境
- LNMP的源码搭建
- LNMP 源码安装搭建
- 利用源码搭建lnmp
- 利用源码搭建lnmp环境
- 源码包编译搭建LNMP+FastCGI平台
- LNMP环境的源码搭建
- LNMP(Linux+Nginx+Mysql+PHP---源码)环境搭建