nginx服务器的源码包搭建与站点安全性
2014-01-25 15:23
274 查看
nginx服务器的源码包搭建与站点安全性
实验环境:
CentOS6.4 32位系统
VMware workstation 10
写在安装nginx之前
Nginx不支持对外部程序的直接调用或者解析,所有的外部程序(包括PHP)必须通过FastCGI接口来
调用。FastCGI接口在Linux下是socket(这个socket可以是文件socket,也可以是ip socket)。
为了调用CGI程序,还需要一个FastCGI的wrapper(wrapper可以理解为用于启动另一个程序的程序
),这个wrapper绑定在某个固定socket上,如端口或者文件socket。当Nginx将CGI请求发送给这个
socket的时候,通过FastCGI接口,wrapper接收到请求,然后派生出一个新的线程,这个线程调用
解释器或者外部程序处理脚本并读取返回数据;接着,wrapper再将返回的数据通过FastCGI接口,
沿着固定的socket传递给Nginx;最后,Nginx将返回的数据发送给客户端。这就是Nginx+FastCGI的
整个运作过程
HTTP的信息类型:
2类型http信息为正常访问信息,3类型为重定向信息,4类型为客户端错误,5类型为服务器错误
nginx它的最大请求数没有限制,是因为采用epoll机制(时间的触发机制),(这对内核有要求,要求内核的版本
必须是2.6版本)
因为我们使用的epoll机制,所以事件的通知就显得尤为重要,而libevent就是一个跨平台的时间
通知库,
pcre则是一个兼容的正则表达式库,所以,我们要先安装以上所说的两个工具
准备安装所用源码包:
[root@localhost ~]# ll
total 1648
-rw-------. 1 root root 2671 Jan 21 02:02 anaconda-ks.cfg
-rw-r--r--. 1 root root 39343 Jan 21 02:02 install.log
-rw-r--r--. 1 root root 20921 Jan 21 02:01 install.log.syslog
-rw-r--r--. 1 root root 837650 Jan 24 22:36 libevent-2.0.16-stable.tar.gz
-rw-r--r--. 1 root root 768217 Jan 24 22:36 nginx-1.4.4.tar.gz
[root@localhost ~]# rpm -qa |grep httpd
httpd-tools-2.2.15-26.el6.centos.i686
httpd-2.2.15-26.el6.centos.i686
[root@localhost ~]# rpm -e httpd
error: Failed dependencies:
httpd >= 2.2.0 is needed by (installed) gnome-user-share-2.28.2-3.el6.i686
[root@localhost ~]# yum --disablerepo=\* --enablerepo=c6-media remove httpd
Removed:
httpd.i686 0:2.2.15-26.el6.centos
Dependency Removed:
gnome-user-share.i686 0:2.28.2-3.el6
[root@localhost dev]# mount -t iso9660 /dev/cdrom1 /media/cdrom
mount: block device /dev/sr0 is write-protected, mounting read-only
[root@localhost dev]# cd
[root@localhost ~]# tar -zxvf nginx-1.4.4.tar.gz -C /usr/local/src
[root@localhost nginx-1.4.4]# rpm -qa|grep pcre
pcre-7.8-6.el6.i686
[root@localhost nginx-1.4.4]# yum --disablerepo=\* --enablerepo=c6-media install
pcre-devel
安装预编译环境:
如图
查看已安装的和未安装的
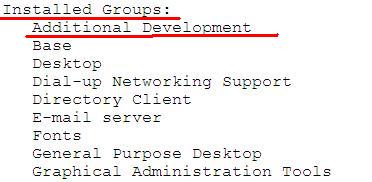
[root@localhost nginx-1.4.4]# yum --disablerepo=\* --enablerepo=c6-media
groupinstall Development tools
[root@localhost ~]# tar -zxvf libevent-2.0.16-stable.tar.gz -C /usr/local/src
[root@localhost libevent-2.0.16-stable]# ./configure --prefix=/usr/local/libevent
[root@localhost libevent-2.0.16-stable]# make && make install
在编译完成后生成的目录中。/lib目录下有许多的动态链接库,及链接,所以我们要将这些库加入系
统的链接目录中去
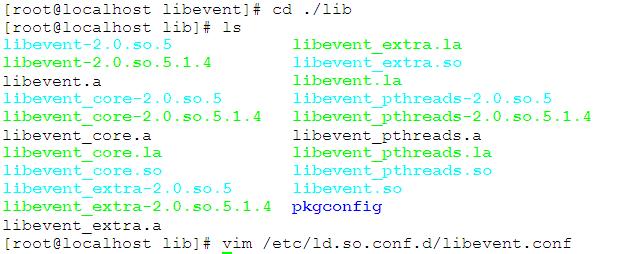
方法是在/etc/ld.so.conf.d/目录下随意创建一个名为.conf的文件
如图
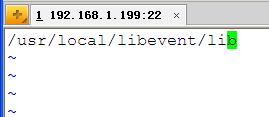
[root@localhost lib]# vim /etc/ld.so.conf.d/libevent.conf
更新缓存,并查看:
[root@localhost lib]# ldconfig
[root@localhost lib]# ldconfig -pv |grep libevent
libevent_pthreads-2.0.so.5 (libc6) =>
/usr/local/libevent/lib/libevent_pthreads-2.0.so.5
libevent_extra-2.0.so.5 (libc6) => /usr/local/libevent/lib/libevent_extra-
2.0.so.5
libevent_core-2.0.so.5 (libc6) => /usr/local/libevent/lib/libevent_core-
2.0.so.5
libevent-2.0.so.5 (libc6) => /usr/local/libevent/lib/libevent-2.0.so.5
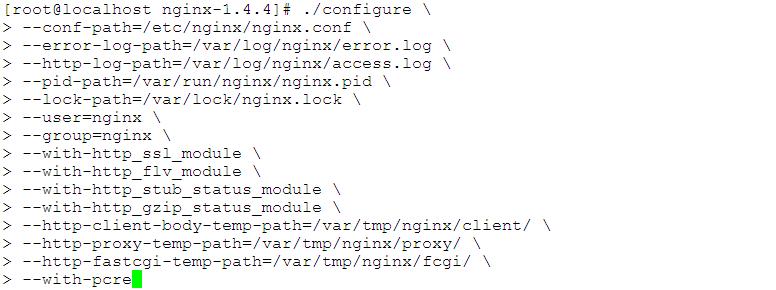
接下来在我们的解压目录下进行编译配置工作,具体的配置参数如下所示
./configure \
--conf-path=/etc/nginx/nginx.conf \
--error-log-path=/var/log/nginx/error.log \
--http-log-path=/var/log/nginx/access.log \
--pid-path=/var/run/nginx/nginx.pid \
--lock-path=/var/lock/nginx.lock \
--user=nginx \
--group=nginx \
--with-http_ssl_module \
--with-http_flv_module \
--with-http_stub_status_module \
--with-http_gzip_static_module \
--http-client-body-temp-path=/var/tmp/nginx/client/ \
--http-proxy-temp-path=/var/tmp/nginx/proxy/ \
--http-fastcgi-temp-path=/var/tmp/nginx/fcgi/ \
--with-pcre
但在配置编译时可能会报出如下所示的错误,是在提示我们有关的包或者是开发包没有安装,解决办法,如下所示,遇到同类的错误都可以依次解决:
./configure: error: SSL modules require the OpenSSL library.
You can either do not enable the modules, or install the OpenSSL library
into the system, or build the OpenSSL library statically from the source
with nginx by using --with-openssl=<path> option.
[root@localhost nginx-1.4.4]# rpm -qa|grep openssl
openssl-1.0.0-27.el6.i686
[root@localhost nginx-1.4.4]# yum --disablerepo=\* --enablerepo=c6-media install
openssl-devel
然后继续./configure工作:
[root@localhost nginx-1.4.4]# ./configure --conf-path=/etc/nginx/nginx.conf --error
-log-path=/var/log/nginx/error.log --http-log-path=/var/log/nginx/access.log --pid-
path=/var/run/nginx/nginx.pid --lock-path=/var/lock/nginx.lock --user=nginx --
group=nginx --with-http_ssl_module --with-http_flv_module --with-http_stub_status_module --with-http_gzip_static_module --http-client-body-temp-
path=/var/tmp/nginx/client/ --http-proxy-temp-path=/var/tmp/nginx/proxy/ --http-
fastcgi-temp-path=/var/tmp/nginx/fcgi/ --with-pcre
在完成此步后接着make && make install
[root@localhost nginx-1.4.4]# make && make install
然后进入目录查看结果,如图

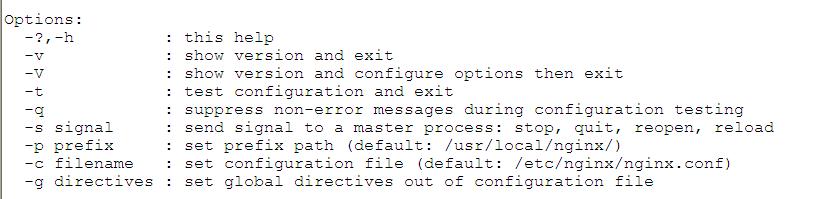
启动nginx方法,如图参数,但我们要先测试一下语法
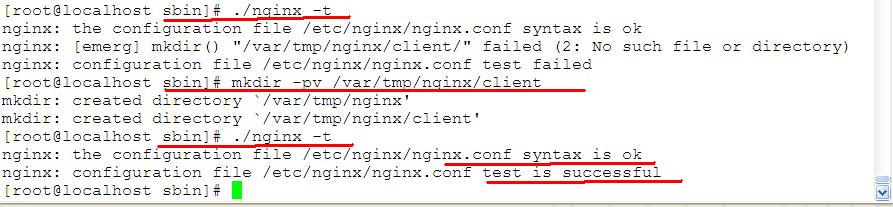
nginx: the configuration file /etc/nginx/nginx.conf syntax is ok
nginx: configuration file /etc/nginx/nginx.conf test is successful
[root@localhost sbin]#
[root@localhost sbin]# ./nginx
[root@localhost sbin]# netstat -tupln|grep 80
tcp 0 0 0.0.0.0:80 0.0.0.0:* LISTEN
23547/nginx
查看进程
[root@localhost sbin]#
[root@localhost sbin]# ps aux|grep nginx
process ./nginx
nginx 23548 0.0 0.2 7376 1160 ? S 00:17 0:00 nginx: worker
process
root 23643 0.0 0.1 4356 760 pts/1 S+ 00:24 0:00 grep nginx
[root@localhost sbin]#
由图我们可以看出,它不需要开启过多的子进程,不像Apache有8个,它只有一个,为了我们对服务的方便控制我们要去编它的控制脚本
编写控制脚本,脚本的具体内容如下
#!/bin/bash/
proc=/usr/local/nginx/sbin/nginx
lockfile=/var/lock/nginx.lock
start() {
if [ -e $lockfile ] ; then
echo "the nginx is running..." && exit
else
echo -n "the nginx is starting..."
sleep 1
$proc && touch $lockfile && echo "ok"||echo "fail"
fi
}
stop() {
if [ ! -e $lockfile ]; then
echo "the nginx is stoped"
else
echo -n "the nginx is stoping..."
$proc -s stop && echo "ok" && rm -rf $lockfile
fi
}
configtest(){
$proc -t
}
reload() {
if [ -e $lockfile ]; then
$proc -s reload && echo "ok" ||echo "fail"
else
$proc && echo "ok" && touch $lockfile
fi
}
case "$1" in
start)
start
;;
stop)
stop
;;
restart)
stop
start
;;
reload)
reload
;;
*)
echo "usage:start|stop|reload"
esac
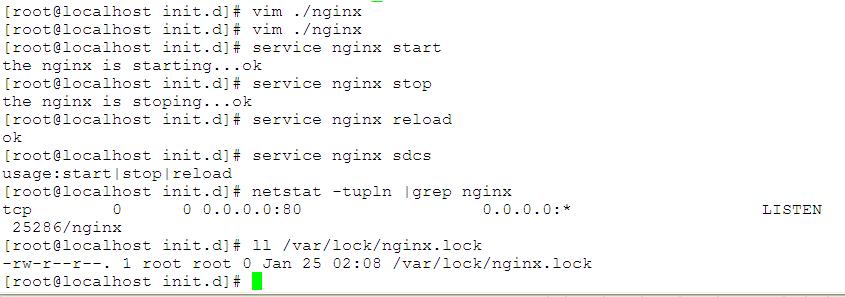
如图,工作正常
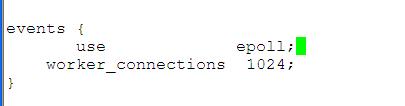
打开配置文件,因为采用epoll机制所以没有文件描述符的限制,而且效率较高,同时的并发链接
请求数也没有限制,如图我们可以在事件这一字段中加入 use epoll意味使用epoll机制,如图
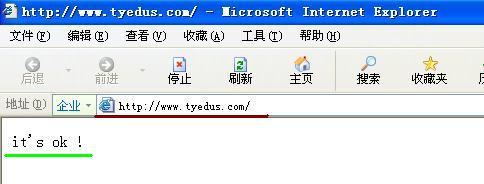
然后测试一下我们的nginx,打开浏览器测试

下面我们来说一下关于nginx的站点安全
在nginx的配置文件中每一个server表示一个站点,所以我们可以利用server做成虚拟地址主机
如果在http这个目录下加入,就表示在所有的HTTP协议下的所有的都会加上
server针对某些站点的,location针对某些目录的
基于ip地址的虚拟主机
修改完windows的有关文件,
之后我们要在nginx的配置文件中启用有关的支持虚拟主机的功能

我们只需要的只是36行到47行
并在80行之后粘贴,如上图,然后测试:
具体步骤:
[root@localhost ~]# vim /etc/nginx/nginx.conf
[root@localhost ~]# service nginx configtest
nginx: the configuration file /etc/nginx/nginx.conf syntax is ok
nginx: configuration file /etc/nginx/nginx.conf test is successful
[root@localhost ~]#
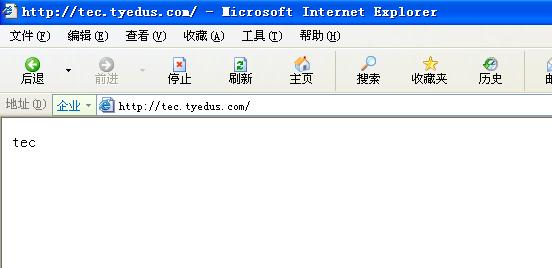
然后我们利用浏览器测试,注意,此时可能因为脚本中reload的问题我们需要重启nginx,如图当出现tec.也是和www的结果一样时,我们需要重启一下nginx(以下步骤每次修改完之后都需要重启一下,将脚本中也要再加入restart语句)
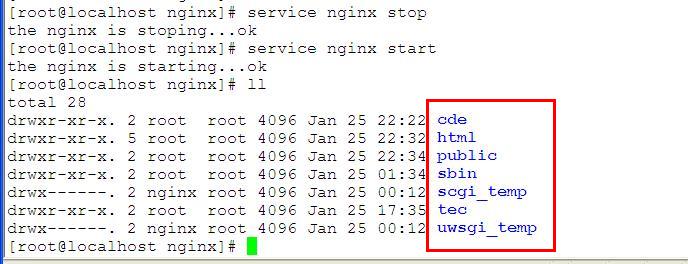
[root@localhost html]# service nginx restart
the nginx is starting...ok
the nginx is stoping...ok

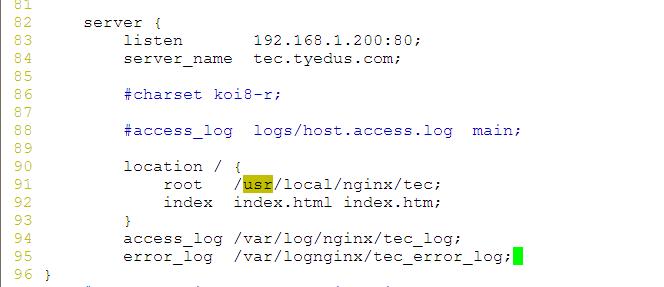
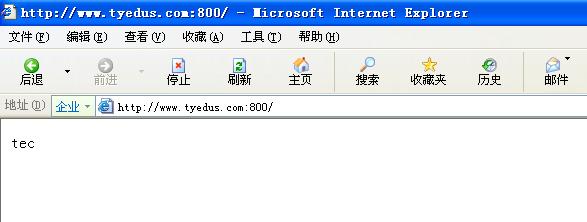
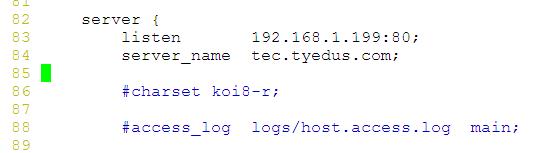
基于端口的虚拟主机
虽然在nginx的官方文档中没有提到基于端口的虚拟主机当可以实现,如tec部门基于800端口
如图,编辑配置文件,
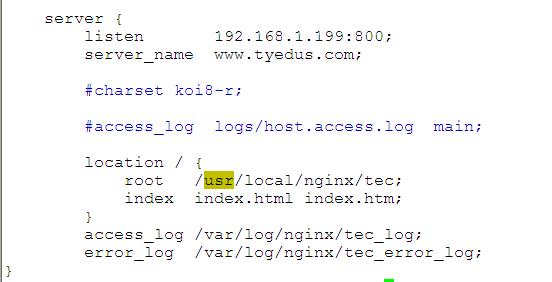
继续测试,看是否正常
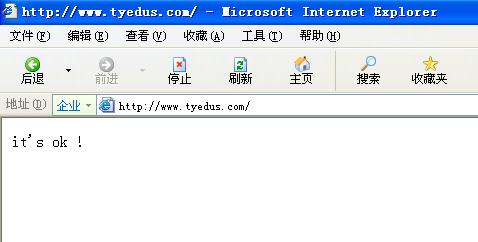
基于主机的虚拟主机(基于主机头)
多个域名对应少量ip的情况,如图在上一个server不变的情况下,修改下一个字段的server为如下
情况
测试
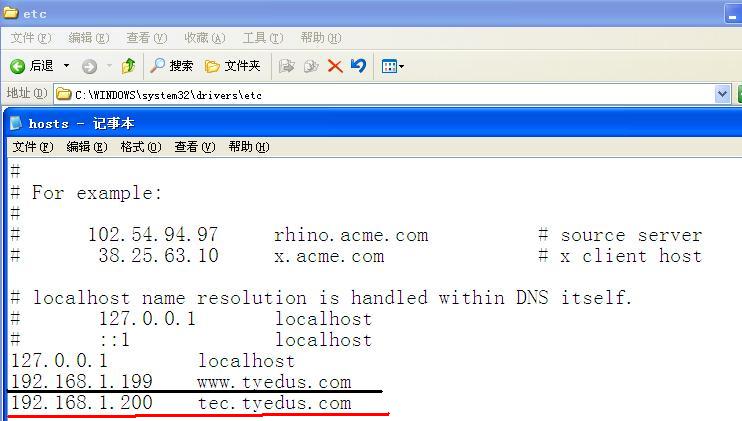
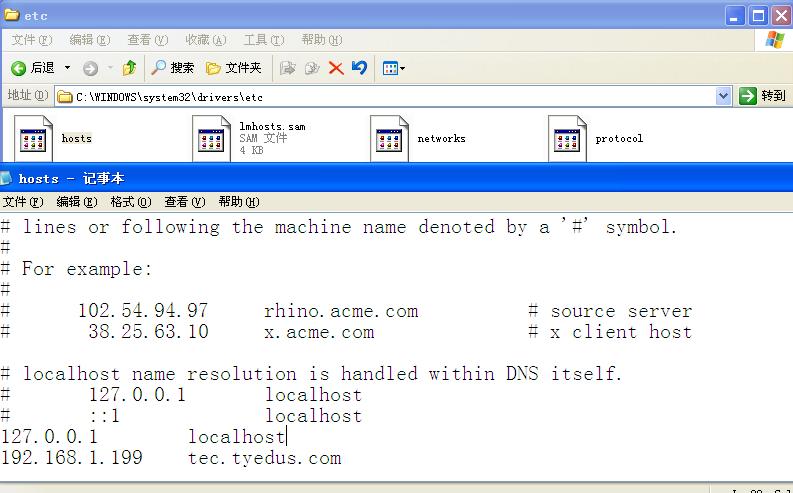
在此我们要修改先前的host文件记录
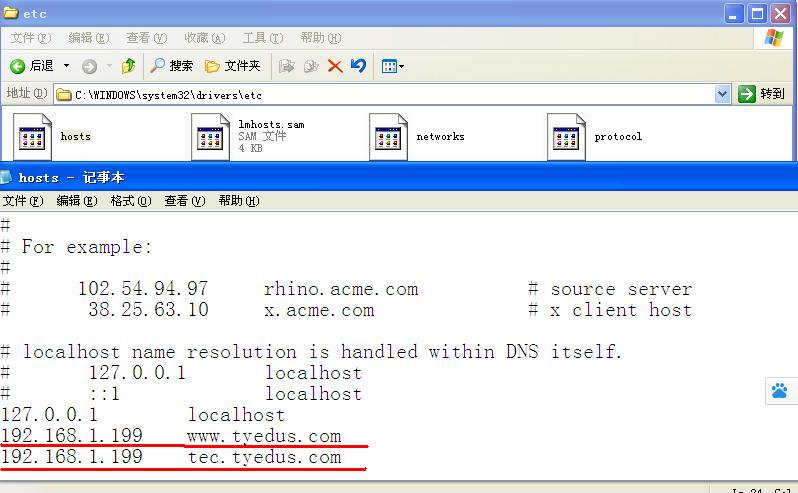
然后再测试
nginx的目录安全性
目录安全性,物理目录,即在物理目录的下边再建目录,以目录的名称来访问,现编写页面测试文件如图

进行测试
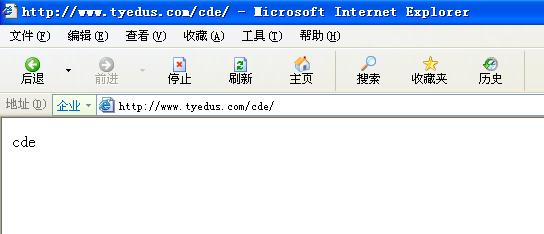
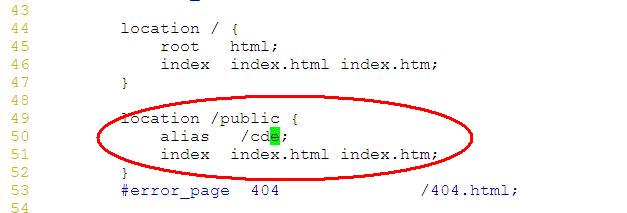
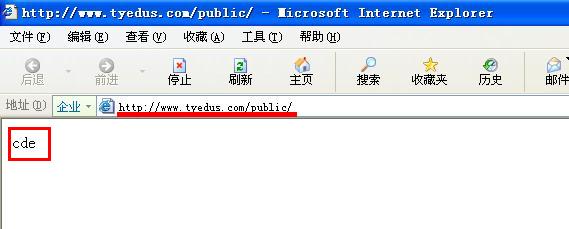
虚拟目录,做如下配置文件中的修改让访问public的都是去访问cde目录
页面测试:
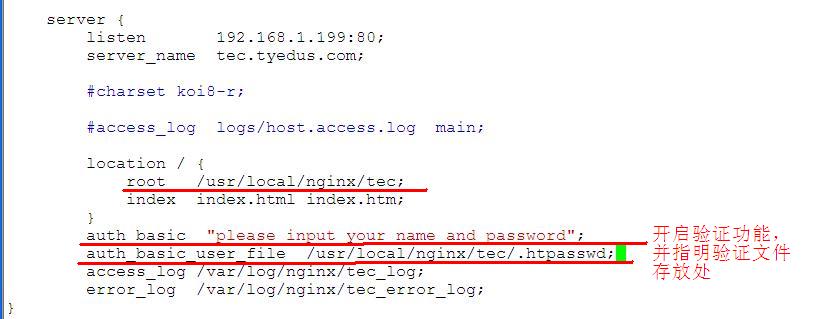
<二>针对tec站点的实现安全访问控制:
身份验证;
和Apache类似的首先要在配置中开启验证功能,并指明验证文件的存放路径,
首先要产生htpasswd文件,而这个文件的产生需要http-tools来产生(安装)
然后利用如下指令产生两个新的nginx用户,注意第一次使用时加 -c 参数是创建.htpasswd文件(
这个文件你也可以不隐藏),第二次使用时就不用加了,否则会一直覆盖原文件
(没有的话,可以挂载光盘,然后用yum安装)
[root@localhost certs]# rpm -qa |grep httpd
httpd-tools-2.2.15-26.el6.centos.i686
[root@localhost ~]# htpasswd /usr/local/nginx/tec/.htpasswd user1
New password:
Re-type new password:
Updating password for user user1
[root@localhost ~]# htpasswd /usr/local/nginx/tec/.htpasswd user2
New password:
Re-type new password:
Updating password for user user2
[root@localhost ~]# cat /usr/local/nginx/tec/.htpasswd
user1:npDv5U/0IBfLI
user2:PX6iU0oSZzg1s
接着我们修改nginx的配置文件,内容如下:
重启我们的nginx,然后在浏览器中测试我们的页面,
[root@localhost html]# service nginx restart
the nginx is starting...ok
the nginx is stoping...ok
注意每一步都要记得清一下缓存,以保证实验的顺利进行,测试结果
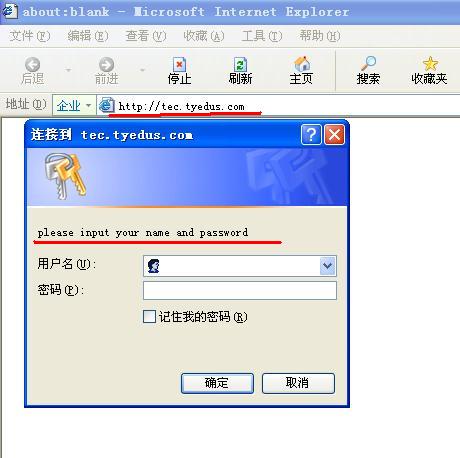
输入先前的账号和密码,进入:

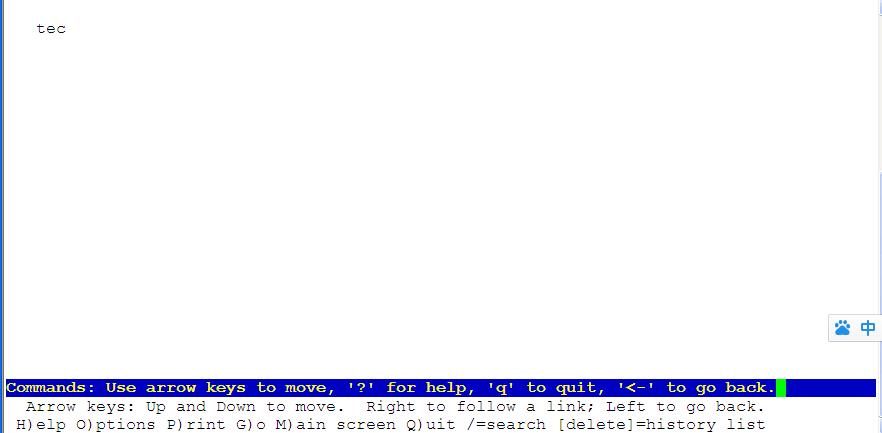
安装lynx文本浏览器便于我们测试
[root@localhost init.d]# mount -t iso9660 /dev/cdrom /media/cdrom
mount: block device /dev/sr0 is write-protected, mounting read-only
[root@localhost init.d]# yum --disablerepo=\* --enablerepo=c6-media install lynx
Installed:
lynx.i686 0:2.8.6-27.el6
Complete
为了方便我们的域名解析(两个域名对应一个ip地址),我们修改Linux下的域名对应文件
,内容如图

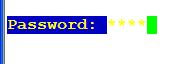
然后同lynx测试我们的结果:

基于nginx实现来源控制
关于来源控制的功能nginx在它的官方网站上说的很清楚,如果在编译配置时不用--without-access
额外指明的话,默认是有此工能的,它的书写及匹配与acl访问控制列表,而且可以在其他的协议字
段中进行引用
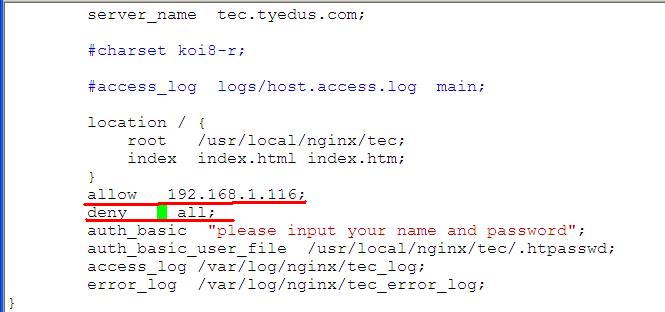
如图,在配置文件中作如下配置,后重启
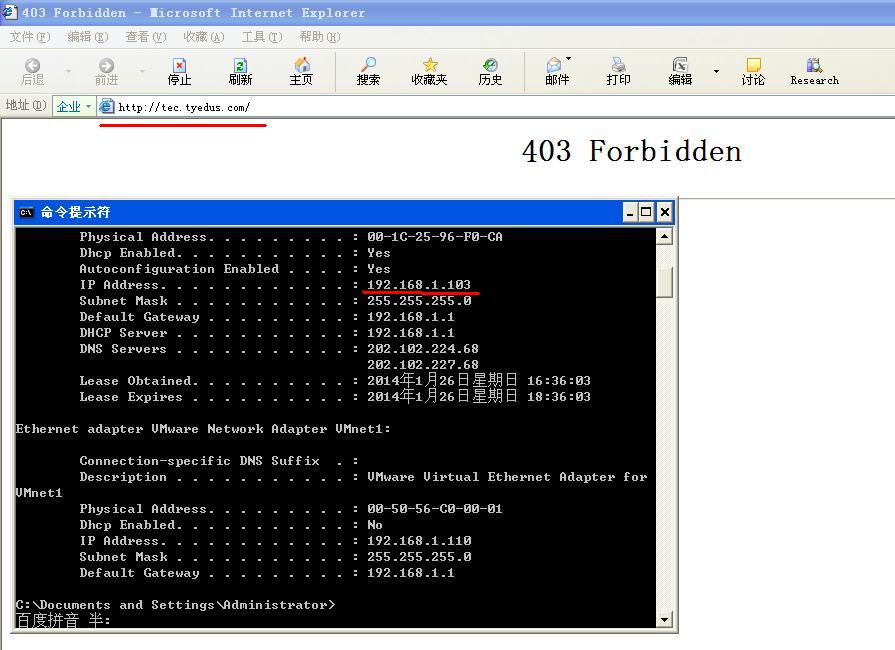
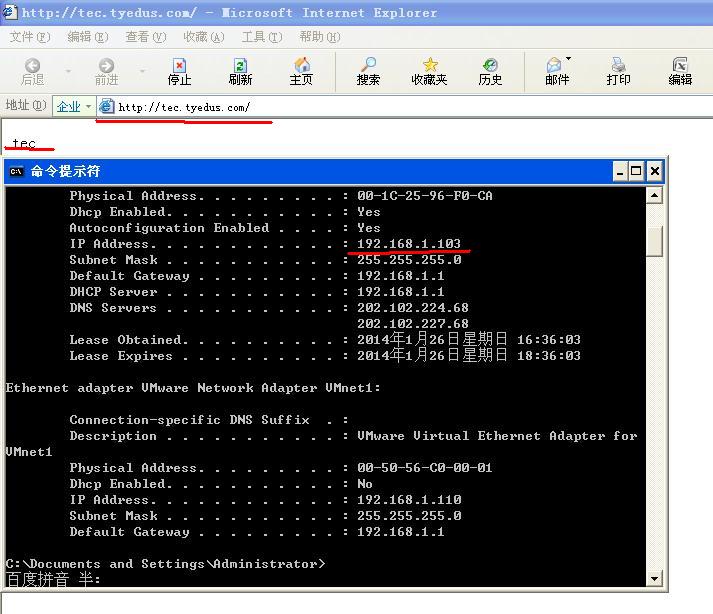
重启nginx,然后我们找一台非允许的ip主机进行访问测试,如图,
为了确认实验的效果,我们将来源主机地址改为192.168.1.103再进行测试
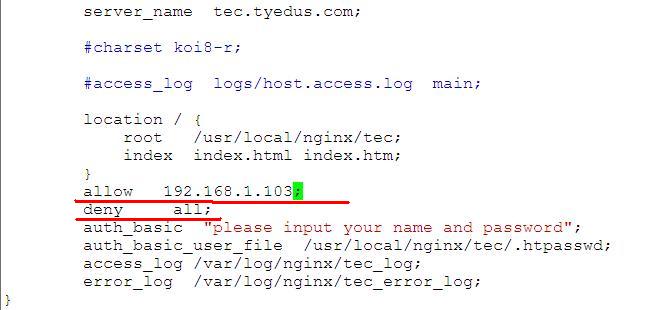
然后再测试一次
所以在实现身份验证和来源控制后,我们可以总结出身份验证靠的是auth_basic模块,来源控制是
access_basic
证书机构的建立,及证书的签发
在CA的实现中windows可以靠专门的证书服务器,Linux下可以靠openca(这是比较大型的应用),
而一些小型的CA我们可以靠openssl来实现。
因为在编译配置安装时我们已经用相关的参数(--with-openssl)来实现了openssl的安装,所以我
们可以直接进入有关目录进行配置工作
具体的目录含义及作用具体解释可参阅Apache下的站点安全
首先创建一个需要用到的目录
并在文件中写入第一个序列号
[root@localhost pki]# cd /etc
[root@localhost etc]# cd ./pki/CA
[root@localhost CA]# touch index.txt
[root@localhost CA]# touch index.txt
[root@localhost CA]# touch serial
[root@localhost CA]# echo "01">serial
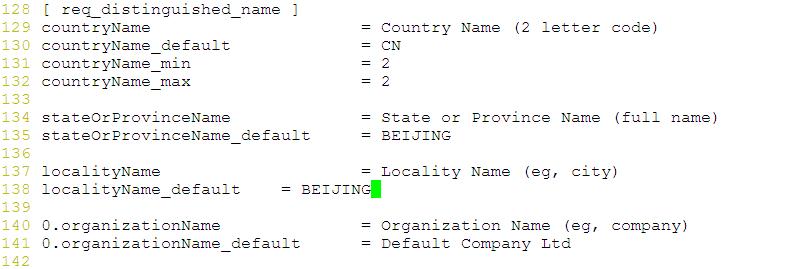
然后修改tls目录下的配置文件中的验证匹配选项,改为可选,
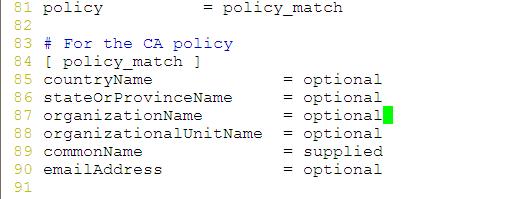
并修改文件的默认国家和地区选项,
以便于以后的注册
产生私钥(要在CA目录下)
[root@localhost CA]# vim /etc/pki/tls/openssl.cnf
[root@localhost ~]# cd /etc/pki/CA
[root@localhost CA]# openssl genrsa 1024 >private/cakey.pem
Generating RSA private key, 1024 bit long modulus
...++++++
...............................................++++++
e is 65537 (0x10001)
[root@localhost CA]#
为了安全性进行特殊安全保管
[root@localhost CA]# ll private/
total 4
-rw-r--r--. 1 root root 887 Jan 26 01:42 cakey.pem
[root@localhost CA]# chmod 600 private/cakey.pem
利用私钥产生证书
[root@localhost CA]# openssl req -new -key private/cakey.pem -x509 -out cacert.pem
You are about to be asked to enter information that will be incorporated
into your certificate request.
What you are about to enter is what is called a Distinguished Name or a DN.
There are quite a few fields but you can leave some blank
For some fields there will be a default value,
If you enter '.', the field will be left blank.
-----
Country Name (2 letter code) [CN]:
State or Province Name (full name) [BEIJING]:
Locality Name (eg, city) [BEIJING]:
Organization Name (eg, company) [Default Company Ltd]:CA
Organizational Unit Name (eg, section) []:tec
Common Name (eg, your name or your server's hostname) []:rootca.or
Email Address []:
一些选项可以省略,如Email
在机构建立之后就可以处理其他的证书申请请求了,(指web服务器),但要先产生证书的请求文件
而顺序应该是先有web服务器自己要以后用到的私钥,然后基于私钥产生请求文件,再由CA批准进而
产生并准后的证书
同样的,web的私钥也要严格保存,先建立文件所在目录,然后修改权限
[root@localhost CA]# mkdir -pv /etc/nginx/certs
mkdir: created directory `/etc/nginx/certs'
[root@localhost CA]# cd /etc/nginx/certs/
[root@localhost certs]# openssl genrsa 1024 >nginx.key
Generating RSA private key, 1024 bit long modulus
......++++++
...++++++
e is 65537 (0x10001)
[root@localhost certs]# ll
total 4
-rw-r--r--. 1 root root 887 Jan 26 01:58 nginx.key
[root@localhost certs]# chmod 600 nginx.key
[root@localhost certs]# ll
total 4
-rw-------. 1 root root 887 Jan 26 01:58 nginx.key
产生请求文件:
[root@localhost certs]# openssl req -new -key nginx.key -out nginx.crq
You are about to be asked to enter information that will be incorporated
into your certificate request.
What you are about to enter is what is called a Distinguished Name or a DN.
There are quite a few fields but you can leave some blank
For some fields there will be a default value,
If you enter '.', the field will be left blank.
-----
Country Name (2 letter code) [CN]:
State or Province Name (full name) [BEIJING]:
Locality Name (eg, city) [BEIJING]:
Organization Name (eg, company) [Default Company Ltd]:tyedus
Organizational Unit Name (eg, section) []:tec
Common Name (eg, your name or your server's hostname) []:tec.tyedus.com
Email Address []:
Please enter the following 'extra' attributes
to be sent with your certificate request
A challenge password []:
An optional company name []:
在请求文件产生之后,紧接着就是利用ca去处理这门请求文件,(请求要在CA的请求文件目录下),
然后签署这份证书给web
total 8
-rw-r--r--. 1 root root 651 Jan 26 02:01 nginx.crq
-rw-------. 1 root root 887 Jan 26 01:58 nginx.key
[root@localhost certs]# openssl ca -in nginx.crq -out nginx.cert
Using configuration from /etc/pki/tls/openssl.cnf
Check that the request matches the signature
Signature ok
Certificate Details:
Serial Number: 1 (0x1)
Validity
Not Before: Jan 26 10:05:45 2014 GMT
Not After : Jan 26 10:05:45 2015 GMT
Subject:
countryName = CN
stateOrProvinceName = BEIJING
organizationName = tyedus
organizationalUnitName = tec
commonName = tec.tyedus.com
X509v3 extensions:
X509v3 Basic Constraints:
CA:FALSE
Netscape Comment:
OpenSSL Generated Certificate
X509v3 Subject Key Identifier:
FC:41:75:59:FB:E1:B8:22:92:19:EE:F8:30:25:E3:B5:E9:1E:58:0F
X509v3 Authority Key Identifier:
keyid:3A:CA:7B:16:C5:C9:BC:48:BA:A2:F4:03:F2:AC:50:FA:52:3C:11:53
Certificate is to be certified until Jan 26 10:05:45 2015 GMT (365 days)
Sign the certificate? [y/n]:y
1 out of 1 certificate requests certified, commit? [y/n]y
Write out database with 1 new entries
Data Base Updated
此时我们可以在ca的有关证书颁发记录中看到刚才的结果
如图

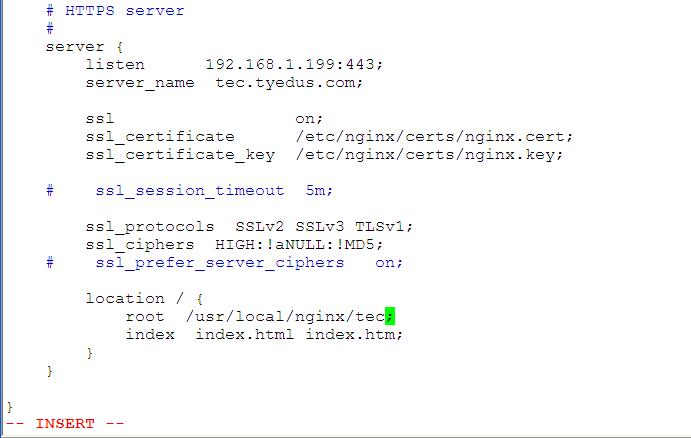
然后在nginx上进行证书的捆绑与发布
[root@localhost certs]# vim /etc/nginx/nginx.conf
然后进行一下语法测试:
[root@localhost certs]# service nginx configtest
nginx: the configuration file /etc/nginx/nginx.conf syntax is ok
nginx: configuration file /etc/nginx/nginx.conf test is successful

因为我们要用到域名访问,但却没有必要去搭建dns服务器,所以,可以去修改一下windows的hosts文件,如图
那么我们以前写的来源控制中的写的地址会不会对这次测试造成影响呢,其实是不会的,因为我们的
证书验证是在另一个server项中,所以不会对访问造成影响
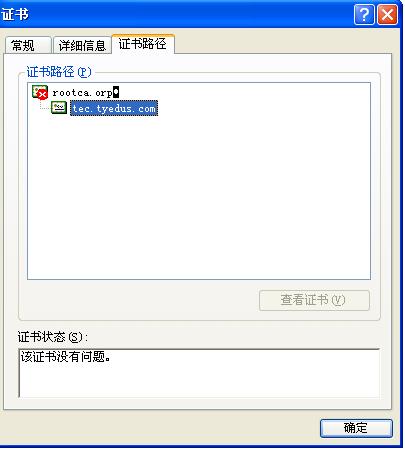
然后利用https协议来打开网址,进行证书验证的页面,如图,
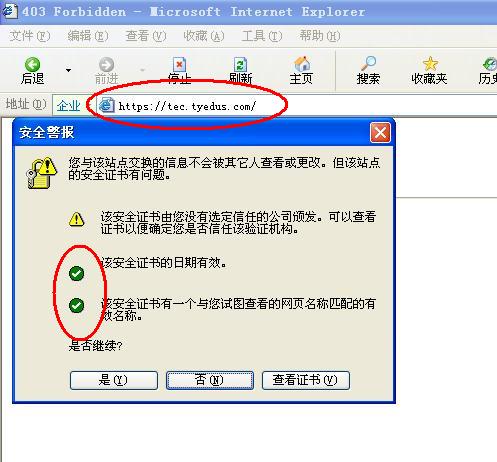
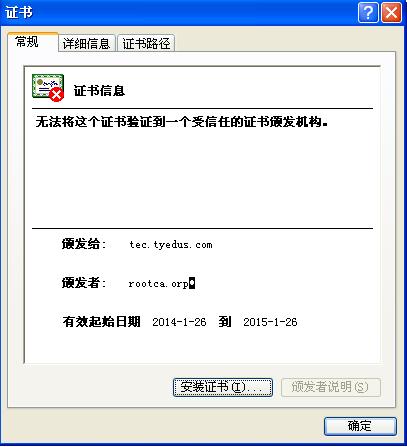
在图中,我们可以看出我们已经有三项中的两项符合要求(当然,对于时间,名称啦你都可以自己去
修改来符合要求),而对于不信任的机构颁发,我们则可以手动导入,来完成证书的信任认证,但在此之前我们要先解决证书的颁发机构的问题
关于证书量chain,即证书的颁发机构,官方网站上没有说明,但我们可以将ca的证书量和web证书拷
成一个证书
[root@localhost certs]# cp /etc/pki/CA/cacert.pem ./
[root@localhost certs]# ll
total 16
-rw-r--r--. 1 root root 952 Jan 26 02:56 cacert.pem
-rw-r--r--. 1 root root 3059 Jan 26 02:05 nginx.cert
-rw-r--r--. 1 root root 651 Jan 26 02:01 nginx.crq
-rw-------. 1 root root 887 Jan 26 01:58 nginx.key
[root@localhost certs]# mv nginx.cert nginx.cert.bak
[root@localhost certs]# cat nginx.cert.bak cacert.pem >nginx.cert
[root@localhost certs]# service nginx stop
the nginx is stoping...ok
[root@localhost certs]# service nginx start
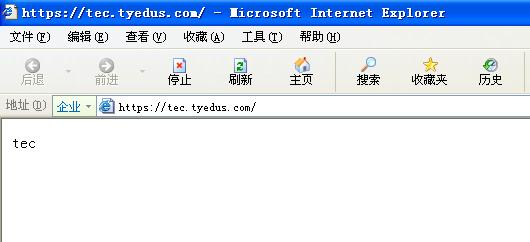
如上图,这样可以解决证书颁发机构的问题
然后我们接着证书的导入工作,注意这时一般不要默认导入路径,因为不信任的因素可能会对导入造成影响
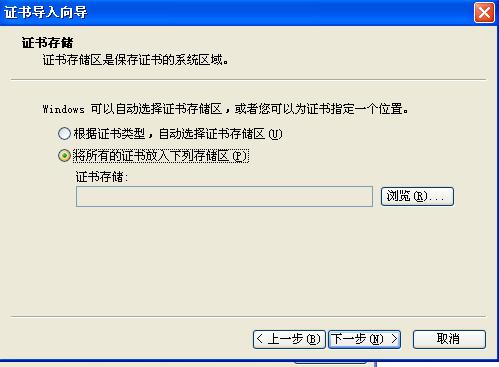
我们要将证书到如到受信任的区域中
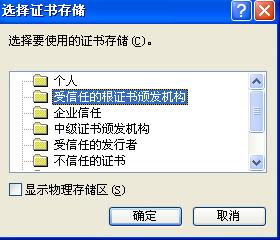
选择确认后,导入成功,
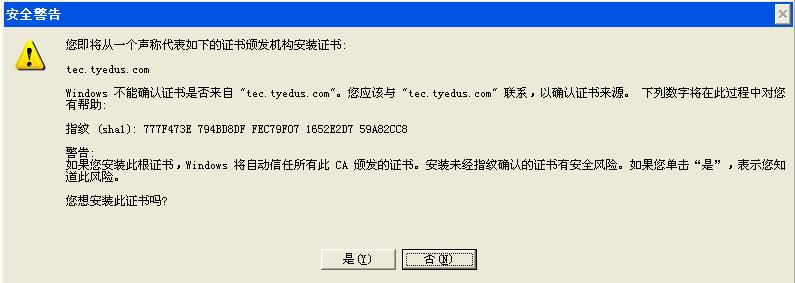

然后进行最后的测试工作,我们会对这个进行证书验证的网站进行直接的访问,以完成我们的要求
实验环境:
CentOS6.4 32位系统
VMware workstation 10
写在安装nginx之前
Nginx不支持对外部程序的直接调用或者解析,所有的外部程序(包括PHP)必须通过FastCGI接口来
调用。FastCGI接口在Linux下是socket(这个socket可以是文件socket,也可以是ip socket)。
为了调用CGI程序,还需要一个FastCGI的wrapper(wrapper可以理解为用于启动另一个程序的程序
),这个wrapper绑定在某个固定socket上,如端口或者文件socket。当Nginx将CGI请求发送给这个
socket的时候,通过FastCGI接口,wrapper接收到请求,然后派生出一个新的线程,这个线程调用
解释器或者外部程序处理脚本并读取返回数据;接着,wrapper再将返回的数据通过FastCGI接口,
沿着固定的socket传递给Nginx;最后,Nginx将返回的数据发送给客户端。这就是Nginx+FastCGI的
整个运作过程
HTTP的信息类型:
2类型http信息为正常访问信息,3类型为重定向信息,4类型为客户端错误,5类型为服务器错误
nginx它的最大请求数没有限制,是因为采用epoll机制(时间的触发机制),(这对内核有要求,要求内核的版本
必须是2.6版本)
因为我们使用的epoll机制,所以事件的通知就显得尤为重要,而libevent就是一个跨平台的时间
通知库,
pcre则是一个兼容的正则表达式库,所以,我们要先安装以上所说的两个工具
准备安装所用源码包:
[root@localhost ~]# ll
total 1648
-rw-------. 1 root root 2671 Jan 21 02:02 anaconda-ks.cfg
-rw-r--r--. 1 root root 39343 Jan 21 02:02 install.log
-rw-r--r--. 1 root root 20921 Jan 21 02:01 install.log.syslog
-rw-r--r--. 1 root root 837650 Jan 24 22:36 libevent-2.0.16-stable.tar.gz
-rw-r--r--. 1 root root 768217 Jan 24 22:36 nginx-1.4.4.tar.gz
[root@localhost ~]# rpm -qa |grep httpd
httpd-tools-2.2.15-26.el6.centos.i686
httpd-2.2.15-26.el6.centos.i686
[root@localhost ~]# rpm -e httpd
error: Failed dependencies:
httpd >= 2.2.0 is needed by (installed) gnome-user-share-2.28.2-3.el6.i686
[root@localhost ~]# yum --disablerepo=\* --enablerepo=c6-media remove httpd
Removed:
httpd.i686 0:2.2.15-26.el6.centos
Dependency Removed:
gnome-user-share.i686 0:2.28.2-3.el6
[root@localhost dev]# mount -t iso9660 /dev/cdrom1 /media/cdrom
mount: block device /dev/sr0 is write-protected, mounting read-only
[root@localhost dev]# cd
[root@localhost ~]# tar -zxvf nginx-1.4.4.tar.gz -C /usr/local/src
[root@localhost nginx-1.4.4]# rpm -qa|grep pcre
pcre-7.8-6.el6.i686
[root@localhost nginx-1.4.4]# yum --disablerepo=\* --enablerepo=c6-media install
pcre-devel
安装预编译环境:
如图
查看已安装的和未安装的
[root@localhost nginx-1.4.4]# yum --disablerepo=\* --enablerepo=c6-media
groupinstall Development tools
[root@localhost ~]# tar -zxvf libevent-2.0.16-stable.tar.gz -C /usr/local/src
[root@localhost libevent-2.0.16-stable]# ./configure --prefix=/usr/local/libevent
[root@localhost libevent-2.0.16-stable]# make && make install
在编译完成后生成的目录中。/lib目录下有许多的动态链接库,及链接,所以我们要将这些库加入系
统的链接目录中去
方法是在/etc/ld.so.conf.d/目录下随意创建一个名为.conf的文件
如图
[root@localhost lib]# vim /etc/ld.so.conf.d/libevent.conf
更新缓存,并查看:
[root@localhost lib]# ldconfig
[root@localhost lib]# ldconfig -pv |grep libevent
libevent_pthreads-2.0.so.5 (libc6) =>
/usr/local/libevent/lib/libevent_pthreads-2.0.so.5
libevent_extra-2.0.so.5 (libc6) => /usr/local/libevent/lib/libevent_extra-
2.0.so.5
libevent_core-2.0.so.5 (libc6) => /usr/local/libevent/lib/libevent_core-
2.0.so.5
libevent-2.0.so.5 (libc6) => /usr/local/libevent/lib/libevent-2.0.so.5
接下来在我们的解压目录下进行编译配置工作,具体的配置参数如下所示
./configure \
--conf-path=/etc/nginx/nginx.conf \
--error-log-path=/var/log/nginx/error.log \
--http-log-path=/var/log/nginx/access.log \
--pid-path=/var/run/nginx/nginx.pid \
--lock-path=/var/lock/nginx.lock \
--user=nginx \
--group=nginx \
--with-http_ssl_module \
--with-http_flv_module \
--with-http_stub_status_module \
--with-http_gzip_static_module \
--http-client-body-temp-path=/var/tmp/nginx/client/ \
--http-proxy-temp-path=/var/tmp/nginx/proxy/ \
--http-fastcgi-temp-path=/var/tmp/nginx/fcgi/ \
--with-pcre
但在配置编译时可能会报出如下所示的错误,是在提示我们有关的包或者是开发包没有安装,解决办法,如下所示,遇到同类的错误都可以依次解决:
./configure: error: SSL modules require the OpenSSL library.
You can either do not enable the modules, or install the OpenSSL library
into the system, or build the OpenSSL library statically from the source
with nginx by using --with-openssl=<path> option.
[root@localhost nginx-1.4.4]# rpm -qa|grep openssl
openssl-1.0.0-27.el6.i686
[root@localhost nginx-1.4.4]# yum --disablerepo=\* --enablerepo=c6-media install
openssl-devel
然后继续./configure工作:
[root@localhost nginx-1.4.4]# ./configure --conf-path=/etc/nginx/nginx.conf --error
-log-path=/var/log/nginx/error.log --http-log-path=/var/log/nginx/access.log --pid-
path=/var/run/nginx/nginx.pid --lock-path=/var/lock/nginx.lock --user=nginx --
group=nginx --with-http_ssl_module --with-http_flv_module --with-http_stub_status_module --with-http_gzip_static_module --http-client-body-temp-
path=/var/tmp/nginx/client/ --http-proxy-temp-path=/var/tmp/nginx/proxy/ --http-
fastcgi-temp-path=/var/tmp/nginx/fcgi/ --with-pcre
在完成此步后接着make && make install
[root@localhost nginx-1.4.4]# make && make install
然后进入目录查看结果,如图
启动nginx方法,如图参数,但我们要先测试一下语法
nginx: the configuration file /etc/nginx/nginx.conf syntax is ok
nginx: configuration file /etc/nginx/nginx.conf test is successful
[root@localhost sbin]#
[root@localhost sbin]# ./nginx
[root@localhost sbin]# netstat -tupln|grep 80
tcp 0 0 0.0.0.0:80 0.0.0.0:* LISTEN
23547/nginx
查看进程
[root@localhost sbin]#
[root@localhost sbin]# ps aux|grep nginx
process ./nginx
nginx 23548 0.0 0.2 7376 1160 ? S 00:17 0:00 nginx: worker
process
root 23643 0.0 0.1 4356 760 pts/1 S+ 00:24 0:00 grep nginx
[root@localhost sbin]#
由图我们可以看出,它不需要开启过多的子进程,不像Apache有8个,它只有一个,为了我们对服务的方便控制我们要去编它的控制脚本
编写控制脚本,脚本的具体内容如下
#!/bin/bash/
proc=/usr/local/nginx/sbin/nginx
lockfile=/var/lock/nginx.lock
start() {
if [ -e $lockfile ] ; then
echo "the nginx is running..." && exit
else
echo -n "the nginx is starting..."
sleep 1
$proc && touch $lockfile && echo "ok"||echo "fail"
fi
}
stop() {
if [ ! -e $lockfile ]; then
echo "the nginx is stoped"
else
echo -n "the nginx is stoping..."
$proc -s stop && echo "ok" && rm -rf $lockfile
fi
}
configtest(){
$proc -t
}
reload() {
if [ -e $lockfile ]; then
$proc -s reload && echo "ok" ||echo "fail"
else
$proc && echo "ok" && touch $lockfile
fi
}
case "$1" in
start)
start
;;
stop)
stop
;;
restart)
stop
start
;;
reload)
reload
;;
*)
echo "usage:start|stop|reload"
esac
如图,工作正常
打开配置文件,因为采用epoll机制所以没有文件描述符的限制,而且效率较高,同时的并发链接
请求数也没有限制,如图我们可以在事件这一字段中加入 use epoll意味使用epoll机制,如图
然后测试一下我们的nginx,打开浏览器测试
下面我们来说一下关于nginx的站点安全
在nginx的配置文件中每一个server表示一个站点,所以我们可以利用server做成虚拟地址主机
如果在http这个目录下加入,就表示在所有的HTTP协议下的所有的都会加上
server针对某些站点的,location针对某些目录的
基于ip地址的虚拟主机
修改完windows的有关文件,
之后我们要在nginx的配置文件中启用有关的支持虚拟主机的功能
我们只需要的只是36行到47行
并在80行之后粘贴,如上图,然后测试:
具体步骤:
[root@localhost ~]# vim /etc/nginx/nginx.conf
[root@localhost ~]# service nginx configtest
nginx: the configuration file /etc/nginx/nginx.conf syntax is ok
nginx: configuration file /etc/nginx/nginx.conf test is successful
[root@localhost ~]#
然后我们利用浏览器测试,注意,此时可能因为脚本中reload的问题我们需要重启nginx,如图当出现tec.也是和www的结果一样时,我们需要重启一下nginx(以下步骤每次修改完之后都需要重启一下,将脚本中也要再加入restart语句)
[root@localhost html]# service nginx restart
the nginx is starting...ok
the nginx is stoping...ok
基于端口的虚拟主机
虽然在nginx的官方文档中没有提到基于端口的虚拟主机当可以实现,如tec部门基于800端口
如图,编辑配置文件,
继续测试,看是否正常
基于主机的虚拟主机(基于主机头)
多个域名对应少量ip的情况,如图在上一个server不变的情况下,修改下一个字段的server为如下
情况
测试
在此我们要修改先前的host文件记录
然后再测试
nginx的目录安全性
目录安全性,物理目录,即在物理目录的下边再建目录,以目录的名称来访问,现编写页面测试文件如图
进行测试
虚拟目录,做如下配置文件中的修改让访问public的都是去访问cde目录
页面测试:
<二>针对tec站点的实现安全访问控制:
身份验证;
和Apache类似的首先要在配置中开启验证功能,并指明验证文件的存放路径,
首先要产生htpasswd文件,而这个文件的产生需要http-tools来产生(安装)
然后利用如下指令产生两个新的nginx用户,注意第一次使用时加 -c 参数是创建.htpasswd文件(
这个文件你也可以不隐藏),第二次使用时就不用加了,否则会一直覆盖原文件
(没有的话,可以挂载光盘,然后用yum安装)
[root@localhost certs]# rpm -qa |grep httpd
httpd-tools-2.2.15-26.el6.centos.i686
[root@localhost ~]# htpasswd /usr/local/nginx/tec/.htpasswd user1
New password:
Re-type new password:
Updating password for user user1
[root@localhost ~]# htpasswd /usr/local/nginx/tec/.htpasswd user2
New password:
Re-type new password:
Updating password for user user2
[root@localhost ~]# cat /usr/local/nginx/tec/.htpasswd
user1:npDv5U/0IBfLI
user2:PX6iU0oSZzg1s
接着我们修改nginx的配置文件,内容如下:
重启我们的nginx,然后在浏览器中测试我们的页面,
[root@localhost html]# service nginx restart
the nginx is starting...ok
the nginx is stoping...ok
注意每一步都要记得清一下缓存,以保证实验的顺利进行,测试结果
输入先前的账号和密码,进入:
安装lynx文本浏览器便于我们测试
[root@localhost init.d]# mount -t iso9660 /dev/cdrom /media/cdrom
mount: block device /dev/sr0 is write-protected, mounting read-only
[root@localhost init.d]# yum --disablerepo=\* --enablerepo=c6-media install lynx
Installed:
lynx.i686 0:2.8.6-27.el6
Complete
为了方便我们的域名解析(两个域名对应一个ip地址),我们修改Linux下的域名对应文件
,内容如图
然后同lynx测试我们的结果:
基于nginx实现来源控制
关于来源控制的功能nginx在它的官方网站上说的很清楚,如果在编译配置时不用--without-access
额外指明的话,默认是有此工能的,它的书写及匹配与acl访问控制列表,而且可以在其他的协议字
段中进行引用
如图,在配置文件中作如下配置,后重启
重启nginx,然后我们找一台非允许的ip主机进行访问测试,如图,
为了确认实验的效果,我们将来源主机地址改为192.168.1.103再进行测试
然后再测试一次
所以在实现身份验证和来源控制后,我们可以总结出身份验证靠的是auth_basic模块,来源控制是
access_basic
证书机构的建立,及证书的签发
在CA的实现中windows可以靠专门的证书服务器,Linux下可以靠openca(这是比较大型的应用),
而一些小型的CA我们可以靠openssl来实现。
因为在编译配置安装时我们已经用相关的参数(--with-openssl)来实现了openssl的安装,所以我
们可以直接进入有关目录进行配置工作
具体的目录含义及作用具体解释可参阅Apache下的站点安全
首先创建一个需要用到的目录
并在文件中写入第一个序列号
[root@localhost pki]# cd /etc
[root@localhost etc]# cd ./pki/CA
[root@localhost CA]# touch index.txt
[root@localhost CA]# touch index.txt
[root@localhost CA]# touch serial
[root@localhost CA]# echo "01">serial
然后修改tls目录下的配置文件中的验证匹配选项,改为可选,
并修改文件的默认国家和地区选项,
以便于以后的注册
产生私钥(要在CA目录下)
[root@localhost CA]# vim /etc/pki/tls/openssl.cnf
[root@localhost ~]# cd /etc/pki/CA
[root@localhost CA]# openssl genrsa 1024 >private/cakey.pem
Generating RSA private key, 1024 bit long modulus
...++++++
...............................................++++++
e is 65537 (0x10001)
[root@localhost CA]#
为了安全性进行特殊安全保管
[root@localhost CA]# ll private/
total 4
-rw-r--r--. 1 root root 887 Jan 26 01:42 cakey.pem
[root@localhost CA]# chmod 600 private/cakey.pem
利用私钥产生证书
[root@localhost CA]# openssl req -new -key private/cakey.pem -x509 -out cacert.pem
You are about to be asked to enter information that will be incorporated
into your certificate request.
What you are about to enter is what is called a Distinguished Name or a DN.
There are quite a few fields but you can leave some blank
For some fields there will be a default value,
If you enter '.', the field will be left blank.
-----
Country Name (2 letter code) [CN]:
State or Province Name (full name) [BEIJING]:
Locality Name (eg, city) [BEIJING]:
Organization Name (eg, company) [Default Company Ltd]:CA
Organizational Unit Name (eg, section) []:tec
Common Name (eg, your name or your server's hostname) []:rootca.or
Email Address []:
一些选项可以省略,如Email
在机构建立之后就可以处理其他的证书申请请求了,(指web服务器),但要先产生证书的请求文件
而顺序应该是先有web服务器自己要以后用到的私钥,然后基于私钥产生请求文件,再由CA批准进而
产生并准后的证书
同样的,web的私钥也要严格保存,先建立文件所在目录,然后修改权限
[root@localhost CA]# mkdir -pv /etc/nginx/certs
mkdir: created directory `/etc/nginx/certs'
[root@localhost CA]# cd /etc/nginx/certs/
[root@localhost certs]# openssl genrsa 1024 >nginx.key
Generating RSA private key, 1024 bit long modulus
......++++++
...++++++
e is 65537 (0x10001)
[root@localhost certs]# ll
total 4
-rw-r--r--. 1 root root 887 Jan 26 01:58 nginx.key
[root@localhost certs]# chmod 600 nginx.key
[root@localhost certs]# ll
total 4
-rw-------. 1 root root 887 Jan 26 01:58 nginx.key
产生请求文件:
[root@localhost certs]# openssl req -new -key nginx.key -out nginx.crq
You are about to be asked to enter information that will be incorporated
into your certificate request.
What you are about to enter is what is called a Distinguished Name or a DN.
There are quite a few fields but you can leave some blank
For some fields there will be a default value,
If you enter '.', the field will be left blank.
-----
Country Name (2 letter code) [CN]:
State or Province Name (full name) [BEIJING]:
Locality Name (eg, city) [BEIJING]:
Organization Name (eg, company) [Default Company Ltd]:tyedus
Organizational Unit Name (eg, section) []:tec
Common Name (eg, your name or your server's hostname) []:tec.tyedus.com
Email Address []:
Please enter the following 'extra' attributes
to be sent with your certificate request
A challenge password []:
An optional company name []:
在请求文件产生之后,紧接着就是利用ca去处理这门请求文件,(请求要在CA的请求文件目录下),
然后签署这份证书给web
total 8
-rw-r--r--. 1 root root 651 Jan 26 02:01 nginx.crq
-rw-------. 1 root root 887 Jan 26 01:58 nginx.key
[root@localhost certs]# openssl ca -in nginx.crq -out nginx.cert
Using configuration from /etc/pki/tls/openssl.cnf
Check that the request matches the signature
Signature ok
Certificate Details:
Serial Number: 1 (0x1)
Validity
Not Before: Jan 26 10:05:45 2014 GMT
Not After : Jan 26 10:05:45 2015 GMT
Subject:
countryName = CN
stateOrProvinceName = BEIJING
organizationName = tyedus
organizationalUnitName = tec
commonName = tec.tyedus.com
X509v3 extensions:
X509v3 Basic Constraints:
CA:FALSE
Netscape Comment:
OpenSSL Generated Certificate
X509v3 Subject Key Identifier:
FC:41:75:59:FB:E1:B8:22:92:19:EE:F8:30:25:E3:B5:E9:1E:58:0F
X509v3 Authority Key Identifier:
keyid:3A:CA:7B:16:C5:C9:BC:48:BA:A2:F4:03:F2:AC:50:FA:52:3C:11:53
Certificate is to be certified until Jan 26 10:05:45 2015 GMT (365 days)
Sign the certificate? [y/n]:y
1 out of 1 certificate requests certified, commit? [y/n]y
Write out database with 1 new entries
Data Base Updated
此时我们可以在ca的有关证书颁发记录中看到刚才的结果
如图
然后在nginx上进行证书的捆绑与发布
[root@localhost certs]# vim /etc/nginx/nginx.conf
然后进行一下语法测试:
[root@localhost certs]# service nginx configtest
nginx: the configuration file /etc/nginx/nginx.conf syntax is ok
nginx: configuration file /etc/nginx/nginx.conf test is successful
因为我们要用到域名访问,但却没有必要去搭建dns服务器,所以,可以去修改一下windows的hosts文件,如图
那么我们以前写的来源控制中的写的地址会不会对这次测试造成影响呢,其实是不会的,因为我们的
证书验证是在另一个server项中,所以不会对访问造成影响
然后利用https协议来打开网址,进行证书验证的页面,如图,
在图中,我们可以看出我们已经有三项中的两项符合要求(当然,对于时间,名称啦你都可以自己去
修改来符合要求),而对于不信任的机构颁发,我们则可以手动导入,来完成证书的信任认证,但在此之前我们要先解决证书的颁发机构的问题
关于证书量chain,即证书的颁发机构,官方网站上没有说明,但我们可以将ca的证书量和web证书拷
成一个证书
[root@localhost certs]# cp /etc/pki/CA/cacert.pem ./
[root@localhost certs]# ll
total 16
-rw-r--r--. 1 root root 952 Jan 26 02:56 cacert.pem
-rw-r--r--. 1 root root 3059 Jan 26 02:05 nginx.cert
-rw-r--r--. 1 root root 651 Jan 26 02:01 nginx.crq
-rw-------. 1 root root 887 Jan 26 01:58 nginx.key
[root@localhost certs]# mv nginx.cert nginx.cert.bak
[root@localhost certs]# cat nginx.cert.bak cacert.pem >nginx.cert
[root@localhost certs]# service nginx stop
the nginx is stoping...ok
[root@localhost certs]# service nginx start
如上图,这样可以解决证书颁发机构的问题
然后我们接着证书的导入工作,注意这时一般不要默认导入路径,因为不信任的因素可能会对导入造成影响
我们要将证书到如到受信任的区域中
选择确认后,导入成功,
然后进行最后的测试工作,我们会对这个进行证书验证的网站进行直接的访问,以完成我们的要求

相关文章推荐
- Centos6.3 编译源码搭建 PHP(fast-cgi)+Nginx+Mysql+Memcached+Redis高性能服务器
- 关于Nginx服务器搭建,编译源码安装Nginx的环境
- 【服务器环境搭建-Centos】Nginx1.9.9 安装(编译源码)
- 地球最强WEB前端Nginx服务器之搭建基础静态WEB站点
- 使用nginx搭建媒体点播服务器
- Nginx搭建反向代理服务器过程详解
- Nginx搭建反向代理服务器过程详解(转)
- nginx上搭建HLS流媒体服务器
- 搭建LNAMP环境(二)- 源码安装Nginx1.10
- Nginx搭建https服务器
- vsftpd源码包服务器的搭建
- 使用nginx搭建前端项目web服务器以及利用反向代理调试远程后台接口
- 使用nginx与nginx-rtmp-module搭建流媒体服务器
- 使用nginx与nginx-rtmp-module搭建流媒体服务器
- CentOS5.5 Nginx环境搭建(源码方式安装)
- 【大型网站技术实践】初级篇:借助Nginx搭建反向代理服务器(转)
- 利用nginx搭建RTMP视频点播、直播、HLS服务器
- 用nginx搭建http/rtmp/hls协议的MP4/FLV流媒体服务器
- 如何在在阿里云服务器(ECS)上搭建nginx服务器?
- nginx服务器搭建部署(linux+nginx+sqlite+php)