HDFS客户端的权限错误:Permission denied
2014-01-07 19:40
281 查看
[root@Lab6-1 ~]# cat /etc/redhat-release
CentOS release 6.6 (Final)
[root@Lab6-1 ~]# uname -r
2.6.32-504.el6.x86_64
[root@Lab6-1 ~]# ifconfig eth0
eth0      Link encap:Ethernet  HWaddr 00:0C:29:25:7F:50
inet addr:172.16.6.1  Bcast:172.16.255.255  Mask:255.255.0.0
inet6 addr: fe80::20c:29ff:fe25:7f50/64 Scope:Link
UP BROADCAST RUNNING MULTICAST  MTU:1500  Metric:1
RX packets:14666 errors:0 dropped:0 overruns:0 frame:0
TX packets:4958 errors:0 dropped:0 overruns:0 carrier:0
collisions:0 txqueuelen:1000
RX bytes:1645179 (1.5 MiB)  TX bytes:815778 (796.6 KiB)
在开机设置菜单,按任意键进入,如果不键入设置菜单会直接开机启动内核

下面是GRUB的stage2提供的交互式菜单栏,主要用到的是e:编辑模式,用于编辑菜单选项,-c:grub的命令行模式,交互式接口,这里我们进入编辑模式,进行尝试在单用户模式下修改密码

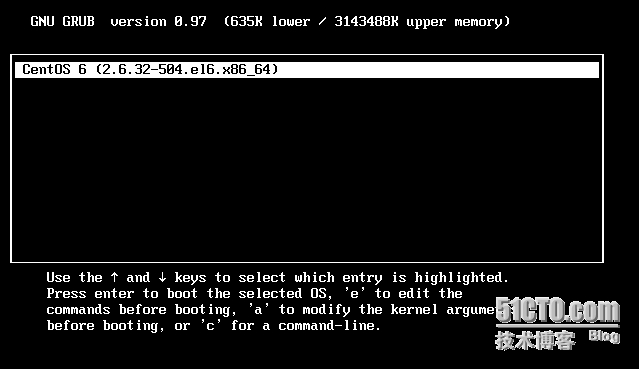
进入编辑模式后会可以看到如下画面:

第一项root(hd0,0) 是根所在的磁盘分区位置
第二项 kernel /vmlinuz-22.6.32-504.e16.x86_64 ro root=/dev/mapper/vg0-root 读取kernel的位置并只读挂载在哪个分区上
第三项:initrd /initramfs-2.6.32-504.e16.x86_64.img 读取initramfs文件位置
b:启动系统 e:编辑模式 d:删除某行 o:增加新行 这里我们选择e进入编辑模式

在quiet(此项为静默输出)后面添加S | s | signal | 1 这个选项都可以,这里我们键入1,并按下回车,进入单用户模式,进行找回密码,又会回到之前的GRUB编辑模式

回到这个界面之后我们选择b启动系统
之后会发现我们进入系统不会在要求输入root账户的管理员密码,直接登录进入系统,这里我们直接使用passwd命令进行修改密码即可。


这次我们重启进入c命令行模式进行常用使用命令引导系统
下图我c命令行模式的界面

下面我们在命令行下进行引导

编辑启动完成之后开机正常如下图

然后我们通过ssh远程连接进行管理,查看grub的配置文件,查看文件的各段的具体定义
Linux可以多版本内核并存,可以
[root@localhost ~]# cat /boot/grub/grub.conf
# grub.conf generated by anaconda
#
# Note that you do not have to rerun grub after making changes to this file
# NOTICE:  You have a /boot partition.  This means that
#          all kernel and initrd paths are relative to /boot/, eg.
#          root (hd0,0)
#          kernel /vmlinuz-version ro root=/dev/mapper/vg0-root
#          initrd /initrd-[generic-]version.img
#boot=/dev/sda
default=0# 定义默认启动的启动的title
timeout=5# 定义进入菜单项超时时间
splashimage=(hd0,0)/grub/splash.xpm.gz# 定义开机菜单背景画面
Hiddenmenu# 隐藏菜单
title CentOS 6 (2.6.32-504.el6.x86_64)# 定义菜单标题,可以出现多次,一个标题带便一个内核
root (hd0,0)grub查找stage2及kernel文件所在设备分区地址
kernel /vmlinuz-2.6.32-504.el6.x86_64 ro root=/dev/mapper/vg0-root rd_NO_LUKS rd_NO_DM LANG=en_US.UTF-8 rd_LVM_LV=vg0/swap rd_NO_MD SYSFONT=latarcyrheb-sun16 crashkernel=auto rd_LVM_LV=vg0/root  KEYBOARDTYPE=pc KEYTABLE=us rhgb crashkernel=auto quiet rhgb quiet# 启动的内核
initrd /initramfs-2.6.32-504.el6.x86_64.img# 内核所匹配的initramfs
title CentOS (3.10.10Corazon-v1)
root (hd0,0)
kernel /vmlinuz-3.10.10Corazon-v1 ro root=/dev/mapper/vg0-root rd_NO_LUKS rd_NO_DM LANG=en_US.UTF-8 rd_LVM_LV=vg0/swap rd_NO_MD SYSFONT=latarcyrheb-sun16 crashkernel=auto rd_LVM_LV=vg0/root  KEYBOARDTYPE=pc KEYTABLE=us rhgb crashkernel=auto quiet rhgb quiet
initrd /initramfs-3.10.10Corazon-v1.img
通过上面进入单用户模式我们可以看出,这样是极不安全的,谁都可以进入你的Linxu系统并安全管理员root的密码,所以我们可以设定加密措施,我们可以在grbu的配置文件内加入md5格式的密码
密码生成命令:
[root@localhost ~]# grub-md5-crypt
Password:
Retype password:
$1$nsrjP$Rqsf9JrkDZfMK.DEv08UI/

[root@localhost ~]# vim /etc/grub.conf
default=0
timeout=5
splashimage=(hd0,0)/grub/splash.xpm.gz
Hiddenmenu
password --md5 $1$nsrjP$Rqsf9JrkDZfMK.DEv08UI/# 设定进入编辑模式需要提供密码
title CentOS (3.10.10Corazon-v1)
root (hd0,0)
kernel /vmlinuz-3.10.10Corazon-v1 ro root=/dev/mapper/vg0-root rd_NO_LUKS rd_NO_DM LANG=en_US.UTF-8 rd_LVM_LV=vg0/swap rd_NO_MD SYSFONT=latarcyrheb-sun16 crashkernel=auto rd_LVM_LV=vg0/root  KEYBOARDTYPE=pc KEYTABLE=us rhgb crashkernel=auto quiet rhgb quiet
initrd /initramfs-3.10.10Corazon-v1.img
password --md5 $1$nsrjP$Rqsf9JrkDZfMK.DEv08UI/# 设定进入操作系统就需要提供密码

title CentOS 6 (2.6.32-504.el6.x86_64)
root (hd0,0)
kernel /vmlinuz-2.6.32-504.el6.x86_64 ro root=/dev/mapper/vg0-root rd_NO_LUKS rd_NO_DM LANG=en_US.UTF-8 rd_LVM_LV=vg0/swap rd_NO_MD SYSFONT=latarcyrheb-sun16 crashkernel=auto rd_LVM_LV=vg0/root  KEYBOARDTYPE=pc KEYTABLE=us rhgb crashkernel=auto quiet rhgb quiet
initrd /initramfs-2.6.32-504.el6.x86_64.img
如果grub无意被我们删除或者损坏我们应该怎么恢复的呢?我们下来来演示一下三种修复grub的方式
1)
[root@Corazon ~]# dd if=/dev/zero of=/dev/sda bs=200 count=1  #使用dd命令模拟损坏
1+0 records in
1+0 records out
200 bytes (200 B) copied, 0.00019932 s, 1.0 MB/s
[root@Corazon ~]# grub#进入grub命令交互模式
Probing devices to guess BIOS drives. This may take a long time.

GNU GRUB  version 0.97  (640K lower / 3072K upper memory)

[ Minimal BASH-like line editing is supported.  For the first word, TAB
lists possible command completions.  Anywhere else TAB lists the possible
completions of a device/filename.]
grub> root (hd0,0)  #选择系统所在的设备和磁盘分区,从0开始编号
root (hd0,0)#如果系统是在你选择的所在分区则会提示如下信息
Filesystem type is ext2fs, partition type 0x83
grub> setup (hd0)# 选择安装的设备编号即可,不用指定磁盘分区
setup (hd0)
Checking if "/boot/grub/stage1" exists... no# 从这里可以看出stage1不存在
Checking if "/grub/stage1" exists... yes# 已经安装stage1完成
Checking if "/grub/stage2" exists... yes
Checking if "/grub/e2fs_stage1_5" exists... yes
Running "embed /grub/e2fs_stage1_5 (hd0)"...  27 sectors are embedded.
succeeded
Running "install /grub/stage1 (hd0) (hd0)1+27 p (hd0,0)/grub/stage2 /grub/grub.conf"... succeeded
Done.# 安装过程结束
grub>

2) [root@Corazon ~]# dd if=/dev/zero of=/dev/sda bs=200 count=1# 再次模拟损坏
1+0 records in
1+0 records out
200 bytes (200 B) copied, 0.000179011 s, 1.1 MB/s
[root@Corazon ~]# grub-install --root-directory=/ /dev/sda #直接使用grub-install安装即可
Installation finished. No error reported.
This is the contents of the device map //boot/grub/device.map.
Check if this is correct or not. If any of the lines is incorrect,
fix it and re-run the script `grub-install'.

# this device map was generated by anaconda
(hd0)     /dev/sda# 提示已经安装至hd0 下的/dev/sda上
3)上两种都是在线修复,下面是如果开启时候无法启动我们需要挂载光盘就如救援模式 开机画面如下: 这里我们选择Rescue installed system 进入救援模式或者按下ESC进入命令行模式输入: rescue 也可以进入救援模式.

进入救援模式后会要求我们选择语言,这里我们选择English

选择键盘字符集,这里我们选择us

还会询问我们是否需要开启网络,这里我们是在本地进行修复,所以选择了No

这里会帮我们查询我们是否有根系统,如果有根系统的话,将系统临时挂载在/mnt/sysimage目录下 ,这里我们选择了Continue

这里提示已经帮我们找到系统了,并帮我们挂载在/mnt/sysimage目录下,我们可以chroot命令进行切换根

/mnt/sysimage目录下
这里我们选择进入shell命令行模式

启动命令行成功,通过chroot我们切换到/mnt/sysimage目录下,安装grub程序,安装成功之后,exit退回到最初的根目录,在执行reboot重启就可以正常开机了

完。

相关文章推荐
- 在大迸发写时,HBase的HDFS DFSClient端报SocketTimeoutException的问题分析和解决
- HDFS API hello world
- HDFS 读写流程
- hdfs读写数据操作分析总结
- How to mount HDFS using FUSE
- JSP访问Hadoop 图片存储服务
- HDFS冗余数据块的自动删除
- 问题记录:spark读取hdfs文件出错
- 使用HDFS和HBASE导出导入功能进行数据迁移
- Hadoop集群环境搭建
- Hadoop自动化运维之创建deb包
- hadoop+hive+mysql 环境搭建
- HDFS简介
- 解读HDFS
- 用 Hadoop 的 MapReduce 编程实现 K-Means 算法
- 数据控使用Hadoop的三种常用方式
- 数据控使用Hadoop的三种常用方式
- 编译hadoop-2.2.0源码,RHEL6.3x64
- HDFS简单介绍汇总
- 使用 Hadoop 分析数据的三种最常用方式