我的第一个ASP.NET MVC程序
2013-12-13 23:25
513 查看
写在前面:本实例重点演示MVC程序的创建,并没有关注其中的代码细节,出现错误在所难免,请见谅。
实验目标:创建 MVC 程序操作数据库数据。
开发环境:VS2010(ASP.NET MVC 2)。
数据库:SQL Server 2008。新建实例数据库TestDB,仅包含表tb_Student。

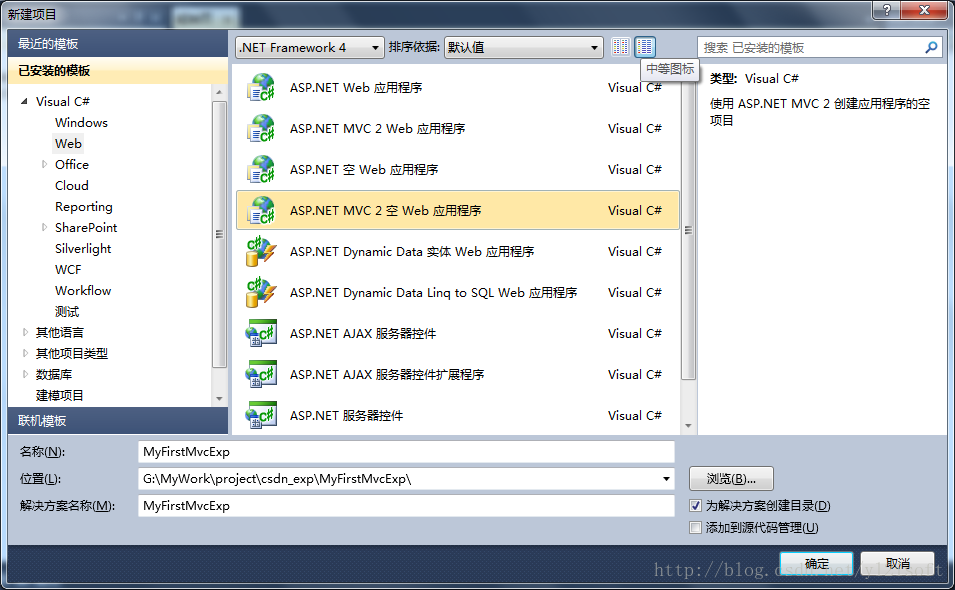
1 新建名称为MyFirstMvcExp的ASP.NET MVC 2空Web应用程序。
2 添加数据库表的实体数据模型。
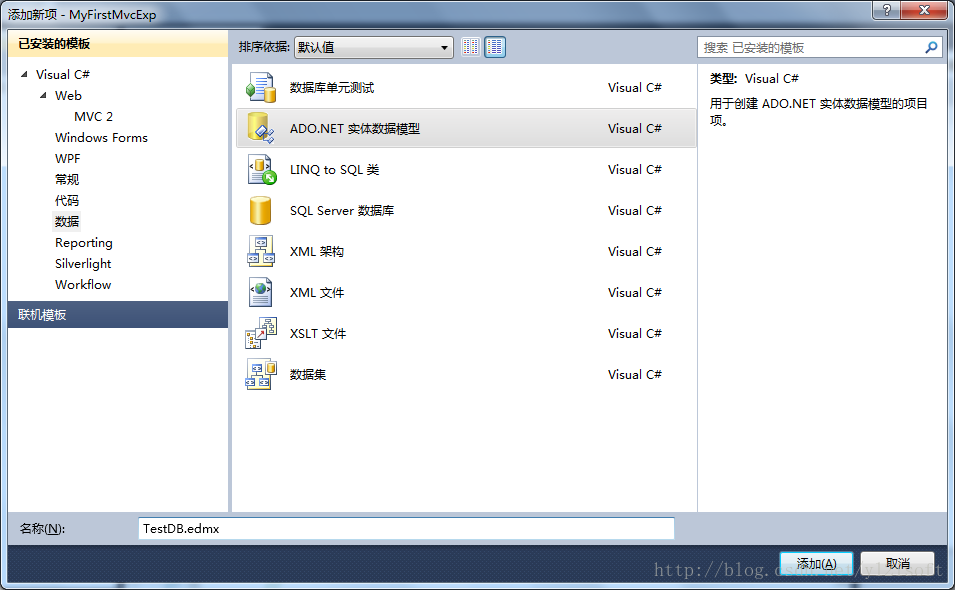
2.1 在“Models”文件夹上单击鼠标右键,在弹出菜单中选择“添加”--“新建项”命令打开“添加新项”对话框。选择“ADO.NET 实体数据模型”,输入名称“TestDB.edmx”。单击“添加”按钮。
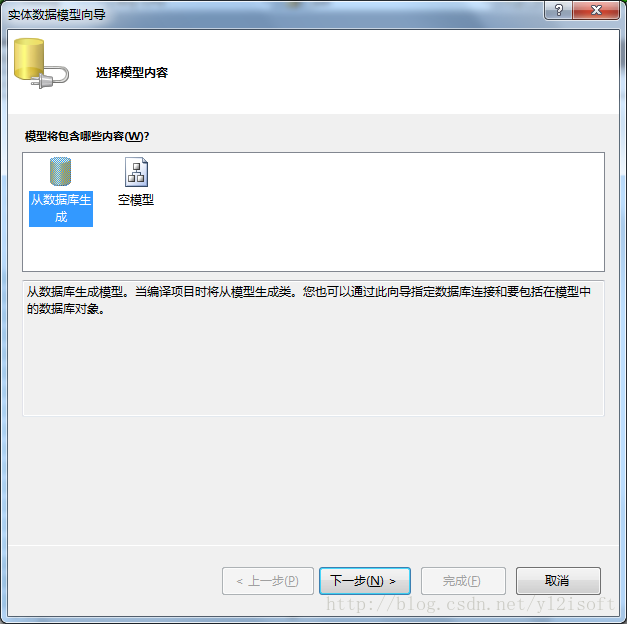
2.2 接上一步,进入“选择模型内容”画面,选择“从数据库生成”选项。单击“下一步”按钮。
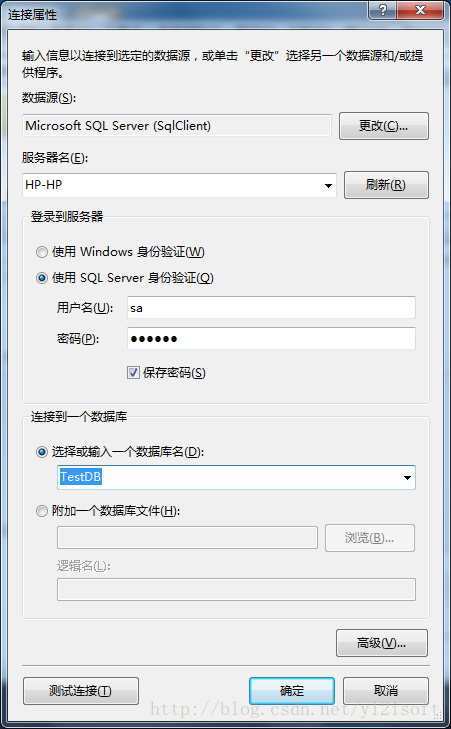
2.3 接上一步,进入“选择您的数据连接”画面,设置数据库连接信息。具体设置可参考下图。设置好数据库连接后,单击“下一步”按钮。
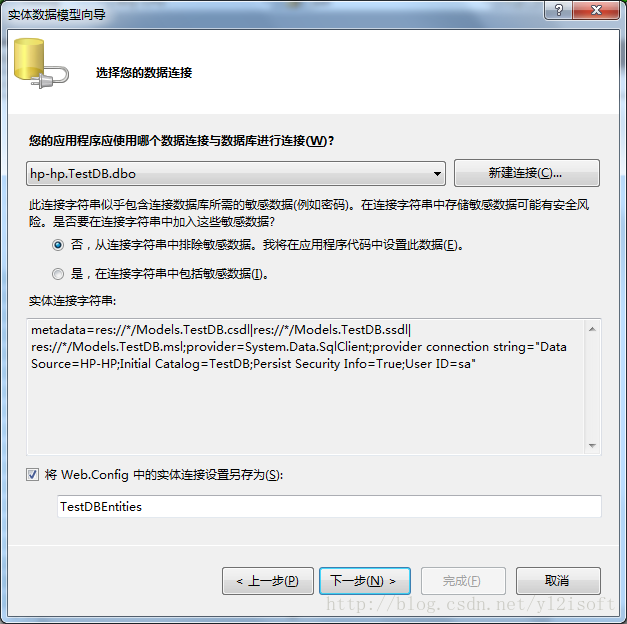
第一次设置数据库连接,可以点击“新建连接”按钮进入“连接属性”设置画面设置数据库的连接信息。设置细节可参考下图设置。
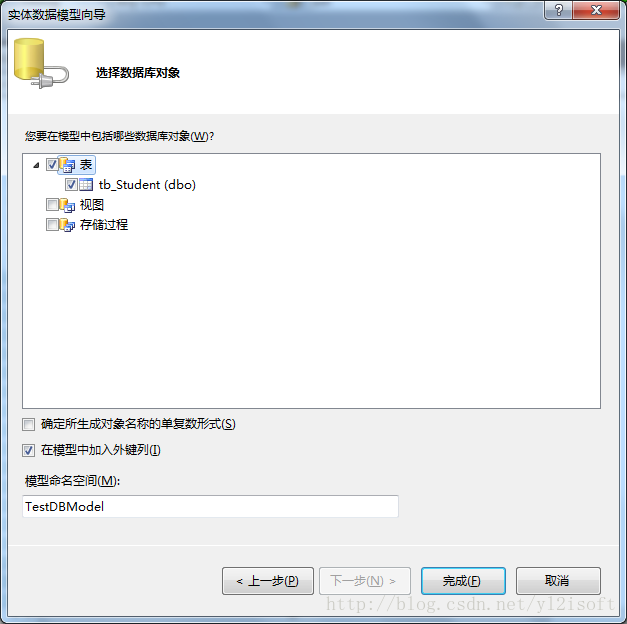
2.4 接上一步,进入“选择数据库对象”画面,选择表tb_Student。点击“完成”按钮完成数据库表实体数据模型的创建工作。
3 添加控制器。
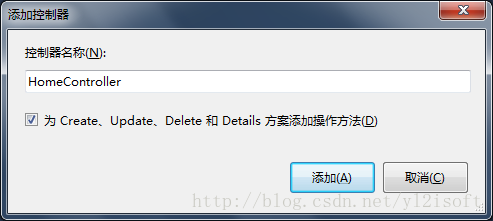
在Controllers文件夹下添加控制器HomeController。勾选“为Create,Update,Delete和Details方案添加操作方法”。
点击“添加”按钮生成HomeController.cs文件。生成的HomeController.cs文件会自动包含下面的代码。
4 改写Index()方法并添加视图。
修改Index()方法代码如下:
其中TestDB的定义如下:
使用TestDBEntities 前需要添加引用:
在Index()方法上单击右键,在弹出菜单上选择“添加视图”命令打开“添加视图”对话框。
视图名称设置为“Index”,勾选“创建强类型视图”,视图数据类设置为“MyFirstMvcExp.Models.tb_Student”,视图内容设置为“List”,且不勾选“选择模板页”选项。

单击“添加”按钮,生成Index.aspx文件,代码如下所示。
运行程序,结果如下图所示。
此时,点击“Edit”,“Details”,“Delete”和“Create New”按钮,程序会出错,因为这些功能并没有实现。
5 改写Edit()方法并添加视图。
修改Edit()方法代码如下:
点击“添加”按钮,生成Edit.aspx文件,代码如下所示。
6 改写Details()方法并添加视图。
修改Details()方法代码如下:

点击“添加”按钮,生成Details.aspx文件,代码如下所示。
7 改写Create()方法并添加视图。
修改Create()方法代码如下:

点击“添加”按钮,生成文件Create.aspx,代码如下所示。
8 改写Delete()方法并添加视图。
修改Delete()方法代码如下:
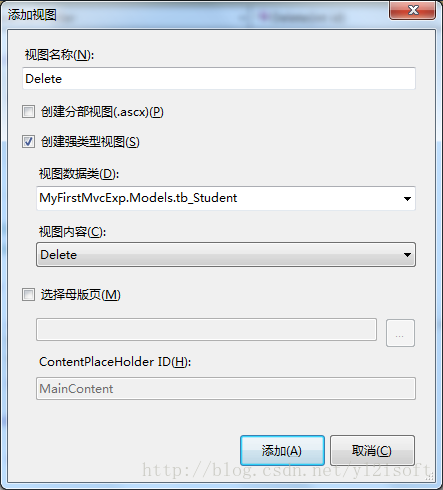
在“添加视图”画面设置视图名称为“Delete”,设置视图内容为“Delete”,其他设置与Index视图设置相同。
点击“添加”按钮,生成Delete.aspx文件,代码如下所示。
到这里,我的第一个ASP.NET MVC程序完成了。
实验目标:创建 MVC 程序操作数据库数据。
开发环境:VS2010(ASP.NET MVC 2)。
数据库:SQL Server 2008。新建实例数据库TestDB,仅包含表tb_Student。
1 新建名称为MyFirstMvcExp的ASP.NET MVC 2空Web应用程序。
2 添加数据库表的实体数据模型。
2.1 在“Models”文件夹上单击鼠标右键,在弹出菜单中选择“添加”--“新建项”命令打开“添加新项”对话框。选择“ADO.NET 实体数据模型”,输入名称“TestDB.edmx”。单击“添加”按钮。
2.2 接上一步,进入“选择模型内容”画面,选择“从数据库生成”选项。单击“下一步”按钮。
2.3 接上一步,进入“选择您的数据连接”画面,设置数据库连接信息。具体设置可参考下图。设置好数据库连接后,单击“下一步”按钮。
第一次设置数据库连接,可以点击“新建连接”按钮进入“连接属性”设置画面设置数据库的连接信息。设置细节可参考下图设置。
2.4 接上一步,进入“选择数据库对象”画面,选择表tb_Student。点击“完成”按钮完成数据库表实体数据模型的创建工作。
3 添加控制器。
在Controllers文件夹下添加控制器HomeController。勾选“为Create,Update,Delete和Details方案添加操作方法”。
点击“添加”按钮生成HomeController.cs文件。生成的HomeController.cs文件会自动包含下面的代码。
using System;
using System.Collections.Generic;
using System.Linq;
using System.Web;
using System.Web.Mvc;

namespace MyFirstMvcExp.Controllers
{
public class HomeController : Controller
{
//
// GET: /Home/

public ActionResult Index()
{
return View();
}

//
// GET: /Home/Details/5

public ActionResult Details(int id)
{
return View();
}

//
// GET: /Home/Create

public ActionResult Create()
{
return View();
}

//
// POST: /Home/Create

[HttpPost]
public ActionResult Create(FormCollection collection)
{
try
{
// TODO: Add insert logic here

return RedirectToAction("Index");
}
catch
{
return View();
}
}

//
// GET: /Home/Edit/5

public ActionResult Edit(int id)
{
return View();
}

//
// POST: /Home/Edit/5

[HttpPost]
public ActionResult Edit(int id, FormCollection collection)
{
try
{
// TODO: Add update logic here

return RedirectToAction("Index");
}
catch
{
return View();
}
}

//
// GET: /Home/Delete/5

public ActionResult Delete(int id)
{
return View();
}

//
// POST: /Home/Delete/5

[HttpPost]
public ActionResult Delete(int id, FormCollection collection)
{
try
{
// TODO: Add delete logic here

return RedirectToAction("Index");
}
catch
{
return View();
}
}
}
}
4 改写Index()方法并添加视图。
修改Index()方法代码如下:
public ActionResult Index()
{
var model = TestDB.tb_Student.ToList();
return View(model);
}
其中TestDB的定义如下:
TestDBEntities TestDB = new TestDBEntities();
使用TestDBEntities 前需要添加引用:
using MyFirstMvcExp.Models;
在Index()方法上单击右键,在弹出菜单上选择“添加视图”命令打开“添加视图”对话框。
视图名称设置为“Index”,勾选“创建强类型视图”,视图数据类设置为“MyFirstMvcExp.Models.tb_Student”,视图内容设置为“List”,且不勾选“选择模板页”选项。
单击“添加”按钮,生成Index.aspx文件,代码如下所示。
<%@ Page Language="C#" Inherits="System.Web.Mvc.ViewPage<IEnumerable<MyFirstMvcExp.Models.tb_Student>>" %>
<!DOCTYPE html PUBLIC "-//W3C//DTD XHTML 1.0 Transitional//EN" "http://www.w3.org/TR/xhtml1/DTD/xhtml1-transitional.dtd">
<html xmlns="http://www.w3.org/1999/xhtml" >
<head runat="server">
<title>Index</title>
</head>
<body>
<table>
<tr>
<th></th>
<th>
student_id
</th>
<th>
student_name
</th>
<th>
student_sex
</th>
<th>
student_age
</th>
<th>
class_id
</th>
<th>
teacher_name
</th>
</tr>
<% foreach (var item in Model) { %>
<tr>
<td>
<%: Html.ActionLink("Edit", "Edit", new { id=item.student_id }) %> |
<%: Html.ActionLink("Details", "Details", new { id=item.student_id })%> |
<%: Html.ActionLink("Delete", "Delete", new { id=item.student_id })%>
</td>
<td>
<%: item.student_id %>
</td>
<td>
<%: item.student_name %>
</td>
<td>
<%: item.student_sex %>
</td>
<td>
<%: item.student_age %>
</td>
<td>
<%: item.class_id %>
</td>
<td>
<%: item.teacher_name %>
</td>
</tr>
<% } %>
</table>
<p>
<%: Html.ActionLink("Create New", "Create") %>
</p>
</body>
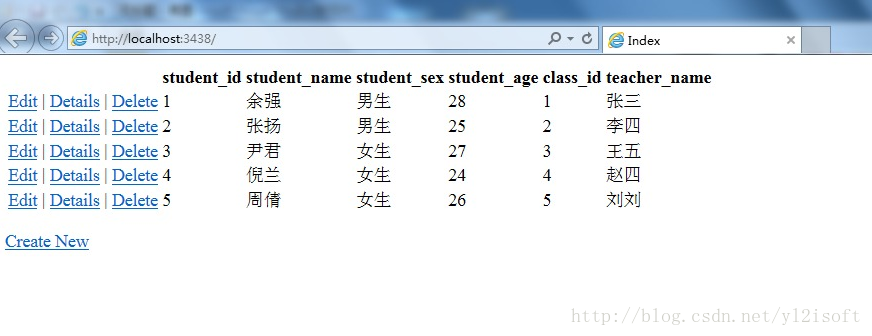
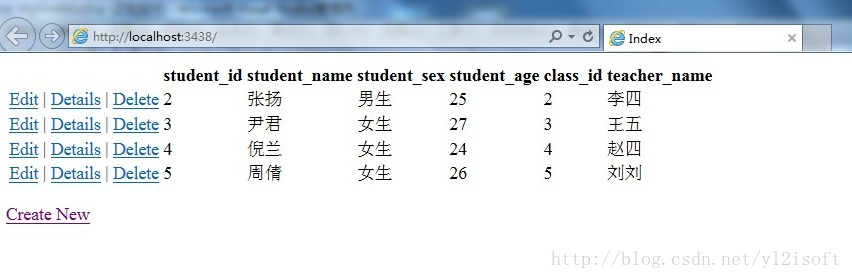
</html>运行程序,结果如下图所示。
此时,点击“Edit”,“Details”,“Delete”和“Create New”按钮,程序会出错,因为这些功能并没有实现。
5 改写Edit()方法并添加视图。
修改Edit()方法代码如下:
//
// GET: /Home/Edit/5

[AcceptVerbs(HttpVerbs.Get)]
public ActionResult Edit(int id)
{
var model = TestDB.tb_Student.First(c => c.student_id == id);
return View(model);
}

//
// POST: /Home/Edit/5

[AcceptVerbs(HttpVerbs.Post)]
public ActionResult Edit(int id, FormCollection from)
{
try
{
// TODO: Add update logic here
var model = TestDB.tb_Student.First(c => c.student_id == id);
UpdateModel(model, new[] { "student_name", "student_sex", "student_age", "class_id", "teacher_name" });
TestDB.SaveChanges();
return RedirectToAction("Index");
}
catch
{
return View();
}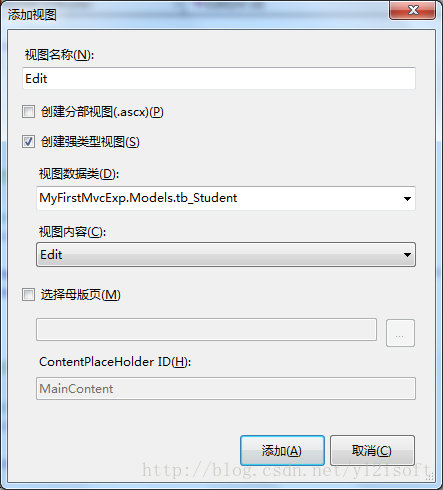
}在“添加视图”画面设置视图名称为“Edit”,设置视图内容为“Edit”,其他设置与Index视图设置相同。点击“添加”按钮,生成Edit.aspx文件,代码如下所示。
<%@ Page Language="C#" Inherits="System.Web.Mvc.ViewPage<MyFirstMvcExp.Models.tb_Student>" %>

<!DOCTYPE html PUBLIC "-//W3C//DTD XHTML 1.0 Transitional//EN" "http://www.w3.org/TR/xhtml1/DTD/xhtml1-transitional.dtd">

<html xmlns="http://www.w3.org/1999/xhtml" >
<head runat="server">
<title>Edit</title>
</head>
<body>
<% using (Html.BeginForm()) {%>
<%: Html.ValidationSummary(true) %>

<fieldset>
<legend>Fields</legend>

<div class="editor-label">
<%: Html.LabelFor(model => model.student_id) %>
</div>
<div class="editor-field">
<%: Html.TextBoxFor(model => model.student_id) %>
<%: Html.ValidationMessageFor(model => model.student_id) %>
</div>

<div class="editor-label">
<%: Html.LabelFor(model => model.student_name) %>
</div>
<div class="editor-field">
<%: Html.TextBoxFor(model => model.student_name) %>
<%: Html.ValidationMessageFor(model => model.student_name) %>
</div>

<div class="editor-label">
<%: Html.LabelFor(model => model.student_sex) %>
</div>
<div class="editor-field">
<%: Html.TextBoxFor(model => model.student_sex) %>
<%: Html.ValidationMessageFor(model => model.student_sex) %>
</div>

<div class="editor-label">
<%: Html.LabelFor(model => model.student_age) %>
</div>
<div class="editor-field">
<%: Html.TextBoxFor(model => model.student_age) %>
<%: Html.ValidationMessageFor(model => model.student_age) %>
</div>

<div class="editor-label">
<%: Html.LabelFor(model => model.class_id) %>
</div>
<div class="editor-field">
<%: Html.TextBoxFor(model => model.class_id) %>
<%: Html.ValidationMessageFor(model => model.class_id) %>
</div>

<div class="editor-label">
<%: Html.LabelFor(model => model.teacher_name) %>
</div>
<div class="editor-field">
<%: Html.TextBoxFor(model => model.teacher_name) %>
<%: Html.ValidationMessageFor(model => model.teacher_name) %>
</div>

<p>
<input type="submit" value="Save" />
</p>
</fieldset>

<% } %>

<div>
<%: Html.ActionLink("Back to List", "Index") %>
</div>

</body>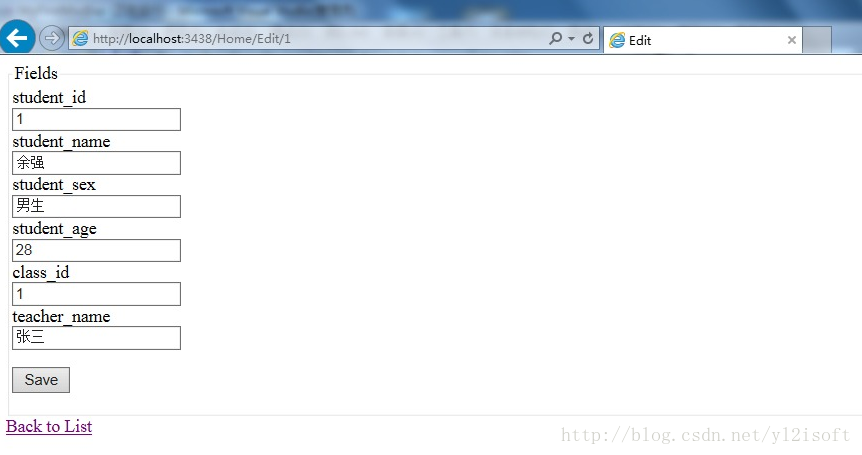
</html>再次运行程序,点击“Edit”按钮打开如下画面。6 改写Details()方法并添加视图。
修改Details()方法代码如下:
[AcceptVerbs(HttpVerbs.Get)]
public ActionResult Details(int id)
{
var model = TestDB.tb_Student.First(c => c.student_id == id);
return View(model);
}在“添加视图”画面设置视图名称为“Details”,设置视图内容为“Details”,其他设置与Index视图设置相同。点击“添加”按钮,生成Details.aspx文件,代码如下所示。
<%@ Page Language="C#" Inherits="System.Web.Mvc.ViewPage<MyFirstMvcExp.Models.tb_Student>" %>

<!DOCTYPE html PUBLIC "-//W3C//DTD XHTML 1.0 Transitional//EN" "http://www.w3.org/TR/xhtml1/DTD/xhtml1-transitional.dtd">

<html xmlns="http://www.w3.org/1999/xhtml" >
<head runat="server">
<title>Details</title>
</head>
<body>
<fieldset>
<legend>Fields</legend>

<div class="display-label">student_id</div>
<div class="display-field"><%: Model.student_id %></div>

<div class="display-label">student_name</div>
<div class="display-field"><%: Model.student_name %></div>

<div class="display-label">student_sex</div>
<div class="display-field"><%: Model.student_sex %></div>

<div class="display-label">student_age</div>
<div class="display-field"><%: Model.student_age %></div>

<div class="display-label">class_id</div>
<div class="display-field"><%: Model.class_id %></div>

<div class="display-label">teacher_name</div>
<div class="display-field"><%: Model.teacher_name %></div>

</fieldset>
<p>

<%: Html.ActionLink("Edit", "Edit", new { id=Model.student_id }) %> |
<%: Html.ActionLink("Back to List", "Index") %>
</p>

</body>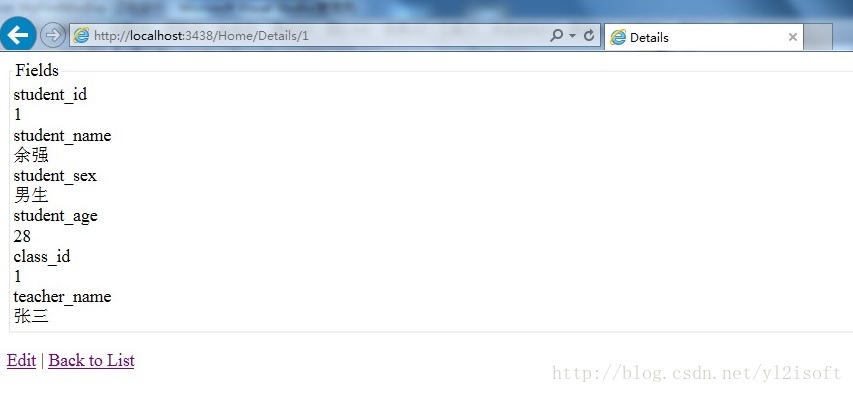
</html>再次运行程序,点击“Details”按钮打开如下画面。7 改写Create()方法并添加视图。
修改Create()方法代码如下:
//
// GET: /Home/Create

[AcceptVerbs(HttpVerbs.Get)]
public ActionResult Create()
{
tb_Student student = new tb_Student();
return View(student);
}

//
// POST: /Home/Create

[AcceptVerbs(HttpVerbs.Post)]
public ActionResult Create(int id, FormCollection form)
{
try
{
// TODO: Add insert logic here
var model = TestDB.tb_Student.First(c => c.student_id == id);
if (model == null)
{
tb_Student student = new tb_Student();
UpdateModel(student, new[] { "student_name", "student_sex", "student_age", "class_id", "teacher_name" });
TestDB.AddTotb_Student(student);
TestDB.SaveChanges();
return RedirectToAction("Index");
}
else
{
return RedirectToAction("Create");
}
}
catch
{
return View();
}
}在“添加视图”画面设置视图名称为“Create”,设置视图内容为“Create”,其他设置与Index视图设置相同。点击“添加”按钮,生成文件Create.aspx,代码如下所示。
<%@ Page Language="C#" Inherits="System.Web.Mvc.ViewPage<MyFirstMvcExp.Models.tb_Student>" %>
<!DOCTYPE html PUBLIC "-//W3C//DTD XHTML 1.0 Transitional//EN" "http://www.w3.org/TR/xhtml1/DTD/xhtml1-transitional.dtd">
<html xmlns="http://www.w3.org/1999/xhtml" >
<head runat="server">
<title>Create</title>
</head>
<body>
<% using (Html.BeginForm()) {%>
<%: Html.ValidationSummary(true) %>
<fieldset>
<legend>Fields</legend>
<div class="editor-label">
<%: Html.LabelFor(model => model.student_id) %>
</div>
<div class="editor-field">
<%: Html.TextBoxFor(model => model.student_id) %>
<%: Html.ValidationMessageFor(model => model.student_id) %>
</div>
<div class="editor-label">
<%: Html.LabelFor(model => model.student_name) %>
</div>
<div class="editor-field">
<%: Html.TextBoxFor(model => model.student_name) %>
<%: Html.ValidationMessageFor(model => model.student_name) %>
</div>
<div class="editor-label">
<%: Html.LabelFor(model => model.student_sex) %>
</div>
<div class="editor-field">
<%: Html.TextBoxFor(model => model.student_sex) %>
<%: Html.ValidationMessageFor(model => model.student_sex) %>
</div>
<div class="editor-label">
<%: Html.LabelFor(model => model.student_age) %>
</div>
<div class="editor-field">
<%: Html.TextBoxFor(model => model.student_age) %>
<%: Html.ValidationMessageFor(model => model.student_age) %>
</div>
<div class="editor-label">
<%: Html.LabelFor(model => model.class_id) %>
</div>
<div class="editor-field">
<%: Html.TextBoxFor(model => model.class_id) %>
<%: Html.ValidationMessageFor(model => model.class_id) %>
</div>
<div class="editor-label">
<%: Html.LabelFor(model => model.teacher_name) %>
</div>
<div class="editor-field">
<%: Html.TextBoxFor(model => model.teacher_name) %>
<%: Html.ValidationMessageFor(model => model.teacher_name) %>
</div>
<p>
<input type="submit" value="Create" />
</p>
</fieldset>
<% } %>
<div>
<%: Html.ActionLink("Back to List", "Index") %>
</div>
</body>
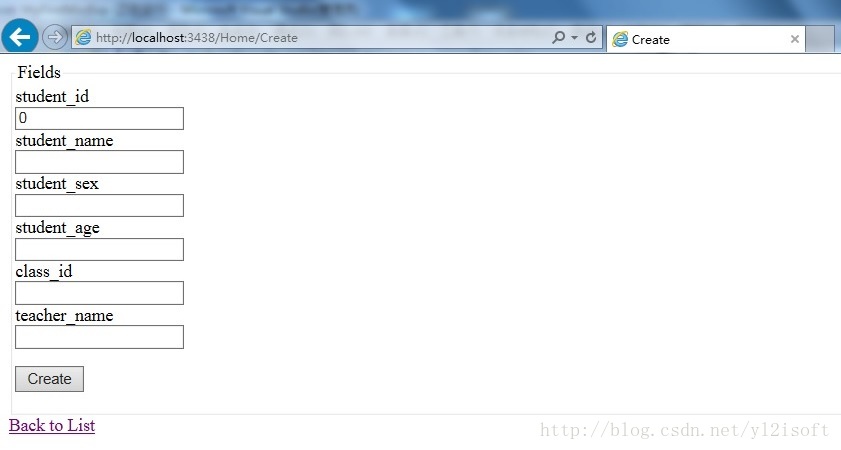
</html>再次运行程序,点击“Create New”按钮打开如下画面。8 改写Delete()方法并添加视图。
修改Delete()方法代码如下:
[AcceptVerbs(HttpVerbs.Get)]
public ActionResult Delete(int id)
{
try
{
var model = TestDB.tb_Student.First(c => c.student_id == id);
TestDB.tb_Student.DeleteObject(model);
TestDB.SaveChanges();
return RedirectToAction("Index");
}
catch
{
return View();
}
}
在“添加视图”画面设置视图名称为“Delete”,设置视图内容为“Delete”,其他设置与Index视图设置相同。
点击“添加”按钮,生成Delete.aspx文件,代码如下所示。
<%@ Page Language="C#" Inherits="System.Web.Mvc.ViewPage<MyFirstMvcExp.Models.tb_Student>" %>

<!DOCTYPE html PUBLIC "-//W3C//DTD XHTML 1.0 Transitional//EN" "http://www.w3.org/TR/xhtml1/DTD/xhtml1-transitional.dtd">

<html xmlns="http://www.w3.org/1999/xhtml" >
<head runat="server">
<title>Delete</title>
</head>
<body>
<h3>Are you sure you want to delete this?</h3>
<fieldset>
<legend>Fields</legend>

<div class="display-label">student_id</div>
<div class="display-field"><%: Model.student_id %></div>

<div class="display-label">student_name</div>
<div class="display-field"><%: Model.student_name %></div>

<div class="display-label">student_sex</div>
<div class="display-field"><%: Model.student_sex %></div>

<div class="display-label">student_age</div>
<div class="display-field"><%: Model.student_age %></div>

<div class="display-label">class_id</div>
<div class="display-field"><%: Model.class_id %></div>

<div class="display-label">teacher_name</div>
<div class="display-field"><%: Model.teacher_name %></div>

</fieldset>
<% using (Html.BeginForm()) { %>
<p>
<input type="submit" value="Delete" /> |
<%: Html.ActionLink("Back to List", "Index") %>
</p>
<% } %>

</body>
</html>再次运行程序,点击第一条记录中的“Delete”按钮,删除第一条记录。到这里,我的第一个ASP.NET MVC程序完成了。

相关文章推荐
- ASP.NET MVC Web API 学习笔记---第一个Web API程序
- ASP.NET MVC Web API 学习笔记---第一个Web API程序【转】
- ASP.NET MVC Web API 学习笔记---第一个Web API程序
- ASP.NET MVC 小牛之旅2:体验第一个MVC程序
- ASP.NET MVC Web API 学习笔记---第一个Web API程序
- 第一个asp.net mvc 程序
- asp.net -mvc框架复习(2)-创建ASP.NET MVC 第一个程序以及MVC项目文件夹说明
- 二 ASP.NET MVC 第一个程序 hello world
- ASP.NET MVC Web API 学习笔记---第一个Web API程序
- 跟我学ASP.NET MVC之二:第一个ASP.NET MVC程序
- 《ASP.NET MVC 4 实战》学习笔记 1:第一个MVC用程序(上)
- 《ASP.NET MVC 4 实战》学习笔记 1:第一个MVC用程序(上)
- ASP.NET MVC Web API 学习笔记---第一个Web API程序
- ASP.NET MVC入门到精通——第一个ASP.NET MVC程序
- 【转载】ASP.NET MVC Web API 学习笔记---第一个Web API程序
- 《ASP.NET MVC 4 实战》学习笔记 1:第一个MVC用程序(上)
- 《ASP.NET MVC 4 实战》学习笔记 1:第一个MVC用程序(上)
- 7、ASP.NET MVC入门到精通——第一个ASP.NET MVC程序
- 《ASP.NET MVC 4 实战》学习笔记 1:第一个MVC用程序(上)
- ASP.NET MVC Web API 学习笔记---第一个Web API程序---近来很多大型的平台都公开了Web API