Build your OWN Apple iBeacon with a Raspberry Pi
2013-12-11 10:33
417 查看
Feature US department store Macy’s recently said it is implementing iPhone-based
tracking tech the better to encourage browsing punters to buy. Of course, Macy has chosen to pitch this as an Apple technology - figuring, presumably, iPhone owners are more receptive to inducements delivered through technology and have more cash to splash
than Android fans.
But the fact is, the system Apple calls iBeacon simply makes use of features already part of the Bluetooth Low Energy (LE) spec.
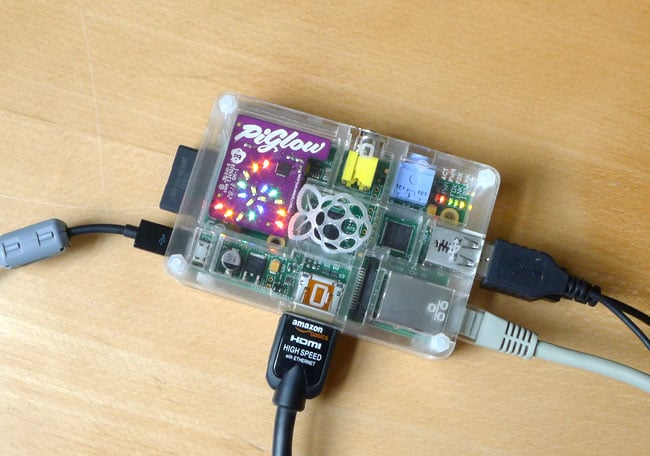
This got me thinking: how difficult would it be to build a similar system of my own? Not very hard at all, it turns out. Choose the right kit and it can be quite cheap too. I created my beacon using a £30 Raspberry Pi and a £12 Bluetooth
4.0 USB dongle.
Surely this can’t be an Apple iBeacon? Yes it can
Bluetooth LE incorporates a protocol for beacon devices to identify themselves. Each sends out a short packet of data "advertising" which can contain up to 31 bytes of user-defined data. Apple’s iBeacon specification, such as it is, stores four values in this
space: a “Proximity” 128-bit UUID and two 16-bit numbers, “Major” and “Minor”.
Apple has a good example of how these variables are used: a department store chain - Macy’s, say - adopts a single UUID for all its beacons. It uses the value of the Major variable to distinguish one shop from another, and the value of the Minor variable to
differentiate between beacons in one shop’s departments.
Not all Bluetooth dongles are Linux-friendly. A handy resource listing well-behaving ones can be found at the Embedded Linux
Wiki. A branded one will set you back around a tenner, generic ones less. I used IoGear’s GBU521.
Next, prepare your Pi. You need to install the official Linux Bluetooth software stack, BlueZ, and various USB development packages, some using the
First run this:
Next install BlueZ’s source files and compile it. The version at the time of writing was 5.11.
This will take a while, but when it’s done, you can reboot and plug in the dongle.
There’s no version of the
of two-digit hexadecimal values - each pair is dubbed an "octet" in the jargon - along with Major and Minor pair of octets, need to be punched into the Pi’s Bluetooth sub-system using BlueZ’s
Note that the square brackets are NOT part of the command - I’ve added them solely to show where the UUID, Major then Minor codes go. The ‘C5’ after them is a value representing transmitted power level. Just cut and paste the line above and replace the UUID
with your own.
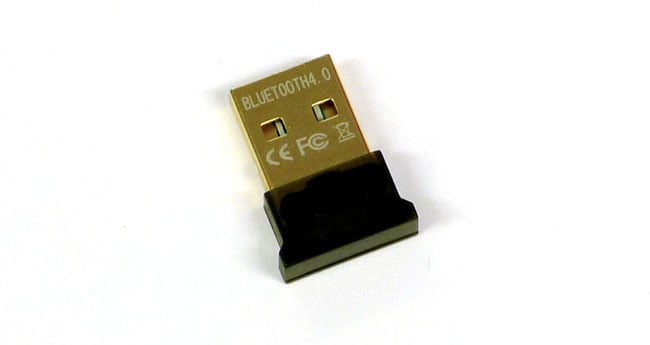
Not all Bluetooth dongles are Pi pals
This is how you decode the command: the "hci0" identifies your Bluetooth dongle, "cmd" tells
is the specific command ("OCF"), HCI_LE_Set_Advertising_Data.
The first "1E" is the number of “significant” octets in the advertising data that follow, up to a maximum of 31. The non-significant part should only comprise pairs of zeroes to take the number of octets up to 31 and which, to save power, are not transmitted.
The ad data is split into groups, each formatted with a single octet providing the number of remaining octets in the group - essentially it tells the Bluetooth sub-system how further along the list of octets is the next group. It’s followed by a single octet
which defines the type of data, and then any number of octets holding the data itself. You can put as many of these groups into the advertising data packet as you can fit into the 31 octets allowed.
In my example, the first "02" in the sequence says the first block of ad data is two octets long. The next octet, "01" says the advertising octet(s) following are Bluetooth flags, and the "1A" is the binary value derived when certain of those flags are set.
‘1A’ says the next group is 26 octets long, and the "FF" identifies the group as manufacturer-specific data. The Bluetooth 4.0 specification says the next two octets have to expose the manufacturer: the "4C 00" is Apple’s Bluetooth manufacturer ID.
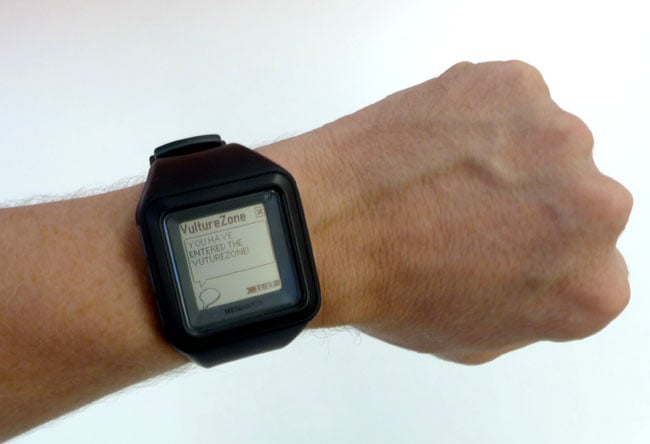
In the Zone: location notification on a Metawatch smartwatch
I’m not yet sure what the "02" and "15" signify, but as I say, the Proximity UUID, Major and Minor values, and the power level complete the 26 octets of manufacturer data - and the 30 octets of the entire advertising data.
The
You can disable LE beacon activity with the command:
Update If you don’t see your beacon after issuing the
And it’s an obvious next step to create scripts to set all this up and activate LE advertising whenever the Pi boots up, but I won’t be covering that here. If you’d like to do that, there’s a very good tutorial written by Washington DC-based Radius
Networks here.
If you’d just like to cut to the chase and start coding iBeacon support into apps, Radius is selling pre-configured Pis as iBeacon
development kits with one or two on-board dongles. Prices start at $100 (£61).
With the Pi running as a beacon, the next stage is to create an app that will look for it and notify you when you’re there. I chose to work up an iOS app - I’m exploring Apple’s iBeacon, after all - but it should be possible to code it up in Android
4.3, which added Bluetooth LE support to the Google OS.
Apple added it to iOS 7, released back in September. iOS’s existing CoreLocation framwork defines a
a beacon’s zone of coverage, an extension of
true if the device is beacon savvy.
Pass that test and a well-behaved app will then double-check that iOS’ Location Services have been enabled and that the app has permission to access them. It can then start looking for beacons with the Proximity UUID, Major and Minor values punched into the
Pi earlier:
CoreLocation provides two handy delegate methods for dealing with events triggered by the beacon monitor:
These two methods provide an easy way to alert the user he or she has entered the zone and to trigger actions accordingly. My test app, for instance, grabs a block of HTML code from El Reg’s server and presents it in a
Offer! The Editor will buy you a pint if you present this code...”, that kind of thing.
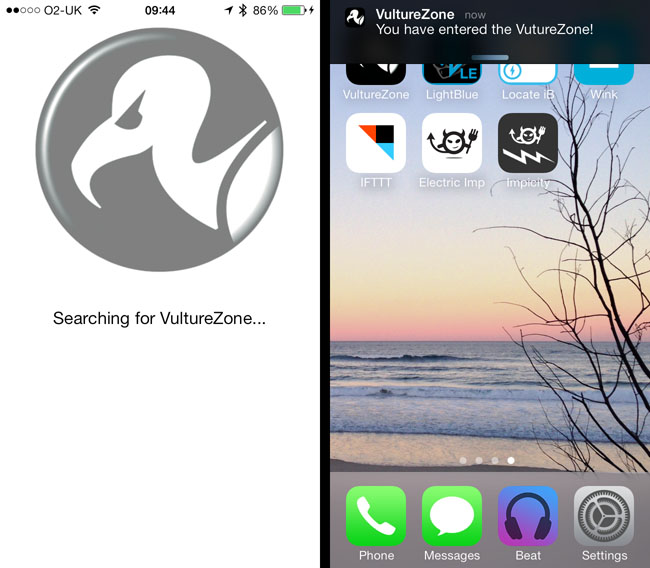
Running the app: We’re too far away (left) but then...
iOS scans for regions even when the app that initiated the monitoring isn’t running. The app is automatically run in the background if the beacon is detected in those circumstances. Likewise, it’s woken from sleep if it is merely napping. You can control whether
messages triggered when beacon region boundaries are crossed are delayed while the iDevice’s screen is off: the
It also has a Boolean property called
Once the phone knows it’s inside a beacon’s sphere of influence, the app can call the
and from each entry, a beacon’s UUID, Major and Minor values to help identify which they are and, thanks to each beacon’s
To keep things tidy, I added an switch to disable beacon scanning. By way of inter-object notifications, it calls
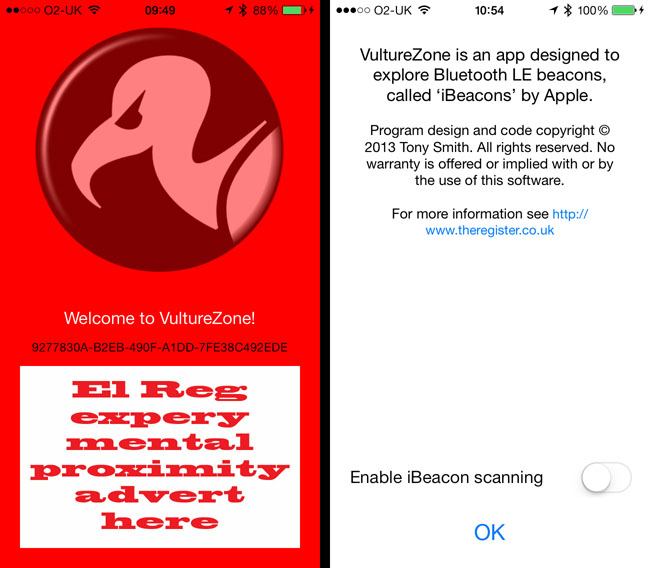
...and here’s a message from our (nearby) sponsor
Once all this is up and running, and the Pi-hosted iBeacon is operating in the background, it’s easy to test the system by walking out of range of the beacon and then turning round and coming back.
Android users keen to try this out without coding their own beacon detector can check out Radius Networks’ iBeacon
Locate app in Google Play. There’s an iOS version in iTunes too. Radius also has an open-source library
of iBeacon compatibility code for Android if you want to incorporate iBeacon support into an app of your own. ®
tracking tech the better to encourage browsing punters to buy. Of course, Macy has chosen to pitch this as an Apple technology - figuring, presumably, iPhone owners are more receptive to inducements delivered through technology and have more cash to splash
than Android fans.
But the fact is, the system Apple calls iBeacon simply makes use of features already part of the Bluetooth Low Energy (LE) spec.
This got me thinking: how difficult would it be to build a similar system of my own? Not very hard at all, it turns out. Choose the right kit and it can be quite cheap too. I created my beacon using a £30 Raspberry Pi and a £12 Bluetooth
4.0 USB dongle.
Surely this can’t be an Apple iBeacon? Yes it can
Bluetooth LE incorporates a protocol for beacon devices to identify themselves. Each sends out a short packet of data "advertising" which can contain up to 31 bytes of user-defined data. Apple’s iBeacon specification, such as it is, stores four values in this
space: a “Proximity” 128-bit UUID and two 16-bit numbers, “Major” and “Minor”.
Apple has a good example of how these variables are used: a department store chain - Macy’s, say - adopts a single UUID for all its beacons. It uses the value of the Major variable to distinguish one shop from another, and the value of the Minor variable to
differentiate between beacons in one shop’s departments.
Not all Bluetooth dongles are Linux-friendly. A handy resource listing well-behaving ones can be found at the Embedded Linux
Wiki. A branded one will set you back around a tenner, generic ones less. I used IoGear’s GBU521.
Next, prepare your Pi. You need to install the official Linux Bluetooth software stack, BlueZ, and various USB development packages, some using the
apt-gettool at the command line, others by compiling the code.
First run this:
sudo apt-get install libusb-dev libdbus-1-dev libglib2.0-dev libudev-dev libical-dev libreadline-dev
Next install BlueZ’s source files and compile it. The version at the time of writing was 5.11.
sudo wget www.kernel.org/pub/linux/bluetooth/bluez-5.11.tar.xz
sudo unxz bluez-5.11.tar.xz
sudo tar xvf bluez-5.11.tar
cd bluez-5.11
sudo ./configure --disable-systemd
sudo make
sudo make install
This will take a while, but when it’s done, you can reboot and plug in the dongle.
Decoding the iBeacon protocol
There’s no version of the uuidgenutility readily available for the Pi, so I used this website. The 16 pairs
of two-digit hexadecimal values - each pair is dubbed an "octet" in the jargon - along with Major and Minor pair of octets, need to be punched into the Pi’s Bluetooth sub-system using BlueZ’s
hcitoolutility:
sudo hcitool -i hci0 cmd 0x08 0x0008 1E 02 01 1A 1A FF 4C 00 02 15 [ 92 77 83 0A B2 EB 49 0F A1 DD 7F E3 8C 49 2E DE ] [ 00 00 ] [ 00 00 ] C5 00
Note that the square brackets are NOT part of the command - I’ve added them solely to show where the UUID, Major then Minor codes go. The ‘C5’ after them is a value representing transmitted power level. Just cut and paste the line above and replace the UUID
with your own.
Not all Bluetooth dongles are Pi pals
This is how you decode the command: the "hci0" identifies your Bluetooth dongle, "cmd" tells
hcitoolto send the following command data to the device. The "0x08" is the Bluetooth command group - the "OGF" in the official parlance - and "0x0008"
is the specific command ("OCF"), HCI_LE_Set_Advertising_Data.
The first "1E" is the number of “significant” octets in the advertising data that follow, up to a maximum of 31. The non-significant part should only comprise pairs of zeroes to take the number of octets up to 31 and which, to save power, are not transmitted.
The ad data is split into groups, each formatted with a single octet providing the number of remaining octets in the group - essentially it tells the Bluetooth sub-system how further along the list of octets is the next group. It’s followed by a single octet
which defines the type of data, and then any number of octets holding the data itself. You can put as many of these groups into the advertising data packet as you can fit into the 31 octets allowed.
In my example, the first "02" in the sequence says the first block of ad data is two octets long. The next octet, "01" says the advertising octet(s) following are Bluetooth flags, and the "1A" is the binary value derived when certain of those flags are set.
‘1A’ says the next group is 26 octets long, and the "FF" identifies the group as manufacturer-specific data. The Bluetooth 4.0 specification says the next two octets have to expose the manufacturer: the "4C 00" is Apple’s Bluetooth manufacturer ID.
In the Zone: location notification on a Metawatch smartwatch
I’m not yet sure what the "02" and "15" signify, but as I say, the Proximity UUID, Major and Minor values, and the power level complete the 26 octets of manufacturer data - and the 30 octets of the entire advertising data.
The
hcitoolcommand formats the iBeacon advertising signal. Telling the Pi to begin sending out that signal requires the following command:
sudo hciconfig hci0 leadv
You can disable LE beacon activity with the command:
sudo hciconfig hci0 noleadv
Update If you don’t see your beacon after issuing the
leadvcommand, try
sudo hciconfig hci0 noscanwhich stops the dongle looking for other Bluetooth devices. This can interfere with the beacon operation.
And it’s an obvious next step to create scripts to set all this up and activate LE advertising whenever the Pi boots up, but I won’t be covering that here. If you’d like to do that, there’s a very good tutorial written by Washington DC-based Radius
Networks here.
Building a beacon monitor app
If you’d just like to cut to the chase and start coding iBeacon support into apps, Radius is selling pre-configured Pis as iBeacondevelopment kits with one or two on-board dongles. Prices start at $100 (£61).
With the Pi running as a beacon, the next stage is to create an app that will look for it and notify you when you’re there. I chose to work up an iOS app - I’m exploring Apple’s iBeacon, after all - but it should be possible to code it up in Android
4.3, which added Bluetooth LE support to the Google OS.
Apple added it to iOS 7, released back in September. iOS’s existing CoreLocation framwork defines a
CLLocationManagerclass that provides an interface for detecting iBeacons and a mechanism for dealing with events triggered by moving into and out
a beacon’s zone of coverage, an extension of
CLLocationManager’s already available ability to work with geographical regions.
CLLocationManageralso defines methods for checking whether the device the app is running on has an OS and hardware able to handle Bluetooth LE:
[CLLocationManager isMonitoringAvailableForClass:[CLBeaconRegion class]]returns a Boolean
true if the device is beacon savvy.
Pass that test and a well-behaved app will then double-check that iOS’ Location Services have been enabled and that the app has permission to access them. It can then start looking for beacons with the Proximity UUID, Major and Minor values punched into the
Pi earlier:
{
...

CLBeaconRegion *beaconRegion;
NSUUID *beaconUUID;
NSString *beaconIdent;

...

beaconUUID = [[NSUUID alloc] initWithUUIDString:@"9277830A-B2EB-490F-A1DD-7FE38C492EDE"];
beaconIdent = @"Vulture.Zone.1";
beaconRegion = [[CLBeaconRegion alloc] initWithProximityUUID:beaconUUID major:0 minor:0 identifier:beaconIdent];

...

[appLocationManager startMonitoringForRegion:beaconRegion];

...
}
CoreLocation provides two handy delegate methods for dealing with events triggered by the beacon monitor:
- (void)locationManager:(CLLocationManager *)manager didEnterRegion:(CLRegion *)regionand
- (void)locationManager:(CLLocationManager
*)manager didExitRegion:(CLRegion *)region
. The object that owns the
CLLocationManagermust adhere to the
CLLocationManagerDelegateprotocol if it’s to receive these messages.
These two methods provide an easy way to alert the user he or she has entered the zone and to trigger actions accordingly. My test app, for instance, grabs a block of HTML code from El Reg’s server and presents it in a
UIWebView: “Special
Offer! The Editor will buy you a pint if you present this code...”, that kind of thing.
Running the app: We’re too far away (left) but then...
iOS scans for regions even when the app that initiated the monitoring isn’t running. The app is automatically run in the background if the beacon is detected in those circumstances. Likewise, it’s woken from sleep if it is merely napping. You can control whether
messages triggered when beacon region boundaries are crossed are delayed while the iDevice’s screen is off: the
CLBeaconRegionobject created above has a Boolean property,
notifyEntryStateOnDisplay, you can use to enable this behaviour.
It also has a Boolean property called
notifyOnEntry, inherited from
CLBeaconRegion’s superclass
CLRegion, which you’ll need to set to NO in this case.
Once the phone knows it’s inside a beacon’s sphere of influence, the app can call the
- (void)locationManager:(CLLocationManager *)manager didRangeBeacons:(NSArray *)beacons inRegion:(CLBeaconRegion *)regionmethod to get a list of nearby beacons
and from each entry, a beacon’s UUID, Major and Minor values to help identify which they are and, thanks to each beacon’s
proximityproperty, roughly how close it is.
To keep things tidy, I added an switch to disable beacon scanning. By way of inter-object notifications, it calls
[appLocationManager stopMonitoringForRegion:beaconRegion]to take the currently defined beacon off the system-wide monitoring list.
...and here’s a message from our (nearby) sponsor
Once all this is up and running, and the Pi-hosted iBeacon is operating in the background, it’s easy to test the system by walking out of range of the beacon and then turning round and coming back.
Android users keen to try this out without coding their own beacon detector can check out Radius Networks’ iBeacon
Locate app in Google Play. There’s an iOS version in iTunes too. Radius also has an open-source library
of iBeacon compatibility code for Android if you want to incorporate iBeacon support into an app of your own. ®

相关文章推荐
- Build Your Own Video Community With Lighttpd And FlowPlayer (Debian Etch)
- How to build a cross compiler for your Raspberry Pi
- Raspberry Pi: Use ssh to talk with your Raspberry Pi
- Build Your Own PaaS with Docker.pdf
- DIY BROADCAST : How to build your own Internet TV Channel with Open-Source & other goodies
- Your build settings specify a provisioning profile with the UUID “”, however, no such provisioning p
- Your build settings specify a provisioning profile with the UUID “”, however, no such provisioning profile was found
- Your build settings specify a provisioning profile with the UUID
- Build Your Own Oracle RAC 10g Release 2 Cluster on Linux and FireWire
- Reading Build your own CAB (1) -- Jeremy D. Miller
- This app has been built with an incorrect configuration. Please configure your build for VectorDra
- Your build settings specify a provisioning profile with the UUID, no provisioning profile was found
- 业余爱好者如何通过使用模板快速建站4(How do amateurs build their own websites with a template part-4)
- 用你自己的插件扩展jQuery(Extend jQuery with Your Very Own Plugin)
- Your build settings specify a provisioning profile with the UUID “d5e43854-539d-44a5-a888-992cf0b953
- Augmenting IDA UI with your own actions.
- Your build settings specify a provisioning profile with the UUID, no provisioning profile was
- Your build settings specify a provisioning profile with the UUID “xxxx" however, no such provisionin
- 报错---[UIApplication _runWithMainScene:transitionContext:completion:], /BuildRoot/Library/Caches/com.apple.xbs/Sources/UIKit_Sim/UIKit-3505.16/UIApplication.m:3294**
- How to Build Your Own Rogue GSM BTS for Fun and Profit