JavaSE Swing知识漏洞
2013-12-07 15:08
344 查看
1. Frame 的默认布局方式是 BorderLayout,所以如果要使用 setBounds 方法给组件设置具体位置时最好是 将默认的布局方式去掉,设置为null
例如:
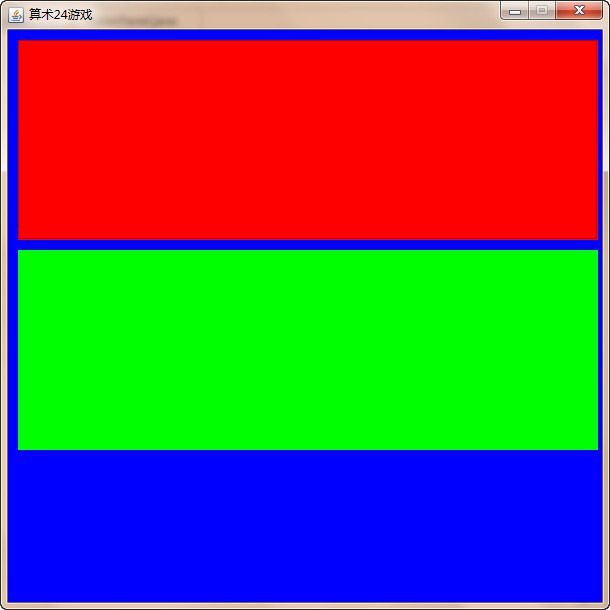
效果:无论是哪个panel最后加上去都会铺满整个frame

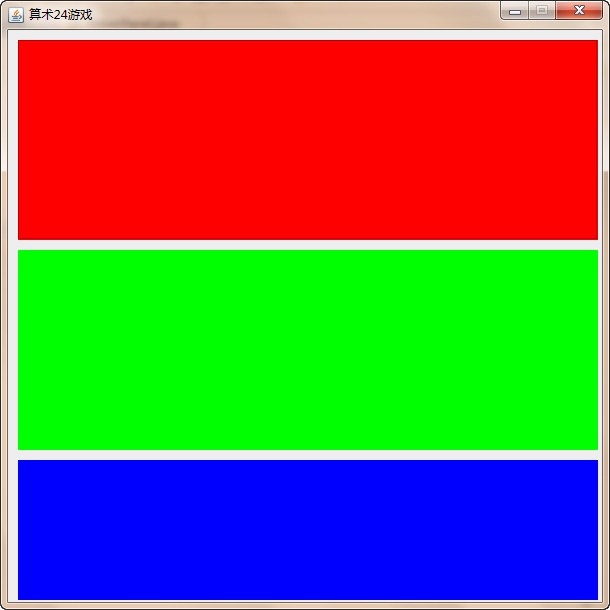
去掉注释后的正确效果:

2. 显示图片
第一种方法是给label放一个 图片,
实例:
label1是使用绝对路径,label2和label3使用的是相对路径,相对于类文件(.class文件)的路径
另一种更好的画图方法:使用 g.drawImage
实例:
我的实例:
效果图:

3.setBounds和setLocation
实例:
效果是:【左图:setLocation 】没有显示 【右图:setBounds 】 显示


所以说:如果要让它显示出来,要么使用setBounds或者setLocation加上setSize(两个都要写,不然就不会显示出来了)
例如:
//        this.setLayout(null);

gamePanel.setVisible(true);
pokerPanel.setVisible(true);
gameInfoPanel.setVisible(true);

pokerPanel.setBounds(10, 10, 580, 200);
pokerPanel.setBackground(Color.RED);

gamePanel.setBounds(10, 220, 580, 200);
gamePanel.setBackground(Color.GREEN);

gameInfoPanel.setBounds(10, 430, 580, 140);
gameInfoPanel.setBackground(Color.BLUE);

add(pokerPanel);
add(gamePanel);
add(gameInfoPanel);
效果:无论是哪个panel最后加上去都会铺满整个frame
去掉注释后的正确效果:
2. 显示图片
第一种方法是给label放一个 图片,
实例:
package com;
import java.awt.BorderLayout;
import java.net.URL;
import javax.swing.*;

public class ShowImage extends JFrame{
/**
* @param args
*/
public ShowImage() {
JPanel panel=new JPanel(new BorderLayout());
JPanel panel2=new JPanel(new BorderLayout());
JPanel panel3=new JPanel(new BorderLayout());

String urlString="D:\\MyEclipse 6.0\\新建文件夹\\Exam\\bin\\images\\winter.jpg";
JLabel label=new JLabel(new ImageIcon(urlString));

URL url=getClass().getResource("/images/orz2.jpg"<
4000
/span>);
JLabel label2=new JLabel(new ImageIcon(url));

URL url2=getClass().getResource("/images/orz.jpg");
JLabel label3=new JLabel(new ImageIcon(url2));

panel.add(label,BorderLayout.CENTER);
panel2.add(label2,BorderLayout.CENTER);
panel3.add(label3,BorderLayout.CENTER);

this.getContentPane().setLayout(new BorderLayout());
this.getContentPane().add(panel,BorderLayout.CENTER);
this.getContentPane().add(panel2,BorderLayout.SOUTH);
this.getContentPane().add(panel3,BorderLayout.EAST);

this.setSize(400, 300);
this.setDefaultCloseOperation(JFrame.EXIT_ON_CLOSE);
this.setTitle("显示图像");
this.setVisible(true);
}
public static void main(String[] args) {
// TODO Auto-generated method stub
ShowImage showImage=new ShowImage();
}

}
label1是使用绝对路径,label2和label3使用的是相对路径,相对于类文件(.class文件)的路径
另一种更好的画图方法:使用 g.drawImage
实例:
Color color=g.getColor();//首先要重画面板,清除前面的所有内容
g.setColor(this.getBackground());
g.fillRect(0, 0, this.getWidth(), this.getHeight());
g.setColor(color);
URL url1 = getClass().getResource("images/"+a+".jpg");
Image image1=getToolkit().getImage(url1);
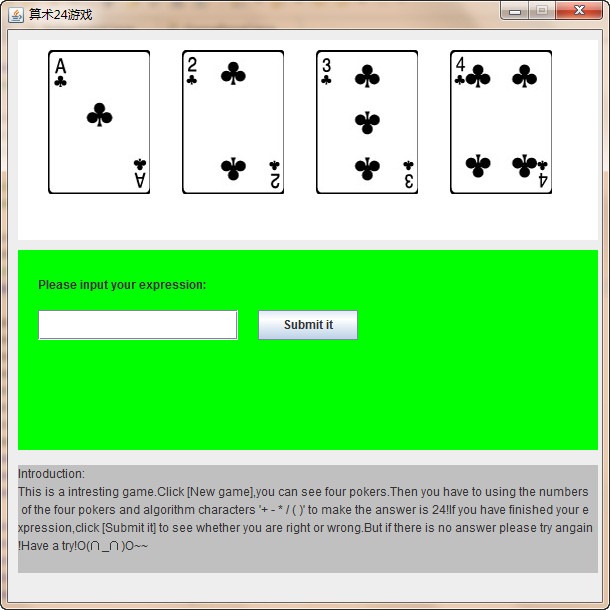
g.drawImage(image1, 20, 10, null, this);我的实例:
URL url1 = getClass().getResource("images/"+a+".jpg");
Image image1=getToolkit().getImage(url1);
g.drawImage(image1, 30, 10, null, this);

URL url2 = getClass().getResource("images/"+b+".jpg");
Image image2=getToolkit().getImage(url2);
g.drawImage(image2, 164, 10, null, this);

URL url3 = getClass().getResource("images/"+c+".jpg");
Image image3=getToolkit().getImage(url3);
g.drawImage(image3, 298, 10, null, this);

URL url4 = getClass().getResource("images/"+d+".jpg");
Image image4=getToolkit().getImage(url4);
g.drawImage(image4, 432, 10, null, this);

//之前使用的是label,不是很好
//        URL url1 = getClass().getResource("images/"+a+".jpg");
//        JLabel label1 = new JLabel(new ImageIcon(url1));
//        this.add(label1);
//
//        URL url2 = getClass().getResource("images/"+b+".jpg");
//        JLabel label2 = new JLabel(new ImageIcon(url2));
//        this.add(label2);
//
//        URL url3 = getClass().getResource("images/"+c+".jpg");
//        JLabel label3 = new JLabel(new ImageIcon(url3));
//        this.add(label3);
//
//        URL url4 = getClass().getResource("images/"+d+".jpg");
//        JLabel label4 = new JLabel(new ImageIcon(url4));
//        this.add(label4);
效果图:

3.setBounds和setLocation
实例:
JButton newButton = new JButton("New game");
newButton.setLocation(300, 20);
//        newButton.setBounds(400, 20,100,30);
gamePanel.add(newButton);
效果是:【左图:setLocation 】没有显示 【右图:setBounds 】 显示
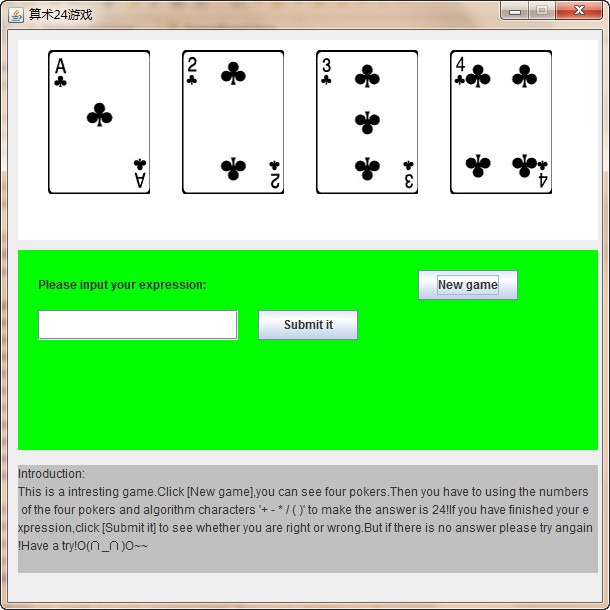
所以说:如果要让它显示出来,要么使用setBounds或者setLocation加上setSize(两个都要写,不然就不会显示出来了)

相关文章推荐
- JavaSE Swing知识漏洞
- JavaSE Swing知识漏洞
- 基础知识: java awt和swing
- JavaSE Swing Menu
- Java知识整理(六)之SE.集合框架
- Java知识整理(七)之SE.(泛型+异常处理)
- Java Swing开发知识总结
- Java Swing的基础知识全接触
- 关于javaSE面向对象的一些小知识
- Java知识整理(八)之SE.(类File+IO流)
- Java Swing 知识回顾
- JAVA_SE ----- 基础知识总结-----关键字,标识符,注释,常量
- 准备Java面试之Java SE基础知识——问题篇
- Java知识整理(九)之SE.多线程
- 我的第一个JavaSE Swing 工程 ——服务器控制端
- JAVA_SE ----- 基础知识总结-----反射
- EasyDemo*JavaSE 基础知识点体系结构图(download pic Thx)
- Java知识整理(十)之SE.TCP通信(Server和Client源代码)
- java入门基础知识(二)swing组件
- JAVA_SE ----- 基础知识总结-----运算符,键盘录入,语句