MongoDB实战(11)Sharding 分片(下)
2013-11-25 22:35
218 查看
管理维护Sharding
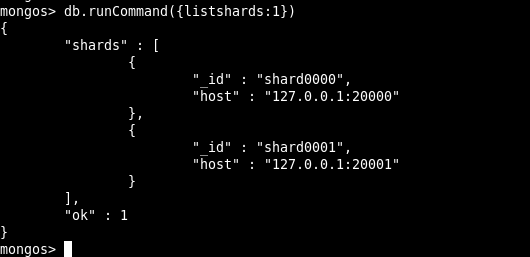
列出所有的Shard Server
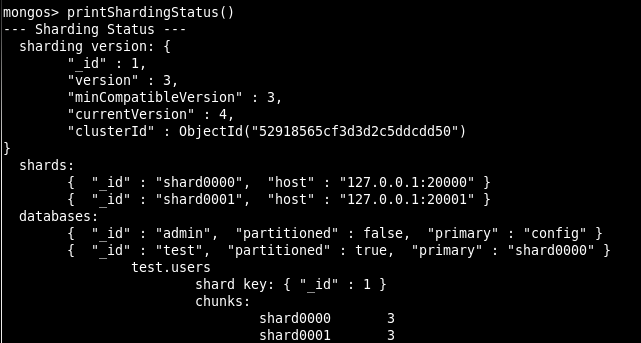
查看Sharding信息
判断是否是Sharding

对现有的表进行Sharding
刚才我们是对表test.users 进行分片了,下面我们将对库中现有的未分片的表test.users_2 进
行分片处理
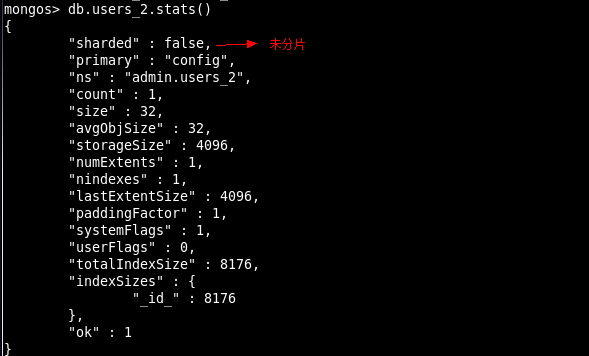
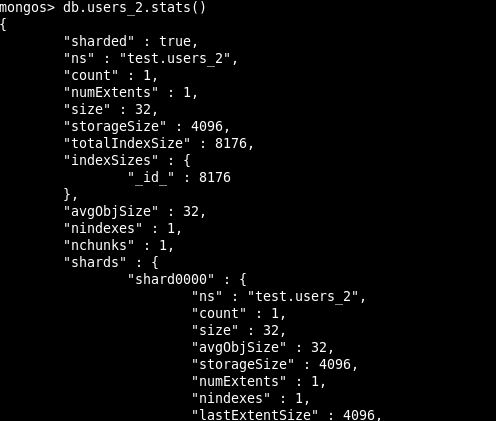
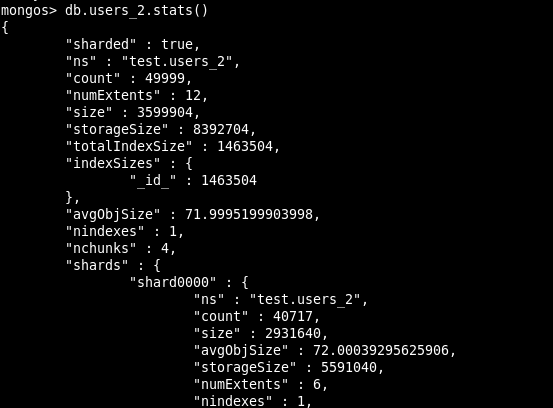
表最初状态如下,可以看出他没有被分片过:
对其进行分片处理:

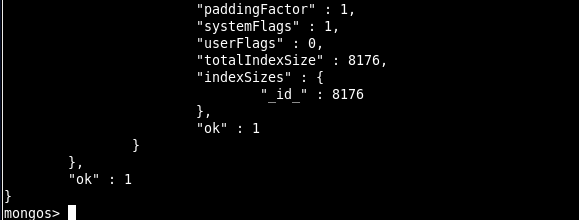
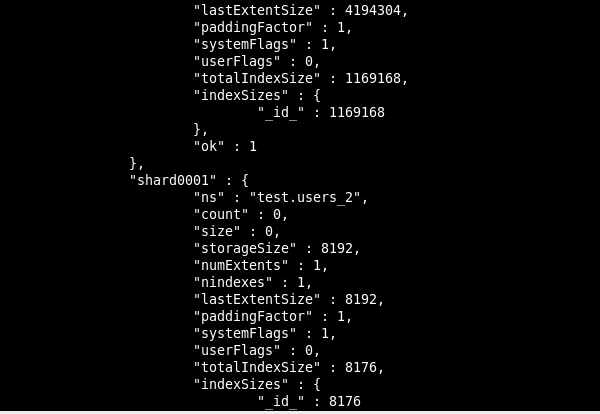
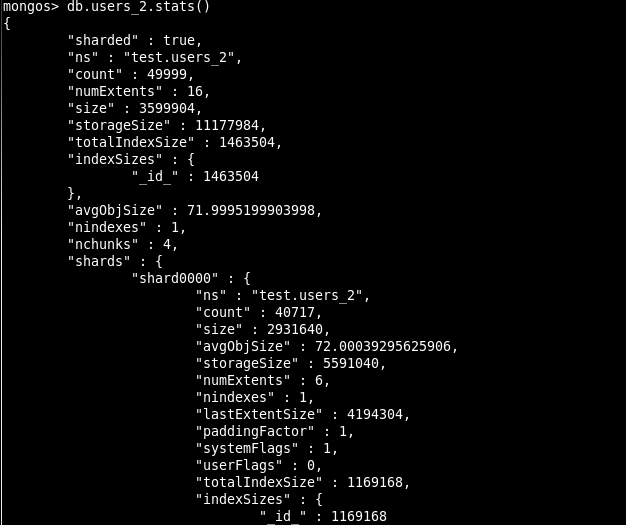
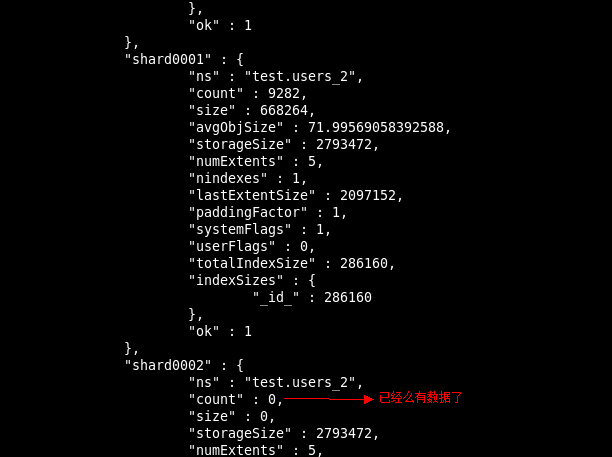
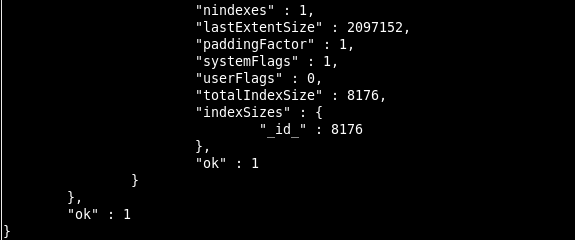
再次查看分片后的表的状态,可以看到它已经被我们分片了
新增Shard Server
刚才我们演示的是新增分片表,接下来我们演示如何新增Shard Server
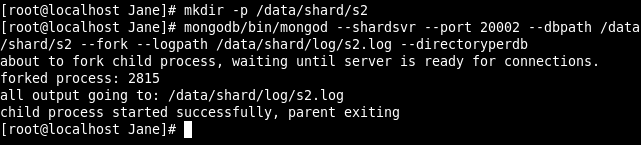
启动一个新Shard Server 进程
配置新Shard Server

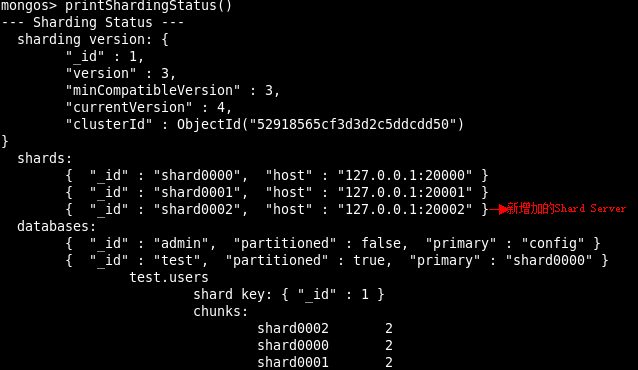
查看分片表状态,以验证新Shard Server
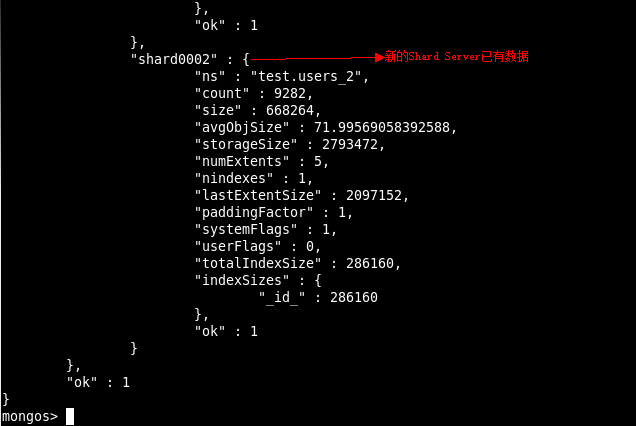
我们可以发现,当我们新增Shard Server 后数据自动分布到了新Shard 上,这是由MongoDB
内部自已实现的。
移除Shard Server
有些时候有于硬件资源有限,所以我们不得不进行一些回收工作,下面我们就要将刚刚启用
的Shard Server 回收,系统首先会将在这个即将被移除的Shard Server 上的数据先平均分配
到其它的Shard Server 上,然后最终在将这个Shard Server 踢下线, 我们需要不停的调用
db.runCommand({"removeshard" : "localhost:20002"});来观察这个移除操作进行到哪里了:
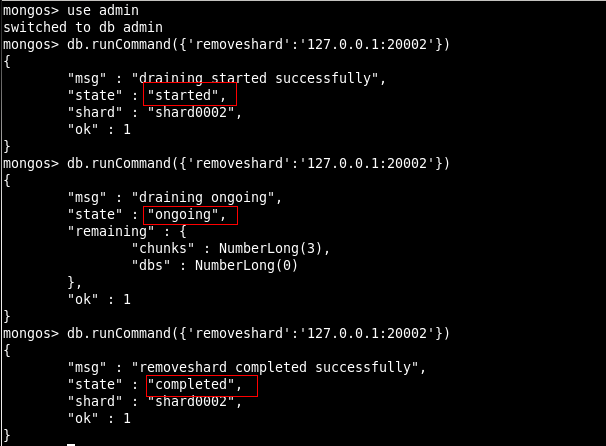

最终移除后,当我们再次调用db.runCommand({"removeshard" : "localhost:20002"});的时候系统
会报错,已便通知我们不存在20002 这个端口的Shard Server 了,因为它已经被移除掉了。
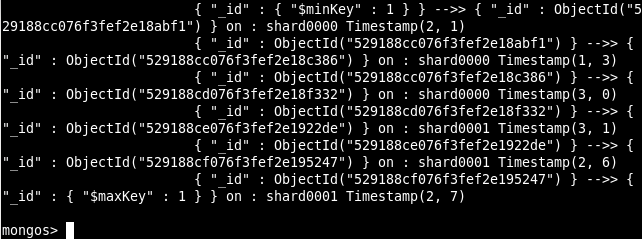
接下来我们看一下表中的数据分布:
可以看出数据又被平均分配到了另外2 台Shard Server 上了,对业务没什么特别大的影响。
但是为什么节点还存在呢,这里留了一个疑问???
本文出自 “phper-每天一点点~” 博客,请务必保留此出处http://janephp.blog.51cto.com/4439680/1331401
列出所有的Shard Server
查看Sharding信息
判断是否是Sharding
对现有的表进行Sharding
刚才我们是对表test.users 进行分片了,下面我们将对库中现有的未分片的表test.users_2 进
行分片处理
表最初状态如下,可以看出他没有被分片过:
对其进行分片处理:
再次查看分片后的表的状态,可以看到它已经被我们分片了
新增Shard Server
刚才我们演示的是新增分片表,接下来我们演示如何新增Shard Server
启动一个新Shard Server 进程
配置新Shard Server
查看分片表状态,以验证新Shard Server
我们可以发现,当我们新增Shard Server 后数据自动分布到了新Shard 上,这是由MongoDB
内部自已实现的。
移除Shard Server
有些时候有于硬件资源有限,所以我们不得不进行一些回收工作,下面我们就要将刚刚启用
的Shard Server 回收,系统首先会将在这个即将被移除的Shard Server 上的数据先平均分配
到其它的Shard Server 上,然后最终在将这个Shard Server 踢下线, 我们需要不停的调用
db.runCommand({"removeshard" : "localhost:20002"});来观察这个移除操作进行到哪里了:
最终移除后,当我们再次调用db.runCommand({"removeshard" : "localhost:20002"});的时候系统
会报错,已便通知我们不存在20002 这个端口的Shard Server 了,因为它已经被移除掉了。
接下来我们看一下表中的数据分布:
可以看出数据又被平均分配到了另外2 台Shard Server 上了,对业务没什么特别大的影响。
但是为什么节点还存在呢,这里留了一个疑问???
本文出自 “phper-每天一点点~” 博客,请务必保留此出处http://janephp.blog.51cto.com/4439680/1331401

相关文章推荐
- mongodb 在slave中统计数据,然后保存到master的表中的javascript脚本代码
- mongodb 使用forEach 和js自定义函数 修改指定列的第19个字符
- mongoDB笔记
- MongoDB的使用
- Mongodb启动命令mongod参数说明
- 在Mac OS上安装配置mongoDB
- 使用MMS(MongoDB Monitoring Service)监控MongoDB
- Mongodb千万级数据在python下的综合压力测试及应用探讨
- Nosql数据库教程之初探MongoDB - 第一部分
- [转] 关于Mongodb的全面总结,学习mongodb的人,可以从这里开始
- MongoDB实战(11)Sharding 分片(上)
- MongoDB实战(11)Sharding 分片(上)
- MongoDB千万级数据的分析
- MongoDB实战(10)Replica Sets 副本集(下)
- 使用mongodb的js来统计数据
- MongoDB C#驱动中Query几个方法
- 3.MongoDB下Windows下的安装
- 2.MongoDB数据库简介
- NoSql 中Mongodb数据库的使用
- MongoDB——Java操作(增删改查)