Android高手进阶教程(十五)之---通过Location获取Address的使用!
2013-11-14 11:40
627 查看
大家好,上一节我讲了一下如何通过LocationManager来获取Location,没有看过上一节的同学,可以点击如下链接返回查看:
Android高手进阶教程十四之---Android Location的使用!
我们获取Location的目的之一肯定是有获取这个位置的详细地址,而我们有了Location在来获取Address就相对简单多了,因为GoogleApi已经封装好了方法,我们只需呀通过Location获取GeoPoint,然后在通过GeoPoint来获取我们想要的Address.下面是我做的一个简单的Demo.
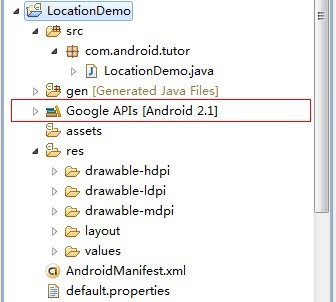
第一步新建一个Android工程LocationDemo,注意这里选用的是(Google APIs),下面是文件目录结构:
第二步: 修改main.xml(相比第十四节增加了一个address的TextView),代码如下:
[xhtml] view
plaincopy
<?xml version="1.0" encoding="utf-8"?> <LinearLayout xmlns:android="http://schemas.android.com/apk/res/android" android:orientation="vertical" android:layout_width="fill_parent" android:layout_height="fill_parent" > <TextView android:id="@+id/longitude" android:layout_width="fill_parent" android:layout_height="wrap_content" android:text="longitude:" /> <TextView android:id="@+id/latitude" android:layout_width="fill_parent" android:layout_height="wrap_content" android:text="latitude:" /> <TextView android:id="@+id/address" android:layout_width="fill_parent" android:layout_height="wrap_content" /> </LinearLayout>
第三步:修改LocationDemo.java(增加了两个方法)代码如下:
[java] view
plaincopy
package com.android.tutor; import java.util.List; import java.util.Locale; import com.google.android.maps.GeoPoint; import android.app.Activity; import android.content.Context; import android.location.Address; import android.location.Geocoder; import android.location.Location; import android.location.LocationManager; import android.os.Bundle; import android.widget.TextView; public class LocationDemo extends Activity { private TextView longitude; private TextView latitude; private TextView address; @Override public void onCreate(Bundle savedInstanceState) { super.onCreate(savedInstanceState); setContentView(R.layout.main); longitude = (TextView)findViewById(R.id.longitude); latitude = (TextView)findViewById(R.id.latitude); address = (TextView)findViewById(R.id.address); Location mLocation = getLocation(this); GeoPoint gp = getGeoByLocation(mLocation); Address mAddress = getAddressbyGeoPoint(this, gp); longitude.setText("Longitude: " + mLocation.getLongitude()); latitude.setText("Latitude: " + mLocation.getLatitude()); address.setText("Address: " + mAddress.getCountryName()+"," + mAddress.getLocality()); } //Get the Location by GPS or WIFI public Location getLocation(Context context) { LocationManager locMan = (LocationManager) context .getSystemService(Context.LOCATION_SERVICE); Location location = locMan .getLastKnownLocation(LocationManager.GPS_PROVIDER); if (location == null) { location = locMan .getLastKnownLocation(LocationManager.NETWORK_PROVIDER); } return location; } //通过Location获取GeoPoint public GeoPoint getGeoByLocation(Location location) { GeoPoint gp = null; try { if (location != null) { double geoLatitude = location.getLatitude() * 1E6; double geoLongitude = location.getLongitude() * 1E6; gp = new GeoPoint((int) geoLatitude, (int) geoLongitude); } } catch (Exception e) { e.printStackTrace(); } return gp; } //通过GeoPoint来获取Address public Address getAddressbyGeoPoint(Context cntext, GeoPoint gp) { Address result = null; try { if (gp != null) { Geocoder gc = new Geocoder(cntext, Locale.CHINA); double geoLatitude = (int) gp.getLatitudeE6() / 1E6; double geoLongitude = (int) gp.getLongitudeE6() / 1E6; List<Address> lstAddress = gc.getFromLocation(geoLatitude, geoLongitude, 1); if (lstAddress.size() > 0) { result = lstAddress.get(0); } } } catch (Exception e) { e.printStackTrace(); } return result; } }
第四步:最重要一步在AndroidManiefest.xml中导入Google Api(第14行代码)库,代码如下:
[xhtml] view
plaincopy
<?xml version="1.0" encoding="utf-8"?> <manifest xmlns:android="http://schemas.android.com/apk/res/android" package="com.android.tutor" android:versionCode="1" android:versionName="1.0"> <application android:icon="@drawable/icon" android:label="@string/app_name"> <activity android:name=".LocationDemo" android:label="@string/app_name"> <intent-filter> <action android:name="android.intent.action.MAIN" /> <category android:name="android.intent.category.LAUNCHER" /> </intent-filter> </activity> <uses-library android:name="com.google.android.maps" /> </application> <uses-sdk android:minSdkVersion="7" /> <uses-permission android:name="android.permission.ACCESS_FINE_LOCATION"/> </manifest>
第五步:运行上述工程,效果如下图如示:

Android高手进阶教程十四之---Android Location的使用!
我们获取Location的目的之一肯定是有获取这个位置的详细地址,而我们有了Location在来获取Address就相对简单多了,因为GoogleApi已经封装好了方法,我们只需呀通过Location获取GeoPoint,然后在通过GeoPoint来获取我们想要的Address.下面是我做的一个简单的Demo.
第一步新建一个Android工程LocationDemo,注意这里选用的是(Google APIs),下面是文件目录结构:
第二步: 修改main.xml(相比第十四节增加了一个address的TextView),代码如下:
[xhtml] view
plaincopy
<?xml version="1.0" encoding="utf-8"?> <LinearLayout xmlns:android="http://schemas.android.com/apk/res/android" android:orientation="vertical" android:layout_width="fill_parent" android:layout_height="fill_parent" > <TextView android:id="@+id/longitude" android:layout_width="fill_parent" android:layout_height="wrap_content" android:text="longitude:" /> <TextView android:id="@+id/latitude" android:layout_width="fill_parent" android:layout_height="wrap_content" android:text="latitude:" /> <TextView android:id="@+id/address" android:layout_width="fill_parent" android:layout_height="wrap_content" /> </LinearLayout>
第三步:修改LocationDemo.java(增加了两个方法)代码如下:
[java] view
plaincopy
package com.android.tutor; import java.util.List; import java.util.Locale; import com.google.android.maps.GeoPoint; import android.app.Activity; import android.content.Context; import android.location.Address; import android.location.Geocoder; import android.location.Location; import android.location.LocationManager; import android.os.Bundle; import android.widget.TextView; public class LocationDemo extends Activity { private TextView longitude; private TextView latitude; private TextView address; @Override public void onCreate(Bundle savedInstanceState) { super.onCreate(savedInstanceState); setContentView(R.layout.main); longitude = (TextView)findViewById(R.id.longitude); latitude = (TextView)findViewById(R.id.latitude); address = (TextView)findViewById(R.id.address); Location mLocation = getLocation(this); GeoPoint gp = getGeoByLocation(mLocation); Address mAddress = getAddressbyGeoPoint(this, gp); longitude.setText("Longitude: " + mLocation.getLongitude()); latitude.setText("Latitude: " + mLocation.getLatitude()); address.setText("Address: " + mAddress.getCountryName()+"," + mAddress.getLocality()); } //Get the Location by GPS or WIFI public Location getLocation(Context context) { LocationManager locMan = (LocationManager) context .getSystemService(Context.LOCATION_SERVICE); Location location = locMan .getLastKnownLocation(LocationManager.GPS_PROVIDER); if (location == null) { location = locMan .getLastKnownLocation(LocationManager.NETWORK_PROVIDER); } return location; } //通过Location获取GeoPoint public GeoPoint getGeoByLocation(Location location) { GeoPoint gp = null; try { if (location != null) { double geoLatitude = location.getLatitude() * 1E6; double geoLongitude = location.getLongitude() * 1E6; gp = new GeoPoint((int) geoLatitude, (int) geoLongitude); } } catch (Exception e) { e.printStackTrace(); } return gp; } //通过GeoPoint来获取Address public Address getAddressbyGeoPoint(Context cntext, GeoPoint gp) { Address result = null; try { if (gp != null) { Geocoder gc = new Geocoder(cntext, Locale.CHINA); double geoLatitude = (int) gp.getLatitudeE6() / 1E6; double geoLongitude = (int) gp.getLongitudeE6() / 1E6; List<Address> lstAddress = gc.getFromLocation(geoLatitude, geoLongitude, 1); if (lstAddress.size() > 0) { result = lstAddress.get(0); } } } catch (Exception e) { e.printStackTrace(); } return result; } }
第四步:最重要一步在AndroidManiefest.xml中导入Google Api(第14行代码)库,代码如下:
[xhtml] view
plaincopy
<?xml version="1.0" encoding="utf-8"?> <manifest xmlns:android="http://schemas.android.com/apk/res/android" package="com.android.tutor" android:versionCode="1" android:versionName="1.0"> <application android:icon="@drawable/icon" android:label="@string/app_name"> <activity android:name=".LocationDemo" android:label="@string/app_name"> <intent-filter> <action android:name="android.intent.action.MAIN" /> <category android:name="android.intent.category.LAUNCHER" /> </intent-filter> </activity> <uses-library android:name="com.google.android.maps" /> </application> <uses-sdk android:minSdkVersion="7" /> <uses-permission android:name="android.permission.ACCESS_FINE_LOCATION"/> </manifest>
第五步:运行上述工程,效果如下图如示:

相关文章推荐
- Android高手进阶教程(十五)之---通过Location获取Address的使用!
- Android高手进阶教程(十五)之---通过Location获取Address的使用!
- Android高手进阶教程(十五)之---通过Location获取Address的使用!
- Android高手进阶教程(十五)之---通过Location获取Address的使用!
- Android高手进阶教程(十五)之---通过Location获取Address的使用!
- Android高手进阶教程(十五)之---通过Location获取Address的使用!
- Android高手进阶教程(十五)之---通过Location获取Address的使用!
- Android高手进阶教程(十四)---通过Location获取Address的使用!
- Android 高手进阶教程(十四)之----Android Location的使用!!
- Android 高手进阶教程(十三)----Android Location的使用!!
- Android 高手进阶教程(十四)之----Android Location的使用!!
- Android高手进阶教程(十五)---Android中万能的BaseAdapter(Spinner,ListView,GridView)的使用!
- Android 高手进阶教程(十四)之----Android Location的使用!!
- Android 高手进阶教程(十四)之----Android Location的使用!!
- Android 高手进阶教程(十四)之----Android Location的使用!!
- Android 高手进阶教程(十四)之----Android Location的使用!!
- Android 高手进阶教程(十四)之----Android Location的使用!!
- Android 高手进阶教程(十四)之----Android Location的使用!!
- Android高手进阶教程(六)之----Android 中MenuInflater的使用(布局定义菜单)!
- Android高手进阶教程(七)----Android 中Preferences的使用!