icinga简明教程1—服务端安装配置
2013-11-07 15:01
405 查看
简介
icinga是nagios的二次开发包,说是原来的团队觉得nagios进展太慢了,然后跳出来开展了这个项目。ICINGA-CN说明如下:
ICINGA项目是由Michael Luebben、HendrikB?cker和JoergLinge等人发起的,他们都是现有的Nagios项目社区委员会的成员,他们承诺,新的开源项 目将完全兼容以前的Nagios应用程序及扩展功能。在新项目的网站上,他们是如此定义ICINGA的,这将是一个介于Nagios社区版和企业版间的产
品。特别将致力于解决Nagios项目现在的问题,比如不能及时处理Nagios项目的bug、新功能不能及时添加等。还有在新的ICINGA项目中,将 更好的实现数据库集成方面的功能,标准化第三发应用程序的接口等。中文化项目是由Icinga中文化项目组,基于icinga(http://www.icinga.com)基础上,并在此基础上针对中文需求进行优化及修改,同时集成nagiosgraph或pnp4nagios绘图,包括简体中文、繁体中文(计划),界面以及生成的图像都已中文化。
安装准备
安装以centos6.4为例,#> yum install httpd gcc glibc glibc-common gd gd-devel #> yum install libjpeg libjpeg-devel libpng libpng-devel
yum install mysql mysql-server \
libdbi libdbi-devel libdbi-drivers libdbi-dbd-mysql
下载最新版的icinga
http://sourceforge.net/projects/icinga-cn/files/icinga-cn/备用:http://dl.vmall.com/c09kipj6x2
最新版是1.9,得到 icinga-cn-1.9.3.tar.bz2
添加用户,
useradd -m icinga修改密码
#> passwd icinga
编译和安装Icinga(包括IDOUtils)
tar xvf icinga-cn-1.9.3.tar.bz2
cd icinga-cn-1.9.3
./configure
输出如下,
Creating sample config files in sample-config/ ...

Creating sample config files in module/idoutils/config/ ...
readline() on closed filehandle IN at subst line 22.

*** Configuration summary for icinga-core 1.9.3 07-07-2013 ***:

General Options:
-------------------------
Icinga executable:  icinga
Icinga user/group:  icinga,icinga
Command user/group:  icinga,icinga
Apache user/group:  apache,apache
Embedded Perl:  no
Event Broker:  yes
ido2db lockfile:  ${prefix}/var/ido2db.lock
ido sockfile:  ${prefix}/var/ido.sock
idomod tempfile:  ${prefix}/var/idomod.tmp
Build IDOUtils:  libdbi, instance_name=default
libdbi driver dir:  /usr/local/lib/dbd
Install ${prefix}:  /usr/local/icinga
Lock file:  ${prefix}/var/icinga.lock
Temp file:  /tmp/icinga.tmp
Chk file:  ${prefix}/var/icinga.chk
HTTP auth file:  ${prefix}/etc/htpasswd.users
Lib directory:  ${exec_prefix}/lib
Bin directory:  ${exec_prefix}/bin
Plugin directory:  ${exec_prefix}/libexec
Eventhandler directory:  ${exec_prefix}/libexec/eventhandlers
Log directory:  ${prefix}/var
Check result directory:  ${prefix}/var/spool/checkresults
Temp directory:  /tmp
State directory:  ${prefix}/var
Ext Cmd file directory:  ${prefix}/var/rw
Init directory:  /etc/rc.d/init.d
Apache conf.d directory:  /etc/httpd/conf.d
Apache config file:  /etc/httpd/conf.d/icinga.conf
Mail program:  /bin/mail
Host OS:  linux-gnu
Environment Prefix:  ICINGA_

Web Interface Options:
------------------------
HTML URL:  http://localhost/icinga/ CGI URL:  http://localhost/icinga/cgi-bin/ Main URL:  http://localhost/icinga/cgi-bin/tac.cgi
Review the options above for accuracy.  If they look okay,
type 'make all' to compile the main program and CGIs.确认无误后,输入make all输出如下:
*** Compile finished ***

If the main program and CGIs compiled without any errors, you
can continue with installing Icinga as follows (type 'make'
without any arguments for a list of all possible options):

make install
- This installs the main program (Icinga Core), CGIs
(Classical Web), and HTML files

make install-init
- This installs the init script in /etc/rc.d/init.d

make install-commandmode
- This installs and configures permissions on the
directory for holding the external command file

make install-idoutils
- This installs the database addon IDOUtils into the
destination directory

make install-config
- This installs *SAMPLE* config files in /usr/local/icinga/etc
You'll have to modify these sample files before you can
use Icinga.  Read the HTML documentation for more info
on doing this.  Pay particular attention to the docs on
object configuration files, as they determine what/how
things get monitored!

make install-webconf
- This installs the Apache config file and http auth file for
the Icinga Classic UI

*** Support Notes *******************************************

If you have questions about configuring or running Icinga,
please make sure that you:

- Look at the sample config files
- Read the HTML documentation in html/docs/

before you post a question to one of the mailing lists at http://www.icinga.org/support/ or at Icinga Portal: http://www.icinga-portal.org
执行:
#> make install
#> make install-init
#> make install-config
#> make install-eventhandlers
#> make install-commandmode
#> make install-idoutils
配置
如果您的数据库没有位于本机,您需要更改ido2db.cfg:socket_type=tcp
启用idomod event broker 模块
cd /usr/local/icinga/etc/
mv modules/idoutils.cfg-sample modules/idoutils.cfg
数据库创建和IDOUtils
#> mysql -u root -p
mysql> CREATE DATABASE icinga;

GRANT USAGE ON icinga.* TO 'icinga'@'localhost'
IDENTIFIED BY 'icinga'
WITH MAX_QUERIES_PER_HOUR 0
MAX_CONNECTIONS_PER_HOUR 0
MAX_UPDATES_PER_HOUR 0;

GRANT SELECT, INSERT, UPDATE, DELETE, DROP, CREATE VIEW, INDEX, EXECUTE
ON icinga.* TO 'icinga'@'localhost';

FLUSH PRIVILEGES;

quit
导入数据库结构:
回到解压好的安装包目录
mysql -u root -p icinga < ./module/idoutils/db/mysql/mysql.sql登录mysql看一下dbversion
mysql> select * from icinga_dbversion;
+--------------+----------+---------+---------------------+---------------------+
| dbversion_id | name     | version | create_time         | modify_time         |
+--------------+----------+---------+---------------------+---------------------+
|            1 | idoutils | 1.9.0   | 2013-11-07 13:52:33 | 2013-11-07 13:52:33 |
+--------------+----------+---------+---------------------+---------------------+
1.9.0,不用更新,如果需要更新
mysql -u root -p icinga < ./module/idoutils/db/mysql/upgrade/mysql-upgrade-1.9.0.sql
编辑DB配置文件自定义IDOUtils
vim /usr/local/icinga/etc/ido2db.cfg
db_servertype=mysql
db_port=3306
db_user=icinga
db_pass=icinga
默认就是这个用户名和密码
配置经典的Web界面,安装Icinga附带的经典web界面("CGIs")
#> make cgis
#> make install-cgis
#> make install-html
安装经典web配置文件到Apache的conf.d目录下.
#> make install-webconf创建 icingaadmin 账户,登录到Icinga经典web界面.
记住您分配给这个帐户的密码 -稍后你会需要它.
#> htpasswd -c /usr/local/icinga/etc/htpasswd.users icingaadmin如果你想改变用户密码,或添加另一个用户,请使用以下命令:
#> htpasswd /usr/local/icinga/etc/htpasswd.users <USERNAME>
启动icinga和ido2db
service ido2db start
service icinga start
配置开机启动
chkconfig ido2db on
chkconfig icinga on
登录:
http://yourdomain.com/icinga/
发现错误:
Internal Server Error
The server encountered an internal error or misconfiguration and was unable to complete your request.
查日志发现:
(13)Permission denied: exec of '/usr/local/icinga/sbin/tac.cgi' failed
关闭selinux
setenforce 0
重启httpd
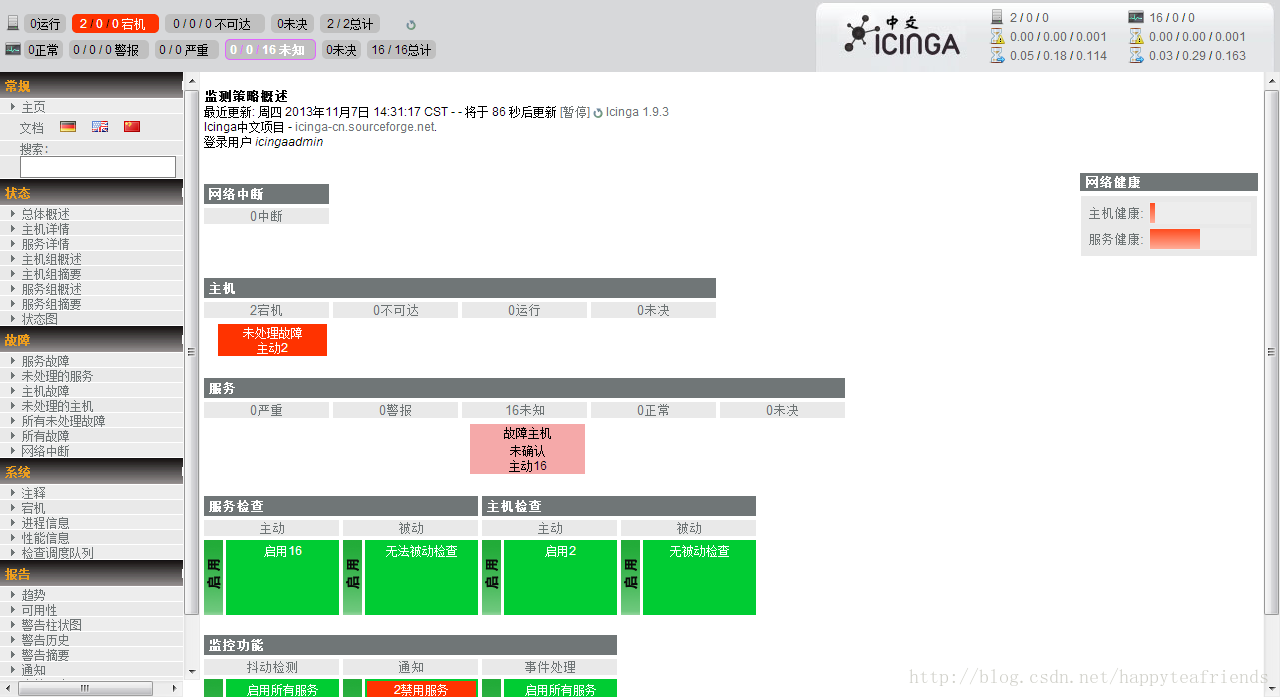
上次监控是红色的,联不通,因为还没有安装用于监控的插件
安装插件:
http://sourceforge.net/projects/icinga-cn/files/icinga%20plugins/下载nagios-cn-plugins-1.5.tar.bz2
tar xvf nagios-cn-plugins-1.5.tar.bz2
cd nagios-cn-plugins-1.5
./configure --prefix=/usr/local/icinga --with-package-name=icinga-plugins --with-cgiurl=/icinga/cgi-bin
#> make
#> make install
此步骤有时候会报错,建议下载icinga-cn-plugins-1.4.16.tar.bz2
如果下载的是icinga-cn-plugins-1.4.16.tar.bz2可直接不加参数
./configure
#> make
#> make install
安装check_nrpe 插件
下载icinga-nrpe-2.14.tar.gz
tar xvf icinga-nrpe-2.14.tar.gz
cd icinga-nrpe-2.14
./configure
报错:
configure: error: Cannot find ssl headers
安装ssl
yum install openssl openssl-devel.x86_64
重新configure,结果如下
*** Configuration summary for nrpe 2.14 12-21-2012 ***:
General Options:
-------------------------
NRPE port: 5666
NRPE user: icinga
NRPE group: icinga
Icinga user: icinga
Icinga group: icinga
Review the options above for accuracy. If they look okay,
type 'make all' to compile the NRPE daemon and client.
make安装即可,make all后结果
*** Compile finished ***

make install
- This installs files in /usr/local/icinga

make install-plugin
- This installs init-script files in /usr/local/icinga/libexec

make install-init
- This installs init-script files in /etc/init.d

make install-xinetd
- This installs sample-config/nrpe.xinetd in /etc/xinit.d

make install-init-freebsd
- This installs init-script.freebsd files in /etc/init.d

make install-init-debian
- This installs init-script.debian files in /etc/init.d

make install-init-suse
- This installs init-script.suse files in /etc/init.d

make install-daemon-config
- This installs the Nrpe config file in /usr/local/icinga/etc
安装即可
#> make all
#> make install-plugin
重新启动icinga ido2db服务,再次登录查看即可。
如果希望能够通过nrpe来监控服务端本机,可以安装nrpe的daemon
#> make install
#> make install-plugin
#> make install-daemon
#> make install-daemon-config
#> make install-init
配置文件地址:/usr/local/icinga/etc/nrpe.cfg
注意:allowed_hosts=127.0.0.1 可以多加一些,用逗号分割
按照实际环境 取消下面
command[check_users]= 等列,配置好参数,
command[check_users]=/usr/local/icinga/libexec/check_users -w 5 -c 10
command[check_load]=/usr/local/icinga/libexec/check_load -w 15,10,5 -c 30,25,20
command[check_hda1]=/usr/local/icinga/libexec/check_disk -w 20% -c 10% -p /dev/hda1
command[check_zombie_procs]=/usr/local/icinga/libexec/check_procs -w 5 -c 10 -s Z
command[check_total_procs]=/usr/local/icinga/libexec/check_procs -w 150 -c 200
command[check_ssh]=/usr/local/icinga/libexec/check_ssh -H localhost
command[check_swap]=/usr/local/icinga/libexec/check_swap -w 20% -c 10%
command[check_mysql]=/usr/local/icinga/libexec/check_mysql -H localhost -uroot -ptomcat2008
command[check_apache]=/usr/local/icinga/libexec/check_apachestatus -H localhost -p 80
command[check_ntp]=/usr/local/icinga/libexec/check_ntp -H localhost -w 0.5 -c 1
command[check_snmp]=/usr/local/icinga/libexec/check_snmp_service -H localhost -C monitor_energysh
启动服务
service icinga-nrpe start
测试nrpe是否安装成功
/usr/local/icinga/libexec/check_nrpe -H 127.0.0.1
参考:
icinga-cn安装配置手册:http://icinga-cn.sourceforge.net/quickstart-icinga-cn.html
官网地址:http://docs.icinga.org/

相关文章推荐
- icinga简明教程3—icinga安装nagiosQL插件用于配置
- CentOs6.5中安装和配置vsftp简明教程
- CentOs6.5中安装和配置vsftp简明教程
- Docker简明教程00: 基于阿里registry 安装配置
- Linux下Tomcat+Nginx服务器环境安装配置的简明教程
- CentOs6.5中安装和配置vsftp简明教程
- Windows下的SVN服务端安装教程及权限配置
- CentOs6.5中安装和配置vsftp简明教程
- CentOS 7下的VirtualEnv的安装配置简明教程
- CentOs中安装和配置vsftp简明教程
- PHPMYADMIN简明安装教程 及 常用配置选项
- redhat Server release 5.2 安装配置简明教程
- Git_Git Windows简明教程--概述、安装和配置
- CentOs6.5中安装和配置vsftp简明教程
- CentOs6.5中安装和配置vsftp简明教程
- svn教程----svn服务端安装配置
- windows nfs 服务端安装配置教程
- CentOs6.5中安装和配置vsftp简明教程
- Centos中安装和配置vsftp简明教程