10 Things You Need To Know About Cocoa Autolayout
2013-10-31 12:03
288 查看
(这篇文章写的实在是太好了,有空我会翻译一下)
10 Things You Need To Know About Cocoa Autolayout
Working with CocoaAutolayout for the first time is very different from the springs and struts model Cocoa developers have known for more than a decade. Despite the complexity of autolayout, I have found that you need to understand just a few basic rules to make the concept
click. This article is an attempt to list those rules.
General Autolayout Concepts
1. Rule of Thumb: At Least Two Constraints in Each Dimension
In each dimension (vertical and horizontal), each view’s position and size is defined by three values: leading space, size and trailing space.1 Theleading and trailing spaces can be defined either in terms of a view’s superview or in relation to a sibling in the view hierarchy. Generally speaking, your layout constraints must fix two of these values so that the third one can be calculated. As a result,
a standard view needs at least two constraints in each dimension for an unambiguous layout.
2. Embrace Intrinsic Size
Some controls, such as labels and buttons, have a so-called intrinsic size. Depending on the control, intrinsic sizes can be valid either horizontally or vertically or in both dimensions. In the absence of explicit width and height constraints, a control’sintrinsic size functions as an implicit constraint. This allows you to create unambiguous layouts with only one explicit constraint per dimension (as opposed to the general rule above) and let the controls resize themselves automatically based on their content.
This is the key for creating a layout that looks best in every localization.
Autolayout in Interface Builder
The autolayout editor in Interface Builder seems to have a mind of its own. An understanding of why the Xcode engineers designed it this way will make working with it much less frustrating.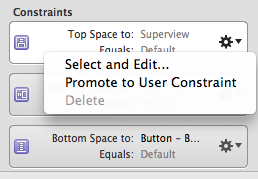
IB won’t let you delete a constraint if that would lead to an ambiguous layout.
3. IB Will Never Let You Create Ambiguous Layouts
IB’s primary goal is to protect you from yourself. It will never let you create an ambiguous layout. That means that IB automatically creates constraints for you as soon as you place a view in a layout. Try placing your views along IB’s automatic guides tohelp it guess correctly which layout you want.
4. Before You Can Delete An Existing Constraint, You Must Create Another One
Use the Size Inspector to see a list of all constraints for a particular view. When the Delete menu item for a constraint is grayed out, this is IB’s way of telling you that deleting this constraint would create an ambiguous layout and is hence not allowed.You need to create at least one more custom constraint before you can delete this one.

IB’s UI for creating new layout constraints.
To create a new constraint, select one or more views in your layout and use the three inconspicuous buttons in the bottom right corner of the canvas. These are easy to overlook.
5. Don’t Resize Controls Explicitly
Try not to set a control’s size explicitly. As long as you don’t resize them manually, most controls will resize themselves to fit their content and use this intrinsic size to create a perfect, content-sensitive layout. This is especially important for UIsthat get localized. Once you (by accident or on purpose) manually resize a control, IB creates an explicit size constraint that is hard to get rid of. To return to intrinsic sizing, use the Editor > Size to Fit Content command.
6. Avoid Premature Optimization
Unfortunately, using autolayout with Interface Builder forces you to be careful. For instance, if you find that you need to replace one control with another, deleting the original from your layout can lead IB to automatically create a bunch of new constraintsthat you then need to modify manually (again) once you have inserted the replacement control. It is probably not a good idea to constantly try to optimize your constraints while your layout is still in a state of flux. Better to do it at a later stage when
it is more stable.
Autolayout in Code
Working with autolayout in Interface Builder can quickly lead to frustration, which is why more and more developers (BrentSimmons is one example) prefer to write their layouts in code.
7. Forget frame
Forget that the frameproperty exists. Never set it directly. A view’s frame is the result
of the autolayout process, not an input variable. To change the frame, change the constraints. This forces you to change the way you think about your UI. Rather than thinking in positions and sizes, think of the rules that specify a each view’s positioning
in relation to its siblings and parents. It’s not unlike CSS.
8. Don’t Forget To Disable Autoresizing Masks
For backwards compatibility of your code, the springs and struts model is still the default. For every programmatically created view that you want to use autolayout with, callsetTranslatesAutoresizingMaskIntoConstraints:NO.
9. The Debugger Console Is Your Friend
When writing your constraints, keep an eye on the debugger console. I found that the error messages Apple logs for ambiguous or unsatisfiable layouts usually help you pin down the problem very quickly.Apple’sdebugging tips in the Cocoa Autolayout Guide are a great start.
10. Animate the Constraints, Not the Frame
Animations also require rethinking under autolayout. You cannot simply animate a view’s frame anymore; if you do, the view will snap back to its autolayout-calculated position and size as soon as the animation finishes. Instead, you need to animate the layoutconstraints directly. To do so, either modify the existing constraints (you can create
IBOutlets
for constraints created in IB) or add new ones, then send
layoutIfNeededto your view
from within an animation block.

相关文章推荐
- The 10 Things You Need to Know About Java SE 6 'Mustang'
- The 10 Things You Need to Know About Java SE 6 'Mustang'
- The 10 Algorithms Machine Learning Engineers Need to Know
- Top 10 jQuery Mobile Code Snippets that you need to know
- [转]Top 10 things Vi user need to know about Vim
- Top 10 jQuery Mobile Code Snippets that you need to know
- 4k HDR – 8 bit, 10 bit, 12 bit, and all the bits you need to know
- Want to start a big data company? Here are 5 things you need to know
- 10 Things You Need To Know About Cocoa Auto Layout
- Top 10 Things You Need to Know in java 6 beta 2
- Top 10 New Things You Need to Know About Java 6
- Top 10 Most Useful iOS Libraries to Know and Love
- 11gR2 Clusterware and Grid Home – What You Need to Know [ID 1053147.1]
- Everything you need to know about Authenticode Code Signing
- Something you need to know about INITIALIZATION LISTS in Constructor of C++
- What you need to know about transimpedance amplifiers – part 1
- [翻译练习]密码学1小时入门 (Everything you need to know about cryptography in 1 hour)
- linux you need to know
- Why Cisco users need to know Tcl
- Several questions need to know for understanding Binder