OpenCL 学习step by step (2) 一个简单的OpenCL的程序
2013-08-15 22:28
447 查看
转自:/article/4843186.html
作者:迈克老狼2012
现在,我们开始写一个简单的OpenCL程序,计算两个数组相加的和,放到另一个数组中去。程序用cpu和gpu分别计算,最后验证它们是否相等。OpenCL程序的流程大致如下:

下面是source code中的主要代码:
int main(int argc, char* argv[])
{
//在host内存中创建三个缓冲区
float *buf1 = 0;
float *buf2 = 0;
float *buf = 0;
buf1 =(float *)malloc(BUFSIZE * sizeof(float));
buf2 =(float *)malloc(BUFSIZE * sizeof(float));
buf =(float *)malloc(BUFSIZE * sizeof(float));
//用一些随机值初始化buf1和buf2的内容
int i;
srand( (unsigned)time( NULL ) );
for(i = 0; i < BUFSIZE; i++)
buf1[i] = rand()%65535;
srand( (unsigned)time( NULL ) +1000);
for(i = 0; i < BUFSIZE; i++)
buf2[i] = rand()%65535;
//cpu计算buf1,buf2的和
for(i = 0; i < BUFSIZE; i++)
buf[i] = buf1[i] + buf2[i];
cl_uint status;
cl_platform_id platform;
//创建平台对象
status = clGetPlatformIDs( 1, &platform, NULL );
注意:如果我们系统中安装不止一个opencl平台,比如我的os中,有intel和amd两家opencl平台,用上面这行代码,有可能会出错,因为它得到了intel的opencl平台,而intel的平台只支持cpu,而我们后面的操作都是基于gpu,这时我们可以用下面的代码,得到AMD的opencl平台。
cl_device_id device;
//创建GPU设备
clGetDeviceIDs( platform, CL_DEVICE_TYPE_GPU,
1,
&device,
NULL);
//创建context
cl_context context = clCreateContext( NULL,
1,
&device,
NULL, NULL, NULL);
//创建命令队列
cl_command_queue queue = clCreateCommandQueue( context,
device,
CL_QUEUE_PROFILING_ENABLE, NULL );
//创建三个OpenCL内存对象,并把buf1的内容通过隐式拷贝的方式
//buf1内容拷贝到clbuf1,buf2的内容通过显示拷贝的方式拷贝到clbuf2
cl_mem clbuf1 = clCreateBuffer(context,
CL_MEM_READ_ONLY | CL_MEM_COPY_HOST_PTR,
BUFSIZE*sizeof(cl_float),buf1,
NULL );
cl_mem clbuf2 = clCreateBuffer(context,
CL_MEM_READ_ONLY ,
BUFSIZE*sizeof(cl_float),NULL,
NULL );
cl_event writeEvt;
status = clEnqueueWriteBuffer(queue, clbuf2, 1,
0, BUFSIZE*sizeof(cl_float), buf2, 0, 0, 0);
上面这行代码把buf2中的内容拷贝到clbuf2,因为buf2位于host端,clbuf2位于device端,所以这个函数会执行一次host到device的传输操作,或者说一次system memory到video memory的拷贝操作,所以我在该函数的后面放置了clFush函数,表示把command queue中的所有命令提交到device(注意:该命令并不保证命令执行完成),所以我们调用函数waitForEventAndRelease来等待write缓冲的完成,waitForEventAndReleae 是一个用户定义的函数,它的内容如下,主要代码就是通过event来查询我们的操作是否完成,没完成的话,程序就一直block在这行代码处,另外我们也可以用opencl中内置的函数clWaitForEvents来代替clFlush和waitForEventAndReleae。
status = clFlush(queue);
//等待数据传输完成再继续往下执行
waitForEventAndRelease(&writeEvt);
cl_mem buffer = clCreateBuffer( context,
CL_MEM_WRITE_ONLY,
BUFSIZE * sizeof(cl_float),
NULL, NULL );
kernel文件中放的是gpu中执行的代码,它被放在一个单独的文件add.cl中,本程序中kernel代码非常简单,只是执行两个数组相加。kernel的代码为:
//kernel文件为add.cl
const char * filename = "add.cl";
std::string sourceStr;
status = convertToString(filename, sourceStr);
convertToString也是用户定义的函数,该函数把kernel源文件读入到一个string中,它的代码如下:
const char * source = sourceStr.c_str();
size_t sourceSize[] = { strlen(source) };
//创建程序对象
cl_program program = clCreateProgramWithSource(
context,
1,
&source,
sourceSize,
NULL);
//编译程序对象
status = clBuildProgram( program, 1, &device, NULL, NULL, NULL );
if(status != 0)
{
printf("clBuild failed:%d\n", status);
char tbuf[0x10000];
clGetProgramBuildInfo(program, device, CL_PROGRAM_BUILD_LOG, 0x10000, tbuf, NULL);
printf("\n%s\n", tbuf);
return -1;
}
//创建Kernel对象
cl_kernel kernel = clCreateKernel( program, "vecadd", NULL );
//设置Kernel参数
cl_int clnum = BUFSIZE;
clSetKernelArg(kernel, 0, sizeof(cl_mem), (void*) &clbuf1);
clSetKernelArg(kernel, 1, sizeof(cl_mem), (void*) &clbuf2);
clSetKernelArg(kernel, 2, sizeof(cl_mem), (void*) &buffer);
注意:在执行kernel时候,我们只设置了global work items数量,没有设置group size,这时候,系统会使用默认的work group size,通常可能是256之类的。
//执行kernel,Range用1维,work itmes size为BUFSIZE
cl_event ev;
size_t global_work_size = BUFSIZE;
clEnqueueNDRangeKernel( queue,
kernel,
1,
NULL,
&global_work_size,
NULL, 0, NULL, &ev);
status = clFlush( queue );
waitForEventAndRelease(&ev);
//数据拷回host内存
cl_float *ptr;
cl_event mapevt;
ptr = (cl_float *) clEnqueueMapBuffer( queue,
buffer,
CL_TRUE,
CL_MAP_READ,
0,
BUFSIZE * sizeof(cl_float),
0, NULL, NULL, NULL );
status = clFlush( queue );
waitForEventAndRelease(&mapevt);
//结果验证,和cpu计算的结果比较
if(!memcmp(buf, ptr, BUFSIZE))
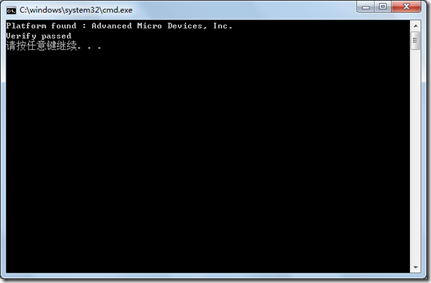
printf("Verify passed\n");
else printf("verify failed");
if(buf)
free(buf);
if(buf1)
free(buf1);
if(buf2)
free(buf2);
程序结束后,这些opencl对象一般会自动释放,但是为了程序完整,养成一个好习惯,这儿我加上了手动释放opencl对象的代码。
//删除OpenCL资源对象
clReleaseMemObject(clbuf1);
clReleaseMemObject(clbuf2);
clReleaseMemObject(buffer);
clReleaseProgram(program);
clReleaseCommandQueue(queue);
clReleaseContext(context);
return 0;
}
程序执行后的界面如下:
完整的代码请参考:
工程文件gclTutorial1
代码下载:
http://files.cnblogs.com/mikewolf2002/gclTutorial.zip
作者:迈克老狼2012
现在,我们开始写一个简单的OpenCL程序,计算两个数组相加的和,放到另一个数组中去。程序用cpu和gpu分别计算,最后验证它们是否相等。OpenCL程序的流程大致如下:

下面是source code中的主要代码:
int main(int argc, char* argv[])
{
//在host内存中创建三个缓冲区
float *buf1 = 0;
float *buf2 = 0;
float *buf = 0;
buf1 =(float *)malloc(BUFSIZE * sizeof(float));
buf2 =(float *)malloc(BUFSIZE * sizeof(float));
buf =(float *)malloc(BUFSIZE * sizeof(float));
//用一些随机值初始化buf1和buf2的内容
int i;
srand( (unsigned)time( NULL ) );
for(i = 0; i < BUFSIZE; i++)
buf1[i] = rand()%65535;
srand( (unsigned)time( NULL ) +1000);
for(i = 0; i < BUFSIZE; i++)
buf2[i] = rand()%65535;
//cpu计算buf1,buf2的和
for(i = 0; i < BUFSIZE; i++)
buf[i] = buf1[i] + buf2[i];
cl_uint status;
cl_platform_id platform;
//创建平台对象
status = clGetPlatformIDs( 1, &platform, NULL );
注意:如果我们系统中安装不止一个opencl平台,比如我的os中,有intel和amd两家opencl平台,用上面这行代码,有可能会出错,因为它得到了intel的opencl平台,而intel的平台只支持cpu,而我们后面的操作都是基于gpu,这时我们可以用下面的代码,得到AMD的opencl平台。
cl_uint numPlatforms;
std::string platformVendor;
status = clGetPlatformIDs(0, NULL, &numPlatforms);
if(status != CL_SUCCESS)
{
return 0;
}
if (0 < numPlatforms)
{
cl_platform_id* platforms = new cl_platform_id[numPlatforms];
status = clGetPlatformIDs(numPlatforms, platforms, NULL);

char platformName[100];
for (unsigned i = 0; i < numPlatforms; ++i)
{
status = clGetPlatformInfo(platforms[i],
CL_PLATFORM_VENDOR,
sizeof(platformName),
platformName,
NULL);

platform = platforms[i];
platformVendor.assign(platformName);

if (!strcmp(platformName, "Advanced Micro Devices, Inc."))
{
break;
}
}

std::cout << "Platform found : " << platformName << "\n";
delete[] platforms;
}
cl_device_id device;
//创建GPU设备
clGetDeviceIDs( platform, CL_DEVICE_TYPE_GPU,
1,
&device,
NULL);
//创建context
cl_context context = clCreateContext( NULL,
1,
&device,
NULL, NULL, NULL);
//创建命令队列
cl_command_queue queue = clCreateCommandQueue( context,
device,
CL_QUEUE_PROFILING_ENABLE, NULL );
//创建三个OpenCL内存对象,并把buf1的内容通过隐式拷贝的方式
//buf1内容拷贝到clbuf1,buf2的内容通过显示拷贝的方式拷贝到clbuf2
cl_mem clbuf1 = clCreateBuffer(context,
CL_MEM_READ_ONLY | CL_MEM_COPY_HOST_PTR,
BUFSIZE*sizeof(cl_float),buf1,
NULL );
cl_mem clbuf2 = clCreateBuffer(context,
CL_MEM_READ_ONLY ,
BUFSIZE*sizeof(cl_float),NULL,
NULL );
cl_event writeEvt;
status = clEnqueueWriteBuffer(queue, clbuf2, 1,
0, BUFSIZE*sizeof(cl_float), buf2, 0, 0, 0);
上面这行代码把buf2中的内容拷贝到clbuf2,因为buf2位于host端,clbuf2位于device端,所以这个函数会执行一次host到device的传输操作,或者说一次system memory到video memory的拷贝操作,所以我在该函数的后面放置了clFush函数,表示把command queue中的所有命令提交到device(注意:该命令并不保证命令执行完成),所以我们调用函数waitForEventAndRelease来等待write缓冲的完成,waitForEventAndReleae 是一个用户定义的函数,它的内容如下,主要代码就是通过event来查询我们的操作是否完成,没完成的话,程序就一直block在这行代码处,另外我们也可以用opencl中内置的函数clWaitForEvents来代替clFlush和waitForEventAndReleae。
//等待事件完成
int waitForEventAndRelease(cl_event *event)
{
cl_int status = CL_SUCCESS;
cl_int eventStatus = CL_QUEUED;
while(eventStatus != CL_COMPLETE)
{
status = clGetEventInfo(
*event,
CL_EVENT_COMMAND_EXECUTION_STATUS,
sizeof(cl_int),
&eventStatus,
NULL);
}

status = clReleaseEvent(*event);

return 0;
}
status = clFlush(queue);
//等待数据传输完成再继续往下执行
waitForEventAndRelease(&writeEvt);
cl_mem buffer = clCreateBuffer( context,
CL_MEM_WRITE_ONLY,
BUFSIZE * sizeof(cl_float),
NULL, NULL );
kernel文件中放的是gpu中执行的代码,它被放在一个单独的文件add.cl中,本程序中kernel代码非常简单,只是执行两个数组相加。kernel的代码为:
__kernel void vecadd(__global const float* A, __global const float* B, __global float* C)
{
int id = get_global_id(0);
C[id] = A[id] + B[id];
}
//kernel文件为add.cl
const char * filename = "add.cl";
std::string sourceStr;
status = convertToString(filename, sourceStr);
convertToString也是用户定义的函数,该函数把kernel源文件读入到一个string中,它的代码如下:
//把文本文件读入一个string中,用来读入kernel源文件
int convertToString(const char *filename, std::string& s)
{
size_t size;
char*  str;

std::fstream f(filename, (std::fstream::in | std::fstream::binary));

if(f.is_open())
{
size_t fileSize;
f.seekg(0, std::fstream::end);
size = fileSize = (size_t)f.tellg();
f.seekg(0, std::fstream::beg);

str = new char[size+1];
if(!str)
{
f.close();
return NULL;
}

f.read(str, fileSize);
f.close();
str[size] = '\0';

s = str;
delete[] str;
return 0;
}
printf("Error: Failed to open file %s\n", filename);
return 1;
}
const char * source = sourceStr.c_str();
size_t sourceSize[] = { strlen(source) };
//创建程序对象
cl_program program = clCreateProgramWithSource(
context,
1,
&source,
sourceSize,
NULL);
//编译程序对象
status = clBuildProgram( program, 1, &device, NULL, NULL, NULL );
if(status != 0)
{
printf("clBuild failed:%d\n", status);
char tbuf[0x10000];
clGetProgramBuildInfo(program, device, CL_PROGRAM_BUILD_LOG, 0x10000, tbuf, NULL);
printf("\n%s\n", tbuf);
return -1;
}
//创建Kernel对象
cl_kernel kernel = clCreateKernel( program, "vecadd", NULL );
//设置Kernel参数
cl_int clnum = BUFSIZE;
clSetKernelArg(kernel, 0, sizeof(cl_mem), (void*) &clbuf1);
clSetKernelArg(kernel, 1, sizeof(cl_mem), (void*) &clbuf2);
clSetKernelArg(kernel, 2, sizeof(cl_mem), (void*) &buffer);
注意:在执行kernel时候,我们只设置了global work items数量,没有设置group size,这时候,系统会使用默认的work group size,通常可能是256之类的。
//执行kernel,Range用1维,work itmes size为BUFSIZE
cl_event ev;
size_t global_work_size = BUFSIZE;
clEnqueueNDRangeKernel( queue,
kernel,
1,
NULL,
&global_work_size,
NULL, 0, NULL, &ev);
status = clFlush( queue );
waitForEventAndRelease(&ev);
//数据拷回host内存
cl_float *ptr;
cl_event mapevt;
ptr = (cl_float *) clEnqueueMapBuffer( queue,
buffer,
CL_TRUE,
CL_MAP_READ,
0,
BUFSIZE * sizeof(cl_float),
0, NULL, NULL, NULL );
status = clFlush( queue );
waitForEventAndRelease(&mapevt);
//结果验证,和cpu计算的结果比较
if(!memcmp(buf, ptr, BUFSIZE))
printf("Verify passed\n");
else printf("verify failed");
if(buf)
free(buf);
if(buf1)
free(buf1);
if(buf2)
free(buf2);
程序结束后,这些opencl对象一般会自动释放,但是为了程序完整,养成一个好习惯,这儿我加上了手动释放opencl对象的代码。
//删除OpenCL资源对象
clReleaseMemObject(clbuf1);
clReleaseMemObject(clbuf2);
clReleaseMemObject(buffer);
clReleaseProgram(program);
clReleaseCommandQueue(queue);
clReleaseContext(context);
return 0;
}
程序执行后的界面如下:

完整的代码请参考:
工程文件gclTutorial1
代码下载:
http://files.cnblogs.com/mikewolf2002/gclTutorial.zip

相关文章推荐
- OpenCL 学习step by step (2) 一个简单的OpenCL的程序
- OpenCL 学习step by step (2) 一个简单的OpenCL的程序
- 深入浅出C#2008从入门到提高Step By Step(三)一个简单的控制台程序
- Android周学习Step By Step(1)--简单介绍环境搭建
- [ASP.NET 设计模式] 用Visual Studio2010搭建一个简单的分层结构示例Step by Step —— 01 准备工作
- shell学习笔记(2) 一个简单的shell脚本程序
- 32位汇编语言学习笔记(28)--一个简单的光标控制程序
- OpenCL 学习step by step (3) 存储kernel文件为二进制
- 【Rebol 学习笔记】第一篇:编写一个简单的 CGI 程序
- OpenCL 学习step by step (4) 读入二进制kernel文件
- OpenCL 学习step by step (4) 读入二进制kernel文件
- UNIX环境编程学习笔记-----编程实例------一个简单的服务器端和客户端程序
- 从零开始学习OpenCL开发(二)一个最简单的示例与简单性能分析
- 从零开始学习OpenCL开发(二)一个最简单的示例与简单性能分析
- OpenCL 学习step by step (3) 存储kernel文件为二进制
- 菜鸟的 PHP 学习之路(三):一个简单的连接数据库并查询的小程序(1)
- 整理一下当年的学习笔记之:初步学习freemarker ,先做一个简单的HelloWord程序!
- Qt Quick学习---------------构建一个简单的qml程序
- ASP.NET MVC3 Step By Step 学习笔记 (2)——创建简单MVC3应用程序
- WCF学习之旅 创建一个简单的WCF程序