linux 内核移植 2.6.35.4 到s3c2440
2013-08-09 15:51
375 查看
硬件平台:FL2440
主机平台:Ubuntu 11.04
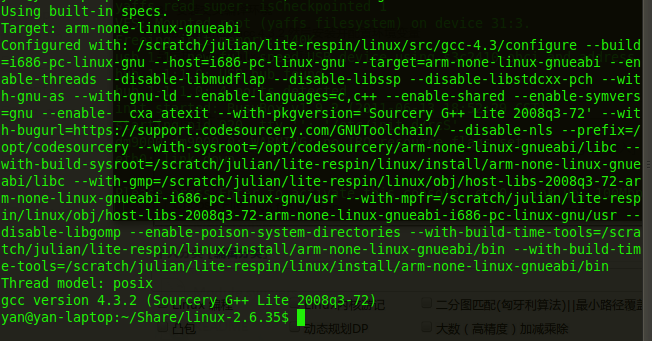
交叉编译器:arm-linux-gcc 4.3.2
本来是想移植最新的内核2.6.39但是总是在编译快完成的时候报错,有人说是新的内核对arm平台的支持不好,所以就降低了一下版本,这里移植2.6.35.4内核
1、下载
解压内核
从官网上下载linux-2.6.35的内核, ftp://ftp.kernel.org/pub/linux/kernel/v2.6/ ,文件不大,约85M。
新建一个工作目录s3c2440,将内核源码包拷贝至工作目录下,再解压。
2、移植yaffs2驱动
下载最新的驱动点击下载 解压在工作目录s3c2440下
进入yaffs2: cd yaffs2
给内核打补丁: ./patch-ker.sh c ../linux-2.6.35

3、安装交叉编译环境
下载arm-linux-gcc 4.3.2,然后安装并配置环境变量
最后执行arm-linux-gcc -v查看
1、修改机器码
飞凌开发板的bootloader默认的机器码是193,所以我们在使用smdk2440机器的时候,需要修
改机器码。修改内核2.6.35.3中的arch/arm /tools/mach-types。
删掉
s3c2410 ARCH_S3C2410 S3C2410 182
然后将
s3c2440 ARCH_S3C2440 S3C2440 362
修改为
s3c2440 ARCH_S3C2440 S3C2440 193
2、指定目标板machine、编译器和编译器路径
修改linux-2.6.35.3/Makefile,将
ARCH ?= $(SUBARCH)
CROSS_COMPILE ?=
修改成ARCH ?= arm
CROSS_COMPILE ?= /opt/arm/4.3.2/bin/arm-linux-
注意:CROSS_COMPILE是指交叉编译器的路径,该路径一定要完整,否则最后make
zImage时提示文件不存在。
3、增加devfs文件管理器的支持
我们所用的文件系统使用的是devfs文件管理器。修改fs/Kconfig,
找到
menu
"Pseudo filesystems"
添加如下语句:
config
DEVFS_FS
bool "/dev file system support (OBSOLETE)"
default y
config
DEVFS_MOUNT
bool
"Automatically mount at boot"
default
y
depends
on DEVFS_FS
帮助理解:Kconfig就是对应着内核的配置菜单。假如要想添加新的驱动到内核的源码中,能够修改Kconfig,
这样就能够选择这个驱动,假如想使这个驱动被编译,要修改Makefile。
4、修改晶振频率( 可解决打印信息乱码问题 )
文件:arch/arm/mach-s3c2440/mach-smdk2440.c
/*s3c24xx_init_clocks(16934400);*/ s3c24xx_init_clocks(12000000);
5、修改MTD分区
[cpp]
view plaincopy
static struct mtd_partition smdk_default_nand_part[] = {
[0] = {
.name = "Boot",
.size = 0x00100000,
.offset = 0
},
[1] = {
.name = "MyApp",
.size = 0x003c0000,
.offset = 0x00140000,
},
[2] = {
.name = "Kernel",
.size = 0x00300000,
.offset = 0x00500000,
},
[3] = {
.name = "fs_yaffs",
.size = 0x0f000000, //240M
.offset = 0x00800000,
},
/*[4] = {
.name = "WINCE",
.size = 0x03c00000,
.offset = 0x04400000,
}
*/
};
具体参考http://blog.csdn.net/yming0221/article/details/6566551
6、关闭ECC校验
文件:drivers/mtd/nand/s3c2410.c
函数:s3c2410_nand_init_chip
/*chip->ecc.mode
= NAND_ECC_SOFT; */ chip->ecc.mode = NAND_ECC_NONE;
问题:关于ECC:ECC是“Error Correcting Code”的简写,中文名称是“错误检查和纠正”。ECC是一种能够实现
“错误检查和纠正”的技术,ECC内存就是应用了这种技术的内存,一般多应用在服务器及图形工作站上,这将使整个
电脑系统在工作时更趋于安全稳定。此处为避免容易出错,将ECC关闭。
7、修改nandflash驱动,支持K9F1G08的nandflash
修改drivers/mtd/nand下面的nand_bbt.c 文件:
[cpp]
view plaincopy
static struct nand_bbt_descr largepage_memorybased = {
.options = 0,
.offs = 0,
.len = 1, // 原数值为2,支持2K每页的flash修改为1。K9F1G08,K9F2G08是2k每页的flash
.pattern = scan_ff_pattern
};
static struct nand_bbt_descr largepage_flashbased = {
.options = NAND_BBT_SCAN2NDPAGE,
.offs = 0,
.len = 1, //原数值为2,支持2K每页的flash修改为1。K9F1G08,K9F2G08是2k每页的flash
.pattern = scan_ff_pattern
};
8、下面,开始配置内核。
进入linux-2.6.35目录,把s3c2410的默认配置写入config文件。
make
s3c2410_defconfig
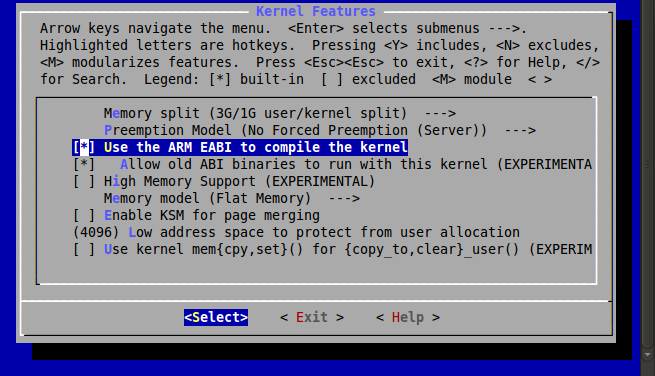
make
menuconfig
配置内核特点使用ARM EABI编译
配置文件系统选项
配置yaffs2文件系统
修改配置如下:
File
systems --->
[*] Miscellaneous filesystems --->
<*> YAFFS2 file system support
-*- 512 byte / page devices
-*- 2048 byte (or larger) / page devices
[*] Autoselect yaffs2 format
[*] Cache short names in RAM
配置cpu相关选项
修改配置如下:
System
Type --->
S3C2440 Machines --->
[*] SMDK2440
[*] SMDK2440 with S3C2440 CPU module
去掉S3C2400
Machines、S3C2410
Machines、S3C2412
Machines、S3C2442
Machines的所有选项 ,
否则会报错。如果现在编译内核,下载到开发板中,内核就可以正常启动了.有了雏形,继续移植设备驱动。
这里,内核选项*代表编译至内核,M代表编译为模块 。
9、移植USB
host驱动
在这个版本的linux内核,已经对USB驱动进行来很好的支持,仅仅需要修改配置。
Device
Drivers --->
[*] USB support --->
{*} Support for Host-side USB
[*] USB device filesystem (DEPRECATED)
[*] USB device class-devices (DEPRECATED)
<*> OHCI HCD support
<*> USB Mass Storage support
[*] HID Devices --->
{*} Generic HID support
[*] /dev/hidraw raw HID device support
SCSI device support --->
<*> SCSI device support
[*] legacy /proc/scsi/ support
<*> SCSI disk support
<*> SCSI tape support
10、移植RTC驱动
在这个版本的linux内核,已经对RTC驱动进行来很好的支持,不需要修改配置。相应配置如下
Device
Drivers --->
<*> Real Time Clock --->
[*] Set system time from RTC on startup and resume
(rtc0) RTC used to set the system time
[ ] RTC debug support
*** RTC interfaces ***
[*] /sys/class/rtc/rtcN (sysfs)
[*] /proc/driver/rtc (procfs for rtc0)
[*] /dev/rtcN (character devices)
<*> Samsung S3C series SoC RTC
然后添加对设备的支持
打开arch/arm/mach-s3c2440/mach-smdk2440.c ,添加设备,代码如下:
[cpp]
view plaincopy
static struct platform_device *smdk2440_devices[] __initdata = {
&s3c_device_ohci,
&s3c_device_lcd,
&s3c_device_wdt,
&s3c_device_i2c0,
&s3c_device_iis,
&s3c_device_rtc,
};
11、移植UDA1341驱动
在平台上添加和配置UDA1341:
修改arch/arm/mach-s3c2440/mach-smdk2440.c ,在开始添加头文件
#include
<sound/s3c24xx_uda134x.h>
#include
<mach/gpio-fns.h>
[cpp]
view plaincopy
static struct s3c24xx_uda134x_platform_data s3c24xx_uda134x_data = {
.l3_clk = S3C2410_GPB(4),
.l3_data = S3C2410_GPB(3),
.l3_mode = S3C2410_GPB(2),
.model = UDA134X_UDA1341,
};
static struct platform_device s3c24xx_uda134x = {
.name = "s3c24xx_uda134x",
.dev = {
.platform_data = &s3c24xx_uda134x_data,
}
};
把设备添加到平台当中
[cpp]
view plaincopy
static struct platform_device *smdk2440_devices[] __initdata = {
&s3c_device_ohci,
&s3c_device_lcd,
&s3c_device_wdt,
&s3c_device_i2c0,
&s3c_device_iis,
&s3c_device_rtc,
&s3c24xx_uda134x,
};
内核配置如下
Device
Drivers --->
<*> Sound card support --->
<*> Advanced Linux Sound Architecture --->
<*> OSS Mixer API
<*> OSS PCM (digital audio) API
[*] OSS PCM (digital audio) API - Include plugin system
[*] Support old ALSA API
[*] Verbose procfs contents
[*] Verbose printk
[*] Generic sound devices --->
<*> ALSA for SoC audio support --->
<*> SoC Audio for the Samsung S3C24XX chips
<*> SoC I2S Audio support UDA134X wired to a S3C24XX
12、移植DM9000驱动
a、修改 drivers/net/dm9000.c 文件:
头文件增加:
#include
<mach/regs-gpio.h>
#include
<mach/irqs.h>
#include
<mach/hardware.h>
在dm9000_probe 函数 开始增加:
[cpp]
view plaincopy
unsigned char ne_def_eth_mac_addr[]={0x00,0x12,0x34,0x56,0x80,0x49};
static void *bwscon;
static void *gpfcon;
static void *extint0;
static void *intmsk;
#define BWSCON (0x48000000)
#define GPFCON (0x56000050)
#define EXTINT0 (0x56000088)
#define INTMSK (0x4A000008)
bwscon=ioremap_nocache(BWSCON,0x0000004);
gpfcon=ioremap_nocache(GPFCON,0x0000004);
extint0=ioremap_nocache(EXTINT0,0x0000004);
intmsk=ioremap_nocache(INTMSK,0x0000004);
writel(readl(bwscon)|0xc0000,bwscon);
writel( (readl(gpfcon) & ~(0x3 << 14)) | (0x2 << 14), gpfcon);
writel( readl(gpfcon) | (0x1 << 7), gpfcon); // Disable pull-up
writel( (readl(extint0) & ~(0xf << 28)) | (0x4 << 28), extint0); //rising edge
writel( (readl(intmsk)) & ~0x80, intmsk);
在这个函数的最后需要修改:
[cpp]
view plaincopy
if (!is_valid_ether_addr(ndev->dev_addr)) {
/* try reading from mac */
mac_src = "chip";
for (i = 0; i < 6; i++)
//ndev->dev_addr[i] = ior(db, i+DM9000_PAR);
ndev->dev_addr[i] = ne_def_eth_mac_addr[i];
}
b、修改arch/arm/mach-s3c2440/mach-smdk2440.c ,添加设备
[cpp]
view plaincopy
static struct platform_device *smdk2440_devices[] __initdata = {
&s3c_device_ohci,
&s3c_device_lcd,
&s3c_device_wdt,
&s3c_device_i2c0,
&s3c_device_iis,
&s3c_device_rtc,
&s3c24xx_uda134x,
&s3c_device_dm9000,
};
c、修改 arch/arm/plat-s3c24xx/devs.c
添加头文件
#include
<linux/dm9000.h>
添加以下代码
[cpp]
view plaincopy
static struct resource s3c_dm9000_resource[] = {
[0] = {
.start = S3C24XX_PA_DM9000,
.end = S3C24XX_PA_DM9000+ 0x3,
.flags = IORESOURCE_MEM
},
[1]={
.start = S3C24XX_PA_DM9000 + 0x4, //CMD pin is A2
.end = S3C24XX_PA_DM9000 + 0x4 + 0x7c,
.flags = IORESOURCE_MEM
},
[2] = {
.start = IRQ_EINT7,
.end = IRQ_EINT7,
.flags = IORESOURCE_IRQ
},
};
static struct dm9000_plat_data s3c_device_dm9000_platdata = {
.flags= DM9000_PLATF_16BITONLY,
};
struct platform_device s3c_device_dm9000 = {
.name= "dm9000",
.id= 0,
.num_resources= ARRAY_SIZE(s3c_dm9000_resource),
.resource= s3c_dm9000_resource,
.dev= {
.platform_data = &s3c_device_dm9000_platdata,
}
};
EXPORT_SYMBOL(s3c_device_dm9000);
d、修改 arch/arm/plat-samsung/include/plat/devs.h
45行附近,添加
[cpp]
view plaincopy
extern struct platform_device s3c_device_dm9000;
e、修改arch/arm/mach-s3c2410/include/mach/map.h 文件
/*
DM9000 */
#define
S3C24XX_PA_DM9000 0x20000300
#define
S3C24XX_VA_DM9000 0xE0000000
13、启动画面显示小企鹅的方法
配置内核 ,下面是必选项
Device Drivers--->
Graphics support --->
<*> Support for frame buffer devices
<*> S3C2410 LCD framebuffer support ,multi support!
Console display driver support --->
<*> Framebuffer Console support
Logo configuration --->
[*] Bootup logo
[*] Standard 224-color Linux logo
14、3.5寸LCD显示的移植
2.6.34内核中已经支持
15、修改uart2为普通串口以及测试程序
修改arch/arm/mach-s3c2440/mach-smdk2440.c 中的uart2的配置,修改后如下:
[cpp]
view plaincopy
static struct s3c2410_uartcfg smdk2440_uartcfgs[] __initdata = {
[0] = {
.hwport = 0,
.flags = 0,
.ucon = 0x3c5,
.ulcon = 0x03,
.ufcon = 0x51,
},
[1] = {
.hwport = 1,
.flags = 0,
.ucon = 0x3c5,
.ulcon = 0x03,
.ufcon = 0x51,
},
/* IR port */
[2] = {
.hwport = 2,
.flags = 0,
.ucon = 0x3c5,
.ulcon = 0x03,/*fatfish 0x43*/
.ufcon = 0x51,
}
};
在drivers/serial/samsung.c 中添加对uart2控制器的配置,配置为普通串口。
添加头文件:
#include
<linux/gpio.h>
#include
<mach/regs-gpio.h>
在static
int s3c24xx_serial_startup(struct uart_port *port)函数中,添加
[cpp]
view plaincopy
if (port->line == 2) {
s3c2410_gpio_cfgpin(S3C2410_GPH(6), S3C2410_GPH6_TXD2);
s3c2410_gpio_pullup(S3C2410_GPH(6), 1);
s3c2410_gpio_cfgpin(S3C2410_GPH(7), S3C2410_GPH7_RXD2);
s3c2410_gpio_pullup(S3C2410_GPH(7), 1);
}
16、移植看门狗
修改配置
Device
Drivers --->
[*] Watchdog Timer Support --->
<*> S3C2410 Watchdog
最后:make
zImage
最后编译出来的zImage就2.1M左右。
烧写内核,启动成功

不过,此时,显示屏显示还有点问题,出现上下两栏。解决方法如下:
修改mach-smdk2440.c中
[cpp]
view plaincopy
static struct s3c2410fb_display smdk2440_lcd_cfg __initdata = {
/* Config for 320x240 LCD */
.lcdcon5 = S3C2410_LCDCON5_FRM565 |
S3C2410_LCDCON5_INVVLINE |
S3C2410_LCDCON5_INVVFRAME |
S3C2410_LCDCON5_PWREN |
S3C2410_LCDCON5_HWSWP,
.type = S3C2410_LCDCON1_TFT,
.width = 320,
.height = 240,
.pixclock = 270000,
.xres = 320,
.yres = 240,
.bpp = 16,
.left_margin =8,
.right_margin = 5,
.hsync_len = 63,
.upper_margin = 15,
.lower_margin = 3,
.vsync_len = 5,
};
并且将.lpcsel
= ((0xCE6) & ~7) | 1<<4,注释掉
[cpp]
view plaincopy
static struct s3c2410fb_mach_info smdk2440_fb_info __initdata = {
.displays = &smdk2440_lcd_cfg,
.num_displays = 1,
.default_display = 0,
#if 0
/* currently setup by downloader */
.gpccon = 0xaa940659,
.gpccon_mask = 0xffffffff,
.gpcup = 0x0000ffff,
.gpcup_mask = 0xffffffff,
.gpdcon = 0xaa84aaa0,
.gpdcon_mask = 0xffffffff,
.gpdup = 0x0000faff,
.gpdup_mask = 0xffffffff,
#endif
//.lpcsel = ((0xCE6) & ~7) | 1<<4,
};
重新编译即可。
至此,2.6.35.4内核移植成功。
出处http://blog.csdn.net/yming0221/article/details/6604616
主机平台:Ubuntu 11.04
交叉编译器:arm-linux-gcc 4.3.2
本来是想移植最新的内核2.6.39但是总是在编译快完成的时候报错,有人说是新的内核对arm平台的支持不好,所以就降低了一下版本,这里移植2.6.35.4内核
一、准备工作
1、下载解压内核
从官网上下载linux-2.6.35的内核, ftp://ftp.kernel.org/pub/linux/kernel/v2.6/ ,文件不大,约85M。
新建一个工作目录s3c2440,将内核源码包拷贝至工作目录下,再解压。
2、移植yaffs2驱动
下载最新的驱动点击下载 解压在工作目录s3c2440下
进入yaffs2: cd yaffs2
给内核打补丁: ./patch-ker.sh c ../linux-2.6.35
3、安装交叉编译环境
下载arm-linux-gcc 4.3.2,然后安装并配置环境变量
最后执行arm-linux-gcc -v查看
二、移植
1、修改机器码飞凌开发板的bootloader默认的机器码是193,所以我们在使用smdk2440机器的时候,需要修
改机器码。修改内核2.6.35.3中的arch/arm /tools/mach-types。
删掉
s3c2410 ARCH_S3C2410 S3C2410 182
然后将
s3c2440 ARCH_S3C2440 S3C2440 362
修改为
s3c2440 ARCH_S3C2440 S3C2440 193
2、指定目标板machine、编译器和编译器路径
修改linux-2.6.35.3/Makefile,将
ARCH ?= $(SUBARCH)
CROSS_COMPILE ?=
修改成ARCH ?= arm
CROSS_COMPILE ?= /opt/arm/4.3.2/bin/arm-linux-
注意:CROSS_COMPILE是指交叉编译器的路径,该路径一定要完整,否则最后make
zImage时提示文件不存在。
3、增加devfs文件管理器的支持
我们所用的文件系统使用的是devfs文件管理器。修改fs/Kconfig,
找到
menu
"Pseudo filesystems"
添加如下语句:
config
DEVFS_FS
bool "/dev file system support (OBSOLETE)"
default y
config
DEVFS_MOUNT
bool
"Automatically mount at boot"
default
y
depends
on DEVFS_FS
帮助理解:Kconfig就是对应着内核的配置菜单。假如要想添加新的驱动到内核的源码中,能够修改Kconfig,
这样就能够选择这个驱动,假如想使这个驱动被编译,要修改Makefile。
4、修改晶振频率( 可解决打印信息乱码问题 )
文件:arch/arm/mach-s3c2440/mach-smdk2440.c
/*s3c24xx_init_clocks(16934400);*/ s3c24xx_init_clocks(12000000);
5、修改MTD分区
[cpp]
view plaincopy
static struct mtd_partition smdk_default_nand_part[] = {
[0] = {
.name = "Boot",
.size = 0x00100000,
.offset = 0
},
[1] = {
.name = "MyApp",
.size = 0x003c0000,
.offset = 0x00140000,
},
[2] = {
.name = "Kernel",
.size = 0x00300000,
.offset = 0x00500000,
},
[3] = {
.name = "fs_yaffs",
.size = 0x0f000000, //240M
.offset = 0x00800000,
},
/*[4] = {
.name = "WINCE",
.size = 0x03c00000,
.offset = 0x04400000,
}
*/
};
具体参考http://blog.csdn.net/yming0221/article/details/6566551
6、关闭ECC校验
文件:drivers/mtd/nand/s3c2410.c
函数:s3c2410_nand_init_chip
/*chip->ecc.mode
= NAND_ECC_SOFT; */ chip->ecc.mode = NAND_ECC_NONE;
问题:关于ECC:ECC是“Error Correcting Code”的简写,中文名称是“错误检查和纠正”。ECC是一种能够实现
“错误检查和纠正”的技术,ECC内存就是应用了这种技术的内存,一般多应用在服务器及图形工作站上,这将使整个
电脑系统在工作时更趋于安全稳定。此处为避免容易出错,将ECC关闭。
7、修改nandflash驱动,支持K9F1G08的nandflash
修改drivers/mtd/nand下面的nand_bbt.c 文件:
[cpp]
view plaincopy
static struct nand_bbt_descr largepage_memorybased = {
.options = 0,
.offs = 0,
.len = 1, // 原数值为2,支持2K每页的flash修改为1。K9F1G08,K9F2G08是2k每页的flash
.pattern = scan_ff_pattern
};
static struct nand_bbt_descr largepage_flashbased = {
.options = NAND_BBT_SCAN2NDPAGE,
.offs = 0,
.len = 1, //原数值为2,支持2K每页的flash修改为1。K9F1G08,K9F2G08是2k每页的flash
.pattern = scan_ff_pattern
};
8、下面,开始配置内核。
进入linux-2.6.35目录,把s3c2410的默认配置写入config文件。
make
s3c2410_defconfig
make
menuconfig
配置内核特点使用ARM EABI编译
配置文件系统选项
配置yaffs2文件系统
修改配置如下:
File
systems --->
[*] Miscellaneous filesystems --->
<*> YAFFS2 file system support
-*- 512 byte / page devices
-*- 2048 byte (or larger) / page devices
[*] Autoselect yaffs2 format
[*] Cache short names in RAM
配置cpu相关选项
修改配置如下:
System
Type --->
S3C2440 Machines --->
[*] SMDK2440
[*] SMDK2440 with S3C2440 CPU module
去掉S3C2400
Machines、S3C2410
Machines、S3C2412
Machines、S3C2442
Machines的所有选项 ,
否则会报错。如果现在编译内核,下载到开发板中,内核就可以正常启动了.有了雏形,继续移植设备驱动。
这里,内核选项*代表编译至内核,M代表编译为模块 。
9、移植USB
host驱动
在这个版本的linux内核,已经对USB驱动进行来很好的支持,仅仅需要修改配置。
Device
Drivers --->
[*] USB support --->
{*} Support for Host-side USB
[*] USB device filesystem (DEPRECATED)
[*] USB device class-devices (DEPRECATED)
<*> OHCI HCD support
<*> USB Mass Storage support
[*] HID Devices --->
{*} Generic HID support
[*] /dev/hidraw raw HID device support
SCSI device support --->
<*> SCSI device support
[*] legacy /proc/scsi/ support
<*> SCSI disk support
<*> SCSI tape support
10、移植RTC驱动
在这个版本的linux内核,已经对RTC驱动进行来很好的支持,不需要修改配置。相应配置如下
Device
Drivers --->
<*> Real Time Clock --->
[*] Set system time from RTC on startup and resume
(rtc0) RTC used to set the system time
[ ] RTC debug support
*** RTC interfaces ***
[*] /sys/class/rtc/rtcN (sysfs)
[*] /proc/driver/rtc (procfs for rtc0)
[*] /dev/rtcN (character devices)
<*> Samsung S3C series SoC RTC
然后添加对设备的支持
打开arch/arm/mach-s3c2440/mach-smdk2440.c ,添加设备,代码如下:
[cpp]
view plaincopy
static struct platform_device *smdk2440_devices[] __initdata = {
&s3c_device_ohci,
&s3c_device_lcd,
&s3c_device_wdt,
&s3c_device_i2c0,
&s3c_device_iis,
&s3c_device_rtc,
};
11、移植UDA1341驱动
在平台上添加和配置UDA1341:
修改arch/arm/mach-s3c2440/mach-smdk2440.c ,在开始添加头文件
#include
<sound/s3c24xx_uda134x.h>
#include
<mach/gpio-fns.h>
[cpp]
view plaincopy
static struct s3c24xx_uda134x_platform_data s3c24xx_uda134x_data = {
.l3_clk = S3C2410_GPB(4),
.l3_data = S3C2410_GPB(3),
.l3_mode = S3C2410_GPB(2),
.model = UDA134X_UDA1341,
};
static struct platform_device s3c24xx_uda134x = {
.name = "s3c24xx_uda134x",
.dev = {
.platform_data = &s3c24xx_uda134x_data,
}
};
把设备添加到平台当中
[cpp]
view plaincopy
static struct platform_device *smdk2440_devices[] __initdata = {
&s3c_device_ohci,
&s3c_device_lcd,
&s3c_device_wdt,
&s3c_device_i2c0,
&s3c_device_iis,
&s3c_device_rtc,
&s3c24xx_uda134x,
};
内核配置如下
Device
Drivers --->
<*> Sound card support --->
<*> Advanced Linux Sound Architecture --->
<*> OSS Mixer API
<*> OSS PCM (digital audio) API
[*] OSS PCM (digital audio) API - Include plugin system
[*] Support old ALSA API
[*] Verbose procfs contents
[*] Verbose printk
[*] Generic sound devices --->
<*> ALSA for SoC audio support --->
<*> SoC Audio for the Samsung S3C24XX chips
<*> SoC I2S Audio support UDA134X wired to a S3C24XX
12、移植DM9000驱动
a、修改 drivers/net/dm9000.c 文件:
头文件增加:
#include
<mach/regs-gpio.h>
#include
<mach/irqs.h>
#include
<mach/hardware.h>
在dm9000_probe 函数 开始增加:
[cpp]
view plaincopy
unsigned char ne_def_eth_mac_addr[]={0x00,0x12,0x34,0x56,0x80,0x49};
static void *bwscon;
static void *gpfcon;
static void *extint0;
static void *intmsk;
#define BWSCON (0x48000000)
#define GPFCON (0x56000050)
#define EXTINT0 (0x56000088)
#define INTMSK (0x4A000008)
bwscon=ioremap_nocache(BWSCON,0x0000004);
gpfcon=ioremap_nocache(GPFCON,0x0000004);
extint0=ioremap_nocache(EXTINT0,0x0000004);
intmsk=ioremap_nocache(INTMSK,0x0000004);
writel(readl(bwscon)|0xc0000,bwscon);
writel( (readl(gpfcon) & ~(0x3 << 14)) | (0x2 << 14), gpfcon);
writel( readl(gpfcon) | (0x1 << 7), gpfcon); // Disable pull-up
writel( (readl(extint0) & ~(0xf << 28)) | (0x4 << 28), extint0); //rising edge
writel( (readl(intmsk)) & ~0x80, intmsk);
在这个函数的最后需要修改:
[cpp]
view plaincopy
if (!is_valid_ether_addr(ndev->dev_addr)) {
/* try reading from mac */
mac_src = "chip";
for (i = 0; i < 6; i++)
//ndev->dev_addr[i] = ior(db, i+DM9000_PAR);
ndev->dev_addr[i] = ne_def_eth_mac_addr[i];
}
b、修改arch/arm/mach-s3c2440/mach-smdk2440.c ,添加设备
[cpp]
view plaincopy
static struct platform_device *smdk2440_devices[] __initdata = {
&s3c_device_ohci,
&s3c_device_lcd,
&s3c_device_wdt,
&s3c_device_i2c0,
&s3c_device_iis,
&s3c_device_rtc,
&s3c24xx_uda134x,
&s3c_device_dm9000,
};
c、修改 arch/arm/plat-s3c24xx/devs.c
添加头文件
#include
<linux/dm9000.h>
添加以下代码
[cpp]
view plaincopy
static struct resource s3c_dm9000_resource[] = {
[0] = {
.start = S3C24XX_PA_DM9000,
.end = S3C24XX_PA_DM9000+ 0x3,
.flags = IORESOURCE_MEM
},
[1]={
.start = S3C24XX_PA_DM9000 + 0x4, //CMD pin is A2
.end = S3C24XX_PA_DM9000 + 0x4 + 0x7c,
.flags = IORESOURCE_MEM
},
[2] = {
.start = IRQ_EINT7,
.end = IRQ_EINT7,
.flags = IORESOURCE_IRQ
},
};
static struct dm9000_plat_data s3c_device_dm9000_platdata = {
.flags= DM9000_PLATF_16BITONLY,
};
struct platform_device s3c_device_dm9000 = {
.name= "dm9000",
.id= 0,
.num_resources= ARRAY_SIZE(s3c_dm9000_resource),
.resource= s3c_dm9000_resource,
.dev= {
.platform_data = &s3c_device_dm9000_platdata,
}
};
EXPORT_SYMBOL(s3c_device_dm9000);
d、修改 arch/arm/plat-samsung/include/plat/devs.h
45行附近,添加
[cpp]
view plaincopy
extern struct platform_device s3c_device_dm9000;
e、修改arch/arm/mach-s3c2410/include/mach/map.h 文件
/*
DM9000 */
#define
S3C24XX_PA_DM9000 0x20000300
#define
S3C24XX_VA_DM9000 0xE0000000
13、启动画面显示小企鹅的方法
配置内核 ,下面是必选项
Device Drivers--->
Graphics support --->
<*> Support for frame buffer devices
<*> S3C2410 LCD framebuffer support ,multi support!
Console display driver support --->
<*> Framebuffer Console support
Logo configuration --->
[*] Bootup logo
[*] Standard 224-color Linux logo
14、3.5寸LCD显示的移植
2.6.34内核中已经支持
15、修改uart2为普通串口以及测试程序
修改arch/arm/mach-s3c2440/mach-smdk2440.c 中的uart2的配置,修改后如下:
[cpp]
view plaincopy
static struct s3c2410_uartcfg smdk2440_uartcfgs[] __initdata = {
[0] = {
.hwport = 0,
.flags = 0,
.ucon = 0x3c5,
.ulcon = 0x03,
.ufcon = 0x51,
},
[1] = {
.hwport = 1,
.flags = 0,
.ucon = 0x3c5,
.ulcon = 0x03,
.ufcon = 0x51,
},
/* IR port */
[2] = {
.hwport = 2,
.flags = 0,
.ucon = 0x3c5,
.ulcon = 0x03,/*fatfish 0x43*/
.ufcon = 0x51,
}
};
在drivers/serial/samsung.c 中添加对uart2控制器的配置,配置为普通串口。
添加头文件:
#include
<linux/gpio.h>
#include
<mach/regs-gpio.h>
在static
int s3c24xx_serial_startup(struct uart_port *port)函数中,添加
[cpp]
view plaincopy
if (port->line == 2) {
s3c2410_gpio_cfgpin(S3C2410_GPH(6), S3C2410_GPH6_TXD2);
s3c2410_gpio_pullup(S3C2410_GPH(6), 1);
s3c2410_gpio_cfgpin(S3C2410_GPH(7), S3C2410_GPH7_RXD2);
s3c2410_gpio_pullup(S3C2410_GPH(7), 1);
}
16、移植看门狗
修改配置
Device
Drivers --->
[*] Watchdog Timer Support --->
<*> S3C2410 Watchdog
最后:make
zImage
最后编译出来的zImage就2.1M左右。
烧写内核,启动成功
不过,此时,显示屏显示还有点问题,出现上下两栏。解决方法如下:
修改mach-smdk2440.c中
[cpp]
view plaincopy
static struct s3c2410fb_display smdk2440_lcd_cfg __initdata = {
/* Config for 320x240 LCD */
.lcdcon5 = S3C2410_LCDCON5_FRM565 |
S3C2410_LCDCON5_INVVLINE |
S3C2410_LCDCON5_INVVFRAME |
S3C2410_LCDCON5_PWREN |
S3C2410_LCDCON5_HWSWP,
.type = S3C2410_LCDCON1_TFT,
.width = 320,
.height = 240,
.pixclock = 270000,
.xres = 320,
.yres = 240,
.bpp = 16,
.left_margin =8,
.right_margin = 5,
.hsync_len = 63,
.upper_margin = 15,
.lower_margin = 3,
.vsync_len = 5,
};
并且将.lpcsel
= ((0xCE6) & ~7) | 1<<4,注释掉
[cpp]
view plaincopy
static struct s3c2410fb_mach_info smdk2440_fb_info __initdata = {
.displays = &smdk2440_lcd_cfg,
.num_displays = 1,
.default_display = 0,
#if 0
/* currently setup by downloader */
.gpccon = 0xaa940659,
.gpccon_mask = 0xffffffff,
.gpcup = 0x0000ffff,
.gpcup_mask = 0xffffffff,
.gpdcon = 0xaa84aaa0,
.gpdcon_mask = 0xffffffff,
.gpdup = 0x0000faff,
.gpdup_mask = 0xffffffff,
#endif
//.lpcsel = ((0xCE6) & ~7) | 1<<4,
};
重新编译即可。
至此,2.6.35.4内核移植成功。
出处http://blog.csdn.net/yming0221/article/details/6604616

相关文章推荐
- linux内核移植-移植2.6.35.4内核到s3c2440
- 转载自 Ubuntu中文论坛---linux内核移植-移植2.6.35.4内核到s3c2440
- linux内核移植-移植2.6.35.4内核到s3c2440
- linux2.6.32 内核移植s3c2440 - DM9000网卡驱动移植
- linux内核移植-移植2.6.35.4内核到s3c2440
- 移植、裁减及配置Linux内核到s3c2440开发板
- s3c2440的linux内核移植简程
- 基于S3C2440的Linux内核移植和yaffs2文件系统制作--内核移植
- 基于S3C2440的linux-3.6.6移植——内核移植,建立自己的平台系统
- linux2.6.32 内核移植s3c2440 - DM9000网卡驱动移植
- linux内核移植-移植2.6.35.4内核到s3c2440
- 基于S3C2440的Linux内核移植和yaffs2文件系统制作--Bootloader的执行过程
- linux-2.6.34内核的移植(s3c2440)
- linux-2.6.35.3内核移植(s3c2440)
- 05-S3C2440学习之内核(移植)linux3.4.2移植(1)之简单移植+修改MTD分区+制作jffs2文件系统
- 基于S3C2440的Linux内核移植和yaffs2文件系统制作--制作根文件系统
- 移植、裁减及配置Linux内核到s3c2440开发板
- 基于S3C2440的Linux内核移植和yaffs2文件系统制作
- 基于S3C2440的Linux内核移植和yaffs2文件系统制作--Bootloader的功能
- s3c2440移植linux-2.6.22 内核启动卡在Uncompressing Linux..... done, booting the kernel.