Android开发——MediaProvider源码分析(2)
2013-07-30 22:28
190 查看
----------------------START---------------------------
在上一篇文章中说到系统当接收到扫描请求广播的时候就会调用scan或者scanFile去扫描手机(手机内存和sdcard)中的媒体文件。这两个方法都是启动MediaScannerService这个服务来完成扫描任务的。接下来我们来看看MediaScannerService是怎么工作的……
4.MediaScannerService(MSS)
MSS实现了Runnable,所以必然的需要实现run方法了,代码如下:
在run方法中设置了线程的优先级,优先级比较低,主要为了避免跟其他服务抢夺资源。还有就是利用looper对ServiceHandler的消息进行循环控制。
接着看一下ServiceHandler的实现代码:
在ServiceHandler中主要根据相关参数来调用不同的扫描方法。

那是在哪里调用ServiceHandler发送消息的呢?请看如下代码:
以上三个方法是属于Service的生命周期的。当我们调用startService的时候,如果对应的Service还未创建就会调用onCreate方法===方法。每次startService的时候就调用onStartCommand,所以ServiceHandler就在此发送消息了。
最后,稍微看一下MSS里面扫描方面。主要是调用MediaScanner对媒体文件进行扫描分析的。至于MediaScanner的实现以后在分析。
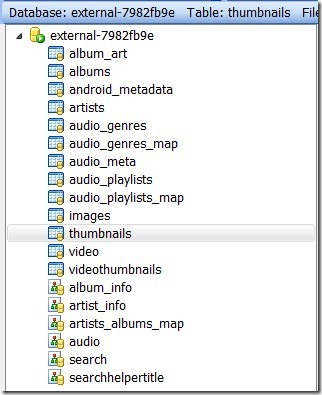
在MediaProvider中还有一个类:MediaThumbRequest,用来创建预览图的,比如视频的预览图,图片的预览图,音频的专辑图片…这些图片的信息也是保存在数据库的,有兴趣的同学可以自己打开数据库看看里面的表。如下图:
啰哩啰唆的写了两篇文章,希望对大家有所帮助。
其中应该有不少是错误的观点,望大家指正。
----------------------END------------------------------
在上一篇文章中说到系统当接收到扫描请求广播的时候就会调用scan或者scanFile去扫描手机(手机内存和sdcard)中的媒体文件。这两个方法都是启动MediaScannerService这个服务来完成扫描任务的。接下来我们来看看MediaScannerService是怎么工作的……
4.MediaScannerService(MSS)
MSS实现了Runnable,所以必然的需要实现run方法了,代码如下:
1: public void run()
2: {3: // reduce priority below other background threads to avoid interfering
4: // with other services at boot time.
5: Process.setThreadPriority(Process.THREAD_PRIORITY_BACKGROUND +
6: Process.THREAD_PRIORITY_LESS_F***ORABLE);
7: Looper.prepare();
8:
9: mServiceLooper = Looper.myLooper();
10: mServiceHandler = new ServiceHandler();
11:
12: Looper.loop();
13: }
在run方法中设置了线程的优先级,优先级比较低,主要为了避免跟其他服务抢夺资源。还有就是利用looper对ServiceHandler的消息进行循环控制。
接着看一下ServiceHandler的实现代码:
1: private final class ServiceHandler extends Handler
2: {3: @Override
4: public void handleMessage(Message msg)
5: {6: Bundle arguments = (Bundle) msg.obj;
7: //获取文件路径
8: String filePath = arguments.getString("filepath");9:
10: try {11: if (filePath != null) {12: //文件路径不为空,则调用扫面当个文件的方法
13: IBinder binder = arguments.getIBinder("listener");14: IMediaScannerListener listener =
15: (binder == null ? null : IMediaScannerListener.Stub.asInterface(binder));
16: Uri uri = scanFile(filePath, arguments.getString("mimetype"));//扫描单个文件17: if (listener != null) {18: //执行扫描完成方法
19: listener.scanCompleted(filePath, uri);
20: }
21: } else {22: //如果文件路径为空,则获取扫面手机内存或者sdcard
23: String volume = arguments.getString("volume");24: String[] directories = null;
25: //内置卡
26: if (MediaProvider.INTERNAL_VOLUME.equals(volume)) {27: // scan internal media storage
28: directories = new String[] {29: Environment.getRootDirectory() + "/media",
30: };
31: }//外置卡
32: else if (MediaProvider.EXTERNAL_VOLUME.equals(volume)) {33: // scan external storage
34: directories = new String[] {35: Environment.getExternalStorageDirectory().getPath(),
36: };
37: }
38:
39: if (directories != null) {40: if (Config.LOGD) Log.d(TAG, "start scanning volume " + volume);
41: //扫描
42: scan(directories, volume);
43: if (Config.LOGD) Log.d(TAG, "done scanning volume " + volume);
44: }
45: }
46: } catch (Exception e) {47: Log.e(TAG, "Exception in handleMessage", e);
48: }
49:
50: stopSelf(msg.arg1);
51: }
52: };
在ServiceHandler中主要根据相关参数来调用不同的扫描方法。
那是在哪里调用ServiceHandler发送消息的呢?请看如下代码:
1: @Override
2: public void onCreate() {3: PowerManager pm = (PowerManager) getSystemService(Context.POWER_SERVICE);
4: mWakeLock = pm.newWakeLock(PowerManager.PARTIAL_WAKE_LOCK, TAG);
5: //启用新线程,这样就可以避免阻塞,执行run,初始化成员变量loop和handler
6: Thread thr = new Thread(null, this, "MediaScannerService");
7: thr.start();
8: }
9:
10: @Override
11: public int onStartCommand(Intent intent, int flags, int startId) {12: while (mServiceHandler == null) {13: synchronized (this) {14: try {15: wait(100);
16: } catch (InterruptedException e) {17: }
18: }
19: }
20:
21: if (intent == null) {22: Log.e(TAG, "Intent is null in onStartCommand: ", new NullPointerException());
23: return Service.START_NOT_STICKY;
24: }
25:
26: Message msg = mServiceHandler.obtainMessage();
27: msg.arg1 = startId;
28: msg.obj = intent.getExtras();
29: //ServiceHandler发送消息
30: mServiceHandler.sendMessage(msg);
31:
32: // Try again later if we are killed before we can finish scanning.
33: return Service.START_REDELIVER_INTENT;
34: }
35:
36: @Override
37: public void onDestroy() {38: // Make sure thread has started before telling it to quit.
39: while (mServiceLooper == null) {40: synchronized (this) {41: try {42: wait(100);
43: } catch (InterruptedException e) {44: }
45: }
46: }
47: mServiceLooper.quit();
48: }
以上三个方法是属于Service的生命周期的。当我们调用startService的时候,如果对应的Service还未创建就会调用onCreate方法===方法。每次startService的时候就调用onStartCommand,所以ServiceHandler就在此发送消息了。
最后,稍微看一下MSS里面扫描方面。主要是调用MediaScanner对媒体文件进行扫描分析的。至于MediaScanner的实现以后在分析。
1: private void openDatabase(String volumeName) {2: try {3: ContentValues values = new ContentValues();
4: values.put("name", volumeName);5: getContentResolver().insert(Uri.parse("content://media/"), values);6: } catch (IllegalArgumentException ex) {7: Log.w(TAG, "failed to open media database");
8: }
9: }
10:
11: private void closeDatabase(String volumeName) {12: try {13: getContentResolver().delete(
14: Uri.parse("content://media/" + volumeName), null, null);15: } catch (Exception e) {16: Log.w(TAG, "failed to close media database " + volumeName + " exception: " + e);
17: }
18: }
19: //创建扫描器
20: private MediaScanner createMediaScanner() {21: MediaScanner scanner = new MediaScanner(this);
22: Locale locale = getResources().getConfiguration().locale;
23: if (locale != null) {24: String language = locale.getLanguage();
25: String country = locale.getCountry();
26: String localeString = null;
27: if (language != null) {28: if (country != null) {29: scanner.setLocale(language + "_" + country);
30: } else {31: scanner.setLocale(language);
32: }
33: }
34: }
35:
36: return scanner;
37: }
38: //扫描目录
39: private void scan(String[] directories, String volumeName) {40: // don't sleep while scanning
41: mWakeLock.acquire();
42:
43: ContentValues values = new ContentValues();
44: values.put(MediaStore.MEDIA_SCANNER_VOLUME, volumeName);
45: Uri scanUri = getContentResolver().insert(MediaStore.getMediaScannerUri(), values);
46:
47: Uri uri = Uri.parse("file://" + directories[0]);48: sendBroadcast(new Intent(Intent.ACTION_MEDIA_SCANNER_STARTED, uri));
49:
50: try {51: if (volumeName.equals(MediaProvider.EXTERNAL_VOLUME)) {52: openDatabase(volumeName);
53: }
54:
55: MediaScanner scanner = createMediaScanner();
56: scanner.scanDirectories(directories, volumeName);
57: } catch (Exception e) {58: Log.e(TAG, "exception in MediaScanner.scan()", e);
59: }
60:
61: getContentResolver().delete(scanUri, null, null);
62:
63: sendBroadcast(new Intent(Intent.ACTION_MEDIA_SCANNER_FINISHED, uri));
64: mWakeLock.release();
65: }
66: //扫描文件
67: private Uri scanFile(String path, String mimeType) {68: String volumeName = MediaProvider.INTERNAL_VOLUME;
69: String externalStoragePath = Environment.getExternalStorageDirectory().getPath();
70:
71: if (path.startsWith(externalStoragePath)) {72: volumeName = MediaProvider.EXTERNAL_VOLUME;
73: openDatabase(volumeName);
74: }
75: MediaScanner scanner = createMediaScanner();
76: //扫描单个文件
77: return scanner.scanSingleFile(path, volumeName, mimeType);
78: }
在MediaProvider中还有一个类:MediaThumbRequest,用来创建预览图的,比如视频的预览图,图片的预览图,音频的专辑图片…这些图片的信息也是保存在数据库的,有兴趣的同学可以自己打开数据库看看里面的表。如下图:

啰哩啰唆的写了两篇文章,希望对大家有所帮助。
其中应该有不少是错误的观点,望大家指正。
----------------------END------------------------------

相关文章推荐
- 【Android应用源码分析】Java多线程:线程本地变量ThreadLocal源码分析
- Android IPC 通讯机制源码分析 (二)
- Android4.2.2 Gallery2源码分析(3)——分析Gallery.java
- Android IPC 通讯机制源码分析
- [置顶] 【Android okhttp源码解析 二】同步请求流程和源码分析
- Android Launcher源码分析(二)
- android的消息处理机制(图+源码分析)——Looper,Handler,Message
- Android源码下的WebView分析
- [Android源码分析]bluez中adapter初始化分析
- Android 进程间通信之匿名共享内存Ashmem源码分析
- android开发源码分析--多个activity调用多个jni库的方法
- Android Universal Image Loader 源码分析
- Android开发——MediaProvider源码分析
- 【Android消息处理机制】android的消息处理机制(图+源码分析)——Looper,Handler,Message
- 【oschina android源码分析】下载更新新版本的设计
- Android应用层View绘制流程与源码分析
- Android源码分析-Activity的启动过程
- Android:Toast源码分析
- Android学习——MediaScanner源码分析