提示框进度条第三方库之MBProgressHUD
2013-07-19 14:35
357 查看
转自http://blog.csdn.net/tangren03/article/details/7877120
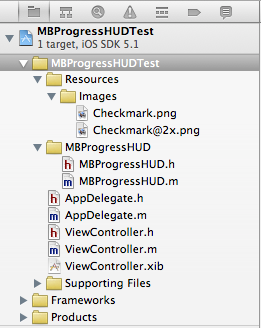
MBProgressHUD是一个开源项目,实现了很多种样式的提示框,使用上简单、方便,并且可以对显示的内容进行自定义,功能很强大,很多项目中都有使用到。到GitHub上可以下载到项目源码https://github.com/jdg/MBProgressHUD,下载下来后直接把MBProgressHUD.h和MBProgressHUD.m拖入工程中就行,别忘了选择拷贝到工程。完了在需要使用的地方导入头文件就可以开始使用了。首先看下工程截图:
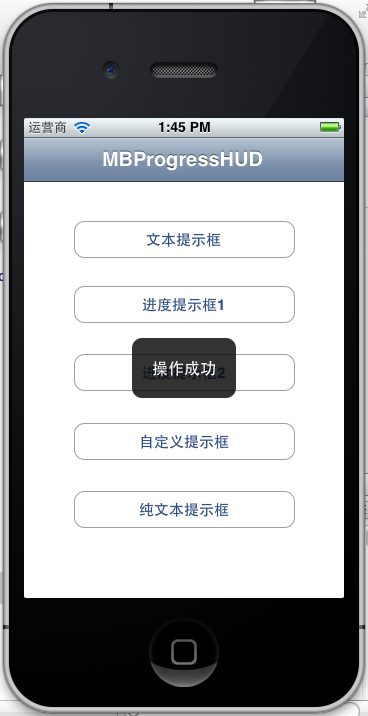
接下来是整个Demo的完整界面,这里我只选择出了几个常用的对话框,其他样式的在源码提供的Demo里可以找到,要用的话直接参考就可以。

接下来直接上代码了,头文件部分:
[cpp] view
plaincopy
#import <UIKit/UIKit.h>
#import "MBProgressHUD.h"
@interface ViewController : UIViewController
{
//HUD(Head-Up Display,意思是抬头显示的意思)
MBProgressHUD *HUD;
}
- (IBAction)showTextDialog:(id)sender;
- (IBAction)showProgressDialog:(id)sender;
- (IBAction)showProgressDialog2:(id)sender;
- (IBAction)showCustomDialog:(id)sender;
- (IBAction)showAllTextDialog:(id)sender;
@end
实现文件(按钮实现部分):
[cpp] view
plaincopy
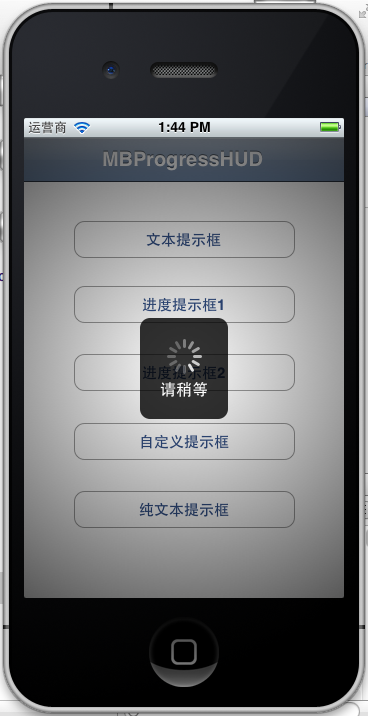
- (IBAction)showTextDialog:(id)sender {
//初始化进度框,置于当前的View当中
HUD = [[MBProgressHUD alloc] initWithView:self.view];
[self.view addSubview:HUD];
//如果设置此属性则当前的view置于后台
HUD.dimBackground = YES;
//设置对话框文字
HUD.labelText = @"请稍等";
//显示对话框
[HUD showAnimated:YES whileExecutingBlock:^{
//对话框显示时需要执行的操作
sleep(3);
} completionBlock:^{
//操作执行完后取消对话框
[HUD removeFromSuperview];
[HUD release];
HUD = nil;
}];
}
- (IBAction)showProgressDialog:(id)sender {
HUD = [[MBProgressHUD alloc] initWithView:self.view];
[self.view addSubview:HUD];
HUD.labelText = @"正在加载";
//设置模式为进度框形的
HUD.mode = MBProgressHUDModeDeterminate;
[HUD showAnimated:YES whileExecutingBlock:^{
float progress = 0.0f;
while (progress < 1.0f) {
progress += 0.01f;
HUD.progress = progress;
usleep(50000);
}
} completionBlock:^{
[HUD removeFromSuperview];
[HUD release];
HUD = nil;
}];
}
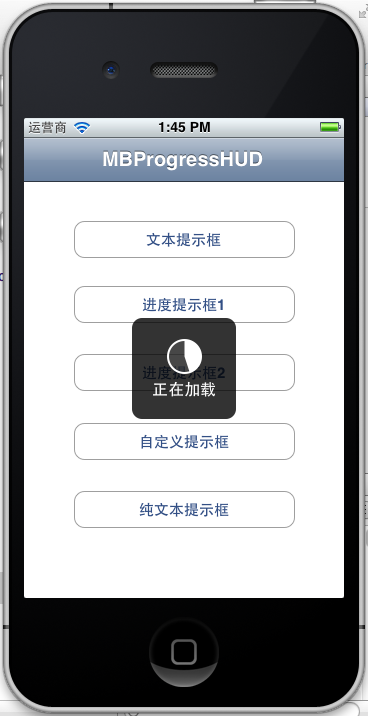
- (IBAction)showProgressDialog2:(id)sender {
HUD = [[MBProgressHUD alloc] initWithView:self.view];
[self.view addSubview:HUD];
HUD.labelText = @"正在加载";
HUD.mode = MBProgressHUDModeAnnularDeterminate;
[HUD showAnimated:YES whileExecutingBlock:^{
float progress = 0.0f;
while (progress < 1.0f) {
progress += 0.01f;
HUD.progress = progress;
usleep(50000);
}
} completionBlock:^{
[HUD removeFromSuperview];
[HUD release];
HUD = nil;
}];
}
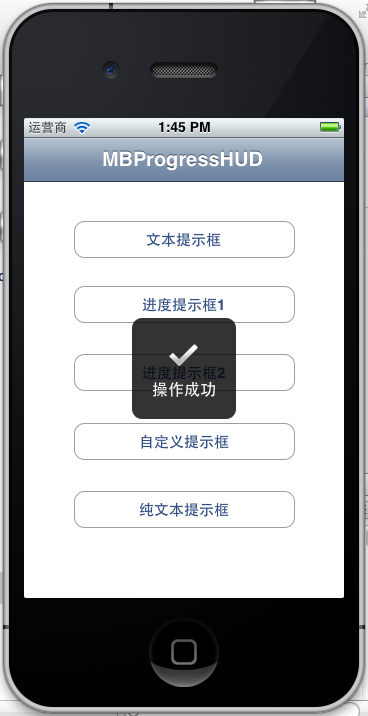
- (IBAction)showCustomDialog:(id)sender {
HUD = [[MBProgressHUD alloc] initWithView:self.view];
[self.view addSubview:HUD];
HUD.labelText = @"操作成功";
HUD.mode = MBProgressHUDModeCustomView;
HUD.customView = [[[UIImageView alloc] initWithImage:[UIImage imageNamed:@"Checkmark"]] autorelease];
[HUD showAnimated:YES whileExecutingBlock:^{
sleep(2);
} completionBlock:^{
[HUD removeFromSuperview];
[HUD release];
HUD = nil;
}];
}
- (IBAction)showAllTextDialog:(id)sender {
HUD = [[MBProgressHUD alloc] initWithView:self.view];
[self.view addSubview:HUD];
HUD.labelText = @"操作成功";
HUD.mode = MBProgressHUDModeText;
//指定距离中心点的X轴和Y轴的偏移量,如果不指定则在屏幕中间显示
// HUD.yOffset = 150.0f;
// HUD.xOffset = 100.0f;
[HUD showAnimated:YES whileExecutingBlock:^{
sleep(2);
} completionBlock:^{
[HUD removeFromSuperview];
[HUD release];
HUD = nil;
}];
}
依次实现的效果如下:

下面这个效果就类似Android中的Toast:
以上就简单介绍了MBProgressHUD的使用,这里都是采用block的形式来操作的,这样写起代码来更直观也更高效。
加入我们的QQ群或微信公众账号请查看:Ryan's
zone公众账号及QQ群
欢迎关注我的新浪微博和我交流:@唐韧_Ryan
MBProgressHUD是一个开源项目,实现了很多种样式的提示框,使用上简单、方便,并且可以对显示的内容进行自定义,功能很强大,很多项目中都有使用到。到GitHub上可以下载到项目源码https://github.com/jdg/MBProgressHUD,下载下来后直接把MBProgressHUD.h和MBProgressHUD.m拖入工程中就行,别忘了选择拷贝到工程。完了在需要使用的地方导入头文件就可以开始使用了。首先看下工程截图:
接下来是整个Demo的完整界面,这里我只选择出了几个常用的对话框,其他样式的在源码提供的Demo里可以找到,要用的话直接参考就可以。
接下来直接上代码了,头文件部分:
[cpp] view
plaincopy
#import <UIKit/UIKit.h>
#import "MBProgressHUD.h"
@interface ViewController : UIViewController
{
//HUD(Head-Up Display,意思是抬头显示的意思)
MBProgressHUD *HUD;
}
- (IBAction)showTextDialog:(id)sender;
- (IBAction)showProgressDialog:(id)sender;
- (IBAction)showProgressDialog2:(id)sender;
- (IBAction)showCustomDialog:(id)sender;
- (IBAction)showAllTextDialog:(id)sender;
@end
实现文件(按钮实现部分):
[cpp] view
plaincopy
- (IBAction)showTextDialog:(id)sender {
//初始化进度框,置于当前的View当中
HUD = [[MBProgressHUD alloc] initWithView:self.view];
[self.view addSubview:HUD];
//如果设置此属性则当前的view置于后台
HUD.dimBackground = YES;
//设置对话框文字
HUD.labelText = @"请稍等";
//显示对话框
[HUD showAnimated:YES whileExecutingBlock:^{
//对话框显示时需要执行的操作
sleep(3);
} completionBlock:^{
//操作执行完后取消对话框
[HUD removeFromSuperview];
[HUD release];
HUD = nil;
}];
}
- (IBAction)showProgressDialog:(id)sender {
HUD = [[MBProgressHUD alloc] initWithView:self.view];
[self.view addSubview:HUD];
HUD.labelText = @"正在加载";
//设置模式为进度框形的
HUD.mode = MBProgressHUDModeDeterminate;
[HUD showAnimated:YES whileExecutingBlock:^{
float progress = 0.0f;
while (progress < 1.0f) {
progress += 0.01f;
HUD.progress = progress;
usleep(50000);
}
} completionBlock:^{
[HUD removeFromSuperview];
[HUD release];
HUD = nil;
}];
}
- (IBAction)showProgressDialog2:(id)sender {
HUD = [[MBProgressHUD alloc] initWithView:self.view];
[self.view addSubview:HUD];
HUD.labelText = @"正在加载";
HUD.mode = MBProgressHUDModeAnnularDeterminate;
[HUD showAnimated:YES whileExecutingBlock:^{
float progress = 0.0f;
while (progress < 1.0f) {
progress += 0.01f;
HUD.progress = progress;
usleep(50000);
}
} completionBlock:^{
[HUD removeFromSuperview];
[HUD release];
HUD = nil;
}];
}
- (IBAction)showCustomDialog:(id)sender {
HUD = [[MBProgressHUD alloc] initWithView:self.view];
[self.view addSubview:HUD];
HUD.labelText = @"操作成功";
HUD.mode = MBProgressHUDModeCustomView;
HUD.customView = [[[UIImageView alloc] initWithImage:[UIImage imageNamed:@"Checkmark"]] autorelease];
[HUD showAnimated:YES whileExecutingBlock:^{
sleep(2);
} completionBlock:^{
[HUD removeFromSuperview];
[HUD release];
HUD = nil;
}];
}
- (IBAction)showAllTextDialog:(id)sender {
HUD = [[MBProgressHUD alloc] initWithView:self.view];
[self.view addSubview:HUD];
HUD.labelText = @"操作成功";
HUD.mode = MBProgressHUDModeText;
//指定距离中心点的X轴和Y轴的偏移量,如果不指定则在屏幕中间显示
// HUD.yOffset = 150.0f;
// HUD.xOffset = 100.0f;
[HUD showAnimated:YES whileExecutingBlock:^{
sleep(2);
} completionBlock:^{
[HUD removeFromSuperview];
[HUD release];
HUD = nil;
}];
}
依次实现的效果如下:
下面这个效果就类似Android中的Toast:
以上就简单介绍了MBProgressHUD的使用,这里都是采用block的形式来操作的,这样写起代码来更直观也更高效。
加入我们的QQ群或微信公众账号请查看:Ryan's
zone公众账号及QQ群
欢迎关注我的新浪微博和我交流:@唐韧_Ryan

相关文章推荐
- 提示框进度条第三方库之MBProgressHUD
- IOS学习笔记29—提示框第三方库之MBProgressHUD
- IOS学习笔记29—提示框第三方库之MBProgressHUD
- ios:提示框第三方库之MBProgressHUD
- IOS学习笔记29—提示框第三方库之MBProgressHUD
- 提示框第三方库之MBProgressHUD iOS toast效果 动态提示框效果
- ios学习-提示框第三方库之MBProgressHUD
- 提示框第三方库之MBProgressHUD
- 提示框第三方库之MBProgressHUD
- 【转】IOS学习笔记29—提示框第三方库之MBProgressHUD
- 提示框第三方库之MBProgressHUD iOS toast效果 动态提示框效果
- IOS学习笔记29—提示框第三方库之MBProgressHUD
- IOS学习笔记29—提示框第三方库之MBProgressHUD
- 提示框第三方库之MBProgressHUD iOS toast效果 动态提示框效果
- 提示框第三方库之MBProgressHUD
- 提示框第三方库之MBProgressHUD
- 提示框第三方库之MBProgressHUD iOS toast效果 动态提示框效果
- 转载之-IOS学习笔记提示框第三方库之MBProgressHUD讲解
- 提示框第三方库之MBProgressHUD
- IOS学习笔记29—提示框第三方库之MBProgressHUD