webservice-Apache CXF环境搭建及测试
2013-07-10 09:46
417 查看
1.去官方下载对应的jar包:http://cxf.apache.org/
2.将lib目录下的jar包放置在项目的lib目录下,并构建路径
3.配置web.xml文件,添加spring和cxf的配置
8.通过Main()方法进行测试
2.将lib目录下的jar包放置在项目的lib目录下,并构建路径
3.配置web.xml文件,添加spring和cxf的配置
<listener>
<listener-class>org.springframework.web.context.ContextLoaderListener</listener-class>
</listener>
<!-- 设置Spring容器加载配置文件路径 -->
<context-param>
<param-name>contextConfigLocation</param-name>
<param-value>classpath*:applicationContext*.xml</param-value>
</context-param>

<servlet>
<servlet-name>CXFServlet</servlet-name>
<servlet-class>org.apache.cxf.transport.servlet.CXFServlet</servlet-class>
<load-on-startup>1</load-on-startup>
</servlet>

<servlet-mapping>
<servlet-name>CXFServlet</servlet-name>
<url-pattern>/webservice/*</url-pattern>
</servlet-mapping>
4.创建服务接口
import javax.jws.WebParam;
import javax.jws.WebService;

@WebService
public interface UserService {
//加入WebParam注解,以保证xml文件中参数名字的正确性
//如果没有加注解,参数将被命名为arg0
public String checkUser(@WebParam(name = "userName")String userName,
@WebParam(name = "userPwd")String userPwd);
}5.完成实现类import javax.jws.WebParam;
import javax.jws.WebService;
import com.dh.webservice.UserService;
//@WebService注解让CXF知道我们希望使用哪个接口来创建WSDL,,本例中就是UserService接口。
@WebService(endpointInterface = "com.dh.webservice.UserService", serviceName = "UserService")
public class UserServiceImpl implements UserService {
@Override
public String checkUser(@WebParam(name = "userName")String userName,
@WebParam(name = "userPwd")String userPwd) {
if("abc".equals(userName)&&"123".equals(userPwd)){
return "登陆成功";
}
return "失败";
}
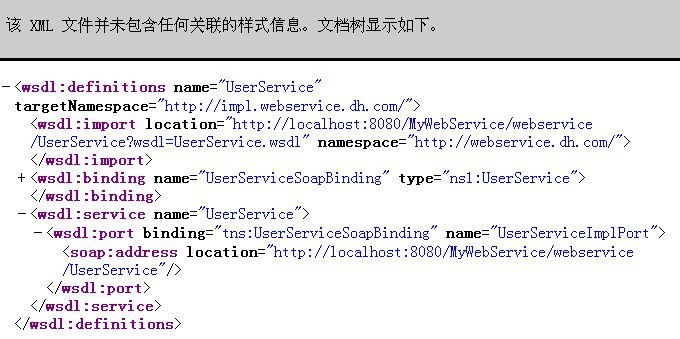
}6.添加spring配置文件applicationContext.xml<?xml version="1.0" encoding="UTF-8"?> <beans xmlns="http://www.springframework.org/schema/beans" xmlns:jaxws="http://cxf.apache.org/jaxws" xmlns:aop="http://www.springframework.org/schema/aop" xmlns:tx="http://www.springframework.org/schema/tx" xmlns:xsi="http://www.w3.org/2001/XMLSchema-instance" xsi:schemaLocation="http://www.springframework.org/schema/beans http://www.springframework.org/schema/beans/spring-beans-3.0.xsd http://www.springframework.org/schema/aop http://www.springframework.org/schema/tx/spring-tx-3.0.xsd http://www.springframework.org/schema/tx http://www.springframework.org/schema/aop/spring-aop-3.0.xsd http://cxf.apache.org/jaxws http://cxf.apache.org/schemas/jaxws.xsd"> <!-- web service配置部分开始 begin --> <import resource="classpath:META-INF/cxf/cxf.xml" /> <import resource="classpath:META-INF/cxf/cxf-extension-soap.xml" /> <import resource="classpath:META-INF/cxf/cxf-servlet.xml" /> <bean id="refUserService" class="com.dh.webservice.impl.UserServiceImpl"> </bean> <jaxws:endpoint id="userService" address="/UserService"> <jaxws:implementor ref="refUserService" /> </jaxws:endpoint> </beans>7.发布,并运行服务器进行测试http://localhost:8080/MyWebService/webservice/UserService?wsdl
8.通过Main()方法进行测试
import org.apache.cxf.jaxws.JaxWsProxyFactoryBean;
import com.dh.webservice.UserService;
public class ServiceTest {

public static void main(String[] args) throws Exception {
JaxWsProxyFactoryBean webService = new JaxWsProxyFactoryBean();
webService.setServiceClass(UserService.class);
webService.setAddress("http://localhost:8080/MyWebService/webservice/UserService");
UserService userService = (UserService) webService.create();
System.out.println(userService.checkUser("abc", "abc"));
//System.out.println(userService.checkUser("abc", "123"));
}
}

相关文章推荐
- 【Web】CXF WebService 服务端和客户端 环境搭建及测试
- Spring framework、Spring MVC、Apache CXF搭建webService环境
- Debian-7.1下JBoss Forge + Arquillian + JBoss-as-7.1 测试环境搭建
- eclipse+appium+AndroidSDK 安卓自动化测试环境搭建
- CentOS下搭建测试环境
- Dubbo分布式环境搭建测试(依赖mybatis,spring,druid)
- Hadoop测试搭建环境
- sparkSQL1.1入门之五:测试环境之搭建
- 从零开始自动化测试框架设计:自动化测试环境搭建一:eclipse+svn+selenium+Junit+maven
- windows测试selenium、firefox环境搭建
- Android6.0 CTS测试环境搭建
- 微信开发 网页应用 本地测试环境的搭建(多图)
- hadoop 2.04测试环境搭建
- Jmeter+Jenkins+Ant+xsltproc搭建测试环境
- Robot + Appium 搭建 iOS 自动化测试环境
- VMware workstation搭建NAT测试环境
- 搭建Firefox36.0下的selenium2.9.1测试环境
- seleninum + testNG + reportNG在Windows7搭建自动化测试环境
- 入职任务--搭建hadoop和storm环境并测试(包含搭建文档和测试准备文档,测试文档)
- Win7 + Ubuntu 14.04 +tomcat + mysql 搭建测试环境手册