VMware VSphere 虚拟化&云计算学习配置笔记(三)
2012-12-19 20:52
337 查看
第三章:安装部署VMware vCenter
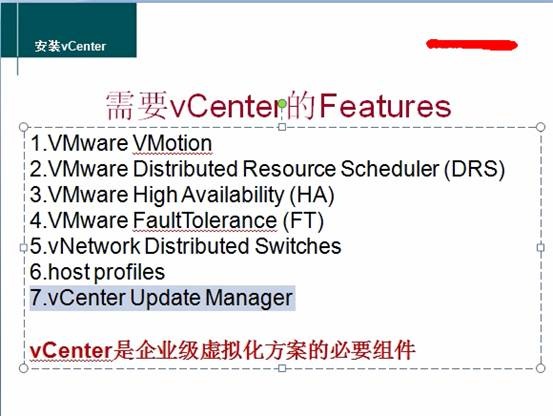
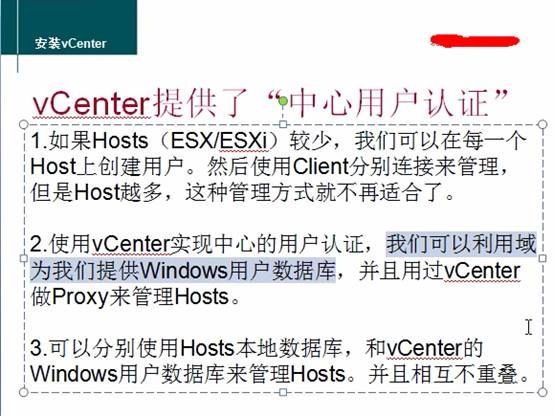
Vcenter安装之后可以实现如下功能:
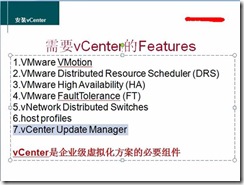
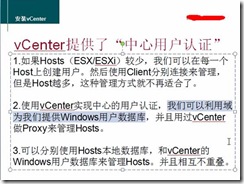
Vcenter 特点:
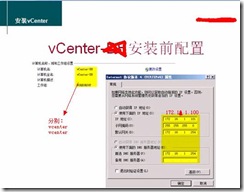
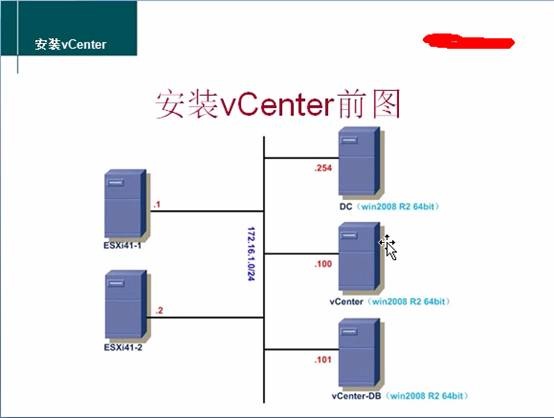
安装vcenter前需要的拓扑规划图:
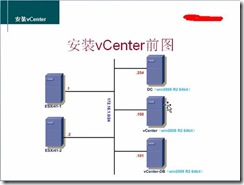
由此图可以,在安装配置vcenter之前,我们需要先部署好DC,和vcenter-db(数据库)最后在部署vcenter,由于从4.1版本开始vcenter只支持安装在x64系统下,为了兼用性最好我心需要安装三台机器为windows 2008 r2,分别用作DC,vcenter-DB和vcenter
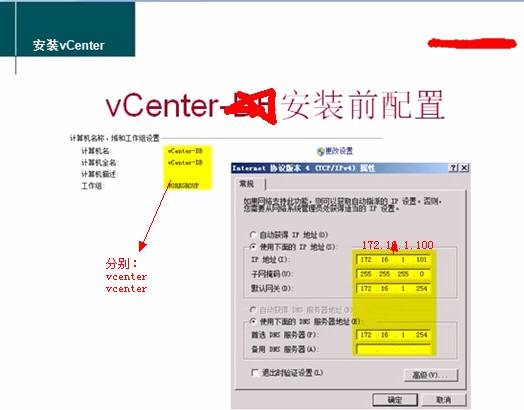
1:安装部署DC,修改好各个主机的主机名为dc,vcenter-db和vcenter,并将vcenter-db主机和vcenter主机分别加入到vsphere.com域

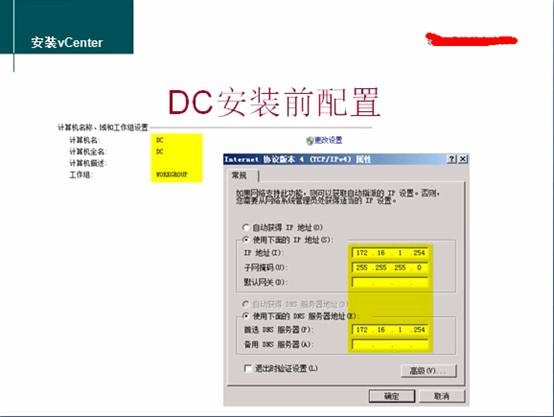
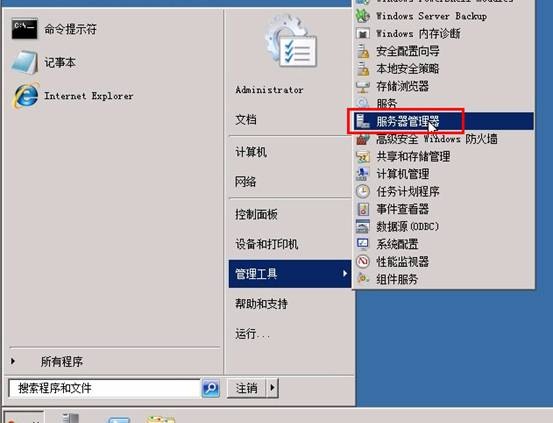
接下来安装DC:
1:


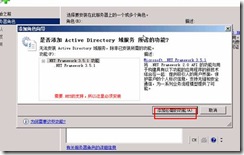

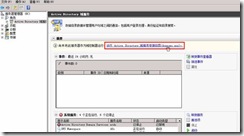
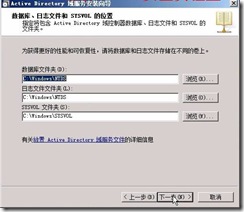
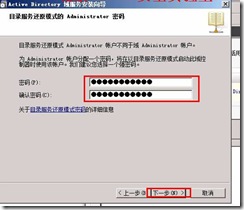
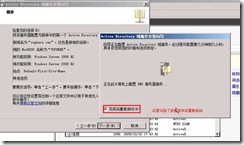
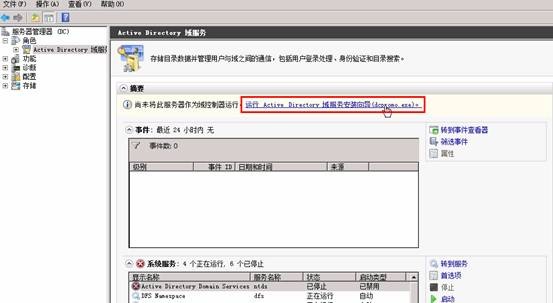
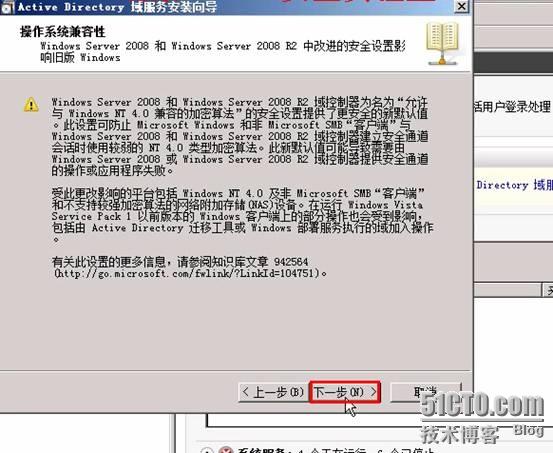
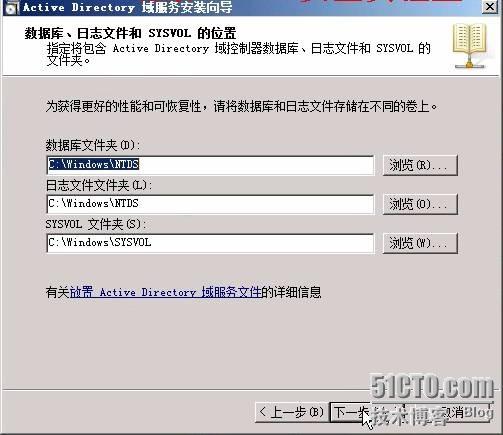
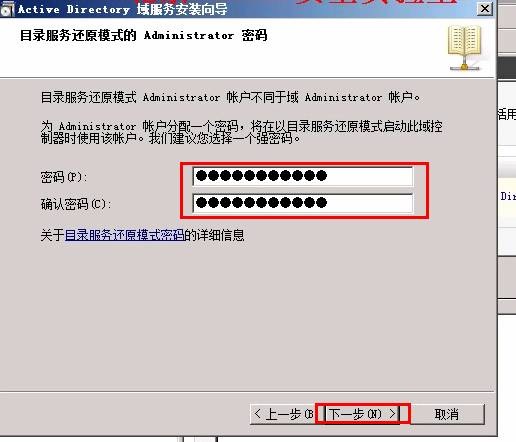
这里并没有安装完毕,相反,接下来才开始真正安装:
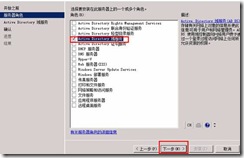
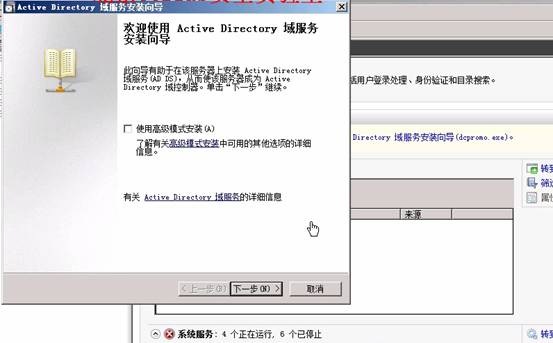
点击进去:
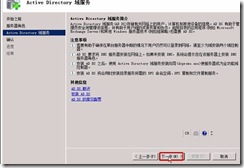
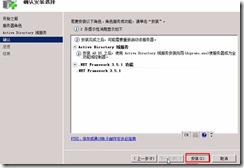
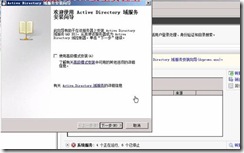
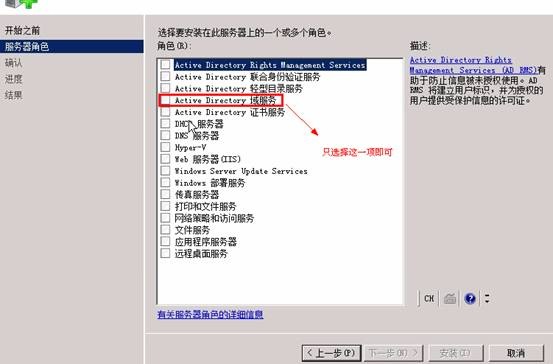
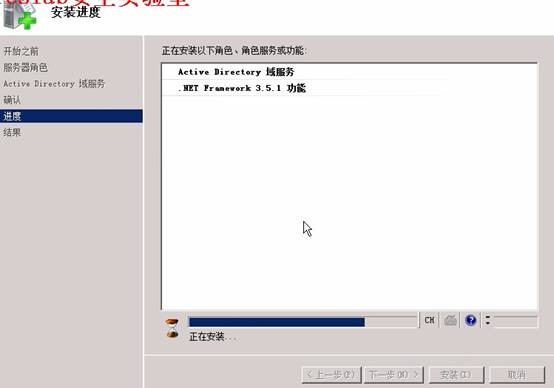
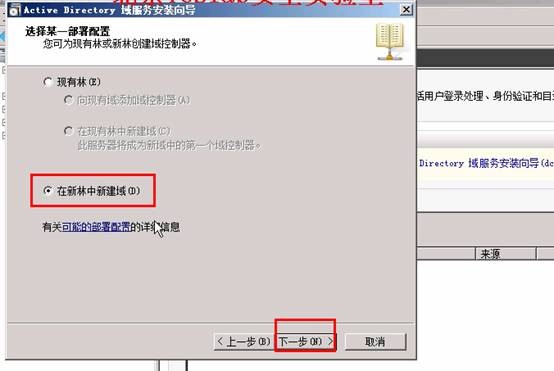
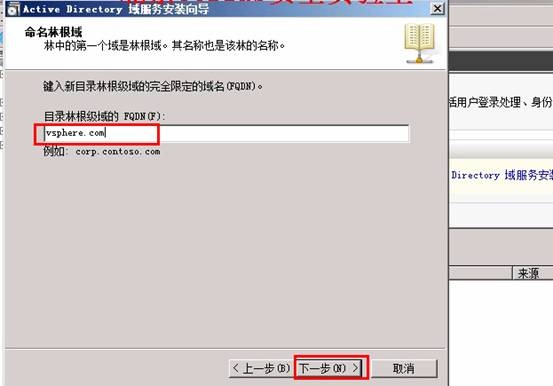
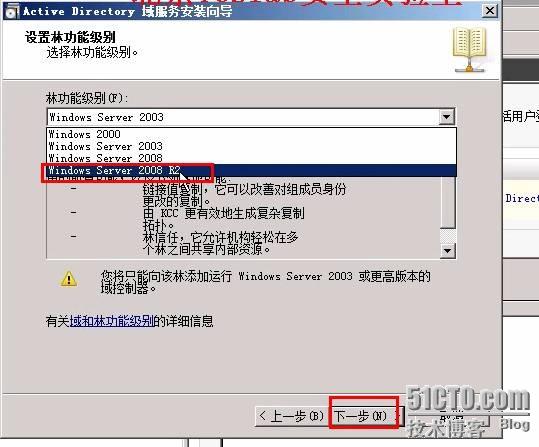
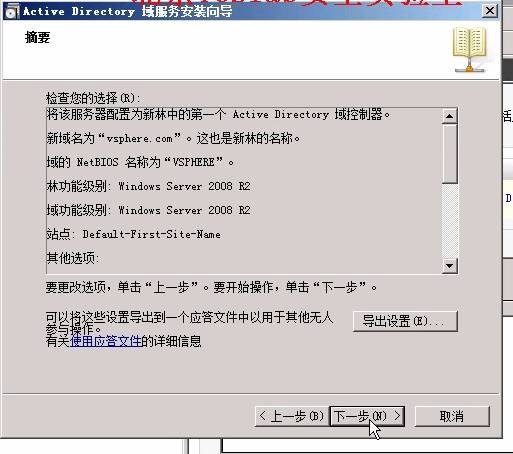
然后选择以下安装:
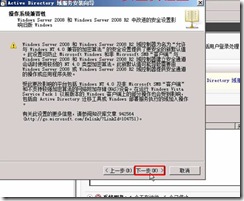

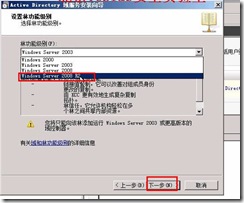

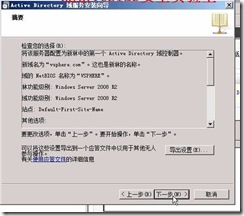
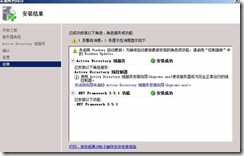
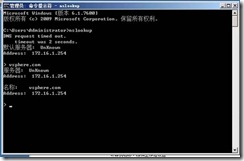
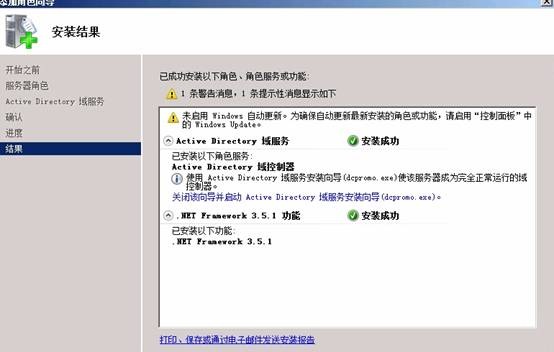
这就是整个安装过程,安装完毕之后系统会重新启动,等系统启动后DC就应该可以正常使用了,可以在vcenter和vcenter-db主机上作如下dns验证:
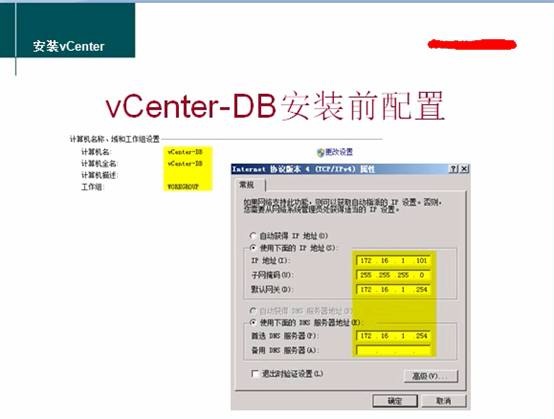
接下来我们将Vcenter-db和vcenter两台主机都加入到vsphere.com下:
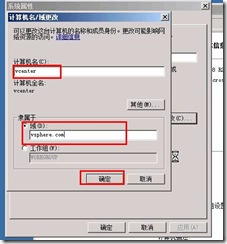
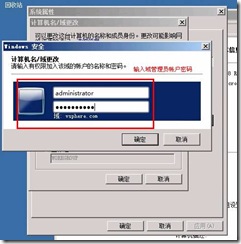
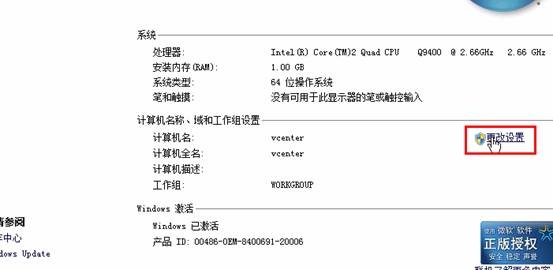
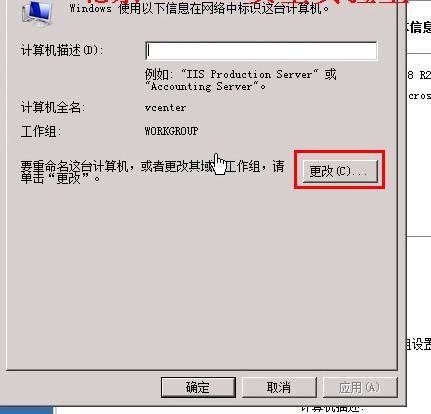
将vcenter和vcenter-db主机分别加入到vsphere.com域
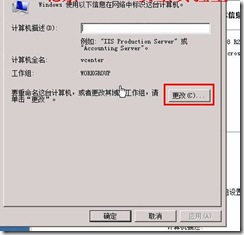
Vcenter-db加入域参照以上步骤来操作。
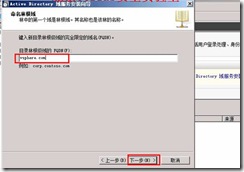
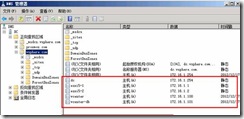
修改DNS配置,添加esxi5-1,esxi5-2,vcenter,vcenter-db,dc主机配置,方便以后通过域名来访问个主机:
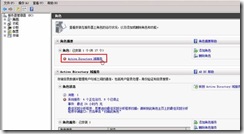
至此:DC服务器安装配置完毕。
Vcenter安装之后可以实现如下功能:
Vcenter 特点:
安装vcenter前需要的拓扑规划图:
由此图可以,在安装配置vcenter之前,我们需要先部署好DC,和vcenter-db(数据库)最后在部署vcenter,由于从4.1版本开始vcenter只支持安装在x64系统下,为了兼用性最好我心需要安装三台机器为windows 2008 r2,分别用作DC,vcenter-DB和vcenter
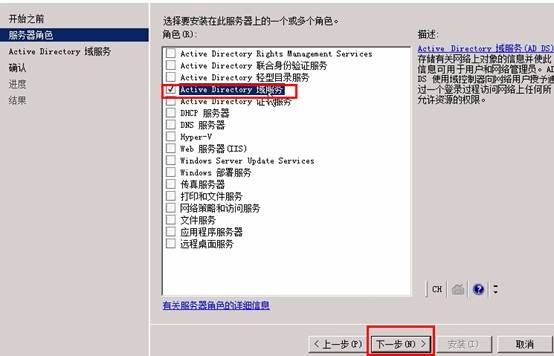
1:安装部署DC,修改好各个主机的主机名为dc,vcenter-db和vcenter,并将vcenter-db主机和vcenter主机分别加入到vsphere.com域
接下来安装DC:
1:
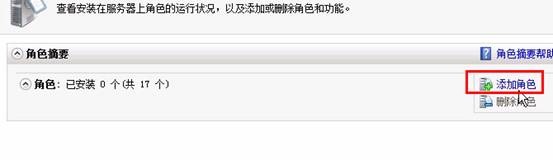
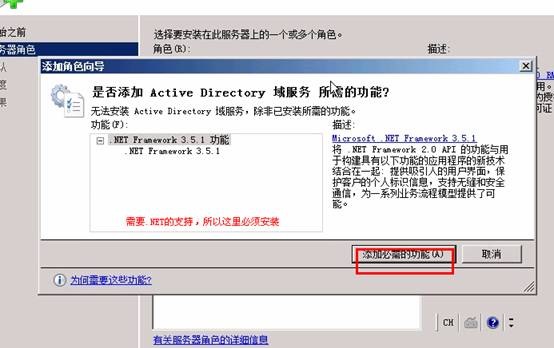
这里并没有安装完毕,相反,接下来才开始真正安装:
点击进去:

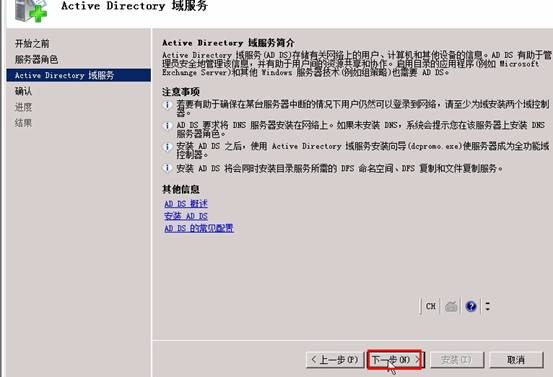
然后选择以下安装:

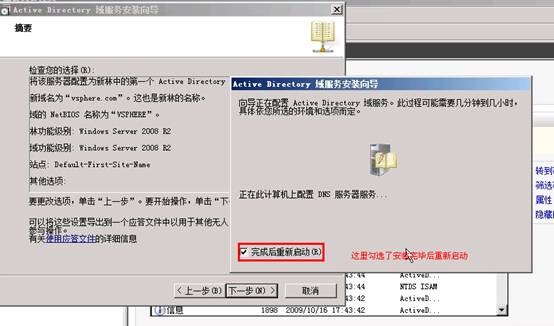
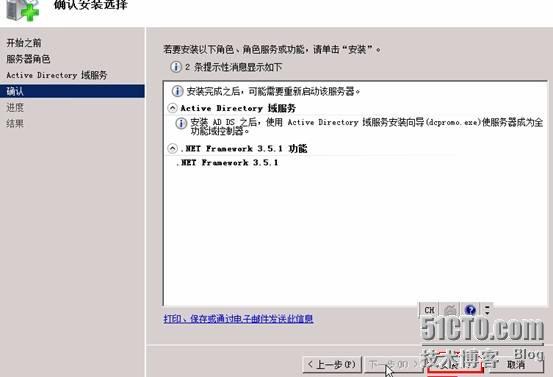
这就是整个安装过程,安装完毕之后系统会重新启动,等系统启动后DC就应该可以正常使用了,可以在vcenter和vcenter-db主机上作如下dns验证:

接下来我们将Vcenter-db和vcenter两台主机都加入到vsphere.com下:
将vcenter和vcenter-db主机分别加入到vsphere.com域


Vcenter-db加入域参照以上步骤来操作。
修改DNS配置,添加esxi5-1,esxi5-2,vcenter,vcenter-db,dc主机配置,方便以后通过域名来访问个主机:

至此:DC服务器安装配置完毕。

相关文章推荐
- VMware VSphere 虚拟化&云计算学习配置笔记(一)
- VMware VSphere 虚拟化&云计算学习配置笔记(八)
- VMware VSphere 虚拟化&云计算学习配置笔记(二)
- VMware VSphere 虚拟化&云计算学习配置笔记(九)
- VMware VSphere 虚拟化&云计算学习配置笔记(二)
- VMware VSphere 虚拟化&云计算学习配置笔记(九)
- VMware VSphere 虚拟化&云计算学习配置笔记(三)
- VMware VSphere 虚拟化&云计算学习配置笔记(四)
- VMware VSphere 虚拟化&云计算学习配置笔记(四)
- VMware VSphere 虚拟化&云计算学习配置笔记(五)
- VMware VSphere 虚拟化&云计算学习配置笔记(五)
- VMware VSphere 虚拟化&云计算学习配置笔记(六)
- VMware VSphere 虚拟化&云计算学习配置笔记(六)
- VMware VSphere 虚拟化&云计算学习配置笔记(七)
- VMware VSphere 虚拟化&云计算学习配置笔记(七)
- VMware VSphere 虚拟化&云计算学习配置笔记(一)
- VMware VSphere 虚拟化&云计算学习配置笔记(八)
- Proxmox VE2.2虚拟化安装配置学习笔记(六)
- Lua学习笔记--环境配置&Hello World
- kvm虚拟化学习笔记(八)之kvm虚拟机vnc配置