使用点聚WebOffice解决配置RMS权限文档在线预览
2012-11-23 14:27
483 查看
前提
在MOSS2010中如果配置了RMS权限的文档,使用Office Web App实现文档的在线查看,会提示如下错误: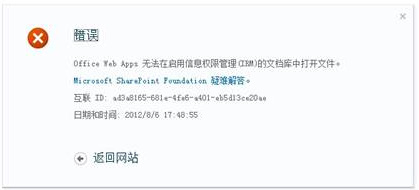
面对此类问题,微软不出补丁包进行解决,因此只能想其他办法进行解决,这里采用点聚的WebOffice插件进行在线预览。 注:WebOffice插件原理就是把客户端Office嵌入到浏览器中,因此需要访问的客户端安装office,同时支持IE浏览器的访问,其他浏览器不支持。
配置
定制WebOffice开发
1、 使用VS2012新建sharepoint2010解决方案,【新建应用程序页】如下:
2、 引用WebOffice的插件包,如下图:

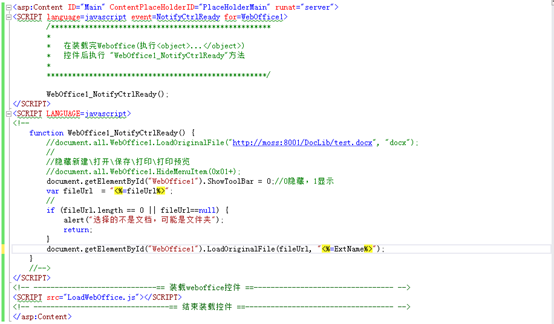
3、 编辑应用程序页如下图:
页面源码:
 后台代码:
using System;
using Microsoft.SharePoint;
using Microsoft.SharePoint.WebControls;
namespace MossWebOfficeMenu.Layouts.MossWebOfficeMenu
{
public partial class testweboffice : LayoutsPageBase
{
public string fileUrl = string.Empty;
public string ExtName = string.Empty;
//
protected void Page_Load(object sender, EventArgs e)
{
string itemID = Request.QueryString["itemID"] == null ? string.Empty :
Request.QueryString["itemID"].ToString();
if (!string.IsNullOrEmpty(itemID))
{
//
SPWeb web = SPContext.Current.Web;
//
if (web != null)
{
SPList list = web.Lists["测试文档"];
if (list != null)
{
SPListItem item = list.GetItemById(Convert.ToInt32(itemID));
//
if (item != null)
{
SPFile file = item.File;
//
if (file != null)
{
fileUrl = string.Format("{0}/{1}",web.Url,file.Url);
//必须有文件
if (!string.IsNullOrEmpty(fileUrl))
{
if (fileUrl.LastIndexOf('.') >= 0)
{
ExtName = fileUrl.Substring(fileUrl.LastIndexOf('.') + 1);
}
}
}
}
}
}
}
}
}
}
后台代码:
using System;
using Microsoft.SharePoint;
using Microsoft.SharePoint.WebControls;
namespace MossWebOfficeMenu.Layouts.MossWebOfficeMenu
{
public partial class testweboffice : LayoutsPageBase
{
public string fileUrl = string.Empty;
public string ExtName = string.Empty;
//
protected void Page_Load(object sender, EventArgs e)
{
string itemID = Request.QueryString["itemID"] == null ? string.Empty :
Request.QueryString["itemID"].ToString();
if (!string.IsNullOrEmpty(itemID))
{
//
SPWeb web = SPContext.Current.Web;
//
if (web != null)
{
SPList list = web.Lists["测试文档"];
if (list != null)
{
SPListItem item = list.GetItemById(Convert.ToInt32(itemID));
//
if (item != null)
{
SPFile file = item.File;
//
if (file != null)
{
fileUrl = string.Format("{0}/{1}",web.Url,file.Url);
//必须有文件
if (!string.IsNullOrEmpty(fileUrl))
{
if (fileUrl.LastIndexOf('.') >= 0)
{
ExtName = fileUrl.Substring(fileUrl.LastIndexOf('.') + 1);
}
}
}
}
}
}
}
}
}
}
.csharpcode, .csharpcode pre
{
font-size: small;
color: black;
font-family: consolas, "Courier New", courier, monospace;
background-color: #ffffff;
/*white-space: pre;*/
}
.csharpcode pre { margin: 0em; }
.csharpcode .rem { color: #008000; }
.csharpcode .kwrd { color: #0000ff; }
.csharpcode .str { color: #006080; }
.csharpcode .op { color: #0000c0; }
.csharpcode .preproc { color: #cc6633; }
.csharpcode .asp { background-color: #ffff00; }
.csharpcode .html { color: #800000; }
.csharpcode .attr { color: #ff0000; }
.csharpcode .alt
{
background-color: #f4f4f4;
width: 100%;
margin: 0em;
}
.csharpcode .lnum { color: #606060; }
4、发布到MOSS2010站点中去即可。
配置下拉菜单
1. 新建一个文档库【共享文档】,此过程省略(不在啰唆,呵呵)。2. 打开文档库【共享文档】列表,如下图:

3. 编辑页面,如下图:

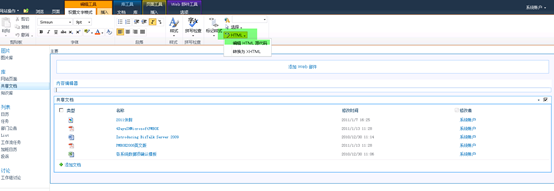
4、添加”内容编辑器”webpart部件,打开:媒体和内容—》内容编辑器,如下图:
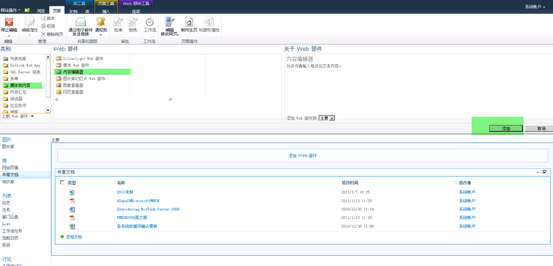
5. 插入webpart部件,如下图:
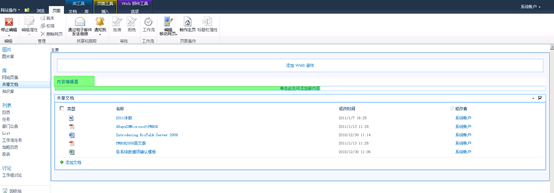
6、 点击中间的“单击此处添加新内容”,出现如下图:

7、点击工具栏:”HTML”à编辑HTML源码,如下图:
8、弹出对话框,如下图:
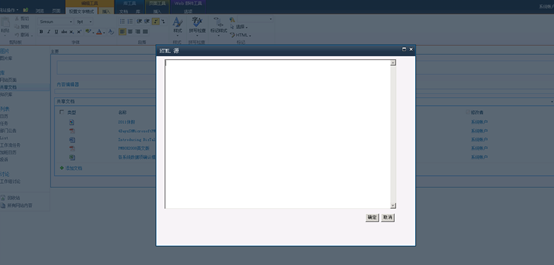
9、
拷贝如下javascript脚本到HTML源.Javascript脚本如下:
<script language="javascript">

//c和a自己随便取名称
function Custom_AddDocLibMenuItems(c, a)
{
//下拉菜单名称
strDisplayText ="使用WebOffice在线打开文档";
//需要执行的脚本,可以自定义
//a.HttpRoot当前的web站点地址
//currentItemID当前的ItemId
//a.listName当前列表名称
//STSNavigate是MOSS执行跳转的函数
strAction = "STSNavigate('"+a.HttpRoot+"/_layouts/MossWebOfficeMenu/testweboffice.aspx?itemID="+currentItemID+"&listID="+ a.listName +"')";
//下拉菜单显示的图片
strImagePath=a.imagesPath+"oisweb.gif";
//执行脚本
menuOption=CAMOpt(c,strDisplayText,strAction,strImagePath,null,260);
//菜单ID
menuOption.id="ID_MySubMenu";
//return
return false;
}</script>
10. 确定后,在停止页面编辑,如下图:
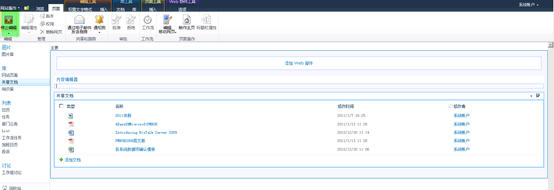
11、停止编辑页面后,最终效果图:如下:

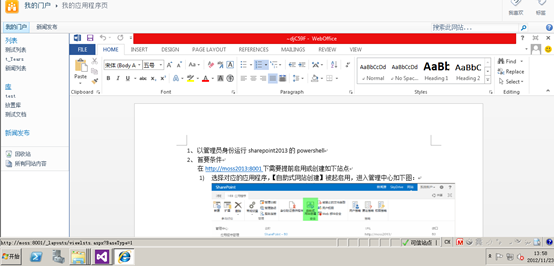
12. 点击“使用WebOffice在线打开文档”,跳转到刚才Javascript制定的页面:效果图:
备注:
自定义函数AddListMenuItems(列表库)和AddDocLibMenuItems(文档库)
.csharpcode, .csharpcode pre
{
font-size: small;
color: black;
font-family: consolas, "Courier New", courier, monospace;
background-color: #ffffff;
/*white-space: pre;*/
}
.csharpcode pre { margin: 0em; }
.csharpcode .rem { color: #008000; }
.csharpcode .kwrd { color: #0000ff; }
.csharpcode .str { color: #006080; }
.csharpcode .op { color: #0000c0; }
.csharpcode .preproc { color: #cc6633; }
.csharpcode .asp { background-color: #ffff00; }
.csharpcode .html { color: #800000; }
.csharpcode .attr { color: #ff0000; }
.csharpcode .alt
{
background-color: #f4f4f4;
width: 100%;
margin: 0em;
}
.csharpcode .lnum { color: #606060; }

相关文章推荐
- 简述在线预览、编辑文档插件的使用
- 简述在线预览、编辑文档插件的使用
- 实战:Windows Server 2008 RMS使用权限策略模板保护文档
- 使用PageOffice实现文档(word,excel,pdf)在线预览编辑
- [置顶] 使用PageOffice实现文档(word,excel,pdf)在线预览编辑
- Print2flash在.NET(C#)中的使用,即文档在线预览
- 文档在线预览(三)- 使用SWFTools转换文档为SWF格式
- 【thinkphp】【mac环境配置】mac上使用mamp配置环境thinkphp访问出现目录无权限的解决办法
- PHP使用COM组件转换word文档为HTML并实现在线预览
- web使用openoffice实现在线预览office文档
- 在线预览-Java 使用 Print2Flash 实现Office文档在线阅读
- vue插件开发之使用pdf.js实现手机端在线预览pdf文档的方法
- Windows 2008-使用RMS管理文档权限 推荐
- SharePoint 2010 RMS Word 2010 您没有权限打开文档 解决方法
- Jquery Media插件使用,解决在线预览及打开PDF文件
- vue插件开发 使用pdf.js实现手机端在线预览pdf文档
- 【JEECG技术文档】JEECG 接口权限开发及配置使用说明
- 文档在线预览(二)-使用JODConverter转换文档为PDF
- Print2flash在.NET(C#)64位中的使用,即文档在线预览
- 如何使用RMS对文档权限进行限制