Android 高手进阶教程(十四)之----Android Location的使用!!
2012-11-07 10:21
489 查看
大家好,今天说说Location , Location 在Android 开发中还是经常用到的,比如 通过经纬度获取天气,根据Location 获取所在地区详细Address (比如Google Map 开发).等。而在Android
中通过LocationManager 来获取Location .通常获取Location 有GPS 获取,WIFI 获取。
我今天做一个简单的小Demo ,来教大家如何获取Location ,从而获取经纬度。下一节将教大家通过Location 来获取Address .
首先第一步:
创建一个Android 工程命名为LocationDemo .
第二步:修改main.xml 代码如下:
[java]
view plaincopyprint?
<?xml version="1.0" encoding="utf-8"?>
<LinearLayout xmlns:android="http://schemas.android.com/apk/res/android"
android:orientation="vertical"
android:layout_width="fill_parent"
android:layout_height="fill_parent"
>
<TextView
android:id="@+id/longitude"
android:layout_width="fill_parent"
android:layout_height="wrap_content"
android:text="longitude:"
/>
<TextView
android:id="@+id/latitude"
android:layout_width="fill_parent"
android:layout_height="wrap_content"
android:text="latitude:"
/>
</LinearLayout>
第四步:增加权限,修改AndroidManifest.xml 代码如下(第16行为所增行):
[java]
view plaincopyprint?
<?xml version="1.0" encoding="utf-8"?>
<manifest xmlns:android="http://schemas.android.com/apk/res/android"
package="com.android.tutor"
android:versionCode="1"
android:versionName="1.0">
<application android:icon="@drawable/icon" android:label="@string/app_name">
<activity android:name=".LocationDemo"
android:label="@string/app_name">
<intent-filter>
<action android:name="android.intent.action.MAIN" />
<category android:name="android.intent.category.LAUNCHER" />
</intent-filter>
</activity>
</application>
<uses-sdk android:minSdkVersion="7" />
<uses-permission android:name="android.permission.ACCESS_FINE_LOCATION"/>
</manifest>
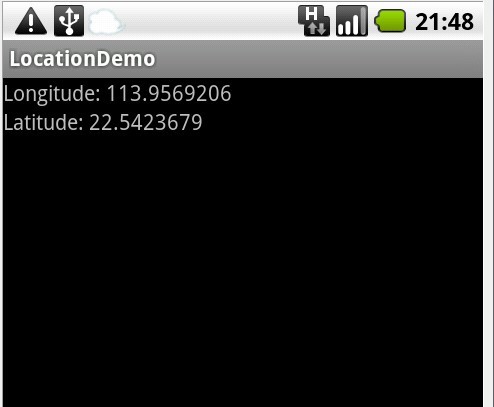
第五步:运行LocationDemo 工程,所得效果如下(真机深圳测试):
中通过LocationManager 来获取Location .通常获取Location 有GPS 获取,WIFI 获取。
我今天做一个简单的小Demo ,来教大家如何获取Location ,从而获取经纬度。下一节将教大家通过Location 来获取Address .
首先第一步:
创建一个Android 工程命名为LocationDemo .
第二步:修改main.xml 代码如下:
[java]
view plaincopyprint?
<?xml version="1.0" encoding="utf-8"?>
<LinearLayout xmlns:android="http://schemas.android.com/apk/res/android"
android:orientation="vertical"
android:layout_width="fill_parent"
android:layout_height="fill_parent"
>
<TextView
android:id="@+id/longitude"
android:layout_width="fill_parent"
android:layout_height="wrap_content"
android:text="longitude:"
/>
<TextView
android:id="@+id/latitude"
android:layout_width="fill_parent"
android:layout_height="wrap_content"
android:text="latitude:"
/>
</LinearLayout>
[java]
view plaincopyprint?

package com.android.tutor;

import android.app.Activity;

import android.content.Context;

import android.location.Location;

import android.location.LocationManager;

import android.os.Bundle;

import android.widget.TextView;

public class LocationDemo
extends Activity {

private TextView longitude;

private TextView latitude;

@Override
public void onCreate(Bundle savedInstanceState) {

super.onCreate(savedInstanceState);

setContentView(R.layout.main);

longitude = (TextView)findViewById(R.id.longitude);

latitude = (TextView)findViewById(R.id.latitude);

Location mLocation = getLocation(this);

longitude.setText("Longitude: " + mLocation.getLongitude());

latitude.setText("Latitude: " + mLocation.getLatitude());

}

//Get the Location by GPS or WIFI
public Location getLocation(Context context) {

LocationManager locMan = (LocationManager) context
.getSystemService(Context.LOCATION_SERVICE);
Location location = locMan
.getLastKnownLocation(LocationManager.GPS_PROVIDER);

if (location == null) {

location = locMan
.getLastKnownLocation(LocationManager.NETWORK_PROVIDER);
}
return location;
}
}

package com.android.tutor;
import android.app.Activity;
import android.content.Context;
import android.location.Location;
import android.location.LocationManager;
import android.os.Bundle;
import android.widget.TextView;
public class LocationDemo extends Activity {

private TextView longitude;
private TextView latitude;
@Override
public void onCreate(Bundle savedInstanceState) {
super.onCreate(savedInstanceState);
setContentView(R.layout.main);

longitude = (TextView)findViewById(R.id.longitude);
latitude = (TextView)findViewById(R.id.latitude);

Location mLocation = getLocation(this);

longitude.setText("Longitude: " + mLocation.getLongitude());
latitude.setText("Latitude: " + mLocation.getLatitude());
}

//Get the Location by GPS or WIFI
public Location getLocation(Context context) {
LocationManager locMan = (LocationManager) context
.getSystemService(Context.LOCATION_SERVICE);
Location location = locMan
.getLastKnownLocation(LocationManager.GPS_PROVIDER);
if (location == null) {
location = locMan
.getLastKnownLocation(LocationManager.NETWORK_PROVIDER);
}
return location;
}
}
第四步:增加权限,修改AndroidManifest.xml 代码如下(第16行为所增行):
[java]
view plaincopyprint?
<?xml version="1.0" encoding="utf-8"?>
<manifest xmlns:android="http://schemas.android.com/apk/res/android"
package="com.android.tutor"
android:versionCode="1"
android:versionName="1.0">
<application android:icon="@drawable/icon" android:label="@string/app_name">
<activity android:name=".LocationDemo"
android:label="@string/app_name">
<intent-filter>
<action android:name="android.intent.action.MAIN" />
<category android:name="android.intent.category.LAUNCHER" />
</intent-filter>
</activity>
</application>
<uses-sdk android:minSdkVersion="7" />
<uses-permission android:name="android.permission.ACCESS_FINE_LOCATION"/>
</manifest>
<?xml version="1.0" encoding="utf-8"?>
<manifest xmlns:android="http://schemas.android.com/apk/res/android"
package="com.android.tutor"
android:versionCode="1"
android:versionName="1.0">
<application android:icon="@drawable/icon" android:label="@string/app_name">
<activity android:name=".LocationDemo"
android:label="@string/app_name">
<intent-filter>
<action android:name="android.intent.action.MAIN" />
<category android:name="android.intent.category.LAUNCHER" />
</intent-filter>
</activity>
</application>
<uses-sdk android:minSdkVersion="7" />
<uses-permission android:name="android.permission.ACCESS_FINE_LOCATION"/>
</manifest>
第五步:运行LocationDemo 工程,所得效果如下(真机深圳测试):

相关文章推荐
- Android高手进阶教程(十四)---通过Location获取Address的使用!
- Android 高手进阶教程(十四)之----Android Location的使用!!
- Android 高手进阶教程(十四)之----Android Location的使用!!
- Android 高手进阶教程(十四)之----Android Location的使用!!
- Android 高手进阶教程(十四)之----Android Location的使用!!
- Android 高手进阶教程(十四)之----Android Location的使用!!
- Android 高手进阶教程(十四)之----Android Location的使用!!
- Android 高手进阶教程(十四)之----Android Location的使用!!
- Android高手进阶教程(十五)之---通过Location获取Address的使用!
- Android高手进阶教程(十五)之---通过Location获取Address的使用!
- Android高手进阶教程(十五)之---通过Location获取Address的使用!
- Android高手进阶教程(十五)之---通过Location获取Address的使用!
- Android高手进阶教程(十五)之---通过Location获取Address的使用!
- Android高手进阶教程(十五)之---通过Location获取Address的使用!
- Android高手进阶教程(十五)之---通过Location获取Address的使用!
- Android高手进阶教程(十五)之---通过Location获取Address的使用!
- Android 高手进阶教程(十三)----Android Location的使用!!
- Android高手进阶教程(十九)之---Android开发中,使用线程应该注意的问题!
- Android高手进阶教程(四)之----Android 中自定义属性(attr.xml,TypedArray)的使用!
- Android高手进阶教程(四)之----Android 中自定义属性(attr.xml,TypedArray)的使用!