Sharepoint学习笔记—Site Definition系列--8、如何在Site Definition中引入Master Page (2、Css等资源的引入)
2012-10-18 04:47
549 查看
上一篇讲了如何在Site Definition中引入Maste Page,作为实际操作这是必要的步骤,但仅仅这样是肯定不够的,因为我们不可能不对Master Page的外观进行设计就部署并使用它了。而外观的设计又必须要涉及到CSS等资源的引入与使用。这里我们就继续上面的操作,在本篇看看如何引入我们的CSS资源(当然,引入Img等资源的方法与引入CSS的方法相同)。
还是在上述的项目中,新添加一个Module,命名为MyStyleLibrary
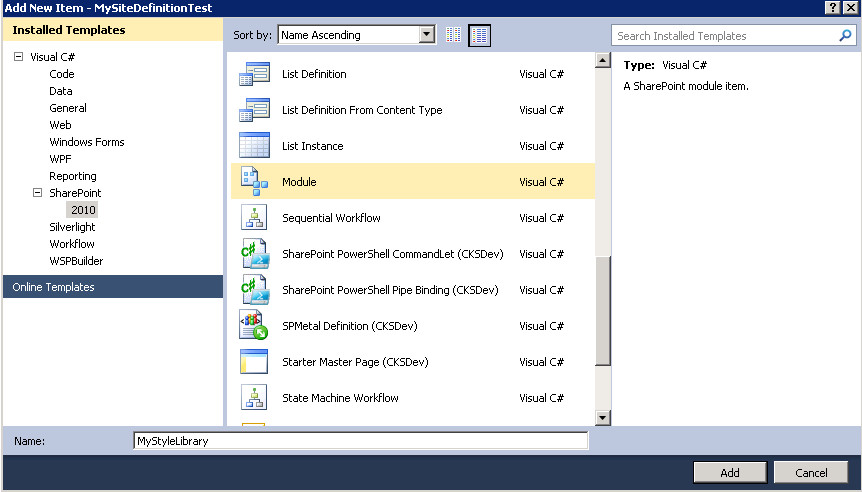
新项目如下图:

把Sample.txt重命名为MyCustomCss.css,并输入内容如下:
body { background-color: #e5e5e5; color: #444; font-family: segoe wp,segoe ui,verdana,arial,helvetica,sans-serif; font-size: 100%; line-height: 1.125em; /* 16×1.125=18 http://spbuzz.it/why1125em */ }
a, a:active, a:hover, a:link, a:visited { color: #1ba1e2; }
#s4-bodyContainer { overflow: auto; }
#s4-workspace { margin: 5px auto; padding: 0 10px; width: 1140px; }
/* make the body use its proper scrollbar again */
body { overflow: auto !important; }
body #s4-workspace { background-color: #fff; overflow: visible; }
.s4-title { background: transparent none; display: inline; float: left; padding-left: 0px; margin-bottom: 16px; overflow:hidden; width: auto; } /** remove padding */
.s4-title h1 { display: block; font-size: 300%; line-height: 100%; margin: 10px auto; text-transform: lowercase; }
.s4-title h1 a { color: #1ba1e2; }
.s4-title h1 a:hover { text-decoration: none;}
.s4-title .s4-pagedescription { font-size: 80%; }
.info { float: right; display: block;}
.info li { display: inline; }
/** Top Navigation */
body #s4-topheader2 { background: transparent none; font-size:small; height:25px; border: 0px; display: inline; float: right; padding-top: 16px; width: auto;}
.s4-toplinks { display: inline; float: left; }
.s4-toplinks .s4-tn A.selected { background: transparent none; border: 0px; font-weight: bold; margin: 0px; padding: 5px 10px; }
.s4-tn LI.static > .menu-item { height: auto; }
.s4-toplinks .s4-tn A:hover { height: auto; text-decoration: none; }
.s4-searcharea { display: inline; float: right; margin-top: 16px; }
.s4-search input.ms-sbplain { background: transparent none; font-size: 80%; }
.s4-search .srch-gosearchimg { background: transparent none; }
/** Quick launch */
BODY #s4-leftpanel-content {
border: 0px;
}
.s4-ql A.selected { background: #1ba1e2 none; background-position-x: left; background-position-y: bottom; border: 0px; color: #fff !important; padding-bottom: 5px; padding-left: 15px; padding-right: 15px; }
.menu .menu-item .additional-background { margin-bottom: 5px; }
BODY #s4-leftpanel {
width: 100%;
}
.s4-ql {
margin: 0px;
}
.s4-ql UL.root > LI > .menu-item, .s4-ql UL.root UL > LI > A {
padding-left: 15px; padding-right: 15px; color: #1ba1e2; font-size: 1.25em;
}
.s4-ca {
margin-left: 0px;
}
.s4-ca H2 {
font-size: 1.3em;
margin-top: 10px;
}
.s4-ca H1 {
font-size: 1.4em;
margin: 5px 0px 5px 0px;
}
.ms-rte-layoutszone-inner { padding: 0px; }
.ms-WPHeader { background-color: #1ba1e2; margin-bottom: 5px; }
.ms-WPTitle, .ms-WPTitle A, .ms-WPTitle A:visited, .ms-WPTitle A:hover { font-size: 1.25em; color: #fff; text-transform: uppercase; font-weight: bold; }
TD.ms-addnew {
padding: 5px 0px 5px 0px; text-transform: uppercase;
}
.ms-partline {
padding-bottom: 5px;
}
A.ms-addnew { padding: 5px; background-color: #ccc; color: #333; }
.s4-recentchanges {
display: none;
}
.ms-v4propertysheetspacing {
margin-left: 0px;
}
.login {
background: #1ba0e1;
}然后修改MyStyleLibrary下的Elements.xml内容如下
<?xml version="1.0" encoding="utf-8"?>
<Elements xmlns="http://schemas.microsoft.com/sharepoint/">
<Module Name="MyStyleLibrary" Url="Style Library" RootWebOnly="FALSE">
<File Path="MyStyleLibrary\MyCustomCss.css"
Url="MyCustomCss.css"
Type="Ghostable" />
</Module>
</Elements> 这里我们把MyCustomCss.css文件放置到新创建Site的Style Library列表中
并且把File的Type设置为Ghostable,如果我们设置为GhostableInLibrary则可能会出现如下报错:
Failed to instantiate file "MyStyleLibrary" from module "MyStyleLibrary": The specified list does not exist 本项目部署后可以通过SP Designer查看到下图:

指定了MyCustomCss.css的内容并指定了它的部署位置,接下来,我们需要操作我们的MasterPage来达成两个任务
1、通知它上哪儿去找我们的MyCustomCss.css
2、覆盖系统默认的CoreV4.css
我们需要作的就是在我们的MyCustom.master文件内容中找到如下代码
<SharePoint:CssLink runat="server" Version="4"/>在它的下面加入如下代码
<SharePoint:CssRegistration name="<% $SPUrl:~sitecollection/Style Library/MyCustom.css %>" After="corev4.css" runat="server"/> 效果如下:

这里我们使用到了CssRegistration: 它的作用就是让CssLink读取此处注册的Css然后插入到Link元素中以达到调用外部CSS定义的目的。
关于CssRegistration类的定义,请参考CssRegistration说明
我们可以在部署后可以查看此处引入的Css效果,方法是在部署后的页面上查看资源文件,如下图

从上图中我们可以看到我们的MyCustomCss.css在CoreV4.css后进行了加载,所以达到了覆盖CoreV4.css的目的。
重新Build并部署项目,效果如下图:

还是在上述的项目中,新添加一个Module,命名为MyStyleLibrary
新项目如下图:
把Sample.txt重命名为MyCustomCss.css,并输入内容如下:
body { background-color: #e5e5e5; color: #444; font-family: segoe wp,segoe ui,verdana,arial,helvetica,sans-serif; font-size: 100%; line-height: 1.125em; /* 16×1.125=18 http://spbuzz.it/why1125em */ }
a, a:active, a:hover, a:link, a:visited { color: #1ba1e2; }
#s4-bodyContainer { overflow: auto; }
#s4-workspace { margin: 5px auto; padding: 0 10px; width: 1140px; }
/* make the body use its proper scrollbar again */
body { overflow: auto !important; }
body #s4-workspace { background-color: #fff; overflow: visible; }
.s4-title { background: transparent none; display: inline; float: left; padding-left: 0px; margin-bottom: 16px; overflow:hidden; width: auto; } /** remove padding */
.s4-title h1 { display: block; font-size: 300%; line-height: 100%; margin: 10px auto; text-transform: lowercase; }
.s4-title h1 a { color: #1ba1e2; }
.s4-title h1 a:hover { text-decoration: none;}
.s4-title .s4-pagedescription { font-size: 80%; }
.info { float: right; display: block;}
.info li { display: inline; }
/** Top Navigation */
body #s4-topheader2 { background: transparent none; font-size:small; height:25px; border: 0px; display: inline; float: right; padding-top: 16px; width: auto;}
.s4-toplinks { display: inline; float: left; }
.s4-toplinks .s4-tn A.selected { background: transparent none; border: 0px; font-weight: bold; margin: 0px; padding: 5px 10px; }
.s4-tn LI.static > .menu-item { height: auto; }
.s4-toplinks .s4-tn A:hover { height: auto; text-decoration: none; }
.s4-searcharea { display: inline; float: right; margin-top: 16px; }
.s4-search input.ms-sbplain { background: transparent none; font-size: 80%; }
.s4-search .srch-gosearchimg { background: transparent none; }
/** Quick launch */
BODY #s4-leftpanel-content {
border: 0px;
}
.s4-ql A.selected { background: #1ba1e2 none; background-position-x: left; background-position-y: bottom; border: 0px; color: #fff !important; padding-bottom: 5px; padding-left: 15px; padding-right: 15px; }
.menu .menu-item .additional-background { margin-bottom: 5px; }
BODY #s4-leftpanel {
width: 100%;
}
.s4-ql {
margin: 0px;
}
.s4-ql UL.root > LI > .menu-item, .s4-ql UL.root UL > LI > A {
padding-left: 15px; padding-right: 15px; color: #1ba1e2; font-size: 1.25em;
}
.s4-ca {
margin-left: 0px;
}
.s4-ca H2 {
font-size: 1.3em;
margin-top: 10px;
}
.s4-ca H1 {
font-size: 1.4em;
margin: 5px 0px 5px 0px;
}
.ms-rte-layoutszone-inner { padding: 0px; }
.ms-WPHeader { background-color: #1ba1e2; margin-bottom: 5px; }
.ms-WPTitle, .ms-WPTitle A, .ms-WPTitle A:visited, .ms-WPTitle A:hover { font-size: 1.25em; color: #fff; text-transform: uppercase; font-weight: bold; }
TD.ms-addnew {
padding: 5px 0px 5px 0px; text-transform: uppercase;
}
.ms-partline {
padding-bottom: 5px;
}
A.ms-addnew { padding: 5px; background-color: #ccc; color: #333; }
.s4-recentchanges {
display: none;
}
.ms-v4propertysheetspacing {
margin-left: 0px;
}
.login {
background: #1ba0e1;
}然后修改MyStyleLibrary下的Elements.xml内容如下
<?xml version="1.0" encoding="utf-8"?>
<Elements xmlns="http://schemas.microsoft.com/sharepoint/">
<Module Name="MyStyleLibrary" Url="Style Library" RootWebOnly="FALSE">
<File Path="MyStyleLibrary\MyCustomCss.css"
Url="MyCustomCss.css"
Type="Ghostable" />
</Module>
</Elements> 这里我们把MyCustomCss.css文件放置到新创建Site的Style Library列表中
并且把File的Type设置为Ghostable,如果我们设置为GhostableInLibrary则可能会出现如下报错:
Failed to instantiate file "MyStyleLibrary" from module "MyStyleLibrary": The specified list does not exist 本项目部署后可以通过SP Designer查看到下图:
指定了MyCustomCss.css的内容并指定了它的部署位置,接下来,我们需要操作我们的MasterPage来达成两个任务
1、通知它上哪儿去找我们的MyCustomCss.css
2、覆盖系统默认的CoreV4.css
我们需要作的就是在我们的MyCustom.master文件内容中找到如下代码
<SharePoint:CssLink runat="server" Version="4"/>在它的下面加入如下代码
<SharePoint:CssRegistration name="<% $SPUrl:~sitecollection/Style Library/MyCustom.css %>" After="corev4.css" runat="server"/> 效果如下:
这里我们使用到了CssRegistration: 它的作用就是让CssLink读取此处注册的Css然后插入到Link元素中以达到调用外部CSS定义的目的。
关于CssRegistration类的定义,请参考CssRegistration说明
我们可以在部署后可以查看此处引入的Css效果,方法是在部署后的页面上查看资源文件,如下图
从上图中我们可以看到我们的MyCustomCss.css在CoreV4.css后进行了加载,所以达到了覆盖CoreV4.css的目的。
重新Build并部署项目,效果如下图:

相关文章推荐
- SharePoint【Site Definition 系列】-- 08. 如何在Site Definition中引入Master Page (02. Css等资源的引入)
- Sharepoint学习笔记—Site Definition系列--7、如何在Site Definition中引入Master Page (1、Master Page的引入)
- SharePoint【Site Definition 系列】-- 07. 如何在Site Definition中引入Master Page (01. Master Page的引入)
- Sharepoint学习笔记—Site Definition系列--7、如何在Site Definition中引入Master Page (1、Master Page的引入)
- Sharepoint学习笔记—Site Definition系列--9、如何在Site Definition中整合Bing Map
- Sharepoint学习笔记—Site Definition系列--6、基于一个已经部署的List Template来创建List Instance
- 如何在SharePoint 2013 的Master page 中引入Jquery
- Sharepoint学习笔记—Site Definition系列-- 4、相对快捷地创建List Definition的Schema.xml文件
- Sharepoin学习笔记—架构系列--Sharepoint的网页(Page),网页解析(Parsing)与解析安全处理(Security)
- ASP.NET 2.0 之 Master Page 学习笔记
- Unity资源打包学习笔记(二)、如何实现高效的unity AssetBundle热更新
- Sharepoint学习笔记—ECMAScript对象模型系列-- 12、通过邮件发送带有Unique DocumentID的文档链接
- 张高兴的 Xamarin.Forms 开发笔记:为 Android 与 iOS 引入 UWP 风格的汉堡菜单 ( MasterDetailPage )
- SharePoint【学习笔记】-- 如何在系统Path中添加STSADM的快速引用(Add STSADM in path)
- Sharepoint学习笔记---如何找到SharePoint List的Template ID
- CSS学习笔记7:如何脱离标准文档流之浮动
- 学习笔记:如何成为一个优秀的scrum master
- Sharepoint学习笔记---如何在Sharepoint2010网站中整合Crystal Report水晶报表(显示数据 一)
- 步步为营 SharePoint 开发学习笔记系列 七、SharePoint Timer Job 开发
- [置顶] Css 学习笔记--样式引入方式及按权重判断优先级