(转)使用WCF 4.0 构建 REST Service
2012-07-20 10:30
204 查看
下面来看下如何一步一步来创建新的REST结构的WCF项目。
创建项目
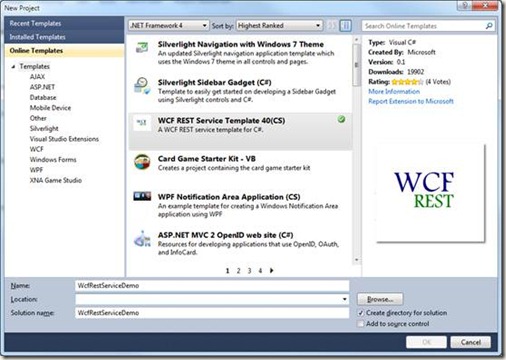
1 打开VS 2010,选择新建项目,我们选择已有的模板来方便创建新的项目,在左侧Online Templates中选择WCF REST Service Template 40(CS)。
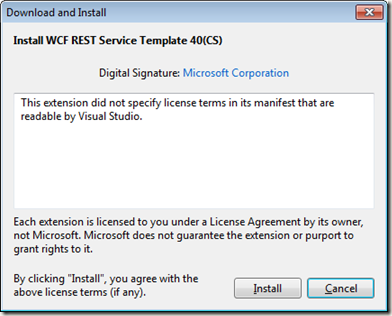
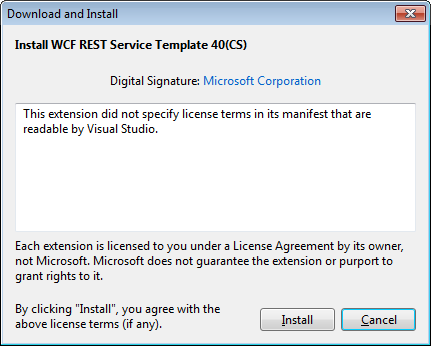
接下来去安装这个模板到本地,第一次安装时需要同意该使用协议,点击“安装”:
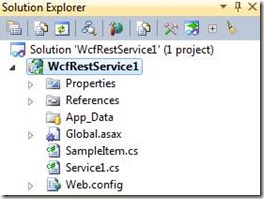
这样我们就很简单的用这个模板生成了一个新的项目。
相对于之前的版本
l 项目中不再有SVC文件,这样就不能每次都通过xx.svc/users/1 来访问,而是通过URL Routing来配置。
l 也不再有接口文件作契约。
1 public class Global : HttpApplication
2 {
3 void Application_Start(object sender, EventArgs e)
4 {
5 RegisterRoutes();
6 }
7
8 private void RegisterRoutes()
9 {
10 // Edit the base address of Service1 by replacing the "Service1" string below
11 RouteTable.Routes.Add(new ServiceRoute("Service1", new WebServiceHostFactory(), typeof(Service1)));
12 }
13 }
通过代码我们可以看到,通过ServiceRoute类来进行URL重定向的,这里我们配置了一个名为Service1的Resource,指定到Service1类上。
1 <?xml version="1.0"?>
2 <configuration>
3 <system.web>
4 <compilation debug="true" targetFramework="4.0" />
5 </system.web>
6
7 <system.webServer>
8 <modules runAllManagedModulesForAllRequests="true">
9 <add name="UrlRoutingModule" type="System.Web.Routing.UrlRoutingModule, System.Web, Version=4.0.0.0, Culture=neutral, PublicKeyToken=b03f5f7f11d50a3a" />
10 </modules>
11 </system.webServer>
12
13 <system.serviceModel>
14 <serviceHostingEnvironment aspNetCompatibilityEnabled="true"/>
15 <standardEndpoints>
16 <webHttpEndpoint>
17 <!--
18 Configure the WCF REST service base address via the global.asax.cs file and the default endpoint
19 via the attributes on the <standardEndpoint> element below
20 -->
21 <standardEndpoint name="" helpEnabled="true" automaticFormatSelectionEnabled="true"/>
22 </webHttpEndpoint>
23 </standardEndpoints>
24 </system.serviceModel>
25 </configuration>
1 [ServiceContract]
2 [AspNetCompatibilityRequirements(RequirementsMode = AspNetCompatibilityRequirementsMode.Allowed)]
3 [ServiceBehavior(InstanceContextMode = InstanceContextMode.PerCall)]
4 public class Service1
5 {
6 // GET /Service1/
7 [WebGet(UriTemplate = "")]
8 public List<SampleItem> GetCollection()
9 {
10 return new List<SampleItem>() { new SampleItem() { Id = 1, StringValue = "Hello" } };
11 }
12
13 // POST /Service1/
14 [WebInvoke(UriTemplate = "", Method = "POST")]
15 public SampleItem Create(SampleItem instance)
16 {
17 throw new NotImplementedException();
18 }
19
20 // GET /Service1/100
21 [WebGet(UriTemplate = "{id}")]
22 public string Get(string id)
23 {
24 return "welcome";
25 }
26
27 // PUT /Service1/100
28 [WebInvoke(UriTemplate = "{id}", Method = "PUT")]
29 public SampleItem Update(string id, SampleItem instance)
30 {
31 throw new NotImplementedException();
32 }
33
34 // DELETE /Service1/100
35 [WebInvoke(UriTemplate = "{id}", Method = "DELETE")]
36 public void Delete(string id)
37 {
38 // TODO: Remove the instance of SampleItem with the given id from the collection
39 throw new NotImplementedException();
40 }
41 }
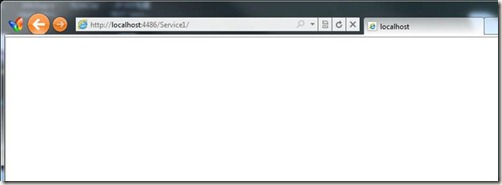
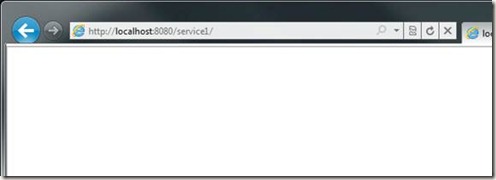
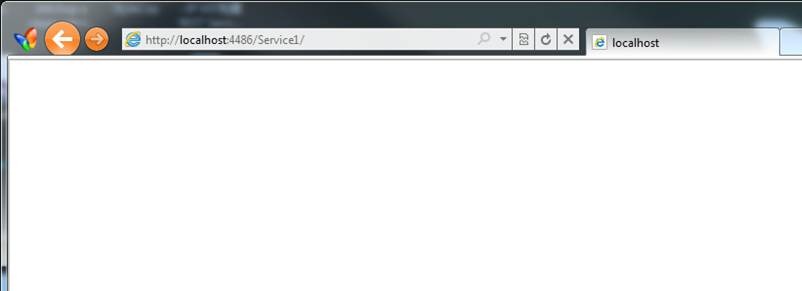
在地址栏中加上Service1,可以看到打开一个空白页面,此时内容已经生成,只是XML数默认不直接显示在页面上。
通过查看其Source,可以看到返回的数据集。

此时参数为空,也就是会调用下面一个返回集合的方法:
1 [WebGet(UriTemplate = "")]
2 public List<SampleItem> GetCollection()
同时,也可以发起带参数的GET请求,如/Service1/1/,则会调用相对应的参数函数:
1 [WebGet(UriTemplate = "{id}")]
2 public string Get(string id)
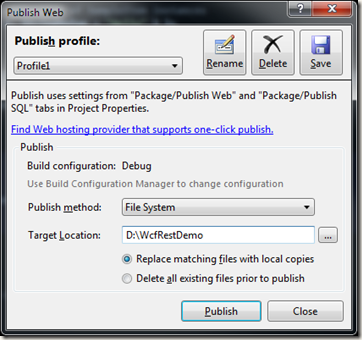
将项目发布到本地磁盘:
在IIS中新建一个Site,在右侧Action下有一个Add Web Site。也可以在Default Web Site下新建一个Application,方式相同:

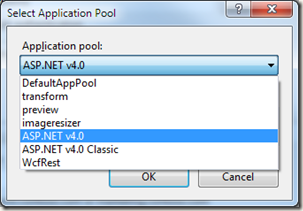
这一步一定要选Application pool为 ASP.NET v4.0,端口任意指定,这里使用8080
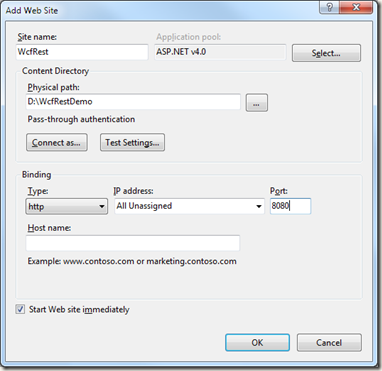
再强调一次,一定要选ASP.NET v4.0
在浏览器中打开可以看到结果。
相关文章推荐
在godaddy设置.net WCF
WCF实现RESTFul Web Service
WCF实例
JQuery调用WCF
创建项目
1 打开VS 2010,选择新建项目,我们选择已有的模板来方便创建新的项目,在左侧Online Templates中选择WCF REST Service Template 40(CS)。

接下来去安装这个模板到本地,第一次安装时需要同意该使用协议,点击“安装”:
这样我们就很简单的用这个模板生成了一个新的项目。
改变之处
该模板使用了一种新的结构来创建简单的REST Service,在细读代码前,先看下项目的文件结构: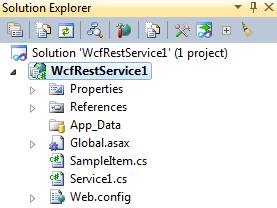
相对于之前的版本
l 项目中不再有SVC文件,这样就不能每次都通过xx.svc/users/1 来访问,而是通过URL Routing来配置。
l 也不再有接口文件作契约。
Global.asax配置
可以看到在.NET 4中构建REST服务相当容易。项目通过在Global.asax中来配置类似于ASP.NET 中的Routing进行URL重定向。见如下代码。1 public class Global : HttpApplication
2 {
3 void Application_Start(object sender, EventArgs e)
4 {
5 RegisterRoutes();
6 }
7
8 private void RegisterRoutes()
9 {
10 // Edit the base address of Service1 by replacing the "Service1" string below
11 RouteTable.Routes.Add(new ServiceRoute("Service1", new WebServiceHostFactory(), typeof(Service1)));
12 }
13 }
通过代码我们可以看到,通过ServiceRoute类来进行URL重定向的,这里我们配置了一个名为Service1的Resource,指定到Service1类上。
Web.config
同时,在web.config中包含着部署所需要的一些配置。下面的代码是默认生成的。1 <?xml version="1.0"?>
2 <configuration>
3 <system.web>
4 <compilation debug="true" targetFramework="4.0" />
5 </system.web>
6
7 <system.webServer>
8 <modules runAllManagedModulesForAllRequests="true">
9 <add name="UrlRoutingModule" type="System.Web.Routing.UrlRoutingModule, System.Web, Version=4.0.0.0, Culture=neutral, PublicKeyToken=b03f5f7f11d50a3a" />
10 </modules>
11 </system.webServer>
12
13 <system.serviceModel>
14 <serviceHostingEnvironment aspNetCompatibilityEnabled="true"/>
15 <standardEndpoints>
16 <webHttpEndpoint>
17 <!--
18 Configure the WCF REST service base address via the global.asax.cs file and the default endpoint
19 via the attributes on the <standardEndpoint> element below
20 -->
21 <standardEndpoint name="" helpEnabled="true" automaticFormatSelectionEnabled="true"/>
22 </webHttpEndpoint>
23 </standardEndpoints>
24 </system.serviceModel>
25 </configuration>
Resource代码
默认生成的Resource:Service1代码,可以看到这是一个完整RESTful的结构,有着Get, Put, Post, Delete的完整支持。1 [ServiceContract]
2 [AspNetCompatibilityRequirements(RequirementsMode = AspNetCompatibilityRequirementsMode.Allowed)]
3 [ServiceBehavior(InstanceContextMode = InstanceContextMode.PerCall)]
4 public class Service1
5 {
6 // GET /Service1/
7 [WebGet(UriTemplate = "")]
8 public List<SampleItem> GetCollection()
9 {
10 return new List<SampleItem>() { new SampleItem() { Id = 1, StringValue = "Hello" } };
11 }
12
13 // POST /Service1/
14 [WebInvoke(UriTemplate = "", Method = "POST")]
15 public SampleItem Create(SampleItem instance)
16 {
17 throw new NotImplementedException();
18 }
19
20 // GET /Service1/100
21 [WebGet(UriTemplate = "{id}")]
22 public string Get(string id)
23 {
24 return "welcome";
25 }
26
27 // PUT /Service1/100
28 [WebInvoke(UriTemplate = "{id}", Method = "PUT")]
29 public SampleItem Update(string id, SampleItem instance)
30 {
31 throw new NotImplementedException();
32 }
33
34 // DELETE /Service1/100
35 [WebInvoke(UriTemplate = "{id}", Method = "DELETE")]
36 public void Delete(string id)
37 {
38 // TODO: Remove the instance of SampleItem with the given id from the collection
39 throw new NotImplementedException();
40 }
41 }
运行测试
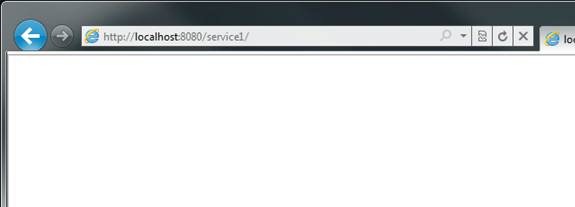
为了测试,将Get(string id)进行修改。可以直接运行项目(F5)。在地址栏中加上Service1,可以看到打开一个空白页面,此时内容已经生成,只是XML数默认不直接显示在页面上。
通过查看其Source,可以看到返回的数据集。
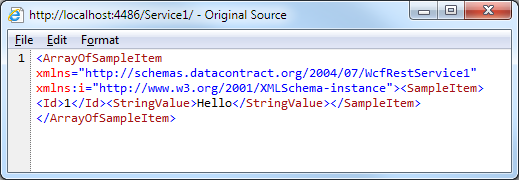
此时参数为空,也就是会调用下面一个返回集合的方法:
1 [WebGet(UriTemplate = "")]
2 public List<SampleItem> GetCollection()
同时,也可以发起带参数的GET请求,如/Service1/1/,则会调用相对应的参数函数:
1 [WebGet(UriTemplate = "{id}")]
2 public string Get(string id)
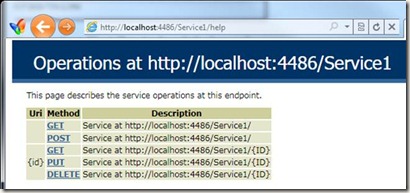
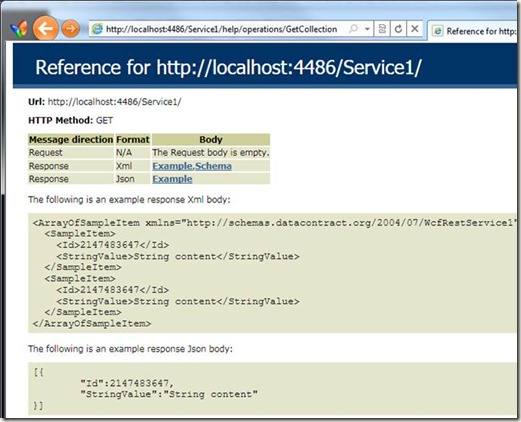
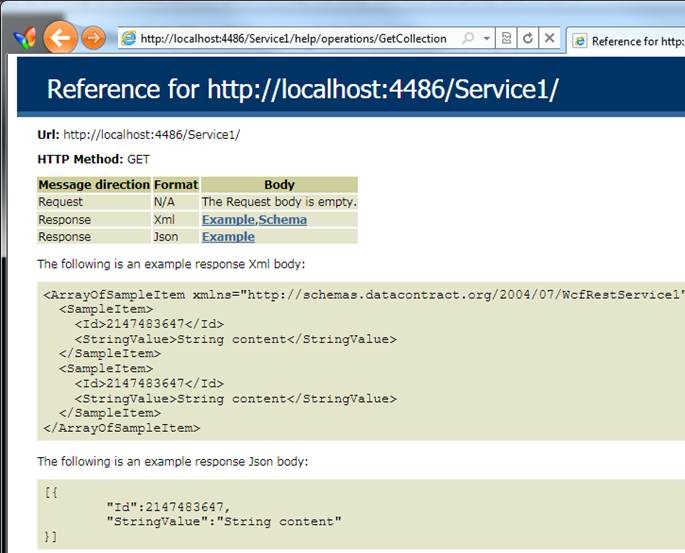
Help 页面
模板同时也为我们生成了一个帮助页面,帮助我们快速了解该Resource所对应的URI祥情。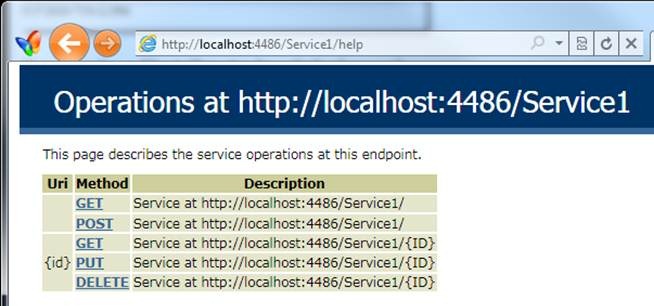
布署到IIS 7
该项目的布署和普通ASP.NET项目相同,这里写下方法。将项目发布到本地磁盘:

在IIS中新建一个Site,在右侧Action下有一个Add Web Site。也可以在Default Web Site下新建一个Application,方式相同:

这一步一定要选Application pool为 ASP.NET v4.0,端口任意指定,这里使用8080
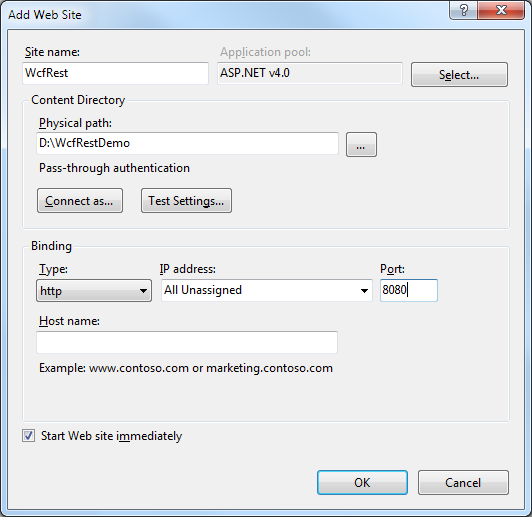
再强调一次,一定要选ASP.NET v4.0

在浏览器中打开可以看到结果。
相关文章推荐
在godaddy设置.net WCF
WCF实现RESTFul Web Service
WCF实例
JQuery调用WCF
HttpClient + ASP.NET Web API, WCF之外的另一个选择
ASP.net WebAPI + JQuery CRUD
相关文章推荐
- 使用WCF 4.0 构建 REST Service
- 使用WCF 4.0 构建 和部署 REST Service
- 使用WCF 4.0 构建 REST Service
- [转]使用WCF 4.0 构建 REST Service
- 使用WCF 4.0 构建 REST Service
- 如何使用Maven 3.0, Flex Mojos 4.0和Flex 4.5构建一个简单的SWF程序
- WCF系列(二) -- 使用配置文件构建和使用WCF服务
- 教程:使用 MongoDB、WCF、OData 和 PowerBI 构建 Azure 上的商业智能解决方案
- 使用 Silverlight 2 和 WCF 构建服务驱动的应用程序
- WCF 4.0 进阶系列 – 第十五章 构建REST服务(第三部分)
- WCF系列(一) -- 完全不使用配置文件构建和使用WCF服务
- .Net中使用WCF构建简单的基于B/S和C/S的服务
- 教程:使用 MongoDB、WCF、OData 和 PowerBI 构建 Azure 上的商业智能解决方案
- WCF 4.0 如何编程修改wcf配置,不使用web.config静态配置
- 普通WCF应用程序使用SVC文件寄宿WF 4.0服务
- 教程:使用 MongoDB、WCF、OData 和 PowerBI 构建 Azure 上的商业智能解决方案
- WCF系列(一) -- 完全不使用配置文件构建和使用WCF服务
- Silverlight学习点滴之一——使用WCF RIA构建应用
- WCF系列(一) -- 完全不使用配置文件构建和使用WCF服务
- WCF系列(二) -- 使用配置文件构建和使用WCF服务