【iOS-Cocos2d游戏开发】使用plist文件制作简单精灵
2012-05-23 21:05
806 查看
最近学cocos2d,看一般都用Zwoptex,但是这个软件要钱,所以用了一个在线版本的http://zwoptexapp.com/flashversion/基本功能也很好,需要注意的是,在最后导出png图片和plist文件时,一定要取相同的名字(切记啊切记),下面是素材


//=================================================================================
上代码:
@interface HelloWorldLayer :CCLayer
{
CCSprite *_sprite;
CCAction *_walkAction;
CCAction *_moveAction;
}
@property(nonatomic,retain)CCSprite*sprite;
@property(nonatomic,retain)CCAction*walkAction;
@property(nonatomic,retain)CCAction*moveAction;
// returns a CCScene that contains the HelloWorldLayer as the onlychild
+(CCScene *) scene;
@end
#import "HelloWorldLayer.h"
// HelloWorldLayer implementation
@implementationHelloWorldLayer
@synthesizesprite=_sprite;
@synthesize moveAction =_moveAction;
@synthesize walkAction =_walkAction;
+(CCScene *) scene
{
// 'scene' is an autorelease object.
CCScene *scene = [CCScenenode];
// 'layer' is an autorelease object.
HelloWorldLayer*layer =[HelloWorldLayernode];
// add layer as a child to scene
[scene
addChild: layer];
// return the scene
return scene;
}
-(id)init{
if((self=[super init])){
[[CCSpriteFrameCache
sharedSpriteFrameCache]addSpriteFramesWithFile:
@"AnimHero.plist"];//第1步
CCSpriteBatchNode*spriteSheet =[CCSpriteBatchNode
batchNodeWithFile:@"AnimHero.png"];
[self
addChild:spriteSheet];//第2步
NSMutableArray *walkAnimFrames =[NSMutableArrayarray];
for(inti=1; i<=3; i++)
{
[walkAnimFramesaddObject:
[[CCSpriteFrameCacheshared SpriteFrameCache]spriteFrameByName:
[NSStringstringWithFormat:@"hero%i.png",i]]];
} //第3步
CCAnimation*walkAnim = [CCAnimation
animationWithFrames:walkAnimFramesdelay:0.1f];//第4步
_sprite=[CCSprite
spriteWithSpriteFrameName:@"hero1.png"];
_sprite.position=ccp(240,160);
self.walkAction=[CCRepeatForever
actionWithAction:
[CCAnimate
actionWithAnimation:walkAni restoreOriginalFrame:NO]];
[_spriterunAction:_walkAction];
[spriteSheet addChild:_sprite]; //第5步
}
return self;
}
-(void) dealloc
{
self.sprite=nil;
self.moveAction=nil;
self.walkAction=nil;
[superdealloc];
}
@end
逐步解析:
第1步:缓冲sprite帧和纹理。 [[CCSpriteFrameCache sharedSpriteFrameCache] addSpriteFramesWithFile:
@"AnimHero.plist"];
首先,调用CCSpriteFrameCache的addSpriteFramesWithFile方法,然后把Zwoptex生成的plist文件当作参数传进去。这个方法做了以下几件事:1:寻找resource下和输入的参数名字一样但是后缀是.png的图片文件,然后把这个文件加入到共享的CCTextureCache中。就是AnimHero.png
2:解析plist文件,追踪所有的sprite在spritesheet中的位置,内部使用CCSpriteFrame对象追踪这些信息。
第2步:创建一个精灵处理批节点。
CCSpriteBatchNode *spriteSheet= [CCSpriteBatchNode
batchNodeWithFile:@"AnimHero.png"];
[self addChild:spriteSheet];
接下来,创建CCSpriteBatchNode对象,把spritesheet当作参数传进去,spritesheet工作原理:1:创建一个CCSpriteBatchNode对象,通过传递一个包含所有sprite的spritesheet的名字作为参数,并加入到当前场景中。2:在spritesheet中创建的任何一个sprite,都应该当作CCSpriteBatchNode的一个孩子加进去,只要sprite包含在sprite中,就ok了。3:CCSpriteBatchNode可以智能遍历所有的孩子节点。
第3步:收集帧列表。
NSMutableArray *walkAnimFrames =[NSMutableArray array];
for(int i=1;i
<=3;i++)
{
[walkAnimFrames addObject:
[[CCSpriteFrameCache sharedSpriteFrameCache] spriteFrameByName:
[NSString stringWithFormat:@"hero%i.png",i]]];
}
为了创建一系列的动画帧,我们简单地遍历我们的图片名字(它们是按照hero1.png-->hero3.png的方式命名的),然后使用共享的CCSpriteFrameCache来获得每一个动画帧。记住,它们已经在缓存里了,因为我们前面调用了addSpriteFramesWithFile方法。
第4步:创建对象动画
CCAnimation *walkAnim = [CCAnimation
animationWithFrames:walkAnimFrames delay:0.1f]
接下来,我们通过传入sprite帧列表来创建一个CCAnimation对象,并且指定动画播放的速度。我们使用0.1来指定每个动画帧之间的时间间隔。
第5步:创建sprite并且让他run动画action
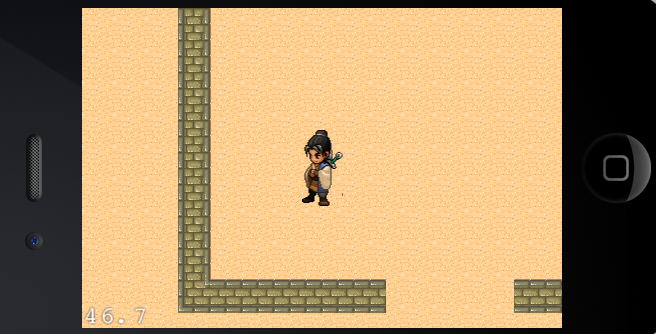
_sprite=[CCSprite spriteWithSpriteFrameName:@"hero1.png"];
_sprite.position=ccp(240,160);
self.walkAction =[CCRepeatForever actionWithAction:
[CCAnimate actionWithAnimation:walkAni restoreOriginalFrame:NO]];
[_sprite runAction:_walkAction];
[spriteSheet addChild:_sprite];
我们首先通过spriteframe来创建一个sprite,并把它放在屏幕中间。然后,生成CCAnimationAction,并赋值给场景的walkAction属性,最后让熊来运行这个action。
最后,我们把hero加个场景中--把它当作spritesheet的孩子加到spritesheet中去。注意,如果在这里我们没有把它加到spritsheet中,而是加到当前层里面的话。那么我们将得不到spritesheet为我们带来的性能提升!!
//=================================================================================
上代码:
@interface HelloWorldLayer :CCLayer
{
CCSprite *_sprite;
CCAction *_walkAction;
CCAction *_moveAction;
}
@property(nonatomic,retain)CCSprite*sprite;
@property(nonatomic,retain)CCAction*walkAction;
@property(nonatomic,retain)CCAction*moveAction;
// returns a CCScene that contains the HelloWorldLayer as the onlychild
+(CCScene *) scene;
@end
#import "HelloWorldLayer.h"
// HelloWorldLayer implementation
@implementationHelloWorldLayer
@synthesizesprite=_sprite;
@synthesize moveAction =_moveAction;
@synthesize walkAction =_walkAction;
+(CCScene *) scene
{
// 'scene' is an autorelease object.
CCScene *scene = [CCScenenode];
// 'layer' is an autorelease object.
HelloWorldLayer*layer =[HelloWorldLayernode];
// add layer as a child to scene
[scene
addChild: layer];
// return the scene
return scene;
}
-(id)init{
if((self=[super init])){
[[CCSpriteFrameCache
sharedSpriteFrameCache]addSpriteFramesWithFile:
@"AnimHero.plist"];//第1步
CCSpriteBatchNode*spriteSheet =[CCSpriteBatchNode
batchNodeWithFile:@"AnimHero.png"];
[self
addChild:spriteSheet];//第2步
NSMutableArray *walkAnimFrames =[NSMutableArrayarray];
for(inti=1; i<=3; i++)
{
[walkAnimFramesaddObject:
[[CCSpriteFrameCacheshared SpriteFrameCache]spriteFrameByName:
[NSStringstringWithFormat:@"hero%i.png",i]]];
} //第3步
CCAnimation*walkAnim = [CCAnimation
animationWithFrames:walkAnimFramesdelay:0.1f];//第4步
_sprite=[CCSprite
spriteWithSpriteFrameName:@"hero1.png"];
_sprite.position=ccp(240,160);
self.walkAction=[CCRepeatForever
actionWithAction:
[CCAnimate
actionWithAnimation:walkAni restoreOriginalFrame:NO]];
[_spriterunAction:_walkAction];
[spriteSheet addChild:_sprite]; //第5步
}
return self;
}
-(void) dealloc
{
self.sprite=nil;
self.moveAction=nil;
self.walkAction=nil;
[superdealloc];
}
@end
逐步解析:
第1步:缓冲sprite帧和纹理。 [[CCSpriteFrameCache sharedSpriteFrameCache] addSpriteFramesWithFile:
@"AnimHero.plist"];
首先,调用CCSpriteFrameCache的addSpriteFramesWithFile方法,然后把Zwoptex生成的plist文件当作参数传进去。这个方法做了以下几件事:1:寻找resource下和输入的参数名字一样但是后缀是.png的图片文件,然后把这个文件加入到共享的CCTextureCache中。就是AnimHero.png
2:解析plist文件,追踪所有的sprite在spritesheet中的位置,内部使用CCSpriteFrame对象追踪这些信息。
第2步:创建一个精灵处理批节点。
CCSpriteBatchNode *spriteSheet= [CCSpriteBatchNode
batchNodeWithFile:@"AnimHero.png"];
[self addChild:spriteSheet];
接下来,创建CCSpriteBatchNode对象,把spritesheet当作参数传进去,spritesheet工作原理:1:创建一个CCSpriteBatchNode对象,通过传递一个包含所有sprite的spritesheet的名字作为参数,并加入到当前场景中。2:在spritesheet中创建的任何一个sprite,都应该当作CCSpriteBatchNode的一个孩子加进去,只要sprite包含在sprite中,就ok了。3:CCSpriteBatchNode可以智能遍历所有的孩子节点。
第3步:收集帧列表。
NSMutableArray *walkAnimFrames =[NSMutableArray array];
for(int i=1;i
<=3;i++)
{
[walkAnimFrames addObject:
[[CCSpriteFrameCache sharedSpriteFrameCache] spriteFrameByName:
[NSString stringWithFormat:@"hero%i.png",i]]];
}
为了创建一系列的动画帧,我们简单地遍历我们的图片名字(它们是按照hero1.png-->hero3.png的方式命名的),然后使用共享的CCSpriteFrameCache来获得每一个动画帧。记住,它们已经在缓存里了,因为我们前面调用了addSpriteFramesWithFile方法。
第4步:创建对象动画
CCAnimation *walkAnim = [CCAnimation
animationWithFrames:walkAnimFrames delay:0.1f]
接下来,我们通过传入sprite帧列表来创建一个CCAnimation对象,并且指定动画播放的速度。我们使用0.1来指定每个动画帧之间的时间间隔。
第5步:创建sprite并且让他run动画action
_sprite=[CCSprite spriteWithSpriteFrameName:@"hero1.png"];
_sprite.position=ccp(240,160);
self.walkAction =[CCRepeatForever actionWithAction:
[CCAnimate actionWithAnimation:walkAni restoreOriginalFrame:NO]];
[_sprite runAction:_walkAction];
[spriteSheet addChild:_sprite];
我们首先通过spriteframe来创建一个sprite,并把它放在屏幕中间。然后,生成CCAnimationAction,并赋值给场景的walkAction属性,最后让熊来运行这个action。
最后,我们把hero加个场景中--把它当作spritesheet的孩子加到spritesheet中去。注意,如果在这里我们没有把它加到spritsheet中,而是加到当前层里面的话。那么我们将得不到spritesheet为我们带来的性能提升!!

相关文章推荐
- iOS-Cocos2d游戏开发】使用plist文件制作简单精灵
- 【iOS-Cocos2d游戏开发之二十】精灵的基础知识点总汇(位图操作/贴图更换/重排z轴等)以及利用CCSprite与CCLayerColor制作简单遮盖层!
- 【iOS-Cocos2d游戏开发】使用Zwoptex生成plist文件
- iOS-Cocos2d游戏开发】使用Zwoptex生成plist文件
- 【iOS-Cocos2d游戏开发之十七】灵活使用精灵可视区域(TextureRect)与锚点(anchorPoint),并结合可视区域与锚点制作进度条!
- 【iOS-Cocos2d游戏开发之十七】灵活使用精灵可视区域(TextureRect)与锚点(anchorPoint),并结合可视区域与锚点制作进度条!
- 【iOS-Cocos2d游戏开发之二十】精灵的基础知识点总汇(位图操作/贴图更换/重排z轴等)以及利用CCSprite与CCLayerColor制作简单遮盖层!
- 【iOS-Cocos2d游戏开发之二十】精灵的基础知识点总汇(位图操作/贴图更换/重排z轴等)及制作简单遮盖层!
- 【iOS-Cocos2d游戏开发之九】讲解CCSpriteBatchNode与TP工具的".pvr.ccz",".plist"共用的终极精灵优化及注意事项!
- 【iOS-Cocos2d游戏开发之九】讲解CCSpriteBatchNode与TP工具的".pvr.ccz",".plist"共用的终极精灵优化及注意事项!
- 【iOS-Cocos2d游戏开发】使用cocosBuiler制作cocos2d场景
- 【iOS-Cocos2d游戏开发之九】讲解CCSpriteBatchNode与TP工具的".pvr.ccz",".plist"共用的终极精灵优化及注意事项!
- 【iOS-Cocos2d游戏开发之九】讲解CCSpriteBatchNode与TP工具的".pvr.ccz",".plist"共用的终极精灵优化及注意事项!
- 【iOS-Cocos2d游戏开发之九】讲解CCSpriteBatchNode与TP工具的”.pvr.ccz”,”.plist”共用的终极精灵优化及注意事项!
- 【iOS-Cocos2d游戏开发】使用cocosBuiler制作cocos2d场景
- 【iOS-Cocos2d游戏开发之九】讲解CCSpriteBatchNode与TP工具的”.pvr.ccz”,”.plist”共用的终极精灵优化及注意事项!
- 【iOS-Cocos2d游戏开发之九】讲解CCSpriteBatchNode与TP工具的”.pvr.ccz”,”.plist”共用的终极精灵优化及注意事项!
- 【iOS-Cocos2d游戏开发之九】讲解CCSpriteBatchNode与TP工具的".pvr.ccz",".plist"共用的终极精灵优化及注意事项!
- 【iOS-Cocos2d游戏开发之九】讲解CCSpriteBatchNode与TP工具的".pvr.ccz",".plist"共用的终极精灵优化及注意事项!
- 【iOS-Cocos2d(2.x) 游戏开发之一】自定义CCSprite中-(id) init 重写需注意& 2.x版本中注册触屏事件代码&简述cocos2d/x/Unity3D引擎使用感想!