VS2008制作ActiveX,并打包为CAB(1)
2012-05-18 13:56
381 查看
1、开发及测试环境:
(1)开发环境:
Visual Studio 2008 SP1
cabsdk(下载地址:http://support.microsoft.com/kb/310618)
(2)测试环境:
Windows Server 2003 R2 SP2
IE6
2、创建项目
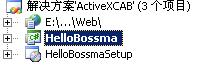
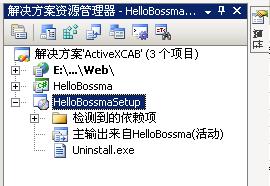
我这里创建了三个项目:
(1)HelloBossma :
项目模板:Windows窗体控件库
(2)HelloBossmaSetup:
项目模板:安装项目
(3)Web:
项目模板:ASP.NET 网站
3、HelloBossma项目
这个项目用于编写具体的控件,并生成安装文件所需要的dll。
(1)添加用户控件:

(2)设计控件:
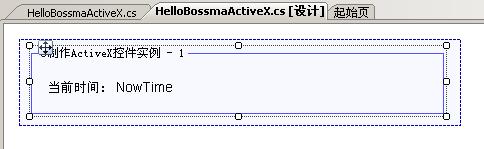
添加Panel、GroupBox、Label 控件。NowTime是一个Label控件,用于显示时间。
然后在控件对应的代码文件中编写程序:
关于IObjectSafety的实现参考了:http://www.pinvoke.net/default.aspx/Interfaces/IObjectSafety.html
这里还包含了一个可以被外部调用的方法,传进来一个字符参数,并显示出来:
(3)设置生成属性,勾选:为Com互操作注册

(4)生成项目,生成这两个文件:
HelloBossma.dll
HelloBossma.tlb
是必须的,否则生成不成功。
4、HelloBossmaSetup项目
这是一个安装项目,用来生成安装程序。
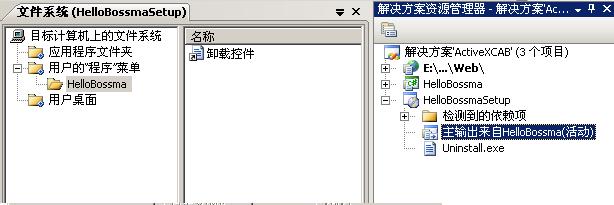
(1)在项目上点右键,【添加】->【项目输出】,选择上边的HelloBossma项目

(2)在安装项目上点右键,属性
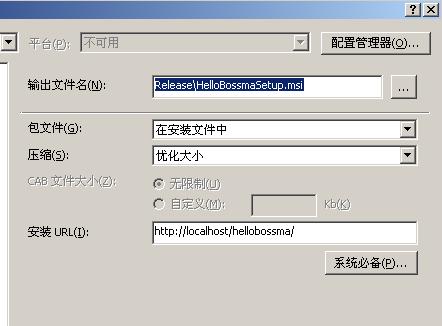
安装URL:貌似用于查找应用程序更新,具体看:http://msdn.microsoft.com/zh-cn/library/c37e68bc(VS.90).aspx
这个目录最好是实际存在的,用来存放生成的安装文件,供客户端下载安装。没有的话就随便输入一个吧。
(3)添加卸载程序
拷贝文件C:\Windows\System32\msiexec.exe文件,修改文件名为Uninstall.exe,添加到安装项目中,然后创建一个快捷方式。
在【用户的“程序”菜单下边】添加一个文件夹HelloBossma,将快捷方式拖动到这里边。
在卸载控件上点击右键,属性:
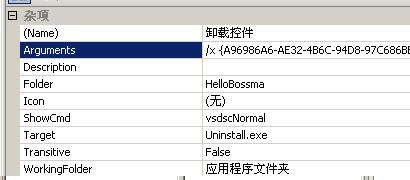
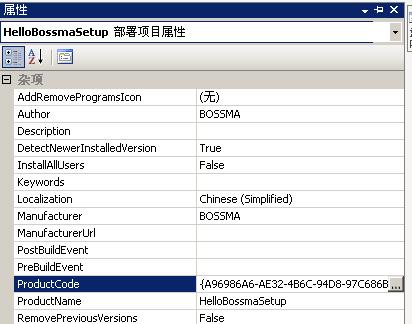
设置Arguments,就是指定要卸载的程序,后面的ProductCode可以这样获得:
选中项目,然后鼠标放到右侧的“属性”上,就可以看到ProductCode了:
(4)最后生成项目
5、制作CAB文件
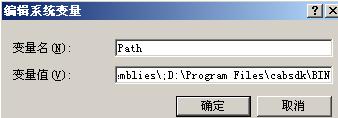
(1)为了方便操作,可以将CABARC.EXE添加到环境变量中:桌面上右击“我的电脑”,“属性”,“高级”,“环境变量”,“系统变量”,找到“Path”,在后边把CABARC.EXE所在的路径添加上去,注意用分号隔开新添加的路径。
(2)准备好文件
install.inf :CAB安装配置文件
HelloBossmaSetup.msi:安装程序文件
install.inf文件的内容:
run:一般只需要修改这个就行了
(3)执行cabarc命令
桌面左下角“开始”,“运行”,输入cmd,打开命令提示符工具,进入准备好的文件的目录,执行命令:
cabarc n HelloBossma.cab HelloBossmaSetup.msi install.inf

显示“Completed successfully” ,打开所在目录,就可以看到生成的文件了。
6、部署到网站
在网站中新建一个目录hellobossma,将生成的cab文件拷贝到里边。
新建一个网页,将控件添加到页面:
ActiveX控件作为一个object添加到页面中,其classid是在编写HelloBossmaActiveX类时定义好的Guid值,codebase用来指示cab安装文件的路径,还可以设置宽度、高度。另外其中文字受页面中字体样式的影响。
因为我们的ActiveX控件没有签名,所以将测试站点加到“本地Intranet”中或者“可信站点”中,并设置安全级别为“低”。

然后打开浏览器,提示安装,点击“安装”,稍等下,效果就出来了:
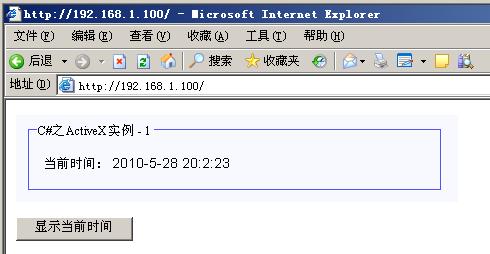
点击按钮,就可以通过javascript设置ActiveX控件中的时间了。
Over!
==============================================================================================
转自:http://blog.bossma.cn/dotnet/visual-studio-2008-csharp-activex-summary-1/
由本人的示例文件和文档说明,分别见链接:
文档:http://download.csdn.net/detail/lockelk/4311666
Demo:http://download.csdn.net/detail/lockelk/4311675
(1)开发环境:
Visual Studio 2008 SP1
cabsdk(下载地址:http://support.microsoft.com/kb/310618)
(2)测试环境:
Windows Server 2003 R2 SP2
IE6
2、创建项目
我这里创建了三个项目:
(1)HelloBossma :
项目模板:Windows窗体控件库
(2)HelloBossmaSetup:
项目模板:安装项目
(3)Web:
项目模板:ASP.NET 网站
3、HelloBossma项目
这个项目用于编写具体的控件,并生成安装文件所需要的dll。
(1)添加用户控件:
(2)设计控件:
添加Panel、GroupBox、Label 控件。NowTime是一个Label控件,用于显示时间。
然后在控件对应的代码文件中编写程序:
using System;

using System.Collections.Generic;

using System.ComponentModel;

using System.Drawing;

using System.Data;

using System.Text;

using System.Windows.Forms;

using System.Runtime.InteropServices;

namespace HelloBossma

{

/// <summary>

/// Guid将用作控件的classid

/// IObjectSafety的是用来标记可安全执行脚本的ActiveX控件

/// </summary>

[Guid("636B8CE1-7512-464C-B63C-FC75BDCA21DB"), ProgId("HelloBossma.HelloBossmaActiveX"), ComVisible(true)]

public partial class HelloBossmaActiveX : UserControl, IObjectSafety

{

private const string _IID_IDispatch = "{00020400-0000-0000-C000-000000000046}";

private const string _IID_IDispatchEx = "{a6ef9860-c720-11d0-9337-00a0c90dcaa9}";

private const string _IID_IPersistStorage = "{0000010A-0000-0000-C000-000000000046}";

private const string _IID_IPersistStream = "{00000109-0000-0000-C000-000000000046}";

private const string _IID_IPersistPropertyBag = "{37D84F60-42CB-11CE-8135-00AA004BB851}";

private const int INTERFACESAFE_FOR_UNTRUSTED_CALLER = 0x00000001;

private const int INTERFACESAFE_FOR_UNTRUSTED_DATA = 0x00000002;

private const int S_OK = 0;

private const int E_FAIL = unchecked((int)0x80004005);

private const int E_NOINTERFACE = unchecked((int)0x80004002);

private bool _fSafeForScripting = true;

private bool _fSafeForInitializing = true;

public HelloBossmaActiveX()

{

InitializeComponent();

}

/// <summary>

/// 设置当前时间

/// </summary>

/// <param name="timeStr"></param>

public void SetTime(string timeStr)

{

this.label2.Text = timeStr;

}

public int GetInterfaceSafetyOptions(ref Guid riid,

ref int pdwSupportedOptions,

ref int pdwEnabledOptions)

{

int Rslt = E_FAIL;

string strGUID = riid.ToString("B");

pdwSupportedOptions = INTERFACESAFE_FOR_UNTRUSTED_CALLER | INTERFACESAFE_FOR_UNTRUSTED_DATA;

switch (strGUID)

{

case _IID_IDispatch:

case _IID_IDispatchEx:

Rslt = S_OK;

pdwEnabledOptions = 0;

if (_fSafeForScripting == true)

pdwEnabledOptions = INTERFACESAFE_FOR_UNTRUSTED_CALLER;

break;

case _IID_IPersistStorage:

case _IID_IPersistStream:

case _IID_IPersistPropertyBag:

Rslt = S_OK;

pdwEnabledOptions = 0;

if (_fSafeForInitializing == true)

pdwEnabledOptions = INTERFACESAFE_FOR_UNTRUSTED_DATA;

break;

default:

Rslt = E_NOINTERFACE;

break;

}

return Rslt;

}

public int SetInterfaceSafetyOptions(ref Guid riid,

int dwOptionSetMask,

int dwEnabledOptions)

{

int Rslt = E_FAIL;

string strGUID = riid.ToString("B");

switch (strGUID)

{

case _IID_IDispatch:

case _IID_IDispatchEx:

if (((dwEnabledOptions & dwOptionSetMask) == INTERFACESAFE_FOR_UNTRUSTED_CALLER) &&

(_fSafeForScripting == true))

Rslt = S_OK;

break;

case _IID_IPersistStorage:

case _IID_IPersistStream:

case _IID_IPersistPropertyBag:

if (((dwEnabledOptions & dwOptionSetMask) == INTERFACESAFE_FOR_UNTRUSTED_DATA) &&

(_fSafeForInitializing == true))

Rslt = S_OK;

break;

default:

Rslt = E_NOINTERFACE;

break;

}

return Rslt;

}

}

}关于IObjectSafety的实现参考了:http://www.pinvoke.net/default.aspx/Interfaces/IObjectSafety.html
using System;

using System.Collections.Generic;

using System.Text;

using System.Runtime.InteropServices;

namespace HelloBossma

{

[ComImport, GuidAttribute("CB5BDC81-93C1-11CF-8F20-00805F2CD064")]

[InterfaceTypeAttribute(ComInterfaceType.InterfaceIsIUnknown)]

public interface IObjectSafety

{

[PreserveSig]

int GetInterfaceSafetyOptions(ref Guid riid, [MarshalAs(UnmanagedType.U4)] ref int pdwSupportedOptions, [MarshalAs(UnmanagedType.U4)] ref int pdwEnabledOptions);

[PreserveSig()]

int SetInterfaceSafetyOptions(ref Guid riid, [MarshalAs(UnmanagedType.U4)] int dwOptionSetMask, [MarshalAs(UnmanagedType.U4)] int dwEnabledOptions);

}

}
这里还包含了一个可以被外部调用的方法,传进来一个字符参数,并显示出来:
/// <summary>

/// 设置当前时间

/// </summary>

/// <param name="timeStr"></param>

public void SetTime(string timeStr)

{

this.label2.Text = timeStr;

}
(3)设置生成属性,勾选:为Com互操作注册
(4)生成项目,生成这两个文件:
HelloBossma.dll
HelloBossma.tlb
是必须的,否则生成不成功。
4、HelloBossmaSetup项目
这是一个安装项目,用来生成安装程序。
(1)在项目上点右键,【添加】->【项目输出】,选择上边的HelloBossma项目
(2)在安装项目上点右键,属性
安装URL:貌似用于查找应用程序更新,具体看:http://msdn.microsoft.com/zh-cn/library/c37e68bc(VS.90).aspx
这个目录最好是实际存在的,用来存放生成的安装文件,供客户端下载安装。没有的话就随便输入一个吧。
(3)添加卸载程序
拷贝文件C:\Windows\System32\msiexec.exe文件,修改文件名为Uninstall.exe,添加到安装项目中,然后创建一个快捷方式。
在【用户的“程序”菜单下边】添加一个文件夹HelloBossma,将快捷方式拖动到这里边。
在卸载控件上点击右键,属性:
设置Arguments,就是指定要卸载的程序,后面的ProductCode可以这样获得:
选中项目,然后鼠标放到右侧的“属性”上,就可以看到ProductCode了:
(4)最后生成项目
5、制作CAB文件
(1)为了方便操作,可以将CABARC.EXE添加到环境变量中:桌面上右击“我的电脑”,“属性”,“高级”,“环境变量”,“系统变量”,找到“Path”,在后边把CABARC.EXE所在的路径添加上去,注意用分号隔开新添加的路径。
(2)准备好文件
install.inf :CAB安装配置文件
HelloBossmaSetup.msi:安装程序文件
install.inf文件的内容:
[version]

signature="$CHICAGO$"

AdvancedINF=2.0

[Setup Hooks]

hook1=hook1

[hook1]

run=msiexec.exe /i "%EXTRACT_DIR%\HelloBossmaSetup.msi" /qn
run:一般只需要修改这个就行了
(3)执行cabarc命令
桌面左下角“开始”,“运行”,输入cmd,打开命令提示符工具,进入准备好的文件的目录,执行命令:
cabarc n HelloBossma.cab HelloBossmaSetup.msi install.inf
显示“Completed successfully” ,打开所在目录,就可以看到生成的文件了。
6、部署到网站
在网站中新建一个目录hellobossma,将生成的cab文件拷贝到里边。
新建一个网页,将控件添加到页面:
<!DOCTYPE html PUBLIC "-//W3C//DTD XHTML 1.0 Transitional//EN" "<A href="http://www.w3.org/TR/xhtml1/DTD/xhtml1-transitional.dtd">http://www.w3.org/TR/xhtml1/DTD/xhtml1-transitional.dtd</A>">

<html xmlns="<A href="http://www.w3.org/1999/xhtml">http://www.w3.org/1999/xhtml</A>">

<head runat="server">

<title></title>

<script type="text/javascript">

function SetTime() {

var d = new Date();

var vYear = d.getFullYear();

var vMon = d.getMonth() + 1;

var vDay = d.getDate();

var vHour = d.getHours();

var vMin = d.getMinutes();

var vSec = d.getSeconds();

document.HelloBossma.SetTime(vYear + "-" + vMon + "-" + vDay + " " + vHour + ":" + vMin + ":" + vSec)

}

</script>

</head>

<body style="font-size: 12px; color: black">

<form id="form1" runat="server">

<div>

<object classid="clsid:636B8CE1-7512-464C-B63C-FC75BDCA21DB" codebase="hellobossma/HelloBossma.CAB" width="442" height="87" id="HelloBossma" name="HelloBossma">

</object>

<br />

<br />

<input type="button" value="显示当前时间" onclick="SetTime()" />

</div>

</form>

</body>

</html>
ActiveX控件作为一个object添加到页面中,其classid是在编写HelloBossmaActiveX类时定义好的Guid值,codebase用来指示cab安装文件的路径,还可以设置宽度、高度。另外其中文字受页面中字体样式的影响。
因为我们的ActiveX控件没有签名,所以将测试站点加到“本地Intranet”中或者“可信站点”中,并设置安全级别为“低”。
然后打开浏览器,提示安装,点击“安装”,稍等下,效果就出来了:
点击按钮,就可以通过javascript设置ActiveX控件中的时间了。
Over!
==============================================================================================
转自:http://blog.bossma.cn/dotnet/visual-studio-2008-csharp-activex-summary-1/
由本人的示例文件和文档说明,分别见链接:
文档:http://download.csdn.net/detail/lockelk/4311666
Demo:http://download.csdn.net/detail/lockelk/4311675

相关文章推荐
- VS2008制作ActiveX,并打包为CAB(2)
- VS2008制作ActiveX,并打包为CAB(3)
- VS2008制作ActiveX,并打包为CAB(4)
- VS2008 ACtivex 制作CAB带 Vcredist_x86.exe 方案
- VS2008 ActiveX IObjectSavety IExpress打包cab,发布
- vs2008 使用c#写Activex插件,并在website中使用加载,并将cab制作为数字签名
- VS2008 ACtivex 制作CAB带 Vcredist_x86.exe 方案
- vs2008 使用c#写Activex插件,并在website中使用加载,并将cab制作为数字签名
- C#制作、打包、签名、发布Activex全过程
- 【转】VS2008制作打包程序将安装路径写入注册表
- visual studio 2012 的制作ActiveX、打包和发布
- 【转】vb 制作、打包、发布activex,试验过,比vs2005好、方便
- Activex打包于发布完整版---微软证书制作
- VS2008 SP1制作安装程序时如何将.Net Framework3.5 SP1打包进去
- C#制作、打包、签名、发布Activex全过程
- visual studio 2012 的制作ActiveX、打包和发布
- ActiveX制作cab包学习总结
- vs2008下面制作activex .时遇到的一些问题
- CAB文件打包以及制作证书签名
- 在vs2008工程中制作cab