[WPF] [AMindMap] 开发手记-3 (UI ANode的状态动画)
2012-04-12 08:59
447 查看
上回说道,ANode的外观绘制,今天继续动画部分。
我对ANode的各个状态做了一个小总结
针对于这几个状态之间的变换,我采用动画的方式,逐一介绍
在介绍我们设定的各种状态前,让我们看看具体都涉及哪些动画。
动画直接写Xaml
ANode边框变小
阴影缩小为5
输入文本框隐藏
工具栏隐藏
这里所用的隐藏,并不是设置Visible,而是将透明度变为0,只写一个KeyTime,
即可在任何状态下直接变成你想要的状态。
大概,需要的动画,就差不多写完了,在不同的状态下,只要改变参数就可以了。
现在将这些动画,分配给各个状态。在我们想要ANode变成什么状态时,就播放相应的动画。
现在就开始设置各个状态的动画面板(StoryBoard)
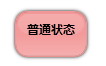
1.普通状态

,普通状态下,控件边框缩小为1,阴影也缩小为5,隐藏工具栏等
2.选中状态:边框 4 阴影 10 工具栏出现

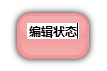
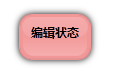
3.编辑状态:边框 4 阴影 10 隐藏工具栏 显示输入框

4.拖动状态:比选中状态少一个工具栏而已

这样,状态动画就做完了,放在<UserControl.Resources>中,作为动画资源,等待调用。
下面,这些状态的触发,可以在Xaml中设置,也可以在代码中启动,将不需要在代码中启动
的动画添加到触发器<UserControl.Triggers>当中。
其实最后一个失去焦点的动画,可以不写在Xaml中,因为,ANode失去焦点有几种情况,
主要发生在UI的事件中。
那么,目前的ANode Xaml部分就介绍完了,如果后续有需要,可以继续在这个结构基础上
添加即可。
贴一个完整的代码。
下期预告,代码中的动画触发和几个基本属性。
我对ANode的各个状态做了一个小总结
| ANode 的 状态 |
| ANode 的 状态 |
| 1.普通状态(NormalStatus) 2.选中状态(SelectedStatus) 3.编辑状态(EditStatus) 4.拖动状态(DragStatus) |
| 基本动画 |
在介绍我们设定的各种状态前,让我们看看具体都涉及哪些动画。
动画直接写Xaml
<!--边框变为1-->
<ThicknessAnimationUsingKeyFrames
Storyboard.TargetProperty="(Border.BorderThickness)"
Storyboard.TargetName="NodeBorder">
<EasingThicknessKeyFrame KeyTime="0" Value="1"/>
</ThicknessAnimationUsingKeyFrames>
ANode边框变小
<!--边框阴影变为5-->
<DoubleAnimationUsingKeyFrames
Storyboard.TargetProperty="(UIElement.Effect)
.(DropShadowEffect.BlurRadius)"
Storyboard.TargetName="NodeBackground">
<EasingDoubleKeyFrame KeyTime="0" Value="5"/>
</DoubleAnimationUsingKeyFrames>
阴影缩小为5
<!--输入框隐藏-->
<DoubleAnimationUsingKeyFrames
Storyboard.TargetProperty="(UIElement.Opacity)"
Storyboard.TargetName="NodeTextInput">
<EasingDoubleKeyFrame KeyTime="0:0:0.2" Value="0"/>
</DoubleAnimationUsingKeyFrames>
输入文本框隐藏
<!--创建工具栏隐藏-->
<DoubleAnimationUsingKeyFrames
Storyboard.TargetProperty="(UIElement.Opacity)"
Storyboard.TargetName="NewFriend">
<EasingDoubleKeyFrame KeyTime="0:0:0.2" Value="0"/>
</DoubleAnimationUsingKeyFrames>
<DoubleAnimationUsingKeyFrames
Storyboard.TargetProperty="(UIElement.Opacity)"
Storyboard.TargetName="NewSubNode">
<EasingDoubleKeyFrame KeyTime="0:0:0.2" Value="0"/>
</DoubleAnimationUsingKeyFrames>
工具栏隐藏
这里所用的隐藏,并不是设置Visible,而是将透明度变为0,只写一个KeyTime,
即可在任何状态下直接变成你想要的状态。
| 动画 的 组合 |
现在将这些动画,分配给各个状态。在我们想要ANode变成什么状态时,就播放相应的动画。
现在就开始设置各个状态的动画面板(StoryBoard)
1.普通状态
,普通状态下,控件边框缩小为1,阴影也缩小为5,隐藏工具栏等
<!--正常状态-->
<Storyboard x:Key="NormalStatus">
<!--边框变为1-->
<ThicknessAnimationUsingKeyFrames Storyboard.TargetProperty="(Border.BorderThickness)" Storyboard.TargetName="NodeBorder">
<EasingThicknessKeyFrame KeyTime="0" Value="1"/>
</ThicknessAnimationUsingKeyFrames>
<!--边框阴影变为5-->
<DoubleAnimationUsingKeyFrames Storyboard.TargetProperty="(UIElement.Effect).(DropShadowEffect.BlurRadius)" Storyboard.TargetName="NodeBackground">
<EasingDoubleKeyFrame KeyTime="0" Value="5"/>
</DoubleAnimationUsingKeyFrames>
<!--输入框隐藏-->
<DoubleAnimationUsingKeyFrames Storyboard.TargetProperty="(UIElement.Opacity)"
Storyboard.TargetName="NodeTextInput">
<EasingDoubleKeyFrame KeyTime="0:0:0.2" Value="0"/>
</DoubleAnimationUsingKeyFrames>
<!--创建工具栏隐藏-->
<DoubleAnimationUsingKeyFrames Storyboard.TargetProperty="(UIElement.Opacity)"
Storyboard.TargetName="NewFriend">
<EasingDoubleKeyFrame KeyTime="0:0:0.2" Value="0"/>
</DoubleAnimationUsingKeyFrames>
<DoubleAnimationUsingKeyFrames Storyboard.TargetProperty="(UIElement.Opacity)"
Storyboard.TargetName="NewSubNode">
<EasingDoubleKeyFrame KeyTime="0:0:0.2" Value="0"/>
</DoubleAnimationUsingKeyFrames>
</Storyboard>
2.选中状态:边框 4 阴影 10 工具栏出现

<!--选中状态-->
<Storyboard x:Key="SelectedStatus">
<!--边框变为4-->
<ThicknessAnimationUsingKeyFrames Storyboard.TargetProperty="(Border.BorderThickness)"
Storyboard.TargetName="NodeBorder">
<EasingThicknessKeyFrame KeyTime="0" Value="4"/>
</ThicknessAnimationUsingKeyFrames>
<!--边框阴影变为10-->
<DoubleAnimationUsingKeyFrames Storyboard.TargetProperty="(UIElement.Effect).(DropShadowEffect.BlurRadius)"
Storyboard.TargetName="NodeBackground">
<EasingDoubleKeyFrame KeyTime="0" Value="10"/>
</DoubleAnimationUsingKeyFrames>
<!--输入框隐藏-->
<DoubleAnimationUsingKeyFrames Storyboard.TargetProperty="(UIElement.Opacity)"
Storyboard.TargetName="NodeTextInput">
<EasingDoubleKeyFrame KeyTime="0:0:0.2" Value="0"/>
</DoubleAnimationUsingKeyFrames>
<!--创建工具栏显现-->
<DoubleAnimationUsingKeyFrames Storyboard.TargetProperty="(UIElement.Opacity)"
Storyboard.TargetName="NewFriend">
<EasingDoubleKeyFrame KeyTime="0:0:0.2" Value="1"/>
</DoubleAnimationUsingKeyFrames>
<DoubleAnimationUsingKeyFrames Storyboard.TargetProperty="(UIElement.Opacity)"
Storyboard.TargetName="NewSubNode">
<EasingDoubleKeyFrame KeyTime="0:0:0.2" Value="1"/>
</DoubleAnimationUsingKeyFrames>
</Storyboard>
3.编辑状态:边框 4 阴影 10 隐藏工具栏 显示输入框
<!--编辑状态-->
<Storyboard x:Key="EditStatus">
<!--鼠标变为手-->
<ObjectAnimationUsingKeyFrames Storyboard.TargetProperty="(FrameworkElement.Cursor)" Storyboard.TargetName="ANodeObject">
<DiscreteObjectKeyFrame KeyTime="0">
<DiscreteObjectKeyFrame.Value>
<Cursor>Hand</Cursor>
</DiscreteObjectKeyFrame.Value>
</DiscreteObjectKeyFrame>
</ObjectAnimationUsingKeyFrames>
<!--边框变为4-->
<ThicknessAnimationUsingKeyFrames Storyboard.TargetProperty="(Border.BorderThickness)"
Storyboard.TargetName="NodeBorder">
<EasingThicknessKeyFrame KeyTime="0" Value="4"/>
</ThicknessAnimationUsingKeyFrames>
<!--边框阴影变为10-->
<DoubleAnimationUsingKeyFrames Storyboard.TargetProperty="(UIElement.Effect).(DropShadowEffect.BlurRadius)"
Storyboard.TargetName="NodeBackground">
<EasingDoubleKeyFrame KeyTime="0" Value="10"/>
</DoubleAnimationUsingKeyFrames>
<!--输入框显现-->
<DoubleAnimationUsingKeyFrames Storyboard.TargetProperty="(UIElement.Opacity)"
Storyboard.TargetName="NodeTextInput">
<EasingDoubleKeyFrame KeyTime="0:0:0.2" Value="1"/>
</DoubleAnimationUsingKeyFrames>
<!--创建工具栏隐藏-->
<DoubleAnimationUsingKeyFrames Storyboard.TargetProperty="(UIElement.Opacity)"
Storyboard.TargetName="NewFriend">
<EasingDoubleKeyFrame KeyTime="0:0:0.2" Value="0"/>
</DoubleAnimationUsingKeyFrames>
<DoubleAnimationUsingKeyFrames Storyboard.TargetProperty="(UIElement.Opacity)"
Storyboard.TargetName="NewSubNode">
<EasingDoubleKeyFrame KeyTime="0:0:0.2" Value="0"/>
</DoubleAnimationUsingKeyFrames>
</Storyboard>
4.拖动状态:比选中状态少一个工具栏而已
<!--拖动状态-->
<Storyboard x:Key="DragStatus">
<!--鼠标变为移动-->
<ObjectAnimationUsingKeyFrames Storyboard.TargetProperty="(FrameworkElement.Cursor)" Storyboard.TargetName="ANodeObject">
<DiscreteObjectKeyFrame KeyTime="0">
<DiscreteObjectKeyFrame.Value>
<Cursor>SizeAll</Cursor>
</DiscreteObjectKeyFrame.Value>
</DiscreteObjectKeyFrame>
</ObjectAnimationUsingKeyFrames>
<!--边框变为4-->
<ThicknessAnimationUsingKeyFrames Storyboard.TargetProperty="(Border.BorderThickness)" Storyboard.TargetName="NodeBorder">
<EasingThicknessKeyFrame KeyTime="0" Value="4"/>
</ThicknessAnimationUsingKeyFrames>
<!--边框阴影变为10-->
<DoubleAnimationUsingKeyFrames Storyboard.TargetProperty="(UIElement.Effect).(DropShadowEffect.BlurRadius)" Storyboard.TargetName="NodeBackground">
<EasingDoubleKeyFrame KeyTime="0" Value="10"/>
</DoubleAnimationUsingKeyFrames>
<!--输入框隐藏-->
<DoubleAnimationUsingKeyFrames Storyboard.TargetProperty="(UIElement.Opacity)"
Storyboard.TargetName="NodeTextInput">
<EasingDoubleKeyFrame KeyTime="0:0:0.2" Value="0"/>
</DoubleAnimationUsingKeyFrames>
<!--创建工具栏隐藏-->
<DoubleAnimationUsingKeyFrames Storyboard.TargetProperty="(UIElement.Opacity)"
Storyboard.TargetName="NewFriend">
<EasingDoubleKeyFrame KeyTime="0:0:0.2" Value="0"/>
</DoubleAnimationUsingKeyFrames>
<DoubleAnimationUsingKeyFrames Storyboard.TargetProperty="(UIElement.Opacity)"
Storyboard.TargetName="NewSubNode">
<EasingDoubleKeyFrame KeyTime="0:0:0.2" Value="0"/>
</DoubleAnimationUsingKeyFrames>
</Storyboard>
这样,状态动画就做完了,放在<UserControl.Resources>中,作为动画资源,等待调用。
下面,这些状态的触发,可以在Xaml中设置,也可以在代码中启动,将不需要在代码中启动
的动画添加到触发器<UserControl.Triggers>当中。
<UserControl.Triggers>
<!--启动时设置为正常状态-->
<EventTrigger RoutedEvent="FrameworkElement.Loaded">
<BeginStoryboard x:Name="OnLoaded_BeginStoryboard"
Storyboard="{StaticResource NormalStatus}"/>
</EventTrigger>
<!--鼠标在NodeText上抬起时设置为编辑状态-->
<EventTrigger RoutedEvent="Mouse.PreviewMouseUp" SourceName="NodeTextInput">
<BeginStoryboard x:Name="EditStatus_BeginStoryboard"
Storyboard="{StaticResource EditStatus}"/>
</EventTrigger>
<!--NodeTextInput失去焦点时,变成普通状态-->
<EventTrigger RoutedEvent="Keyboard.LostKeyboardFocus" SourceName="NodeTextInput">
<BeginStoryboard Storyboard="{StaticResource NormalStatus}"/>
</EventTrigger>
</UserControl.Triggers>
其实最后一个失去焦点的动画,可以不写在Xaml中,因为,ANode失去焦点有几种情况,
主要发生在UI的事件中。
| 完整 的 代码 |
添加即可。
贴一个完整的代码。
<UserControl x:Class="ANode"  x:Name="ANodeObject"
xmlns="http://schemas.microsoft.com/winfx/2006/xaml/presentation"
xmlns:x="http://schemas.microsoft.com/winfx/2006/xaml"
xmlns:mc="http://schemas.openxmlformats.org/markup-compatibility/2006"
xmlns:d="http://schemas.microsoft.com/expression/blend/2008" Cursor="Hand"
>
<UserControl.Resources>
<DrawingBrush x:Key="NewFriendSource" Stretch="None">
<DrawingBrush.Drawing>
<DrawingGroup>
<DrawingGroup.Children>
<GeometryDrawing Brush="#FFFFFFFF" Geometry="F1 M 17.5914,16.3333L 2.25811,16.3333C 1.56327,16.3333 0.999996,15.6636 0.999996,14.8374L 0.999996,2.49591C 0.999996,1.66974 1.56327,1 2.25811,1L 17.5914,1L 24,8.71332L 17.5914,16.3333 Z ">
<GeometryDrawing.Pen>
<Pen Thickness="1" LineJoin="Round" Brush="#FFBCBCB3"/>
</GeometryDrawing.Pen>
</GeometryDrawing>
<GeometryDrawing Brush="#FFFFFFFF" Geometry="F1 M 6.66936,7.17059L 11.0569,7.17059C 12.1615,7.17059 13.0569,8.06598 13.0569,9.17059L 13.0569,12.1517C 13.0569,13.2563 12.1615,14.1517 11.0569,14.1517L 6.66936,14.1517C 5.56479,14.1517 4.66936,13.2563 4.66936,12.1517L 4.66936,9.17059C 4.66936,8.06598 5.56479,7.17059 6.66936,7.17059 Z ">
<GeometryDrawing.Pen>
<Pen LineJoin="Round" Brush="#FFA9A9A6"/>
</GeometryDrawing.Pen>
</GeometryDrawing>
<GeometryDrawing Brush="#FFFFFFFF" Geometry="F1 M 8.02445,7.17059L 4.4598,2.93213">
<GeometryDrawing.Pen>
<Pen LineJoin="Round" Brush="#FF000000"/>
</GeometryDrawing.Pen>
</GeometryDrawing>
<GeometryDrawing Brush="#FFFFC800" Geometry="F1 M 17.8081,5.81027L 15.7027,6.15466L 17.2235,7.95245L 15.9447,8.9368L 14.7892,6.79465L 13.6794,8.9368L 12.4006,7.95245L 13.8918,6.1449L 11.7795,5.81027L 12.3001,4.24701L 14.248,5.10681L 13.8621,2.68375L 15.6159,2.68375L 15.3396,5.11658L 17.2738,4.24701L 17.8081,5.81027 Z "/>
</DrawingGroup.Children>
</DrawingGroup>
</DrawingBrush.Drawing>
</DrawingBrush>
<DrawingBrush x:Key="NewSubSource" Stretch="None">
<DrawingBrush.Drawing>
<DrawingGroup>
<DrawingGroup.Children>
<GeometryDrawing Brush="#FFFFFFFF" Geometry="F1 M 2.40969,1.00002L 19.5903,1.00002C 20.3689,1.00002 21,1.63118 21,2.40975L 21,14.0399C 21,14.8184 20.3689,15.4496 19.5903,15.4496L 15.185,15.4496L 11.2203,19.4144L 7.34276,15.4496L 2.40969,15.4496C 1.63113,15.4496 0.999995,14.8184 0.999995,14.0399L 0.999995,2.40975C 0.999995,1.63118 1.63113,1.00002 2.40969,1.00002 Z ">
<GeometryDrawing.Pen>
<Pen Thickness="1" LineJoin="Round" Brush="#FFBCBCB3"/>
</GeometryDrawing.Pen>
</GeometryDrawing>
<GeometryDrawing Brush="#FFFFFFFF" Geometry="F1 M 7.78709,7.44625L 13.185,7.44625C 14.2896,7.44625 15.185,8.34169 15.185,9.44625L 15.185,12.0249C 15.185,13.1295 14.2896,14.0249 13.185,14.0249L 7.78709,14.0249C 6.68251,14.0249 5.78708,13.1295 5.78708,12.0249L 5.78708,9.44625C 5.78708,8.34169 6.68251,7.44625 7.78709,7.44625 Z ">
<GeometryDrawing.Pen>
<Pen LineJoin="Round" Brush="#FFA9A9A6"/>
</GeometryDrawing.Pen>
</GeometryDrawing>
<GeometryDrawing Brush="#FFFFFFFF" Geometry="F1 M 10.2511,7.44619L 10.2471,2.58602">
<GeometryDrawing.Pen>
<Pen LineJoin="Round" Brush="#FF000000"/>
</GeometryDrawing.Pen>
</GeometryDrawing>
<GeometryDrawing Brush="#FFFFC800" Geometry="F1 M 19.6998,6.25523L 17.5943,6.59962L 19.1152,8.39738L 17.8364,9.38176L 16.6809,7.23961L 15.5711,9.38176L 14.2923,8.39738L 15.7835,6.58986L 13.6712,6.25523L 14.1918,4.69194L 16.1397,5.55177L 15.7538,3.12871L 17.5076,3.12871L 17.2313,5.56154L 19.1655,4.69194L 19.6998,6.25523 Z "/>
</DrawingGroup.Children>
</DrawingGroup>
</DrawingBrush.Drawing>
</DrawingBrush>
<!--正常状态-->
<Storyboard x:Key="NormalStatus">
<!--边框变为1-->
<ThicknessAnimationUsingKeyFrames Storyboard.TargetProperty="(Border.BorderThickness)" Storyboard.TargetName="NodeBorder">
<EasingThicknessKeyFrame KeyTime="0" Value="1"/>
</ThicknessAnimationUsingKeyFrames>
<!--边框阴影变为5-->
<DoubleAnimationUsingKeyFrames Storyboard.TargetProperty="(UIElement.Effect).(DropShadowEffect.BlurRadius)" Storyboard.TargetName="NodeBackground">
<EasingDoubleKeyFrame KeyTime="0" Value="5"/>
</DoubleAnimationUsingKeyFrames>
<!--输入框隐藏-->
<DoubleAnimationUsingKeyFrames Storyboard.TargetProperty="(UIElement.Opacity)"
Storyboard.TargetName="NodeTextInput">
<EasingDoubleKeyFrame KeyTime="0:0:0.2" Value="0"/>
</DoubleAnimationUsingKeyFrames>
<!--创建工具栏隐藏-->
<DoubleAnimationUsingKeyFrames Storyboard.TargetProperty="(UIElement.Opacity)"
Storyboard.TargetName="NewFriend">
<EasingDoubleKeyFrame KeyTime="0:0:0.2" Value="0"/>
</DoubleAnimationUsingKeyFrames>
<DoubleAnimationUsingKeyFrames Storyboard.TargetProperty="(UIElement.Opacity)"
Storyboard.TargetName="NewSubNode">
<EasingDoubleKeyFrame KeyTime="0:0:0.2" Value="0"/>
</DoubleAnimationUsingKeyFrames>
</Storyboard>
<!--选中状态-->
<Storyboard x:Key="SelectedStatus">
<!--边框变为4-->
<ThicknessAnimationUsingKeyFrames Storyboard.TargetProperty="(Border.BorderThickness)"
Storyboard.TargetName="NodeBorder">
<EasingThicknessKeyFrame KeyTime="0" Value="4"/>
</ThicknessAnimationUsingKeyFrames>
<!--边框阴影变为10-->
<DoubleAnimationUsingKeyFrames Storyboard.TargetProperty="(UIElement.Effect).(DropShadowEffect.BlurRadius)"
Storyboard.TargetName="NodeBackground">
<EasingDoubleKeyFrame KeyTime="0" Value="10"/>
</DoubleAnimationUsingKeyFrames>
<!--输入框隐藏-->
<DoubleAnimationUsingKeyFrames Storyboard.TargetProperty="(UIElement.Opacity)"
Storyboard.TargetName="NodeTextInput">
<EasingDoubleKeyFrame KeyTime="0:0:0.2" Value="0"/>
</DoubleAnimationUsingKeyFrames>
<!--创建工具栏显现-->
<DoubleAnimationUsingKeyFrames Storyboard.TargetProperty="(UIElement.Opacity)"
Storyboard.TargetName="NewFriend">
<EasingDoubleKeyFrame KeyTime="0:0:0.2" Value="1"/>
</DoubleAnimationUsingKeyFrames>
<DoubleAnimationUsingKeyFrames Storyboard.TargetProperty="(UIElement.Opacity)"
Storyboard.TargetName="NewSubNode">
<EasingDoubleKeyFrame KeyTime="0:0:0.2" Value="1"/>
</DoubleAnimationUsingKeyFrames>
</Storyboard>
<!--编辑状态-->
<Storyboard x:Key="EditStatus">
<!--鼠标变为手-->
<ObjectAnimationUsingKeyFrames Storyboard.TargetProperty="(FrameworkElement.Cursor)" Storyboard.TargetName="ANodeObject">
<DiscreteObjectKeyFrame KeyTime="0">
<DiscreteObjectKeyFrame.Value>
<Cursor>Hand</Cursor>
</DiscreteObjectKeyFrame.Value>
</DiscreteObjectKeyFrame>
</ObjectAnimationUsingKeyFrames>
<!--边框变为4-->
<ThicknessAnimationUsingKeyFrames Storyboard.TargetProperty="(Border.BorderThickness)"
Storyboard.TargetName="NodeBorder">
<EasingThicknessKeyFrame KeyTime="0" Value="4"/>
</ThicknessAnimationUsingKeyFrames>
<!--边框阴影变为10-->
<DoubleAnimationUsingKeyFrames Storyboard.TargetProperty="(UIElement.Effect).(DropShadowEffect.BlurRadius)"
Storyboard.TargetName="NodeBackground">
<EasingDoubleKeyFrame KeyTime="0" Value="10"/>
</DoubleAnimationUsingKeyFrames>
<!--输入框显现-->
<DoubleAnimationUsingKeyFrames Storyboard.TargetProperty="(UIElement.Opacity)"
Storyboard.TargetName="NodeTextInput">
<EasingDoubleKeyFrame KeyTime="0:0:0.2" Value="1"/>
</DoubleAnimationUsingKeyFrames>
<!--创建工具栏隐藏-->
<DoubleAnimationUsingKeyFrames Storyboard.TargetProperty="(UIElement.Opacity)"
Storyboard.TargetName="NewFriend">
<EasingDoubleKeyFrame KeyTime="0:0:0.2" Value="0"/>
</DoubleAnimationUsingKeyFrames>
<DoubleAnimationUsingKeyFrames Storyboard.TargetProperty="(UIElement.Opacity)"
Storyboard.TargetName="NewSubNode">
<EasingDoubleKeyFrame KeyTime="0:0:0.2" Value="0"/>
</DoubleAnimationUsingKeyFrames>
</Storyboard>
<!--拖动状态-->
<Storyboard x:Key="DragStatus">
<!--鼠标变为移动-->
<ObjectAnimationUsingKeyFrames Storyboard.TargetProperty="(FrameworkElement.Cursor)" Storyboard.TargetName="ANodeObject">
<DiscreteObjectKeyFrame KeyTime="0">
<DiscreteObjectKeyFrame.Value>
<Cursor>SizeAll</Cursor>
</DiscreteObjectKeyFrame.Value>
</DiscreteObjectKeyFrame>
</ObjectAnimationUsingKeyFrames>
<!--边框变为4-->
<ThicknessAnimationUsingKeyFrames Storyboard.TargetProperty="(Border.BorderThickness)" Storyboard.TargetName="NodeBorder">
<EasingThicknessKeyFrame KeyTime="0" Value="4"/>
</ThicknessAnimationUsingKeyFrames>
<!--边框阴影变为10-->
<DoubleAnimationUsingKeyFrames Storyboard.TargetProperty="(UIElement.Effect).(DropShadowEffect.BlurRadius)" Storyboard.TargetName="NodeBackground">
<EasingDoubleKeyFrame KeyTime="0" Value="10"/>
</DoubleAnimationUsingKeyFrames>
<!--输入框隐藏-->
<DoubleAnimationUsingKeyFrames Storyboard.TargetProperty="(UIElement.Opacity)"
Storyboard.TargetName="NodeTextInput">
<EasingDoubleKeyFrame KeyTime="0:0:0.2" Value="0"/>
</DoubleAnimationUsingKeyFrames>
<!--创建工具栏隐藏-->
<DoubleAnimationUsingKeyFrames Storyboard.TargetProperty="(UIElement.Opacity)"
Storyboard.TargetName="NewFriend">
<EasingDoubleKeyFrame KeyTime="0:0:0.2" Value="0"/>
</DoubleAnimationUsingKeyFrames>
<DoubleAnimationUsingKeyFrames Storyboard.TargetProperty="(UIElement.Opacity)"
Storyboard.TargetName="NewSubNode">
<EasingDoubleKeyFrame KeyTime="0:0:0.2" Value="0"/>
</DoubleAnimationUsingKeyFrames>
</Storyboard>
</UserControl.Resources>
<UserControl.Triggers>
<!--启动时设置为正常状态-->
<EventTrigger RoutedEvent="FrameworkElement.Loaded">
<BeginStoryboard x:Name="OnLoaded_BeginStoryboard"
Storyboard="{StaticResource NormalStatus}"/>
</EventTrigger>
<!--鼠标在NodeText上抬起时设置为编辑状态-->
<EventTrigger RoutedEvent="Mouse.PreviewMouseUp" SourceName="NodeTextInput">
<BeginStoryboard x:Name="EditStatus_BeginStoryboard"
Storyboard="{StaticResource EditStatus}"/>
</EventTrigger>
<!--NodeTextInput失去焦点时,变成普通状态-->
<EventTrigger RoutedEvent="Keyboard.LostKeyboardFocus" SourceName="NodeTextInput">
<BeginStoryboard Storyboard="{StaticResource NormalStatus}"/>
</EventTrigger>
</UserControl.Triggers>
<Grid x:Name="NodeGrid" Background="Transparent" >
<Grid.ColumnDefinitions>
<ColumnDefinition Width="10"/>
<ColumnDefinition Width="*"/>
<ColumnDefinition Width="10"/>
</Grid.ColumnDefinitions>
<Grid.RowDefinitions>
<RowDefinition Height="10"/>
<RowDefinition Height="*"/>
<RowDefinition Height="10"/>
</Grid.RowDefinitions>
<Grid Grid.Column="1" Grid.Row="1">
<Border x:Name="NodeBackground" Background="#FF6C6262" CornerRadius="12"
BorderThickness="1" BorderBrush="#FF6C6262" >
<Border.Effect>
<DropShadowEffect RenderingBias="Quality" ShadowDepth="0"/>
</Border.Effect>
</Border>
<Grid>
<Grid.RowDefinitions>
<RowDefinition Height="50*"/>
<RowDefinition Height="50*"/>
</Grid.RowDefinitions>
<Border Grid.Row="0" Margin="3,3,3,0" CornerRadius="10" Opacity="0.2">
<Border.Background>
<LinearGradientBrush EndPoint="0.5,1" StartPoint="0.5,0">
<GradientStop Color="#7FFFFFFF" Offset="1"/>
<GradientStop Color="White"/>
</LinearGradientBrush>
</Border.Background>
</Border>
</Grid>
<Border x:Name="NodeBorder"
CornerRadius="12"
BorderThickness="1"
Opacity="0.6"
BorderBrush="#4CFFFFFF"
>
<Border.Background>
<LinearGradientBrush EndPoint="0.5,1" StartPoint="0.5,0">
<GradientStop Color="#99FFFFFF" Offset="1"/>
<GradientStop Color="#4CFFFFFF"/>
<GradientStop Color="#58FFFFFF" Offset="0.5"/>
</LinearGradientBrush>
</Border.Background>
</Border>
<Border>
<TextBlock x:Name="NodeText"
Text="{Binding Text, Mode=OneWay}"
FontSize="12"
HorizontalAlignment="Center" VerticalAlignment="Center"
TextWrapping="WrapWithOverflow"
Cursor="IBeam"
Margin="10,10,10,20"
MinWidth="46"
FontWeight="Bold" />
</Border>
<TextBox x:Name="NodeTextInput"
Text="{Binding Text, Mode=TwoWay, UpdateSourceTrigger=PropertyChanged}"
FontSize="12"
Focusable="True"
HorizontalAlignment="Center" VerticalAlignment="Bottom"
AcceptsReturn="True"
Margin="10,0,10,20"
MinWidth="50"
BorderThickness="0"
FontStretch="UltraExpanded"
Padding="0"
FontWeight="Bold"
/>
</Grid>
<Grid x:Name="ToolsPanel" Grid.Column="2" Grid.Row="1" >
<Rectangle Name="NewFriend" Fill="{DynamicResource NewFriendSource}" Margin="-10,0" Width="25" UseLayoutRounding="False"/>
</Grid>
<Canvas x:Name="ToolsPanel1" Grid.Column="3" Grid.Row="3">
<Rectangle Name="NewSubNode" Fill="{DynamicResource NewSubSource}" Width="26" Height="21" Margin="-10,-15,0,0"></Rectangle>
</Canvas>
</Grid>
</UserControl>
下期预告,代码中的动画触发和几个基本属性。

相关文章推荐
- [WPF] [AMindMap] 开发手记-4 (UI ANode的在代码中触发动画)
- [WPF] [AMindMap] 开发手记-2 (UI ANode的绘制)
- [WPF] [AMindMap] 开发手记-6 (Map基本结构与节点间通信)
- [WPF] [AMindMap] 开发手记-5 (MindMap 项目及内容 的 建模)
- [WPF] [AMindMap] 开发手记-1 (基本结构)
- C#开发WPF/Silverlight动画及游戏系列教程(Game Tutorial):(三十九)向Silverlight移植①
- C#开发WPF/Silverlight动画及游戏系列教程(转)
- C#开发WPF/Silverlight动画及游戏系列教程(Game Tutorial):(五十) 终章!新的曙光!
- C#开发WPF/Silverlight动画及游戏系列教程(Game Tutorial):(四十一)制作精美的Mini地图①
- silverlight,WPF动画终极攻略之会飞的小鸟篇(Blend 4开发)
- C#开发WPF/Silverlight动画及游戏系列教程(Game Tutorial):目录
- C#开发WPF/Silverlight动画及游戏系列教程(2)让物体动起来
- C#开发WPF/Silverlight动画及游戏系列教程(Game Tutorial):(三十一) 超酷万变的矢量魔法
- C#开发WPF/Silverlight动画及游戏系列教程(Game Tutorial):(十二)神奇的副本地图
- C#开发WPF/Silverlight动画及游戏系列教程(Game Tutorial):(五)实现2D人物动画②
- C#开发WPF/Silverlight动画及游戏系列教程(Game Tutorial):(三十四)地图编辑器诞生啦!
- C#开发WPF/Silverlight动画及游戏系列教程(Game Tutorial):(十六) 牵引式地图移动模式②
- C#开发WPF/Silverlight动画及游戏系列教程(Game Tutorial):(十九) 完美精灵之八面玲珑(WPF Only)③
- C#开发WPF/Silverlight动画及游戏系列教程(Game Tutorial):(十八) 完美精灵之八面玲珑(WPF Only)②
- C#开发WPF/Silverlight动画及游戏系列教程(Game Tutorial):(二十三)自适应性窗口化与全屏化(WPF Only)