如何创建自己的短网址服务
2012-03-20 19:57
417 查看
46人收藏此文章, 我要收藏
发表于7天前 , 已有3220次阅读 共12个评论
由于现在使用Twitter服务的越来越多,短网址服务也越来越受欢迎。 因此越来越多的第三方的短网址服务开始大批量创建。
如果你有兴趣,那么请跟随本文,这里将教大家如何使用Google短网址的API来创建我们自己简单的短网址服务。 Let's go!
2. 创建 index.php
3. 创建gen.php
4. 演示
5. 下载
6. 结束
创建两个PHP文件,并命名为 "index.php" 和"gen.php"。
1 index.php: 首页。
2 gen.php: 服务端调用Google短网址服务API。 我们不能使用JavaScript直接(跨域)从谷歌获得数据。
3 从http://code.google.com/apis/urlshortener/v1/getting_started.html#APIKey , 获得谷歌的API密钥,此密钥将用于从谷歌查询数据,这个是关键点。
4 复制和粘贴图片"load.gif" 到"index.php"同目录下。 此图片将用于AJAX的等待加载提示。
2. 创建 index.php
先创建一个简单的HTML原型的index.php页面:
view source
print?
这里将创建一个简单的文本框和提交按钮。
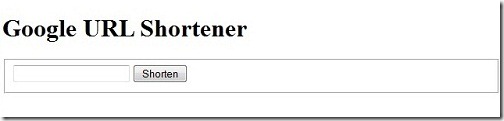
效果如下:
接下来,让我们添加一些CSS样式,使它更好看些。代码如下:
view source
print?
我们这里就不对CSS样式进行说明了。
请注意,我们还要创建了一个"class='loading'"的"DIV" 层,这用于Ajax的加载;默认情况它是不显示的,我们使用jQuery控制它的隐藏显示。

完成"index.php"的最后一步,也是最重要的一步,我们将导入jQuery库来完成Ajax操作。
复制并粘贴以下的JavaScript代码到CSS样式下面。我们稍后将作解释。
view source
print?
让我们来仔细看看,上面添加在那些的JavaScript代码:
view source
print?
第1步:使用谷歌提供的jQuery库。
第2步:一个提交的事件处理程序。
第3步:使用“POST”方法的数据序列化形式,提交表单数据到“gen.php”。
第4步:发送数据时,显示加载的DIV层。
第5步:AJAX操作完成时,隐藏加载的DIV层 。
第6步:将AJAX完成的数据显示在文本框中。
接下来,我们继续完成“gen.php”,它涉及Google的短网址API。
3. 创建 gen.php
复制并粘贴以下代码,完成“gen.php”。
view source
print?
在我解释这段代码之前,请先在第6行处提供你的“Google API密钥”。
1. 当提交的数据($_REQUEST ['URL'])不存在,则它会响应一个错误消息(“请输入网址”)。
2. 从$_REQUEST中得到URL。
3. 创建一个JSON数据,包含URL和谷歌API密钥。这个JSON数据将被发送到Google作为请求参数。
4. 使用PHP的cURL连接谷歌API服务器。
5. 从谷歌获取数据,并解码JSON对象。
6. 关闭cURL连接。
7. 如果返回数据有错误,就返回错误信息,否则显示短URL。
大功告成。现在你可以去体验以下自己的短网址服务了。
4. 演示
从这里你可以
现场演示 .
5. 下载
你也可以从GitHub帐户,下载此
脚本。
6. 结束
感谢您看完这篇文章,希望它能对你有所帮助。
发表于7天前 , 已有3220次阅读 共12个评论
由于现在使用Twitter服务的越来越多,短网址服务也越来越受欢迎。 因此越来越多的第三方的短网址服务开始大批量创建。
如果你有兴趣,那么请跟随本文,这里将教大家如何使用Google短网址的API来创建我们自己简单的短网址服务。 Let's go!
以下是本文的目录
1. 准备2. 创建 index.php
3. 创建gen.php
4. 演示
5. 下载
6. 结束
内容
1. 准备创建两个PHP文件,并命名为 "index.php" 和"gen.php"。
1 index.php: 首页。
2 gen.php: 服务端调用Google短网址服务API。 我们不能使用JavaScript直接(跨域)从谷歌获得数据。
3 从http://code.google.com/apis/urlshortener/v1/getting_started.html#APIKey , 获得谷歌的API密钥,此密钥将用于从谷歌查询数据,这个是关键点。
4 复制和粘贴图片"load.gif" 到"index.php"同目录下。 此图片将用于AJAX的等待加载提示。
2. 创建 index.php
先创建一个简单的HTML原型的index.php页面:
view source
print?
01 | < html > |
02 | < head > |
03 | </ head > |
04 | < body > |
05 | < div id = "container" > |
06 | < h1 >Google URL Shortener</ h1 > |
07 | < div id = "generator" > |
08 | < form id = "form" action = "#" method = "post" > |
09 | < fieldset > |
10 | < input type = "text" name = "url" id = "short" > |
11 | < input type = "submit" value = "Shorten" ></ input > |
12 | < div class = "loading" ></ div > |
13 | </ fieldset > |
14 | </ form > |
15 | </ div > |
16 | </ div > |
17 | </ body > |
18 | </ html > |
效果如下:

接下来,让我们添加一些CSS样式,使它更好看些。代码如下:
view source
print?
01 | < html > |
02 | < head > |
03 | < style > |
04 | body{ |
05 | width:100%; |
06 | margin:0px; |
07 | padding:0px; |
08 | } |
09 | #container{ |
10 | font-family: Arial, serif; |
11 | font-size:12px; |
12 | padding-top:20px; |
13 | width:700px; |
14 | margin: auto; |
15 | } |
16 | form{ |
17 | width:100%; |
18 | padding: 0px; |
19 | margin: 0px; |
20 | } |
21 | form fieldset{ |
22 | padding:20px; |
23 | } |
24 | form input{ |
25 | padding:5px; |
26 | font-size:14px; |
27 | } |
28 | form input[type=text]{ |
29 | float:left; |
30 | width:80%; |
31 | border: 1px solid #CCCCCC; |
32 | } |
33 | form input[type=submit]{ |
34 | width:10%; |
35 | margin-left:5px; |
36 | float:left; |
37 | border: 1px solid #CCCCCC; |
38 | background: #DDDDDD; |
39 | cursor: pointer; |
40 | } |
41 | div.loading{ |
42 | display:none; |
43 | margin:5px; |
44 | float:left; |
45 | width:16px; |
46 | height:16px; |
47 | background-image: url("load.gif"); |
48 | background-repeat: no-repeat; |
49 | background-position: top left; |
50 | background-color: transparent; |
51 | } |
52 | </ style > |
53 | </ head > |
54 | < body > |
55 | < div id = "container" > |
56 | < h1 >Google URL Shortener</ h1 > |
57 | < div id = "generator" > |
58 | < form id = "form" action = "#" method = "post" > |
59 | < fieldset > |
60 | < input type = "text" name = "url" id = "short" > |
61 | < input type = "submit" value = "Shorten" ></ input > |
62 | < div class = "loading" ></ div > |
63 | </ fieldset > |
64 | </ form > |
65 | </ div > |
66 | </ div > |
67 | </ body > |
68 | </ html > |
请注意,我们还要创建了一个"class='loading'"的"DIV" 层,这用于Ajax的加载;默认情况它是不显示的,我们使用jQuery控制它的隐藏显示。

完成"index.php"的最后一步,也是最重要的一步,我们将导入jQuery库来完成Ajax操作。
复制并粘贴以下的JavaScript代码到CSS样式下面。我们稍后将作解释。
view source
print?
01 | < html > |
02 | < head > |
03 | < style > |
04 | body{ |
05 | width:100%; |
06 | margin:0px; |
07 | padding:0px; |
08 | } |
09 | #container{ |
10 | font-family: Arial, serif; |
11 | font-size:12px; |
12 | padding-top:20px; |
13 | width:700px; |
14 | margin: auto; |
15 | } |
16 | form{ |
17 | width:100%; |
18 | padding: 0px; |
19 | margin: 0px; |
20 | } |
21 | form fieldset{ |
22 | padding:20px; |
23 | } |
24 | form input{ |
25 | padding:5px; |
26 | font-size:14px; |
27 | } |
28 | form input[type=text]{ |
29 | float:left; |
30 | width:80%; |
31 | border: 1px solid #CCCCCC; |
32 | } |
33 | form input[type=submit]{ |
34 | width:10%; |
35 | margin-left:5px; |
36 | float:left; |
37 | border: 1px solid #CCCCCC; |
38 | background: #DDDDDD; |
39 | cursor: pointer; |
40 | } |
41 | div.loading{ |
42 | display:none; |
43 | margin:5px; |
44 | float:left; |
45 | width:16px; |
46 | height:16px; |
47 | background-image: url("load.gif"); |
48 | background-repeat: no-repeat; |
49 | background-position: top left; |
50 | background-color: transparent; |
51 | } |
52 | </ style > |
53 | < script src = "http://ajax.googleapis.com/ajax/libs/jquery/1.6.4/jquery.min.js" ></ script > |
54 | < script > |
55 | $(document).ready(function(){ |
56 | $('#form').submit(function(){ |
57 | $.ajax({ |
58 | type: "POST", |
59 | url: "gen.php", |
60 | data: $(this).serialize(), |
61 | beforeSend: function(){ |
62 | $('.loading').show(1); |
63 | }, |
64 | complete: function(){ |
65 | $('.loading').hide(1); |
66 | }, |
67 | success: function(data){ |
68 | $('#short').val(data); |
69 | } |
70 | }); |
71 | return false; |
72 | }); |
73 | }); |
74 | </ script > |
75 | </ head > |
76 | < body > |
77 | < div id = "container" > |
78 | < h1 >Google URL Shortener</ h1 > |
79 | < div id = "generator" > |
80 | < form id = "form" action = "#" method = "post" > |
81 | < fieldset > |
82 | < input type = "text" name = "url" id = "short" > |
83 | < input type = "submit" value = "Shorten" ></ input > |
84 | < div class = "loading" ></ div > |
85 | </ fieldset > |
86 | </ form > |
87 | </ div > |
88 | </ div > |
89 | </ body > |
90 | </ html > |
view source
print?
01 | < script src = "http://ajax.googleapis.com/ajax/libs/jquery/1.6.4/jquery.min.js" ></ script > <!-- setp 1 --> |
02 | < script > |
03 | $(document).ready(function(){ |
04 | $('#form').submit(function(){ //step 2 |
05 | $.ajax({//step 3 |
06 | type: "POST", |
07 | url: "gen.php", |
08 | data: $(this).serialize(), |
09 | beforeSend: function(){ //step 4 |
10 | $('.loading').show(1); |
11 | }, |
12 | complete: function(){ //step 5 |
13 | $('.loading').hide(1); |
14 | }, |
15 | success: function(data){//step 6 |
16 | $('#short').val(data); |
17 | } |
18 | }); |
19 | return false; |
20 | }); |
21 | }); |
22 | </ script > |
第2步:一个提交的事件处理程序。
第3步:使用“POST”方法的数据序列化形式,提交表单数据到“gen.php”。
第4步:发送数据时,显示加载的DIV层。
第5步:AJAX操作完成时,隐藏加载的DIV层 。
第6步:将AJAX完成的数据显示在文本框中。
接下来,我们继续完成“gen.php”,它涉及Google的短网址API。
3. 创建 gen.php
复制并粘贴以下代码,完成“gen.php”。
view source
print?
01 | <?php |
02 | //1 |
03 | if (isset( $_REQUEST [ 'url' ])&&! empty ( $_REQUEST [ 'url' ])){ |
04 | //2 |
05 | $longUrl = $_REQUEST [ 'url' ]; |
06 | $apiKey = 'Your-Api-Key' ; |
07 | //3 |
08 | $postData = array ( 'longUrl' => $longUrl , 'key' => $apiKey ); |
09 | $jsonData =json_encode( $postData ); |
10 | //4 |
11 | $curlObj =curl_init(); |
12 | curl_setopt( $curlObj , CURLOPT_URL, 'https://www.googleapis.com/urlshortener/v1/url' ); |
13 | curl_setopt( $curlObj , CURLOPT_RETURNTRANSFER, 1); |
14 | curl_setopt( $curlObj , CURLOPT_SSL_VERIFYPEER, 0); |
15 | curl_setopt( $curlObj , CURLOPT_HEADER, 0); |
16 | curl_setopt( $curlObj , CURLOPT_HTTPHEADER, array ( 'Content-type:application/json' )); |
17 | curl_setopt( $curlObj , CURLOPT_POST, 1); |
18 | curl_setopt( $curlObj , CURLOPT_POSTFIELDS, $jsonData ); |
19 | //5 |
20 | $response =curl_exec( $curlObj ); |
21 | $json =json_decode( $response ); |
22 | //6 |
23 | curl_close( $curlObj ); |
24 | //7 |
25 | if (isset( $json ->error)){ |
26 | echo $json ->error->message; |
27 | } else { |
28 | echo $json ->id; |
29 | } |
30 | } else { |
31 | echo 'Please enter a URL' ; |
32 | } |
33 | ?> |
1. 当提交的数据($_REQUEST ['URL'])不存在,则它会响应一个错误消息(“请输入网址”)。
2. 从$_REQUEST中得到URL。
3. 创建一个JSON数据,包含URL和谷歌API密钥。这个JSON数据将被发送到Google作为请求参数。
4. 使用PHP的cURL连接谷歌API服务器。
5. 从谷歌获取数据,并解码JSON对象。
6. 关闭cURL连接。
7. 如果返回数据有错误,就返回错误信息,否则显示短URL。
大功告成。现在你可以去体验以下自己的短网址服务了。
4. 演示
从这里你可以
现场演示 .
5. 下载
你也可以从GitHub帐户,下载此
脚本。
6. 结束
感谢您看完这篇文章,希望它能对你有所帮助。

相关文章推荐
- 51822如何创建自己的服务
- 教大家如何设计实现自己的PHP短网址服务
- WCF的基本编程 设计服务协定 如何:创建单工协定
- 如何创建RESTFul Web服务
- #每天问自己个问题#3. 如何创建免费的签名证书
- 如何利用fleet单元文件为CoreOS集群创建高灵活性服务
- VS2010 创建WCF以及SL的客户端如何调用WCF服务教程(一): 创建WCF
- 【菜鸟学WCF】使用ScriptManager+Ajax调用WCF服务之如何为服务创建接口
- 如何创建自己的ContentProvider
- 【项目成长日记】如何使用EasyUI-demo创建自己的项目
- VC/MFC如何使用CreateEx()创建自己的对话框资源
- CXF学习笔记二:如何在Tomcat中创建、发布和访问基于CXF的服务
- MyEclipse-如何创建自己风格的JSP模板
- VS中如何快捷地给自己的代码添加创建信息注释
- 如何给Android应用创建本地服务
- 如何创建、安装和调试Windows服务
- mysql如何新创建一个mysql只复制结构,或复制自己想要的内容
- 如何创建RESTFul Web服务
- 手把手教你如何创建一个连接到Binder上的服务(图文)(一)
- 如何创建自己的开源依赖库(如何上传自己的依赖库library到jCenter)