ubuntu上安装OpenCV 2.1
2012-03-17 08:28
447 查看
| OpenCVis an excellent library for Computer Vision. I have been using it for years and it helped me a lot during my master thesis. OpenCV 1.0 can be easily installed in Ubuntu via the repositories. You can install OpenCV 2.0 by following one of my previous postshttp://www.samontab.com/web/2010/03/installing-opencv-2-0-in-ubuntu/ Unfortunately, the newer version of OpenCV, 2.1, which was released on April has a slightly different installation procedure. Since it contains many bug fixes and some nice new additions, I will show you how to install it. UPDATE: Install OpenCV 2.2 in Ubuntu 11.04 with Python and TBB supporthere. Here are the steps that I used to successfully install OpenCV 2.1 in Ubuntu 9.10. I have used this procedure for previous versions of Ubuntu as well with minor modifications (if any). First, you need to install many dependencies, such as support for reading and writing jpg files, movies, etc… This step is very easy, you only need to write the following command in the Terminal sudo apt-get install build-essential libgtk2.0-dev libavcodec-dev libavformat-dev libjpeg62-dev libtiff4-dev cmake libswscale-dev libjasper-dev The next step is to get the OpenCV 2.1 code: cd ~ wget http://sourceforge.net/projects/opencvlibrary/files/opencv-unix/2.1/OpenCV-2.1.0.tar.bz2/download tar -xvf OpenCV-2.1.0.tar.bz2 cd OpenCV-2.1.0/ In this version of OpenCV, the configure utility has been removed. Therefore you need to use Cmake to generate the makefile. Just execute the following line at the console. Note that there is a dot at the end of the line, it is an argument for the cmake program and it means current directory. cmake . Check that the above command produces no error and that in particular it reports FFMPEG as 1. If this is not the case you will not be able to read or write videos. 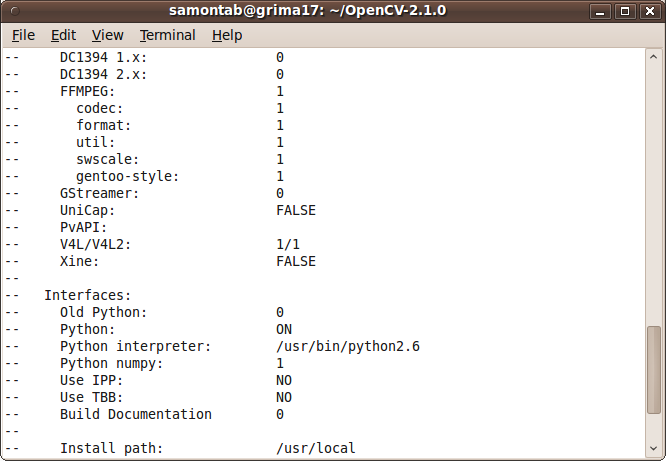 Now, you are ready to compile and install OpenCV 2.1: make sudo make install Now you have to configure the library. First, open the opencv.conf file with the following code: sudo gedit /etc/ld.so.conf.d/opencv.conf Add the following line at the end of the file(it may be an empty file, that is ok) and then save it: /usr/local/lib 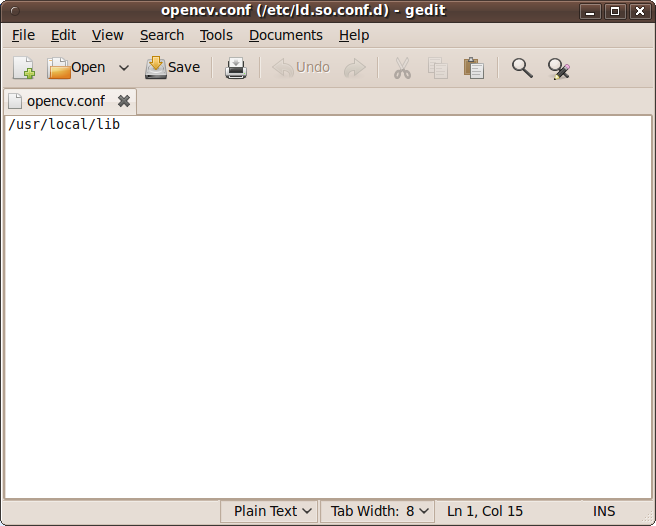 Run the following code to configure the library: sudo ldconfig Now you have to open another file: sudo gedit /etc/bash.bashrc Add these two lines at the end of the file and save it: PKG_CONFIG_PATH=$PKG_CONFIG_PATH:/usr/local/lib/pkgconfig export PKG_CONFIG_PATH  Finally, open a new console, restart the computer or logout and then login again. OpenCV will not work correctly until you do this. Now you have OpenCV 2.1 installed in your computer. Let’s check some demos included in OpenCV: cd ~ mkdir openCV_samples cp OpenCV-2.1.0/samples/c/* openCV_samples cd openCV_samples/ chmod +x build_all.sh ./build_all.sh Some of the training data for object detection is stored in /usr/local/share/opencv/haarcascades. You need to tell OpenCV which training data to use. I will use one of the frontal face detectors available. Let’s find a face: ./facedetect --cascade="/usr/local/share/opencv/haarcascades/haarcascade_frontalface_alt.xml" --scale=1.5 lena.jpg 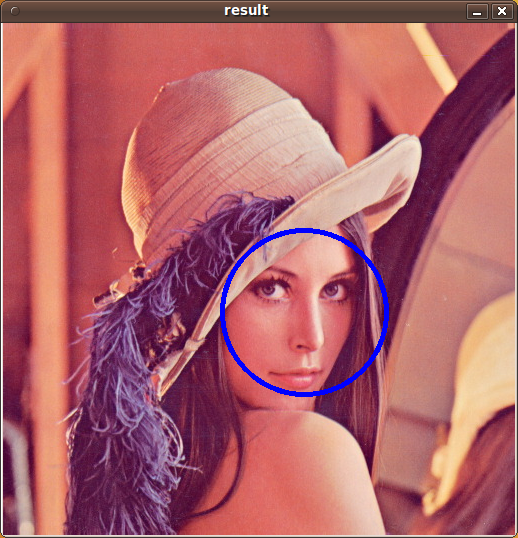 Note the scale parameter. It allows you to increase or decrease the size of the smallest object found in the image (faces in this case). Smaller numbers allows OpenCV to find smaller faces, which may lead to increasing the number of false detections. Also, the computation time needed gets larger when searching for smaller objects. In OpenCV 2.1, the grabcut algorithm is provided in the samples. This is a very nice segmentation algorithm that needs very little user input to segment the objects in the image. For using the demo, you need to select a rectangle of the area you want to segment. Then, hold the Control key and left click to select the background (in Blue). After that, hold the Shift key and left click to select the foreground (in Red). Then press the n key to generate the segmentation. You can press n again to continue to the next iteration of the algorithm. ./grabcut lena.jpg This image shows the initial rectangle for defining the object that I want to segment. 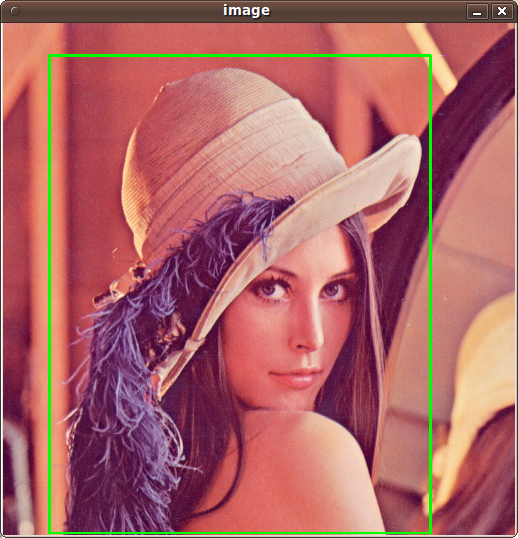 Now I roughly set the foreground (red) and background (blue). 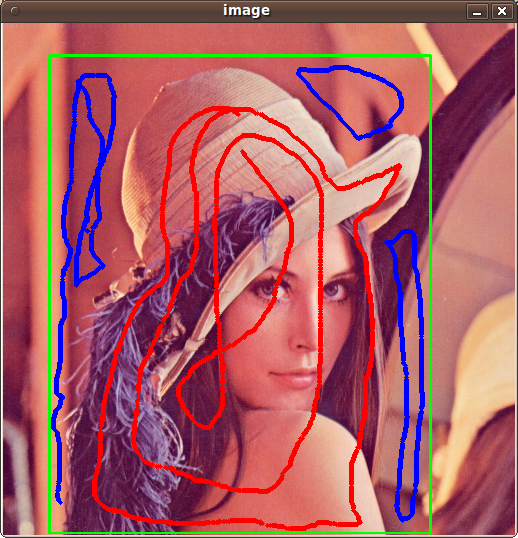 When you are ready, press the n key to run the grabcut algorithm. This image shows the result of the first iteration of the algorithm.  Now let’s see some background subtraction from a video. The original video shows a hand moving in front of some trees. OpenCV allows you to separate the foreground (hand) from the background (trees). 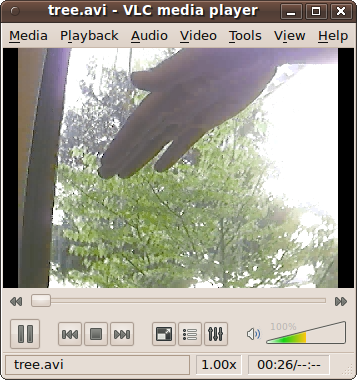 ./bgfg_segm tree.avi 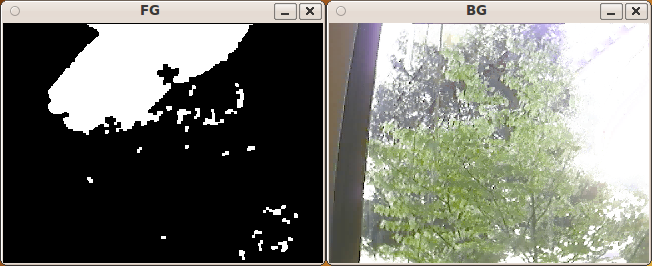 There are many other samples that you can try. |

相关文章推荐
- Ubuntu10.10中安装opencv2.1_数字图像处理
- Ubuntu 10.04 下安装OpenCV 2.1
- 在ubuntu中指令安装opencv2.1
- Ubuntu 10.04中安装OpenCv2.1
- OpenCV 2.1 在ubuntu中的编译安装
- ubuntu16.04+cuda8+opencv3.1+zed sdk2.1+ros 安装配置
- Ubuntu14.04 下 OpenCV3 安装
- ubuntu 系统 opencv3.1.0 安装
- 在Ubuntu下安装Opencv 2.4.9
- ubuntu 下安装opencv 2.3.1 人脸识别
- Ubuntu14.04 下 OpenCV3 安装
- Ubuntu14.04下OpenCV2.4.9+FFmpeg1.2.12安装配置及问题解决方案
- Ubuntu系统下opencv的安装与测试
- opencv2.4.13在ubuntu16.10下的安装
- Ubuntu安装OpenCV问题相关博客整理
- Ubuntu下安装OpenCV
- Ubuntu下OpenCV源码编译安装 转
- ubuntu16.04,python2.7,opencv3.4.0,安装
- ubuntu14.04中安装opencv2.4.10
- ubuntu 安装ffmpeg1.0 , opencv2.4.2