Silverlight+WCF 实战-网络象棋最终篇之对战视频-下篇[客户端发送与服务端中转](六)
2012-03-09 00:00
483 查看
本篇继上一篇:Silverlight+WCF 实战-网络象棋最终篇之对战视频-上篇[客户端开启视频/注册编号/接收视频](五)
一:对战视频 简单原理
略,内容见上篇。
二:对战视频 步骤解析:
略,内容见上篇。
三:对战视频 具体实施
1:如何打开视频
略,内容见上篇。
2:Silverlight如何使用Socket进行通讯
2.1:与远程建立链接:
2.2:注册编号[这里的规则是“房间号+棋手颜色值”]
2.3:开新线程,等待接收对方视频
2.4:将视频显示出来,需要用主线程来操作
略,以上内容见上篇。作者:路过秋天 博客:http://cyq1162.cnblogs.com/ 秋色园:http://www.cyqdata.com/
3:图片压缩与视频发送
3.1:图片压缩


我们发送的视频,是通过定时器每秒截5张图发送过去的,每秒钟将产生5张图片,因此,图片压缩变的相当重要。
因此,找一种图片压缩算法,是一种开始:
一开始:是从网上down了个PngEncoder,压缩160*160的截图后,图片大小是40K,看成是4K[因为看字节时是4后面好多0,看少了一个0],兴奋的我~~~
因此一开始在本地测试是正常的,上到网上就oh..no了。
40K*5,即每秒要发送200K的数据,这样就等于把2M/200K带宽给用光了,房东那限制的512K/56K带宽,就更提不上了~~~
最后:还是用上了大伙普通通用的JpgEncoder,压缩160*160的截图后,图片大小是10K,每秒产生10K*5=50K,56K带宽刚好够用了。
由于JpgEncoder为第三方插件,因此其代码就不贴了,下面简单介绍下:
1:JpgEncoder下载后内容为:FJ.Core.dll、JpgEncoder.cs两个文件。
2:JpgEncoder.cs有一静态方法,直接可以获取Stream流:
public static Stream GetStream(WriteableBitmap bitmap)
3:没了~~~
ps:具体FJ.Core.dll、JpgEncoder.cs两个文件可以从下载源码下找到。
3.2 视频发送
为了定时发送视频,我们需要开启定时器:
System.Windows.Threading.DispatcherTimer timer;
//
全局定义
public
MainPage()
{
InitializeComponent();
timer
=
new
System.Windows.Threading.DispatcherTimer();
timer.Interval
=
TimeSpan.FromSeconds(
0.2
);
//
0.2秒一次,每秒5次
timer.Tick
+=
new
EventHandler(timer_Tick);
}
void
timer_Tick(
object
sender, EventArgs e)
{
//
这里就是发送视频的代码了
}
private
void
btnSend_Click(
object
sender, RoutedEventArgs e)
{
timer.Start();
//
点击发送视频时,启动定时器即可
}
在点击发送触发定时器时,发送视频
byte
[] content
=
new
byte
[
56
*
1024
];
int
length;
void
timer_Tick(
object
sender, EventArgs e)
{
WriteableBitmap img
=
new
WriteableBitmap(canVideo,
null
);
Stream stream
=
JpgEncoder.GetStream(img);
//
获取压缩后的流
length
=
(
int
)stream.Length;
stream.Read(content,
, length);
stream.Close();
SocketAsyncEventArgs sendEvent
=
new
SocketAsyncEventArgs();
sendEvent.SetBuffer(content,
, length);
videoSocket.SendAsync(sendEvent);
//
这里只管发送,发送后的结果不管了。
img
=
null
;
}
至此,客户端的一系列动作就完成了,包括[打开视频/注册编号/发送视频/接收视频],下面到服务端代码上场了。
4:控制台服务端Socket中转
4.1:额外的处理事件
第一:服务端需要解决跨域问题,这个看过:Silverlight+WCF 新手实例 象棋 WCF通讯跨域(十五)
--
就会明白Silverlight客户端和通讯端不在同一站点下通讯时,需要解决跨域问题了。
虽然这里没用WCF,改用Socket方式,一样需要解决跨域问题。
第二:用Socket通讯方式,还需要开启另外的943端口监听。
不过这两步,网上都有现成的代码,直接copy就可以了。
步骤如下:
1:新建控制台项目—》起名:TCPService
2:新建类文件:PolicyServer.cs,完整代码如下,大伙直接使用就可以了:
PolicyServer类与跨域xml文件
using
System;
using
System.Collections.Generic;
using
System.Linq;
using
System.Text;
using
System.Net.Sockets;
using
System.Net;
namespace
TCPService
{
class
PolicyServer
{
Socket m_listenerIPv4;
Socket m_listenerIPv6;
byte
[] m_policy;
//
pass in the path of an XML file containing the socket policy
public
PolicyServer(
string
policyContents)
{
m_policy
=
Encoding.UTF8.GetBytes(policyContents);
//
Create the Listening Sockets
m_listenerIPv4
=
new
Socket(AddressFamily.InterNetwork, SocketType.Stream, ProtocolType.Tcp);
m_listenerIPv4.Bind(
new
IPEndPoint(IPAddress.Any,
943
));
m_listenerIPv4.Listen(
10
);
m_listenerIPv4.BeginAccept(
new
AsyncCallback(OnConnection), m_listenerIPv4);
//
Console.WriteLine("Listenting on IPv4 port 943.");
if
(System.Net.Sockets.Socket.OSSupportsIPv6)
{
m_listenerIPv6
=
new
Socket(AddressFamily.InterNetworkV6, SocketType.Stream, ProtocolType.Tcp);
m_listenerIPv6.Bind(
new
IPEndPoint(IPAddress.IPv6Any,
943
));
m_listenerIPv6.Listen(
10
);
m_listenerIPv6.BeginAccept(
new
AsyncCallback(OnConnection), m_listenerIPv6);
//
Console.WriteLine("Listenting on IPv6 port 943.");
}
else
{
//
Console.WriteLine("IPv6 is not supported by the system.");
}
}
//
Called when we receive a connection from a client
public
void
OnConnection(IAsyncResult res)
{
Socket listener
=
(Socket)res.AsyncState;
Socket client
=
null
;
try
{
client
=
listener.EndAccept(res);
}
catch
(SocketException)
{
return
;
}
//
handle this policy request with a PolicyConnection
PolicyConnection pc
=
new
PolicyConnection(client, m_policy);
//
look for more connections
listener.BeginAccept(
new
AsyncCallback(OnConnection), listener);
}
public
void
Close()
{
m_listenerIPv4.Close();
if
(m_listenerIPv6
!=
null
)
{
m_listenerIPv6.Close();
}
}
}
class
PolicyConnection
{
Socket m_connection;
//
buffer to receive the request from the client
byte
[] m_buffer;
int
m_received;
//
the policy to return to the client
byte
[] m_policy;
//
the request that we're expecting from the client
static
string
s_policyRequestString
=
"
<policy-file-request/>
"
;
public
PolicyConnection(Socket client,
byte
[] policy)
{
m_connection
=
client;
m_policy
=
policy;
m_buffer
=
new
byte
[s_policyRequestString.Length];
m_received
=
;
try
{
//
receive the request from the client
m_connection.BeginReceive(m_buffer,
, s_policyRequestString.Length, SocketFlags.None,
new
AsyncCallback(OnReceive),
null
);
}
catch
(SocketException)
{
m_connection.Close();
}
}
//
Called when we receive data from the client
private
void
OnReceive(IAsyncResult res)
{
try
{
m_received
+=
m_connection.EndReceive(res);
//
if we haven't gotten enough for a full request yet, receive again
if
(m_received
<
s_policyRequestString.Length)
{
m_connection.BeginReceive(m_buffer, m_received, s_policyRequestString.Length
-
m_received, SocketFlags.None,
new
AsyncCallback(OnReceive),
null
);
return
;
}
//
make sure the request is valid
string
request
=
System.Text.Encoding.UTF8.GetString(m_buffer,
, m_received);
if
(StringComparer.InvariantCultureIgnoreCase.Compare(request, s_policyRequestString)
!=
)
{
m_connection.Close();
return
;
}
//
send the policy
m_connection.BeginSend(m_policy,
, m_policy.Length, SocketFlags.None,
new
AsyncCallback(OnSend),
null
);
}
catch
(SocketException)
{
m_connection.Close();
}
}
//
called after sending the policy to the client; close the connection.
public
void
OnSend(IAsyncResult res)
{
try
{
m_connection.EndSend(res);
}
finally
{
m_connection.Close();
}
}
}
//
跨域用的xml文件,以代码的方式传入。
public
static
class
SocketPolicy
{
public
const
string
Policy
=
@"
<?xml version=""1.0"" encoding =""utf-8""?>
<access-policy>
<cross-domain-access>
<policy>
<allow-from>
<domain uri=""*"" />
</allow-from>
<grant-to>
<socket-resource port=""4502-4530"" protocol=""tcp"" />
</grant-to>
</policy>
</cross-domain-access>
</access-policy>
"
;
}
}
3:控制台启动首行代码
static
void
Main(
string
[] args)
{
PolicyServer ps
=
new
PolicyServer(SocketPolicy.Policy);
//
Silverlight跨域访问与开启943端口
}
至此,我们添加了个额外的处理类来解决943端口和跨域问题[注意上面代码中xml的端口号配置范围哦],下面开始自己的服务端处理流程
4.2:服务端处理流程
4.2.1:开启监听
namespace
TCPService
{
class
Program
{
public
static
Dictionary
<
int
, ThreadProxy
>
soketList;
//
房号+颜色值
static
void
Main(
string
[] args)
{
PolicyServer ps
=
new
PolicyServer(SocketPolicy.Policy);
//
Silverlight跨域访问及943端口
//
主线程监听
soketList
=
new
Dictionary
<
int
, ThreadProxy
>
();
Console.WriteLine(
"
TCPService正在启动运行
"
);
IPEndPoint ip
=
new
IPEndPoint(IPAddress.Any,
4505
);
//
本地任意IP及4505端口
Socket mainSocket
=
new
Socket(AddressFamily.InterNetwork, SocketType.Stream, ProtocolType.Tcp);
mainSocket.Bind(ip);
mainSocket.Listen(
-
1
);
while
(
true
)
{
Socket socket
=
mainSocket.Accept();
new
ThreadProxy(socket).Run();
//
收到消息即时处理。
}
}
public
static
void
WriteLine(
string
msg)
{
Console.WriteLine(msg);
}
}
class
ThreadProxy
{
public
Socket socket;
public
ThreadProxy(Socket newSocket)
{
socket
=
newSocket;
}
public
void
Run()
{
Thread thread
=
new
Thread(
new
ThreadStart(Action));
thread.Start();
}
public
void
Action()
{
Program.WriteLine(
"
有人来了----
"
);
//
下面开启处理逻辑
}
}
}
说明:
这里要注意的是监听的端口号必须要跨域文件配置的范围内。同时用一字典泛型soketList保存了所以注册的用户通讯socket,这样可以方便查找对方的socket进行中转。
4.2.2 定义下全局变量
public
Socket socket;
//
我方的Socket
ThreadProxy youThreadProxy;
//
对方
int num;//注册的编号
byte
[] buffer
=
new
byte
[
30
*
1024
];
//
缓冲字节30K,简单说就是用户10K发送3次,这里收到满30K才转发一次
bool
firstConn
=
true
;
//
是否第一次建立链接,首次链接都是注册编号,不发送视频的;
4.2.3 处理编号注册、移除、查找对方
编号注册:
private
void
RegSocket(
string
key)
{
firstConn
=
false
;
//
注册完后,设置下标识
if
(key.Length
<
10
)
//
字节太多就是图片流了
{
if
(
int
.TryParse(key,
out
num))
{
if
(Program.soketList.ContainsKey(num))
//
之前都有人在了
{
Program.soketList[num].socket.Close();
Program.soketList[num].socket.Dispose();
Program.soketList.Remove(num);
}
Program.soketList.Add(num,
this
);
Program.WriteLine(
"
用户注册:
"
+
key);
FindYouSocket();
return
;
}
}
}
线程错误,编号移除:
private
void
OnError(ThreadProxy errorProxy,
string
errorMsg)
{
if
(errorProxy.socket
!=
null
)
{
errorProxy.socket.Close();
}
Console.WriteLine(
"
删除用户:
"
+
errorProxy.num
+
"
错误信息:
"
+
errorMsg);
Program.soketList.Remove(errorProxy.num);
}
查询对方:
private
void
FindYouSocket()
{
int
youNum
=
num
%
2
==
?
num
-
1
: num
+
1
;
if
(Program.soketList.ContainsKey(youNum))
{
youThreadProxy
=
Program.soketList[youNum];
}
}
4.2.4 主业务处理中转流程
public
ThreadProxy(Socket newSocket)
{
socket
=
newSocket;
socket.SendBufferSize
=
buffer.Length;
socket.ReceiveBufferSize
=
buffer.Length;
}
public
void
Run()
{
Thread thread
=
new
Thread(
new
ThreadStart(Action));
thread.Start();
}
public
void
Action()
{
Program.WriteLine(
"
有人来了----
"
);
try
{
while
(
true
)
{
if
(socket.Connected)
{
int
length
=
, count
=
;
do
{
System.Threading.Thread.Sleep(
20
);
//
关键点,请求太快数据接收不全
length
=
socket.Receive(buffer, count, socket.Available,
);
count
=
count
+
length;
}
while
(socket.Available
>
);
if
(count
>
1
)
{
if
(count
<
4
)
//
小字节,命令字符
{
if
(firstConn)
//
首次登陆,需要注册ID
{
string
key
=
ASCIIEncoding.ASCII.GetString(buffer,
, count);
RegSocket(key);
}
}
else
if
(youThreadProxy
==
null
)
{
Program.WriteLine(
"
没人接收。。。
"
);
FindYouSocket();
}
else
if
(youThreadProxy.canReceive)
//
对方允许接收图片发送
{
Program.WriteLine(
"
图片来了:
"
+
count);
if
(youThreadProxy.socket.Connected)
{
Program.WriteLine(
"
图片转发:
"
+
buffer.Length);
try
{
youThreadProxy.socket.Send(buffer, count,
);
}
catch
(Exception err)
{
OnError(youThreadProxy, err.Message);
}
}
}
}
}
else
{
OnError(
this
,
"
socket链接已关闭
"
);
break
;
}
}
}
catch
(Exception err)
{
OnError(
this
,err.Message);
}
}
处理流程也很简单,根据请求的字节大小来调用是“注册”还是“中转”。
至此,整个完整的视频传输篇完成了,完成的图片和上一节一样了:
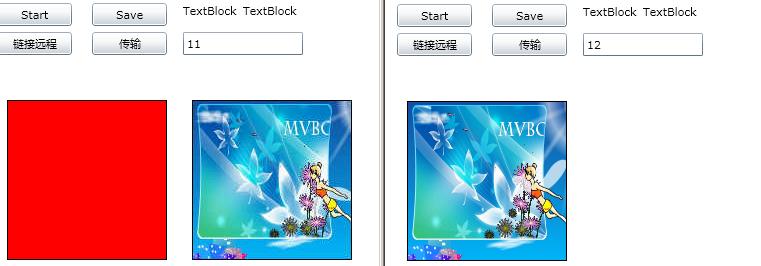
最后是大家期待已久的示例源码下载:点击下载 [别忘了留下言推荐下哦^-^]
说明:视频源码中的内容会多一些,包括一开始我写的一些其它杂七杂八的代码,不过不影响整个的运行。
最后:谢谢大家对本系列的喜欢,谢谢支持~
PS:传说点一下推荐会有10个园豆,喜欢麻烦点一下“推荐”,thank you very much!!
原文链接:
http://www.cnblogs.com/cyq1162/archive/2010/12/03/1895177.html
一:对战视频 简单原理
略,内容见上篇。
二:对战视频 步骤解析:
略,内容见上篇。
三:对战视频 具体实施
1:如何打开视频
略,内容见上篇。
2:Silverlight如何使用Socket进行通讯
2.1:与远程建立链接:
2.2:注册编号[这里的规则是“房间号+棋手颜色值”]
2.3:开新线程,等待接收对方视频
2.4:将视频显示出来,需要用主线程来操作
略,以上内容见上篇。作者:路过秋天 博客:http://cyq1162.cnblogs.com/ 秋色园:http://www.cyqdata.com/
3:图片压缩与视频发送
3.1:图片压缩
我们发送的视频,是通过定时器每秒截5张图发送过去的,每秒钟将产生5张图片,因此,图片压缩变的相当重要。
因此,找一种图片压缩算法,是一种开始:
一开始:是从网上down了个PngEncoder,压缩160*160的截图后,图片大小是40K,看成是4K[因为看字节时是4后面好多0,看少了一个0],兴奋的我~~~
因此一开始在本地测试是正常的,上到网上就oh..no了。
40K*5,即每秒要发送200K的数据,这样就等于把2M/200K带宽给用光了,房东那限制的512K/56K带宽,就更提不上了~~~
最后:还是用上了大伙普通通用的JpgEncoder,压缩160*160的截图后,图片大小是10K,每秒产生10K*5=50K,56K带宽刚好够用了。
由于JpgEncoder为第三方插件,因此其代码就不贴了,下面简单介绍下:
1:JpgEncoder下载后内容为:FJ.Core.dll、JpgEncoder.cs两个文件。
2:JpgEncoder.cs有一静态方法,直接可以获取Stream流:
public static Stream GetStream(WriteableBitmap bitmap)
3:没了~~~
ps:具体FJ.Core.dll、JpgEncoder.cs两个文件可以从下载源码下找到。
3.2 视频发送
为了定时发送视频,我们需要开启定时器:
System.Windows.Threading.DispatcherTimer timer;
//
全局定义
public
MainPage()
{
InitializeComponent();
timer
=
new
System.Windows.Threading.DispatcherTimer();
timer.Interval
=
TimeSpan.FromSeconds(
0.2
);
//
0.2秒一次,每秒5次
timer.Tick
+=
new
EventHandler(timer_Tick);
}
void
timer_Tick(
object
sender, EventArgs e)
{
//
这里就是发送视频的代码了
}
private
void
btnSend_Click(
object
sender, RoutedEventArgs e)
{
timer.Start();
//
点击发送视频时,启动定时器即可
}
在点击发送触发定时器时,发送视频
byte
[] content
=
new
byte
[
56
*
1024
];
int
length;
void
timer_Tick(
object
sender, EventArgs e)
{
WriteableBitmap img
=
new
WriteableBitmap(canVideo,
null
);
Stream stream
=
JpgEncoder.GetStream(img);
//
获取压缩后的流
length
=
(
int
)stream.Length;
stream.Read(content,
, length);
stream.Close();
SocketAsyncEventArgs sendEvent
=
new
SocketAsyncEventArgs();
sendEvent.SetBuffer(content,
, length);
videoSocket.SendAsync(sendEvent);
//
这里只管发送,发送后的结果不管了。
img
=
null
;
}
至此,客户端的一系列动作就完成了,包括[打开视频/注册编号/发送视频/接收视频],下面到服务端代码上场了。
4:控制台服务端Socket中转
4.1:额外的处理事件
第一:服务端需要解决跨域问题,这个看过:Silverlight+WCF 新手实例 象棋 WCF通讯跨域(十五)
--
就会明白Silverlight客户端和通讯端不在同一站点下通讯时,需要解决跨域问题了。
虽然这里没用WCF,改用Socket方式,一样需要解决跨域问题。
第二:用Socket通讯方式,还需要开启另外的943端口监听。
不过这两步,网上都有现成的代码,直接copy就可以了。
步骤如下:
1:新建控制台项目—》起名:TCPService
2:新建类文件:PolicyServer.cs,完整代码如下,大伙直接使用就可以了:
PolicyServer类与跨域xml文件
using
System;
using
System.Collections.Generic;
using
System.Linq;
using
System.Text;
using
System.Net.Sockets;
using
System.Net;
namespace
TCPService
{
class
PolicyServer
{
Socket m_listenerIPv4;
Socket m_listenerIPv6;
byte
[] m_policy;
//
pass in the path of an XML file containing the socket policy
public
PolicyServer(
string
policyContents)
{
m_policy
=
Encoding.UTF8.GetBytes(policyContents);
//
Create the Listening Sockets
m_listenerIPv4
=
new
Socket(AddressFamily.InterNetwork, SocketType.Stream, ProtocolType.Tcp);
m_listenerIPv4.Bind(
new
IPEndPoint(IPAddress.Any,
943
));
m_listenerIPv4.Listen(
10
);
m_listenerIPv4.BeginAccept(
new
AsyncCallback(OnConnection), m_listenerIPv4);
//
Console.WriteLine("Listenting on IPv4 port 943.");
if
(System.Net.Sockets.Socket.OSSupportsIPv6)
{
m_listenerIPv6
=
new
Socket(AddressFamily.InterNetworkV6, SocketType.Stream, ProtocolType.Tcp);
m_listenerIPv6.Bind(
new
IPEndPoint(IPAddress.IPv6Any,
943
));
m_listenerIPv6.Listen(
10
);
m_listenerIPv6.BeginAccept(
new
AsyncCallback(OnConnection), m_listenerIPv6);
//
Console.WriteLine("Listenting on IPv6 port 943.");
}
else
{
//
Console.WriteLine("IPv6 is not supported by the system.");
}
}
//
Called when we receive a connection from a client
public
void
OnConnection(IAsyncResult res)
{
Socket listener
=
(Socket)res.AsyncState;
Socket client
=
null
;
try
{
client
=
listener.EndAccept(res);
}
catch
(SocketException)
{
return
;
}
//
handle this policy request with a PolicyConnection
PolicyConnection pc
=
new
PolicyConnection(client, m_policy);
//
look for more connections
listener.BeginAccept(
new
AsyncCallback(OnConnection), listener);
}
public
void
Close()
{
m_listenerIPv4.Close();
if
(m_listenerIPv6
!=
null
)
{
m_listenerIPv6.Close();
}
}
}
class
PolicyConnection
{
Socket m_connection;
//
buffer to receive the request from the client
byte
[] m_buffer;
int
m_received;
//
the policy to return to the client
byte
[] m_policy;
//
the request that we're expecting from the client
static
string
s_policyRequestString
=
"
<policy-file-request/>
"
;
public
PolicyConnection(Socket client,
byte
[] policy)
{
m_connection
=
client;
m_policy
=
policy;
m_buffer
=
new
byte
[s_policyRequestString.Length];
m_received
=
;
try
{
//
receive the request from the client
m_connection.BeginReceive(m_buffer,
, s_policyRequestString.Length, SocketFlags.None,
new
AsyncCallback(OnReceive),
null
);
}
catch
(SocketException)
{
m_connection.Close();
}
}
//
Called when we receive data from the client
private
void
OnReceive(IAsyncResult res)
{
try
{
m_received
+=
m_connection.EndReceive(res);
//
if we haven't gotten enough for a full request yet, receive again
if
(m_received
<
s_policyRequestString.Length)
{
m_connection.BeginReceive(m_buffer, m_received, s_policyRequestString.Length
-
m_received, SocketFlags.None,
new
AsyncCallback(OnReceive),
null
);
return
;
}
//
make sure the request is valid
string
request
=
System.Text.Encoding.UTF8.GetString(m_buffer,
, m_received);
if
(StringComparer.InvariantCultureIgnoreCase.Compare(request, s_policyRequestString)
!=
)
{
m_connection.Close();
return
;
}
//
send the policy
m_connection.BeginSend(m_policy,
, m_policy.Length, SocketFlags.None,
new
AsyncCallback(OnSend),
null
);
}
catch
(SocketException)
{
m_connection.Close();
}
}
//
called after sending the policy to the client; close the connection.
public
void
OnSend(IAsyncResult res)
{
try
{
m_connection.EndSend(res);
}
finally
{
m_connection.Close();
}
}
}
//
跨域用的xml文件,以代码的方式传入。
public
static
class
SocketPolicy
{
public
const
string
Policy
=
@"
<?xml version=""1.0"" encoding =""utf-8""?>
<access-policy>
<cross-domain-access>
<policy>
<allow-from>
<domain uri=""*"" />
</allow-from>
<grant-to>
<socket-resource port=""4502-4530"" protocol=""tcp"" />
</grant-to>
</policy>
</cross-domain-access>
</access-policy>
"
;
}
}
3:控制台启动首行代码
static
void
Main(
string
[] args)
{
PolicyServer ps
=
new
PolicyServer(SocketPolicy.Policy);
//
Silverlight跨域访问与开启943端口
}
至此,我们添加了个额外的处理类来解决943端口和跨域问题[注意上面代码中xml的端口号配置范围哦],下面开始自己的服务端处理流程
4.2:服务端处理流程
4.2.1:开启监听
namespace
TCPService
{
class
Program
{
public
static
Dictionary
<
int
, ThreadProxy
>
soketList;
//
房号+颜色值
static
void
Main(
string
[] args)
{
PolicyServer ps
=
new
PolicyServer(SocketPolicy.Policy);
//
Silverlight跨域访问及943端口
//
主线程监听
soketList
=
new
Dictionary
<
int
, ThreadProxy
>
();
Console.WriteLine(
"
TCPService正在启动运行
"
);
IPEndPoint ip
=
new
IPEndPoint(IPAddress.Any,
4505
);
//
本地任意IP及4505端口
Socket mainSocket
=
new
Socket(AddressFamily.InterNetwork, SocketType.Stream, ProtocolType.Tcp);
mainSocket.Bind(ip);
mainSocket.Listen(
-
1
);
while
(
true
)
{
Socket socket
=
mainSocket.Accept();
new
ThreadProxy(socket).Run();
//
收到消息即时处理。
}
}
public
static
void
WriteLine(
string
msg)
{
Console.WriteLine(msg);
}
}
class
ThreadProxy
{
public
Socket socket;
public
ThreadProxy(Socket newSocket)
{
socket
=
newSocket;
}
public
void
Run()
{
Thread thread
=
new
Thread(
new
ThreadStart(Action));
thread.Start();
}
public
void
Action()
{
Program.WriteLine(
"
有人来了----
"
);
//
下面开启处理逻辑
}
}
}
说明:
这里要注意的是监听的端口号必须要跨域文件配置的范围内。同时用一字典泛型soketList保存了所以注册的用户通讯socket,这样可以方便查找对方的socket进行中转。
4.2.2 定义下全局变量
public
Socket socket;
//
我方的Socket
ThreadProxy youThreadProxy;
//
对方
int num;//注册的编号
byte
[] buffer
=
new
byte
[
30
*
1024
];
//
缓冲字节30K,简单说就是用户10K发送3次,这里收到满30K才转发一次
bool
firstConn
=
true
;
//
是否第一次建立链接,首次链接都是注册编号,不发送视频的;
4.2.3 处理编号注册、移除、查找对方
编号注册:
private
void
RegSocket(
string
key)
{
firstConn
=
false
;
//
注册完后,设置下标识
if
(key.Length
<
10
)
//
字节太多就是图片流了
{
if
(
int
.TryParse(key,
out
num))
{
if
(Program.soketList.ContainsKey(num))
//
之前都有人在了
{
Program.soketList[num].socket.Close();
Program.soketList[num].socket.Dispose();
Program.soketList.Remove(num);
}
Program.soketList.Add(num,
this
);
Program.WriteLine(
"
用户注册:
"
+
key);
FindYouSocket();
return
;
}
}
}
线程错误,编号移除:
private
void
OnError(ThreadProxy errorProxy,
string
errorMsg)
{
if
(errorProxy.socket
!=
null
)
{
errorProxy.socket.Close();
}
Console.WriteLine(
"
删除用户:
"
+
errorProxy.num
+
"
错误信息:
"
+
errorMsg);
Program.soketList.Remove(errorProxy.num);
}
查询对方:
private
void
FindYouSocket()
{
int
youNum
=
num
%
2
==
?
num
-
1
: num
+
1
;
if
(Program.soketList.ContainsKey(youNum))
{
youThreadProxy
=
Program.soketList[youNum];
}
}
4.2.4 主业务处理中转流程
public
ThreadProxy(Socket newSocket)
{
socket
=
newSocket;
socket.SendBufferSize
=
buffer.Length;
socket.ReceiveBufferSize
=
buffer.Length;
}
public
void
Run()
{
Thread thread
=
new
Thread(
new
ThreadStart(Action));
thread.Start();
}
public
void
Action()
{
Program.WriteLine(
"
有人来了----
"
);
try
{
while
(
true
)
{
if
(socket.Connected)
{
int
length
=
, count
=
;
do
{
System.Threading.Thread.Sleep(
20
);
//
关键点,请求太快数据接收不全
length
=
socket.Receive(buffer, count, socket.Available,
);
count
=
count
+
length;
}
while
(socket.Available
>
);
if
(count
>
1
)
{
if
(count
<
4
)
//
小字节,命令字符
{
if
(firstConn)
//
首次登陆,需要注册ID
{
string
key
=
ASCIIEncoding.ASCII.GetString(buffer,
, count);
RegSocket(key);
}
}
else
if
(youThreadProxy
==
null
)
{
Program.WriteLine(
"
没人接收。。。
"
);
FindYouSocket();
}
else
if
(youThreadProxy.canReceive)
//
对方允许接收图片发送
{
Program.WriteLine(
"
图片来了:
"
+
count);
if
(youThreadProxy.socket.Connected)
{
Program.WriteLine(
"
图片转发:
"
+
buffer.Length);
try
{
youThreadProxy.socket.Send(buffer, count,
);
}
catch
(Exception err)
{
OnError(youThreadProxy, err.Message);
}
}
}
}
}
else
{
OnError(
this
,
"
socket链接已关闭
"
);
break
;
}
}
}
catch
(Exception err)
{
OnError(
this
,err.Message);
}
}
处理流程也很简单,根据请求的字节大小来调用是“注册”还是“中转”。
至此,整个完整的视频传输篇完成了,完成的图片和上一节一样了:

最后是大家期待已久的示例源码下载:点击下载 [别忘了留下言推荐下哦^-^]
说明:视频源码中的内容会多一些,包括一开始我写的一些其它杂七杂八的代码,不过不影响整个的运行。
最后:谢谢大家对本系列的喜欢,谢谢支持~
PS:传说点一下推荐会有10个园豆,喜欢麻烦点一下“推荐”,thank you very much!!
原文链接:
http://www.cnblogs.com/cyq1162/archive/2010/12/03/1895177.html

相关文章推荐
- Silverlight+WCF 实战-网络象棋最终篇之对战视频-下篇[客户端发送与服务端中转](六)
- Silverlight+WCF 实战-网络象棋最终篇之对战视频-下篇[客户端发送与服务端中转](六)
- Silverlight+WCF 实战-网络象棋最终篇之对战视频-上篇[客户端开启视频/注册编号/接收视频](五)
- Silverlight+WCF 实战-网络象棋最终篇之对战视频-上篇[客户端开启视频/注册编号/接收视频](五)
- Silverlight+WCF 实战-网络象棋最终篇之对战视频-上篇[客户端开启视频/注册编号/接收视频](五)
- Silverlight+WCF 实战-网络象棋最终篇之对战视频-上篇[客户端开启视频/注册编号/接收视频](五)
- Silverlight+WCF 实战-网络象棋最终篇之非线程阻塞倒计时窗口-应用篇(七)
- Silverlight+WCF 实战-网络象棋最终篇之解决重复的消息提示-状态重置(九)
- Silverlight+WCF 实战-网络象棋最终篇之解决重复的消息提示(八)
- Silverlight+WCF 实战-网络象棋最终篇之非线程阻塞倒计时窗口(四)
- Silverlight+WCF 实战-网络象棋最终篇之解决重复的消息提示(八)
- Silverlight+WCF 实战-网络象棋最终篇之十字轨迹(一)
- Silverlight+WCF 实战-网络象棋最终篇之房间装修-WCF端(二)
- Silverlight+WCF 实战-网络象棋最终篇之非线程阻塞倒计时窗口-应用篇(七)
- Silverlight+WCF 实战-网络象棋最终篇之解决重复的消息提示(八)
- Silverlight+WCF 实战-网络象棋最终篇之解决重复的消息提示-状态重置(九)
- Silverlight+WCF 实战-网络象棋最终篇之解决重复的消息提示-状态重置(九)
- Silverlight+WCF 实战-网络象棋最终篇之非线程阻塞倒计时窗口-应用篇(七)
- Silverlight+WCF 实战-网络象棋最终篇之非线程阻塞倒计时窗口(四)
- Silverlight+WCF 实战-网络象棋最终篇之解决重复的消息提示(八)