深入浅出android/ophone UI实现水平布局的Tab控件 Tabwidget在左边/右边
2012-03-08 14:41
691 查看
From:http://www.ophonesdn.com/blog/mobgame/showBlog/publicshow/050933dd-30bc-4b9f-8cc6-0c2e20ab7eb3;jsessionid=715C7625130217C251FBCE3C259174C8?count=&max=&index=
Tab UI控件是非常常见、常用的导航UI组件,使用它能够很方便地迅速切换页面。甚为强大的android当然也少不了它,在android/ophone平台上也可以很方便地使用TabHost,TabWidget来实现你的Tab。有点遗憾的是目前系统自带的UI布局只能实现垂直方向的Tab UI, 在某些项目我们不免需要水平方向的Tab UI,如果你有这种需求你可以参考本文所介绍方法。本文所述方法参考API 源代码内部实现。
1预备知识:TabHost,TabWidget, TabSpec简介
TabHost:是整个Tab ui的布局容器实质上就是是一个扩展的FrameLayout,所有的Tab UI相关组件必须位于该布局里,必须包含的组件有:名为TabWidget的(选项卡组件布局)和选项卡内容容器
TabWidget:选项卡组件布局容器,实质上一个线性布局LinearLayout,所有Tab选项控件都放在这里,你可以使用tabHost.addTab(TabSpec tab Spec)方法将不同的选项卡内容添加的选项卡布局容器中,或许你会有点迷糊这明明是TabSpec嘛,不要急接着看
TabSpec:是一个与选项卡相关描述文件,其内部包含了一个类型为View[更确切地说是RelativeLayout]的tabIndicator,这个tabIndicator就是选项卡对应的视图,当你在执行t abHost.addTab(TabSpec tabSpec)时,内部会有个操作将此tabIndicator添加到TabWidget中:下面是摘自API的TabHost.java中关于addTab的一段代码
public void addTab(TabSpec tabSpec) {
//...
mTabWidget.addView(tabIndicator);
mTabSpecs.add(tabSpec);
//...
}
外加一个固定ID为 android:id="@android:id/tabcontent"的FrameLayout,用于容纳Tab选项卡对应的内容
2正题:一步一步编写水平方向的Tab:
第一步:改写你的tab_indicator:直接从SDK..\platforms\android-ndata\res\layout中:拷贝tab_indicator.xml命名为tab_indicator_horizontal.xml 存放于工程中layout目录中,并修改如下:
<RelativeLayout xmlns:android="http://schemas.android.com/apk/res/android"
android:layout_width="64dip"
android:layout_height="0dip"
android:layout_weight="1"
android:layout_marginTop="0dip"
android:layout_marginBottom="0dip"
android:orientation="vertical"
android:background="@drawable/tab_indicator_horizontal">
<ImageView android:id="@+id/icon"
android:layout_width="wrap_content"
android:layout_height="wrap_content"
android:layout_centerInParent="true"
/>
<TextView android:id="@+id/title"
android:layout_width="wrap_content"
android:layout_height="wrap_content"
android:layout_alignParentBottom="true"
android:layout_centerHorizontal="true"
style="?android:attr/tabWidgetStyle"
/>
</RelativeLayout>
第二步:编写水平Tab选项卡显示状态背景:android:background="@drawable/tab_indicator_horizontal"
同样直接从SDK..\platforms\android-ndata\res\drawable中直接拷贝tab_indicator.xml并命名为tab_indicator_horizontal.xml 存放于工程中drawable目录中,内容如下,很简单相信你应该明白是怎么回事,这个文件不需要改动,拿来就用:
<?xml version="1.0" encoding="utf-8"?>
<selector xmlns:android="http://schemas.android.com/apk/res/android">
<!-- Non focused states -->
<item android:state_focused="false" android:state_selected="false" android:state_pressed="false" android:drawable="@drawable/tab_unselected" />
<item android:state_focused="false" android:state_selected="true" android:state_pressed="false" android:drawable="@drawable/tab_selected" />
<!-- Focused states -->
<item android:state_focused="true" android:state_selected="false" android:state_pressed="false" android:drawable="@drawable/tab_focus" />
<item android:state_focused="true" android:state_selected="true" android:state_pressed="false" android:drawable="@drawable/tab_focus" />
<!-- Pressed -->
<item android:state_pressed="true" android:drawable="@drawable/tab_press" />
</selector>
说明:上面的drawable/tab_unselected,drawable/tab_selected实质就是图片,android本身提供的名为9patch的可拉伸自适应填充图,因为系统本身自带的是垂直方向的图,不适合在这里使用,你需要自己修改上述图片,为了简要说明这里直接使自定义图形来适配:
第三步:使用自定义图形来适配选项卡显示状态背景:
tab_focus.xml,其他如tab_unselected你亦可参照此格式自定义,这里不再重复简述
<?xml version="1.0" encoding="utf-8"?>
<shape xmlns:android="http://schemas.android.com/apk/res/android">
<gradient android:startColor="#88FF88" android:endColor="#55EE55"
android:angle="0"/>
<corners android:radius="6dp" />
</shape>
第四步:编写Tab ui布局main_tab_horizontal.xml:
注意下面图片使用的的定义,请自行修改
<?xml version="1.0" encoding="utf-8"?>
<LinearLayout xmlns:android="http://schemas.android.com/apk/res/android"
android:orientation="vertical" android:background="@drawable/style_theme"
android:layout_width="fill_parent" android:layout_height="fill_parent">
<TabHost android:id="@+id/tabHost" android:layout_width="fill_parent"
android:layout_height="fill_parent" android:layout_weight="1">
<!-- 水平方向的Tab -->
<LinearLayout android:orientation="horizontal"
android:layout_width="fill_parent" android:layout_height="fill_parent">
<!-- Tab标签控件 注意ID的方式-->
<TabWidget android:id="@android:id/tabs"
android:layout_height="wrap_content" android:layout_width="wrap_content"
android:layout_weight="0" />
<!-- Tab 内容控件 注意ID的方式-->
<FrameLayout android:id="@android:id/tabcontent"
android:layout_height="fill_parent" android:layout_width="0dip"
android:layout_weight="1">
<!-- 使用垂直与水平ScrollView -->
<HorizontalScrollView android:layout_width="wrap_content"
android:layout_height="fill_parent" android:fillViewport="true">
<LinearLayout android:id="@+id/id_tab_view1" android:orientation="horizontal"
android:layout_width="fill_parent" android:layout_height="fill_parent">
<ImageView android:layout_width="wrap_content"
android:layout_height="wrap_content" android:layout_gravity="center_horizontal|center_vertical"
android:src="@drawable/tree2" />
</LinearLayout>
</HorizontalScrollView>
<HorizontalScrollView android:layout_width="wrap_content"
android:layout_height="fill_parent" android:fillViewport="true">
<LinearLayout android:id="@+id/id_tab_view2" android:orientation="horizontal"
android:layout_width="fill_parent" android:layout_height="fill_parent">
<ImageView android:layout_width="wrap_content"
android:layout_height="wrap_content" android:layout_gravity="center_horizontal|center_vertical"
android:src="@drawable/building3" />
</LinearLayout>
</HorizontalScrollView>
<HorizontalScrollView android:id="@+id/id_tab_view3" android:layout_width="wrap_content"
android:layout_height="fill_parent" android:fillViewport="true">
<LinearLayout android:orientation="horizontal"
android:layout_width="fill_parent" android:layout_height="fill_parent">
<ImageView android:layout_width="wrap_content"
android:layout_height="wrap_content" android:layout_gravity="center_horizontal|center_vertical"
android:src="@drawable/building1" />
</LinearLayout>
</HorizontalScrollView>
<HorizontalScrollView android:id="@+id/id_tab_view4" android:layout_width="wrap_content"
android:layout_height="fill_parent" android:fillViewport="true">
<LinearLayout android:orientation="horizontal"
android:layout_width="fill_parent" android:layout_height="fill_parent">
<ImageView android:layout_width="wrap_content"
android:layout_height="wrap_content" android:layout_gravity="center_horizontal|center_vertical"
android:src="@drawable/building2" />
</LinearLayout>
</HorizontalScrollView>
</FrameLayout>
</LinearLayout>
</TabHost>
</LinearLayout>
第五步:编写测试代码:
public class TestActivity extends Activity {
@Override
public void onCreate(Bundle savedInstanceState) {
super.onCreate(savedInstanceState);
setContentView(R.layout.main_tab_horizontal);
parseHorizontalTab();
}
Drawable icon_tab_1, icon_tab_2, icon_tab_3, icon_tab_4;
private void parseHorizontalTab() {
// 注意下面的代码用的是android.R.id.tabhost,在布局中有2个ID参数是固定的需要使用固定的ID:
// 选项卡:TabWidget->android:id/tabs
// 选项内容:FrameLayout android:id="android:id/tabcontent"
final TabHost tabHost = (TabHost) findViewById(R.id.tabHost);
tabHost.setup();
icon_tab_1 = this.getResources().getDrawable(R.drawable.icon1);
icon_tab_2 = this.getResources().getDrawable(R.drawable.icon2);
icon_tab_3 = this.getResources().getDrawable(R.drawable.icon3);
icon_tab_4 = this.getResources().getDrawable(R.drawable.icon4);
createHorizontalTab(tabHost);
}
private void createHorizontalTab(TabHost tabHost) {
tabHost.addTab(tabHost
.newTabSpec("tab1")
.setIndicator(
createIndicatorView(this, tabHost, icon_tab_1, "tab1"))
.setContent(R.id.id_tab_view1));
tabHost.addTab(tabHost
.newTabSpec("tab2")
.setIndicator(
createIndicatorView(this, tabHost, icon_tab_2, "tab2"))
.setContent(R.id.id_tab_view2));
tabHost.addTab(tabHost
.newTabSpec("tab3")
.setIndicator(
createIndicatorView(this, tabHost, icon_tab_3, "tab3"))
.setContent(R.id.id_tab_view3));
tabHost.addTab(tabHost
.newTabSpec("tab4")
.setIndicator(
createIndicatorView(this, tabHost, icon_tab_4, "tab4"))
.setContent(R.id.id_tab_view4));
TabWidget tw = tabHost.getTabWidget();
tw.setOrientation(LinearLayout.VERTICAL);//注意在此处设置此参数使TAB 垂直布局
}
private View createIndicatorView(Context context, TabHost tabHost,
Drawable icon, String title) {
LayoutInflater inflater = (LayoutInflater) context
.getSystemService(Context.LAYOUT_INFLATER_SERVICE);
View tabIndicator = inflater.inflate(R.layout.tab_indicator_horizontal,
tabHost.getTabWidget(), false);
final ImageView iconView = (ImageView) tabIndicator
.findViewById(R.id.icon);
final TextView titleView = (TextView) tabIndicator
.findViewById(R.id.title);
titleView.setText(title);
iconView.setImageDrawable(icon);
return tabIndicator;
}
}
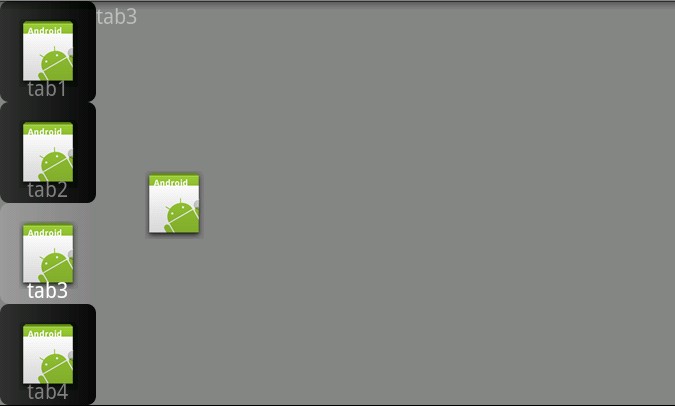
结果如图:
Tab UI控件是非常常见、常用的导航UI组件,使用它能够很方便地迅速切换页面。甚为强大的android当然也少不了它,在android/ophone平台上也可以很方便地使用TabHost,TabWidget来实现你的Tab。有点遗憾的是目前系统自带的UI布局只能实现垂直方向的Tab UI, 在某些项目我们不免需要水平方向的Tab UI,如果你有这种需求你可以参考本文所介绍方法。本文所述方法参考API 源代码内部实现。
1预备知识:TabHost,TabWidget, TabSpec简介
TabHost:是整个Tab ui的布局容器实质上就是是一个扩展的FrameLayout,所有的Tab UI相关组件必须位于该布局里,必须包含的组件有:名为TabWidget的(选项卡组件布局)和选项卡内容容器
TabWidget:选项卡组件布局容器,实质上一个线性布局LinearLayout,所有Tab选项控件都放在这里,你可以使用tabHost.addTab(TabSpec tab Spec)方法将不同的选项卡内容添加的选项卡布局容器中,或许你会有点迷糊这明明是TabSpec嘛,不要急接着看
TabSpec:是一个与选项卡相关描述文件,其内部包含了一个类型为View[更确切地说是RelativeLayout]的tabIndicator,这个tabIndicator就是选项卡对应的视图,当你在执行t abHost.addTab(TabSpec tabSpec)时,内部会有个操作将此tabIndicator添加到TabWidget中:下面是摘自API的TabHost.java中关于addTab的一段代码
public void addTab(TabSpec tabSpec) {
//...
mTabWidget.addView(tabIndicator);
mTabSpecs.add(tabSpec);
//...
}
外加一个固定ID为 android:id="@android:id/tabcontent"的FrameLayout,用于容纳Tab选项卡对应的内容
2正题:一步一步编写水平方向的Tab:
第一步:改写你的tab_indicator:直接从SDK..\platforms\android-ndata\res\layout中:拷贝tab_indicator.xml命名为tab_indicator_horizontal.xml 存放于工程中layout目录中,并修改如下:
<RelativeLayout xmlns:android="http://schemas.android.com/apk/res/android"
android:layout_width="64dip"
android:layout_height="0dip"
android:layout_weight="1"
android:layout_marginTop="0dip"
android:layout_marginBottom="0dip"
android:orientation="vertical"
android:background="@drawable/tab_indicator_horizontal">
<ImageView android:id="@+id/icon"
android:layout_width="wrap_content"
android:layout_height="wrap_content"
android:layout_centerInParent="true"
/>
<TextView android:id="@+id/title"
android:layout_width="wrap_content"
android:layout_height="wrap_content"
android:layout_alignParentBottom="true"
android:layout_centerHorizontal="true"
style="?android:attr/tabWidgetStyle"
/>
</RelativeLayout>
第二步:编写水平Tab选项卡显示状态背景:android:background="@drawable/tab_indicator_horizontal"
同样直接从SDK..\platforms\android-ndata\res\drawable中直接拷贝tab_indicator.xml并命名为tab_indicator_horizontal.xml 存放于工程中drawable目录中,内容如下,很简单相信你应该明白是怎么回事,这个文件不需要改动,拿来就用:
<?xml version="1.0" encoding="utf-8"?>
<selector xmlns:android="http://schemas.android.com/apk/res/android">
<!-- Non focused states -->
<item android:state_focused="false" android:state_selected="false" android:state_pressed="false" android:drawable="@drawable/tab_unselected" />
<item android:state_focused="false" android:state_selected="true" android:state_pressed="false" android:drawable="@drawable/tab_selected" />
<!-- Focused states -->
<item android:state_focused="true" android:state_selected="false" android:state_pressed="false" android:drawable="@drawable/tab_focus" />
<item android:state_focused="true" android:state_selected="true" android:state_pressed="false" android:drawable="@drawable/tab_focus" />
<!-- Pressed -->
<item android:state_pressed="true" android:drawable="@drawable/tab_press" />
</selector>
说明:上面的drawable/tab_unselected,drawable/tab_selected实质就是图片,android本身提供的名为9patch的可拉伸自适应填充图,因为系统本身自带的是垂直方向的图,不适合在这里使用,你需要自己修改上述图片,为了简要说明这里直接使自定义图形来适配:
第三步:使用自定义图形来适配选项卡显示状态背景:
tab_focus.xml,其他如tab_unselected你亦可参照此格式自定义,这里不再重复简述
<?xml version="1.0" encoding="utf-8"?>
<shape xmlns:android="http://schemas.android.com/apk/res/android">
<gradient android:startColor="#88FF88" android:endColor="#55EE55"
android:angle="0"/>
<corners android:radius="6dp" />
</shape>
第四步:编写Tab ui布局main_tab_horizontal.xml:
注意下面图片使用的的定义,请自行修改
<?xml version="1.0" encoding="utf-8"?>
<LinearLayout xmlns:android="http://schemas.android.com/apk/res/android"
android:orientation="vertical" android:background="@drawable/style_theme"
android:layout_width="fill_parent" android:layout_height="fill_parent">
<TabHost android:id="@+id/tabHost" android:layout_width="fill_parent"
android:layout_height="fill_parent" android:layout_weight="1">
<!-- 水平方向的Tab -->
<LinearLayout android:orientation="horizontal"
android:layout_width="fill_parent" android:layout_height="fill_parent">
<!-- Tab标签控件 注意ID的方式-->
<TabWidget android:id="@android:id/tabs"
android:layout_height="wrap_content" android:layout_width="wrap_content"
android:layout_weight="0" />
<!-- Tab 内容控件 注意ID的方式-->
<FrameLayout android:id="@android:id/tabcontent"
android:layout_height="fill_parent" android:layout_width="0dip"
android:layout_weight="1">
<!-- 使用垂直与水平ScrollView -->
<HorizontalScrollView android:layout_width="wrap_content"
android:layout_height="fill_parent" android:fillViewport="true">
<LinearLayout android:id="@+id/id_tab_view1" android:orientation="horizontal"
android:layout_width="fill_parent" android:layout_height="fill_parent">
<ImageView android:layout_width="wrap_content"
android:layout_height="wrap_content" android:layout_gravity="center_horizontal|center_vertical"
android:src="@drawable/tree2" />
</LinearLayout>
</HorizontalScrollView>
<HorizontalScrollView android:layout_width="wrap_content"
android:layout_height="fill_parent" android:fillViewport="true">
<LinearLayout android:id="@+id/id_tab_view2" android:orientation="horizontal"
android:layout_width="fill_parent" android:layout_height="fill_parent">
<ImageView android:layout_width="wrap_content"
android:layout_height="wrap_content" android:layout_gravity="center_horizontal|center_vertical"
android:src="@drawable/building3" />
</LinearLayout>
</HorizontalScrollView>
<HorizontalScrollView android:id="@+id/id_tab_view3" android:layout_width="wrap_content"
android:layout_height="fill_parent" android:fillViewport="true">
<LinearLayout android:orientation="horizontal"
android:layout_width="fill_parent" android:layout_height="fill_parent">
<ImageView android:layout_width="wrap_content"
android:layout_height="wrap_content" android:layout_gravity="center_horizontal|center_vertical"
android:src="@drawable/building1" />
</LinearLayout>
</HorizontalScrollView>
<HorizontalScrollView android:id="@+id/id_tab_view4" android:layout_width="wrap_content"
android:layout_height="fill_parent" android:fillViewport="true">
<LinearLayout android:orientation="horizontal"
android:layout_width="fill_parent" android:layout_height="fill_parent">
<ImageView android:layout_width="wrap_content"
android:layout_height="wrap_content" android:layout_gravity="center_horizontal|center_vertical"
android:src="@drawable/building2" />
</LinearLayout>
</HorizontalScrollView>
</FrameLayout>
</LinearLayout>
</TabHost>
</LinearLayout>
第五步:编写测试代码:
public class TestActivity extends Activity {
@Override
public void onCreate(Bundle savedInstanceState) {
super.onCreate(savedInstanceState);
setContentView(R.layout.main_tab_horizontal);
parseHorizontalTab();
}
Drawable icon_tab_1, icon_tab_2, icon_tab_3, icon_tab_4;
private void parseHorizontalTab() {
// 注意下面的代码用的是android.R.id.tabhost,在布局中有2个ID参数是固定的需要使用固定的ID:
// 选项卡:TabWidget->android:id/tabs
// 选项内容:FrameLayout android:id="android:id/tabcontent"
final TabHost tabHost = (TabHost) findViewById(R.id.tabHost);
tabHost.setup();
icon_tab_1 = this.getResources().getDrawable(R.drawable.icon1);
icon_tab_2 = this.getResources().getDrawable(R.drawable.icon2);
icon_tab_3 = this.getResources().getDrawable(R.drawable.icon3);
icon_tab_4 = this.getResources().getDrawable(R.drawable.icon4);
createHorizontalTab(tabHost);
}
private void createHorizontalTab(TabHost tabHost) {
tabHost.addTab(tabHost
.newTabSpec("tab1")
.setIndicator(
createIndicatorView(this, tabHost, icon_tab_1, "tab1"))
.setContent(R.id.id_tab_view1));
tabHost.addTab(tabHost
.newTabSpec("tab2")
.setIndicator(
createIndicatorView(this, tabHost, icon_tab_2, "tab2"))
.setContent(R.id.id_tab_view2));
tabHost.addTab(tabHost
.newTabSpec("tab3")
.setIndicator(
createIndicatorView(this, tabHost, icon_tab_3, "tab3"))
.setContent(R.id.id_tab_view3));
tabHost.addTab(tabHost
.newTabSpec("tab4")
.setIndicator(
createIndicatorView(this, tabHost, icon_tab_4, "tab4"))
.setContent(R.id.id_tab_view4));
TabWidget tw = tabHost.getTabWidget();
tw.setOrientation(LinearLayout.VERTICAL);//注意在此处设置此参数使TAB 垂直布局
}
private View createIndicatorView(Context context, TabHost tabHost,
Drawable icon, String title) {
LayoutInflater inflater = (LayoutInflater) context
.getSystemService(Context.LAYOUT_INFLATER_SERVICE);
View tabIndicator = inflater.inflate(R.layout.tab_indicator_horizontal,
tabHost.getTabWidget(), false);
final ImageView iconView = (ImageView) tabIndicator
.findViewById(R.id.icon);
final TextView titleView = (TextView) tabIndicator
.findViewById(R.id.title);
titleView.setText(title);
iconView.setImageDrawable(icon);
return tabIndicator;
}
}
结果如图:

相关文章推荐
- 深入浅出android/ophone UI实现水平布局的Tab控件
- 深入浅出android/ophone UI实现水平布局的Tab控件
- Android UI控件之CheckBox实现墨迹天气设置布局界面(漂亮)
- Android Design新控件之TabLaout(二),仿微信实现App底部Tab布局
- Android UI控件系列:TabWidget(切换卡)
- Android UI控件之CheckBox实现墨迹天气设置布局界面(漂亮)
- 深入浅出android/ophone UI实现水平布局的Tab控件
- Android UI控件系列:TabWidget(切换卡)
- Android Design新控件之TabLaout(二),仿微信实现App底部Tab布局
- 深入浅出android/ophone UI实现水平布局的Tab控件
- Android UI控件之ListView实现圆角效果
- Android-自定义多TAB悬浮控件实现蘑菇街首页效果
- Android使用RecyclerView实现水平滚动控件
- Android开发学习之路--UI之自定义布局和控件
- Android UI 之 RecyclerView实现常见首页布局
- Android:实现TabWidget选项卡按钮在屏幕下方
- 【Android 应用开发】AndroidUI设计之 布局管理器 - 详细解析布局实现
- CSS两栏布局,左边定宽,右边自适应怎么实现?
- 【Android 开发】:UI控件之 ImageView 实现图片旋转和缩放功能
- Android UI开发第三十九篇——Tab界面实现汇总及比较