converter 迁移xen server 上的虚拟机 到 wmware esxi
2011-10-29 19:53
260 查看
本文分为两个部分,第一部分为 使用 vmware converter 工具迁移虚拟机,第二部分为将迁移的 xen server 虚拟机更新内核,更改系统配置文件等等,否则 vmware esxi 下 将无法启动!
第一部分
使用 converter 迁移xen server 上的虚拟机 到 wmware esxi ,步骤如下
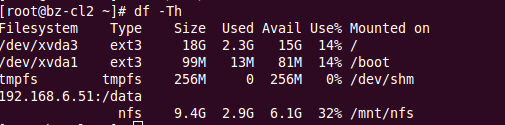
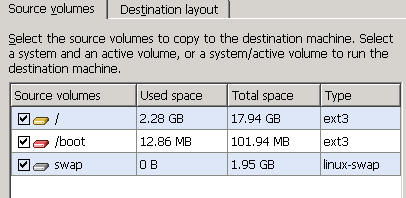
1 此次将要迁移的数据,xen server 下 硬盘为 /dev/xvda
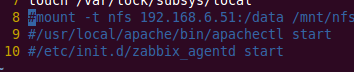
2 编辑 /etc/rc.local 文件,注释某些启动脚本
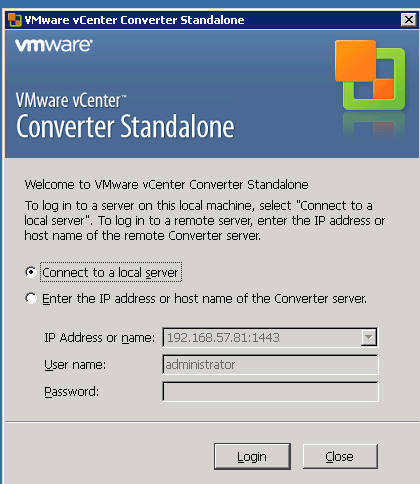
3 登录 vmware converter 服务器
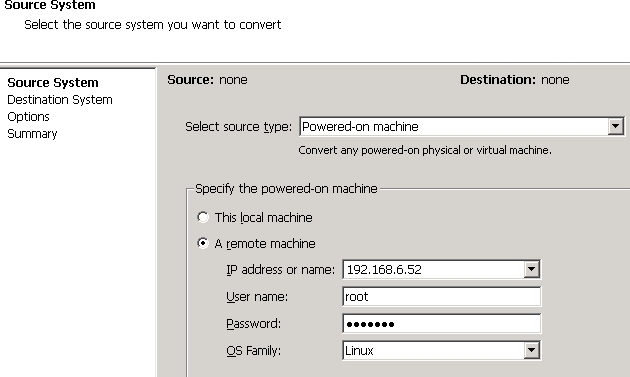
4 选择 convert machine ,添加源系统信息,比如 ip 地址 用户名 密码
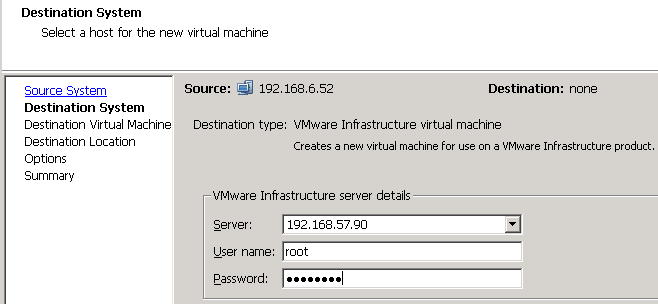
5 填入目标系统信息(vmware esxi)
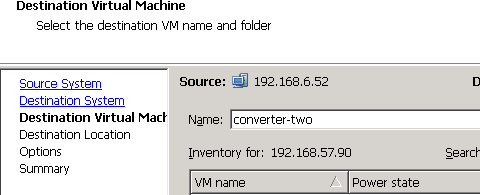
6 给目标虚拟机填入名称,此处 converter-two
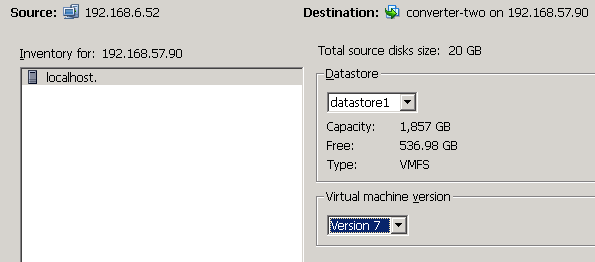
7 选择虚拟机版本与存储
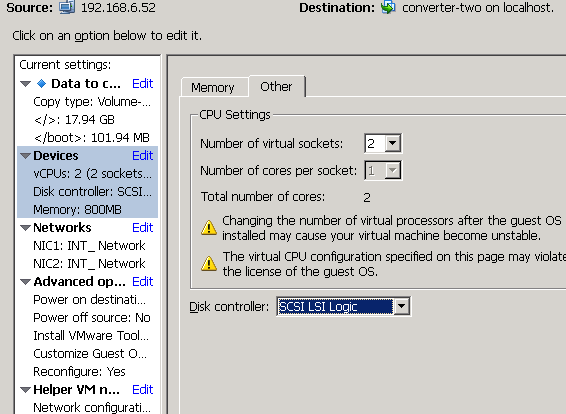
8 配置虚拟机信息,比如硬盘 等等
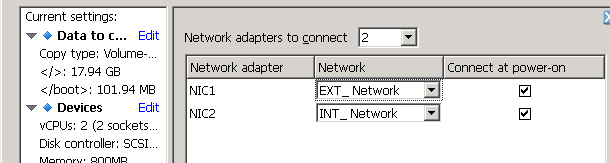
10 配置虚拟机信息 ,虚拟网卡
11 迁移前完整信息,确认无误可以单击下一步, 将开始迁移!

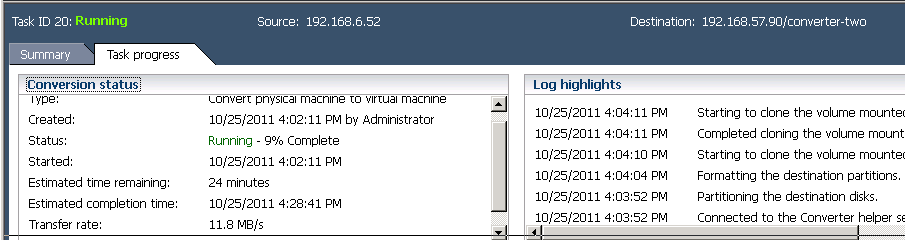
12 converter 任务条显示相关信息
13 迁移完成

第二部分
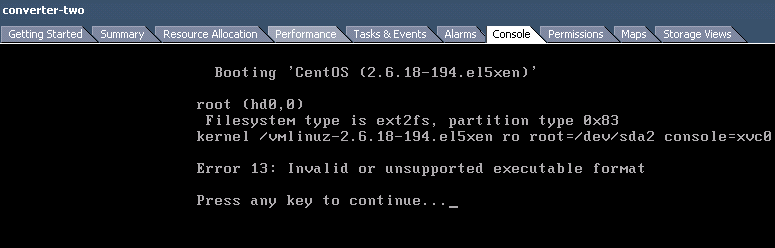
更改迁移后的虚拟机内核,否则无法运行因为 经过xenserver修改过的 xen内核不能在vmkernel上运行!
1 xen内核不能在vmkernel上运行!!!
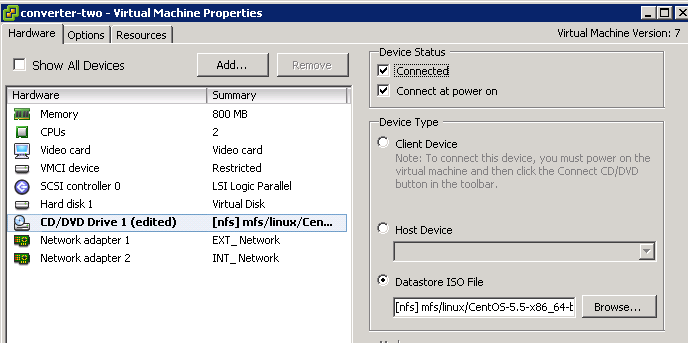
2 设置虚拟机添加 iso 镜像文件
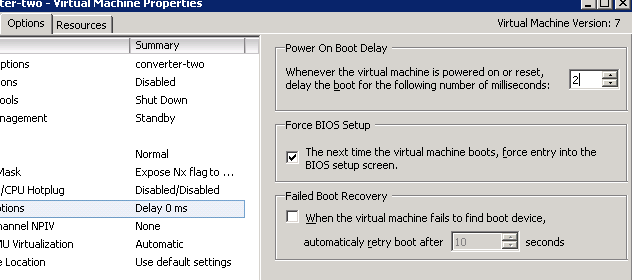
3 设置虚拟 机强制进入 bios
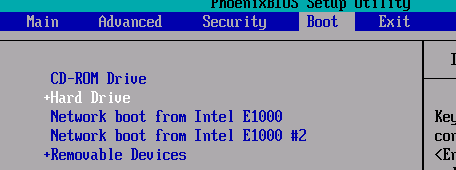
4 设置虚拟 第一启动设备为 cdrom
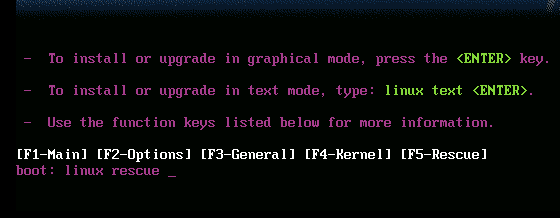
5 输入 linux rescue 进入救援模式
6 进入救援模式
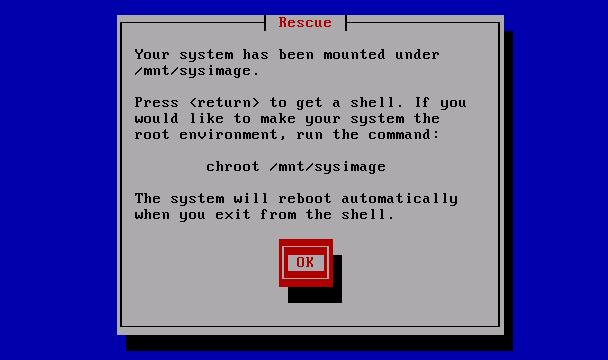
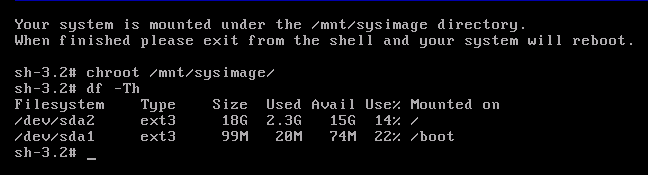
7 按照提示 输入 chroot /mnt/sysimage/
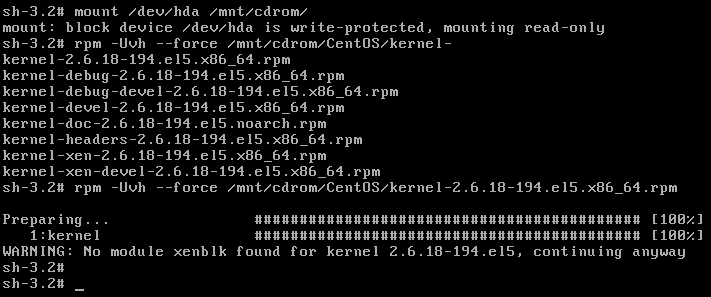
8 挂在 cdrom ,强制更新非 xen 内核
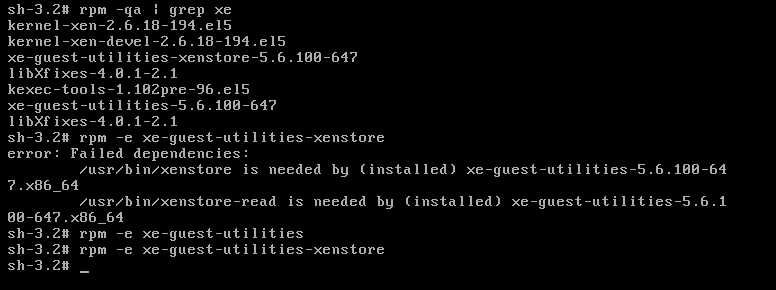
9 卸载 xen server 工具
10 停止一些影响系统的服务

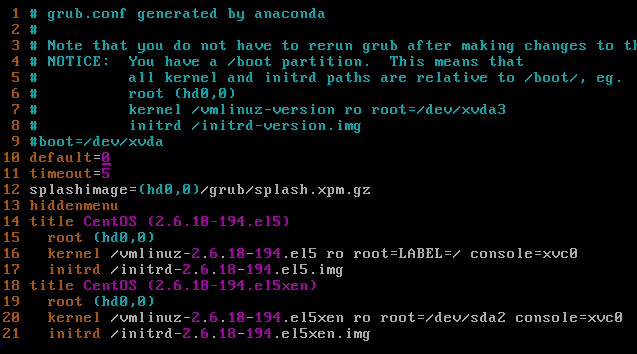
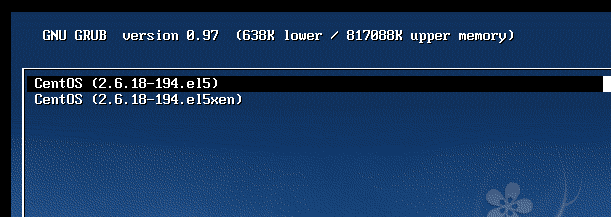
11 编辑 /boot/grub/grub.conf 配置文件,default=0 非xen 内核
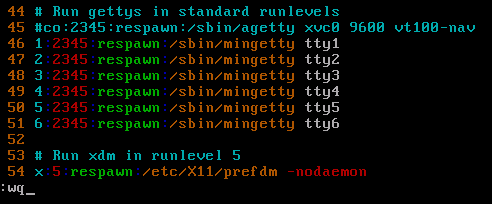
12 编辑 /etc/inittab 文件,注意 下面这几行
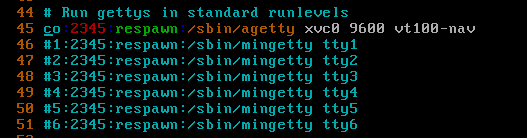
注意注释
如果未注释 #co 这行,启动将提示如下错误,无法进入系统!

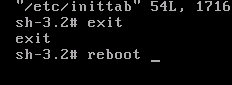
14 退出并重启系统
15 grub 界面
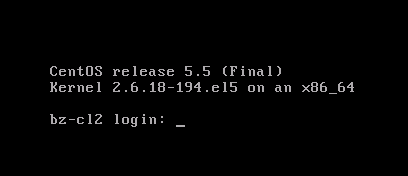
16 成功启动后
扩展
系统引导管理器GRUB
Linux启动过程详解
linux 内核损坏
INIT:Id “co” respawning too fast提示
结束
第一部分
使用 converter 迁移xen server 上的虚拟机 到 wmware esxi ,步骤如下
1 此次将要迁移的数据,xen server 下 硬盘为 /dev/xvda
2 编辑 /etc/rc.local 文件,注释某些启动脚本
3 登录 vmware converter 服务器
4 选择 convert machine ,添加源系统信息,比如 ip 地址 用户名 密码
5 填入目标系统信息(vmware esxi)
6 给目标虚拟机填入名称,此处 converter-two
7 选择虚拟机版本与存储
8 配置虚拟机信息,比如硬盘 等等
10 配置虚拟机信息 ,虚拟网卡
11 迁移前完整信息,确认无误可以单击下一步, 将开始迁移!
12 converter 任务条显示相关信息
13 迁移完成
第二部分
更改迁移后的虚拟机内核,否则无法运行因为 经过xenserver修改过的 xen内核不能在vmkernel上运行!
1 xen内核不能在vmkernel上运行!!!
2 设置虚拟机添加 iso 镜像文件
3 设置虚拟 机强制进入 bios
4 设置虚拟 第一启动设备为 cdrom
5 输入 linux rescue 进入救援模式
6 进入救援模式
7 按照提示 输入 chroot /mnt/sysimage/
8 挂在 cdrom ,强制更新非 xen 内核
9 卸载 xen server 工具
10 停止一些影响系统的服务
11 编辑 /boot/grub/grub.conf 配置文件,default=0 非xen 内核
12 编辑 /etc/inittab 文件,注意 下面这几行
注意注释
如果未注释 #co 这行,启动将提示如下错误,无法进入系统!
14 退出并重启系统
15 grub 界面
16 成功启动后
扩展
系统引导管理器GRUB
Linux启动过程详解
linux 内核损坏
INIT:Id “co” respawning too fast提示
debian testing控制台出现提示"INIT: Id "co" respawning too fast: disabled for 5 minutes."
这应该是内核的一个bug,有很多人提出来了,这个提示是由/etc/inittab中的这行
co:2345:respawn:/sbin/getty hvc0 9600 linux
引起的。这行的意思是在运行级2345上运行一个终端类型为linux,波特率baud rate为9600的虚拟控制台hvc0
hvc0是一个hvc控制台实例,hvc是hypeyvisor console的缩写,其实际就是一个虚拟机监视控制台,因为现在linux内核集成了KVM,所以才有这么个控制台,一般我们都不会用到,所以将其关闭是安全的。
结束

相关文章推荐
- VMware vCenter Converter 实现物理机迁移到虚拟机的同步情况
- Xen server 虚拟机 迁移到 VMware esxi启动不了更换内核
- 使用vmware vconverter从物理机迁移系统到虚拟机P2V(多图)
- 实战 Xen server 虚拟机 迁移到 VMware esxi 推荐
- 使用VMware vCenter Converter迁移到虚拟机(p2v)
- 迁移Xen Server 虚拟机到VMware ESXI 主机
- 操作VMware vCenter Converter 实现物理机迁移到虚拟机
- vSphere 4系列之十一:使用VMware vCenter Converter迁移到虚拟机
- 向vSphere迁移虚拟机,Converter需要升级至4.0.1
- 向vSphere迁移虚拟机,Converter需要升级至4.0.1 推荐
- vSphere 4系列之十一:使用VMware vCenter Converter迁移到虚拟机 推荐
- [转]向vSphere迁移虚拟机,Converter需要升级至4.0.1
- 操作VMware vCenter Converter 实现物理机迁移到虚拟机
- VMware vCenter Converter 实现物理机迁移到虚拟机的同步情况
- XenServer虚拟机转换迁移到ESXi
- Xen server三为xen添加存储及创建虚拟机
- 物理机与Hyper-v虚拟机迁移到VMware workstation 8 推荐
- VMware Converter 迁移物理机到 esxi 虚拟机
- openstack手工迁移虚拟机方法
- 关于虚拟机迁移文档(p2v v2v