WCF的安全审核——记录谁在敲打你的门
2011-10-27 08:17
736 查看
WCF所谓的安全审核就是针对认证和授权所做的针对EventLog的日志记录。我们不但可以设置进行审核的事件(认证成功/失败,授权成功或失败),还可以选择记录信息被写入的EventLog类型,即应用程序日志(Application)还是安全日志(Security)。WCF的安全审核是通过ServiceSecurityAuditBehavior服务行为实现的。
[/code]
属性AuditLogLocation代表的是日志信息被写入的EventLog类型,该属性的类型是一个具有如下定义的AuditLogLocation枚举。其中Application和Security分别代表应用程序日志和安全日志。如果选择Default,则最终日志被写入的位置决定于当前的操作系统。如果支持写入安全日志,则选择安全日志类型,否则选择应用程序日志类型。Default是默认选项。
[/code]
MessageAuthenticationAuditLevel和ServiceAuthorizationAuditLevel两个属性分别代表针对认证和授权审核的级别。所谓审核的级别在这里指的应该在审核事件(认证和授权)在成功或者失败的情况下进行日志记录。审核级别通过具有如下定义的AuditLevel枚举表示。Success和Failure代表分别针对认证/授权成功和失败进行审核日志。SuccessOrFailure则意味着不管认证/授权是成功还是失败,都会进行审核日志。None为默认值,表示不进行审核日记记录。
[/code]
布尔类型的SuppressAuditFailure属性表示审核日志失败是否会影响应用本身。在默认的情况下该属性值为True,意味着为认证和授权进行审核日志的时候出现的异常不会对应用(服务)本身造成任何影响。
既然是服务行为,我们就可以通过将创建的ServiceSecurityAuditBehavior添加到服务的行为列表的方式来进行安全审核的控制。当然我们还是推荐采用配置的方式来进行安全什么的相关设置。服务行为ServiceSecurityAuditBehavior对应的配置节是<serviceSecurityAudit>。在下面的配置中,我定义了一个包含了ServiceSecurityAuditBehavior的服务行为,并对其四个属性进行了显式设置。
[/code]
[/code]
而作为服务行为的ServiceSecurityAuditBehavior,最终的目的就是将定义在自身的这四个属性赋值给分发上下文。而具体操作定义在ApplyDispatchBehavior方法上,整个逻辑大体上如下面的代码所示。
[/code]
[/code]
客户端利用如下的代码进行服务的调用,两次服务调分别采用Foo和Bar两个本地Windows帐号进行,其中基于帐号Foo给定的密码是正确的,而基于帐号Bar给定的密码是错误的。而辅助方法Invoke旨在避免避免认证失败导致的异常是程序终止。
[/code]
由于我们通过配置将应用在服务上的ServiceSecurityAuditBehavior服务行为的AuditLogLocation和MessageAuthenticationAuditLevel分别设置为Application和SuccessOrFailure,意味着不论是认证成功或者失败都会进行安全审核日志。而审核日志最终会被写入EventLog的应用程序日志。当程序执行后,在事件查看器的应用程序节点,你会发现具有如下图所示的4条新的日志(之前的日志在程序运行前被清空)。

下面列出了这4条日志的内容。其中前3条基于认证成功的信息(Information)日志,最后一条是基于认证失败的错误(Error)日志。[源代码从这里下载]
[/code]
[/code]
然后我们将服务端配置中关于安全审核的相关配置进行了如下的修改。我们只关心授权相关的安全审核,所以将messageAuthenticationAuditLevel属性替换成serviceAuthorizationAuditLevel。
[/code]
客户端在进行服务调用的时候需要为帐号Bar指定正确的密码。和前面一样,这里的帐号Foo被预先添加到管理员用户组中,而Bar则没有,所以只有第一次服务调用才是被成功授权的。
[/code]
当客户端完成两次服务调用后,如下两条基于授权的审核日志被写入应用程序日志。虽然只有第一次服务调用才是真正被授权的操作,但是从日志的内容我们却发现两条均是“授权成功”的审核日志。[源代码从这里下载]
[/code]
实际对于安全审核中所谓的授权失败指的是调用ServiceAuthorizationManager的CheckAccess方法返回False的情况。在默认的情况下,ServiceAuthorizationManager的CheckAccess方法总是返回True,所以授权总是会“成功”。
为了迎合安全审核对“授权失败”的判断,我在Service项目中创建了如下一个简单的自定ServiceAuthorizationManager。在重写的CheckAccessCore方法中,如果当前用户是Foo(Jinnan-PC\Jinnan)就发返回True,否则返回False。
[/code]
然后通过如下的配置将这个自定义的MyServiceAuthorizationManager应用到ServiceAuthorizationBehavior服务行为上。再次运行我们的程序,将会得到分别代表授权成功和失败的两条审核日志,并且在日志中还包含了我们自定的ServiceAuthorizationManager类型(ServiceAuthorizationManager: MyServiceAuthorizationManager)。[源代码从这里下载]
[/code]
授权成功/失败审核日志:
[/code]
一、ServiceSecurityAuditBehavior服务行为
针对WCF安全审核的编程只涉及ServiceSecurityAuditBehavior服务行为。下面给出了定义在ServiceSecurityAuditBehavior中具体审核行为进行控制的三个可读写的属性。[code] public sealed class ServiceSecurityAuditBehavior : IServiceBehavior
{
//其他成员
public AuditLogLocation AuditLogLocation { get; set; }
public AuditLevel MessageAuthenticationAuditLevel { get; set; }
public AuditLevel ServiceAuthorizationAuditLevel { get; set; }
public bool SuppressAuditFailure { get; set; }
}[/code]
属性AuditLogLocation代表的是日志信息被写入的EventLog类型,该属性的类型是一个具有如下定义的AuditLogLocation枚举。其中Application和Security分别代表应用程序日志和安全日志。如果选择Default,则最终日志被写入的位置决定于当前的操作系统。如果支持写入安全日志,则选择安全日志类型,否则选择应用程序日志类型。Default是默认选项。
[code]
     public enum AuditLogLocation

     {

         Default,

         Application,

         Security

     }
[/code]
MessageAuthenticationAuditLevel和ServiceAuthorizationAuditLevel两个属性分别代表针对认证和授权审核的级别。所谓审核的级别在这里指的应该在审核事件(认证和授权)在成功或者失败的情况下进行日志记录。审核级别通过具有如下定义的AuditLevel枚举表示。Success和Failure代表分别针对认证/授权成功和失败进行审核日志。SuccessOrFailure则意味着不管认证/授权是成功还是失败,都会进行审核日志。None为默认值,表示不进行审核日记记录。
[code]
     public enum AuditLevel

     {

         None,

         Success,

         Failure,

         SuccessOrFailure

     }
[/code]
布尔类型的SuppressAuditFailure属性表示审核日志失败是否会影响应用本身。在默认的情况下该属性值为True,意味着为认证和授权进行审核日志的时候出现的异常不会对应用(服务)本身造成任何影响。
既然是服务行为,我们就可以通过将创建的ServiceSecurityAuditBehavior添加到服务的行为列表的方式来进行安全审核的控制。当然我们还是推荐采用配置的方式来进行安全什么的相关设置。服务行为ServiceSecurityAuditBehavior对应的配置节是<serviceSecurityAudit>。在下面的配置中,我定义了一个包含了ServiceSecurityAuditBehavior的服务行为,并对其四个属性进行了显式设置。
[code]
     <configuration>

       <system.serviceModel>

         <behaviors>

           <serviceBehaviors>

             <behavior ...>

               <serviceSecurityAudit auditLogLocation ="Application"

                                     messageAuthenticationAuditLevel ="Failure"

                                     serviceAuthorizationAuditLevel="SuccessOrFailure"

                                     suppressAuditFailure="true"/>

             </behavior>

           </serviceBehaviors>

         </behaviors>

       </system.serviceModel>

     </configuration>
[/code]
二、安全审核的实现
WCF最终进行安全审核的控制信息是从基于某个终结点的分发上下文中获取的。如下面的代码片段所示,对于定义在ServiceSecurityAuditBehavior中的四个属性,在DispatchRuntime中具有相应的定义。WCF在认证和授权成功或者失败的时候,会根据该运行时这四个属性进行相应安全审核日志。[code]
public sealed class DispatchRuntime
{
//其他成员
public AuditLogLocation SecurityAuditLogLocation { get; set; }
public AuditLevel MessageAuthenticationAuditLevel { get; set; }
public AuditLevel ServiceAuthorizationAuditLevel { get; set; }
public bool SuppressAuditFailure { get; set; }
}[/code]
而作为服务行为的ServiceSecurityAuditBehavior,最终的目的就是将定义在自身的这四个属性赋值给分发上下文。而具体操作定义在ApplyDispatchBehavior方法上,整个逻辑大体上如下面的代码所示。
[code]
     public sealed class ServiceSecurityAuditBehavior : IServiceBehavior

     {

         //其他成员

         public void ApplyDispatchBehavior(ServiceDescription serviceDescription,

         ServiceHostBase serviceHostBase)

         {

             foreach (ChannelDispatcher channelDispatcher in

                serviceHostBase.ChannelDispatchers)

             {

                 foreach (EndpointDispatcher endpointDispatcher in channelDispatcher.Endpoints)

                 {

                     DispatchRuntime dispatchRuntime = endpointDispatcher.DispatchRuntime;

                     dispatchRuntime.SecurityAuditLogLocation = this.AuditLogLocation;

                     dispatchRuntime.MessageAuthenticationAuditLevel = this.MessageAuthenticationAuditLevel;

                     dispatchRuntime.ServiceAuthorizationAuditLevel = this.ServiceAuthorizationAuditLevel;

                     dispatchRuntime.SuppressAuditFailure = this.SuppressAuditFailure;

                 }

             }

         }

     }
[/code]
三、实例演示:如何实施安全审核
接下来我们通过一个简单的实例来演示如何进行针对认证和授权的安全审核,并且看看在认证或者授权成功或者失败的情况下,会有怎样的日志信息被记录下来。基于认证的安全审核
先来演示针对认证的安全审核。我们还是直接使用一直在使用的计算服务的例子,服务契约和服务的定义我们已经很熟悉了,我们现在只来介绍采用的服务端的配置。从下面的配置可以看出,被寄宿的服务具有为一个基于WS2007HttpBinding的终结点,该绑定采用默认的Windows认证。通过服务行为,我们将安全审核的AuditLogLocation和MessageAuthenticationAuditLevel分别设置为Application和SuccessOrFailure。[code]
<configuration>
<system.serviceModel>
<services>
<service name="Artech.WcfServices.Service.CalculatorService"
behaviorConfiguration="authenticationAudit">
<endpoint address="http://127.0.0.1:3721/calculatorservice"
binding="ws2007HttpBinding"
contract="Artech.WcfServices.Service.Interface.ICalculator"/>
</service>
</services>
<behaviors>
<serviceBehaviors>
<behavior name="authenticationAudit">
<serviceSecurityAudit auditLogLocation ="Application"
messageAuthenticationAuditLevel ="SuccessOrFailure"/>
</behavior>
</serviceBehaviors>
</behaviors>
</system.serviceModel>
</configuration>[/code]
客户端利用如下的代码进行服务的调用,两次服务调分别采用Foo和Bar两个本地Windows帐号进行,其中基于帐号Foo给定的密码是正确的,而基于帐号Bar给定的密码是错误的。而辅助方法Invoke旨在避免避免认证失败导致的异常是程序终止。
[code]
     ChannelFactory<ICalculator> channelFactory = new ChannelFactory<ICalculator>("calculatorService");

     NetworkCredential credential = channelFactory.Credentials.Windows.ClientCredential;

     credential.UserName = "Foo";

     credential.Password = "Password";

     ICalculator calculator = channelFactory.CreateChannel();

     Invoke(calculator);


     channelFactory = new ChannelFactory<ICalculator>("calculatorService");

     credential = channelFactory.Credentials.Windows.ClientCredential;

     credential.UserName = "Bar";

     credential.Password = "InvalidPass";

     calculator = channelFactory.CreateChannel();

     Invoke(calculator);
[/code]
由于我们通过配置将应用在服务上的ServiceSecurityAuditBehavior服务行为的AuditLogLocation和MessageAuthenticationAuditLevel分别设置为Application和SuccessOrFailure,意味着不论是认证成功或者失败都会进行安全审核日志。而审核日志最终会被写入EventLog的应用程序日志。当程序执行后,在事件查看器的应用程序节点,你会发现具有如下图所示的4条新的日志(之前的日志在程序运行前被清空)。
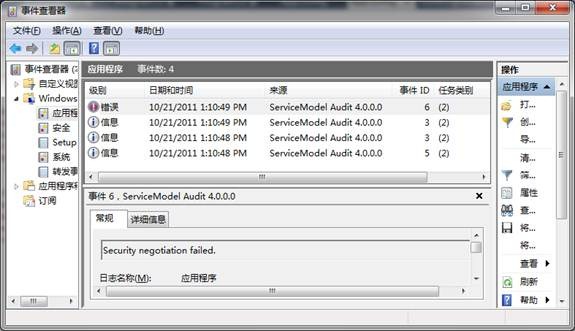
下面列出了这4条日志的内容。其中前3条基于认证成功的信息(Information)日志,最后一条是基于认证失败的错误(Error)日志。[源代码从这里下载]
[code]
     Security negotiation succeeded.

      Service: http://127.0.0.1:3721/calculatorservice
      Action: http://docs.oasis-open.org/ws-sx/ws-trust/200512/RSTR/Issue
      ClientIdentity: Jinnan-PC\Foo; S-1-5-21-3534336654-2901585401-846244909-1006

      ActivityId: <null>

      Negotiation: SpnegoTokenAuthenticator


     Message authentication succeeded.

      Service: http://127.0.0.1:3721/calculatorservice
      Action: http://docs.oasis-open.org/ws-sx/ws-trust/200512/RST/SCT
      ClientIdentity: Jinnan-PC\Foo; S-1-5-21-3534336654-2901585401-846244909-1006

      ActivityId: <null>


     Message authentication succeeded.

      Service: http://127.0.0.1:3721/calculatorservice
      Action: http://www.artech.com/ICalculator/Add
      ClientIdentity: Jinnan-PC\Foo; S-1-5-21-3534336654-2901585401-846244909-1006

      ActivityId: <null>


     Security negotiation failed.

      Service: http://127.0.0.1:3721/calculatorservice
      Action: http://docs.oasis-open.org/ws-sx/ws-trust/200512/RSTR/Issue
      ClientIdentity:

      ActivityId: <null>

      Negotiation: SpnegoTokenAuthenticator

      Win32Exception: The Security Support Provider Interface (SSPI) negotiation failed.
[/code]
基于授权的安全审核
接下来我们演示授权的安全审核,并查看分别在授权成功和失败的情况下分别由怎样的日志被写入到EventLog中。我们首先按照如下的方式在服务类型CalculatorService的Add方法上应用PrincipalPermissionAttribute特性使该方法只有在管理员才有权限调用。[code]
public class CalculatorService : ICalculator
{
[PrincipalPermission(SecurityAction.Demand,Role="Administrators")]
public double Add(double x, double y)
{
return x + y;
}
}[/code]
然后我们将服务端配置中关于安全审核的相关配置进行了如下的修改。我们只关心授权相关的安全审核,所以将messageAuthenticationAuditLevel属性替换成serviceAuthorizationAuditLevel。
[code]
     <configuration>

       <system.serviceModel>

        ...

         <behaviors>

           <serviceBehaviors>

             <behavior  name="authenticationAudit">

               <serviceSecurityAudit auditLogLocation ="Application"

                                     serviceAuthorizationAuditLevel ="SuccessOrFailure"/>

             </behavior>

           </serviceBehaviors>

         </behaviors>

       </system.serviceModel>

     </configuration>
[/code]
客户端在进行服务调用的时候需要为帐号Bar指定正确的密码。和前面一样,这里的帐号Foo被预先添加到管理员用户组中,而Bar则没有,所以只有第一次服务调用才是被成功授权的。
[code]
     ChannelFactory<ICalculator> channelFactory = new ChannelFactory<ICalculator>("calculatorService");

     NetworkCredential credential = channelFactory.Credentials.Windows.ClientCredential;

     credential.UserName = "Foo";

     credential.Password = "Password";

     ICalculator calculator = channelFactory.CreateChannel();

     Invoke(calculator);


     channelFactory = new ChannelFactory<ICalculator>("calculatorService");

     credential = channelFactory.Credentials.Windows.ClientCredential;

     credential.UserName = "Bar";

     credential.Password = "Password";

     calculator = channelFactory.CreateChannel();

     Invoke(calculator);
[/code]
当客户端完成两次服务调用后,如下两条基于授权的审核日志被写入应用程序日志。虽然只有第一次服务调用才是真正被授权的操作,但是从日志的内容我们却发现两条均是“授权成功”的审核日志。[源代码从这里下载]
[code]
     Service authorization succeeded.

      Service: http://127.0.0.1:3721/calculatorservice
      Action: http://www.artech.com/ICalculator/Add
      ClientIdentity: Jinnan-PC\Foo; S-1-5-21-3534336654-2901585401-846244909-1006

      AuthorizationContext: uuid-528e86ce-a4f4-48b3-9a2e-b713e1dea539-1

      ActivityId: <null>

      ServiceAuthorizationManager: <default>


     Service authorization succeeded.

      Service: http://127.0.0.1:3721/calculatorservice
      Action: http://www.artech.com/ICalculator/Add
      ClientIdentity: Jinnan-PC\Bar; S-1-5-21-3534336654-2901585401-846244909-1007

      AuthorizationContext: uuid-528e86ce-a4f4-48b3-9a2e-b713e1dea539-2

      ActivityId: <null>

      ServiceAuthorizationManager: <default>
[/code]
实际对于安全审核中所谓的授权失败指的是调用ServiceAuthorizationManager的CheckAccess方法返回False的情况。在默认的情况下,ServiceAuthorizationManager的CheckAccess方法总是返回True,所以授权总是会“成功”。
为了迎合安全审核对“授权失败”的判断,我在Service项目中创建了如下一个简单的自定ServiceAuthorizationManager。在重写的CheckAccessCore方法中,如果当前用户是Foo(Jinnan-PC\Jinnan)就发返回True,否则返回False。
[code]
     using System.ServiceModel;

     namespace Artech.WcfServices.Service

     {

         public class MyServiceAuthorizationManager : ServiceAuthorizationManager

         {

             protected override bool CheckAccessCore(OperationContext operationContext)

             {

                 string userName = operationContext.ServiceSecurityContext.PrimaryIdentity.Name;

                 return  string.Compare(userName, @"Jinnan-PC\Foo",true) == 0;

             }

         }

     }
[/code]
然后通过如下的配置将这个自定义的MyServiceAuthorizationManager应用到ServiceAuthorizationBehavior服务行为上。再次运行我们的程序,将会得到分别代表授权成功和失败的两条审核日志,并且在日志中还包含了我们自定的ServiceAuthorizationManager类型(ServiceAuthorizationManager: MyServiceAuthorizationManager)。[源代码从这里下载]
[code]
     <configuration>

       <system.serviceModel>

         ...

         <behaviors>

           <serviceBehaviors>

             <behavior  name="authenticationAudit">

               <serviceAuthorization serviceAuthorizationManagerType="Artech.WcfServices.Service.MyServiceAuthorizationManager, Artech.WcfServices.Service">

               </serviceAuthorization>

               <serviceSecurityAudit auditLogLocation ="Application"

                                     serviceAuthorizationAuditLevel ="SuccessOrFailure"/>

             </behavior>

           </serviceBehaviors>

         </behaviors>

       </system.serviceModel>

     </configuration>
[/code]
授权成功/失败审核日志:
[code]
     Service authorization succeeded.

      Service: http://127.0.0.1:3721/calculatorservice
      Action: http://www.artech.com/ICalculator/Add
      ClientIdentity: Jinnan-PC\Foo; S-1-5-21-3534336654-2901585401-846244909-1006

      AuthorizationContext: uuid-91ff29c8-84cb-4c1a-837c-0913c12c0be5-1

      ActivityId: <null>

      ServiceAuthorizationManager: MyServiceAuthorizationManager


     Service authorization failed.

      Service: http://127.0.0.1:3721/calculatorservice
      Action: http://www.artech.com/ICalculator/Add
      ClientIdentity: Jinnan-PC\Bar; S-1-5-21-3534336654-2901585401-846244909-1007

      AuthorizationContext: uuid-91ff29c8-84cb-4c1a-837c-0913c12c0be5-2

      ActivityId: <null>

      ServiceAuthorizationManager: MyServiceAuthorizationManager

      FaultException: Access is denied.
[/code]

相关文章推荐
- 快速入门系列--WCF--07传输安全、授权与审核
- 【实践】WCF 传输安全 1 前期准备之证书制作
- WCF BasicHttpBinding 安全解析(1)BasicHttpBinding基本配置
- 十种工具审核网络安全
- 白帽子讲安全 的一些记录点
- 记录关于HashMap线程不安全示例
- Windows Server 2003 安全审核事件ID 分析
- php安全配置记录和常见错误梳理
- WCF系列(九) - WCF安全系列(四) - WSHttpBinding绑定之Transport安全模式
- 【转】WCF传输安全(Transfer Security)的基本概念和原理:认证(Authentication)
- linux 进程审核 记录用户操作记录
- linux安全运维理论研究-记录《防线:企业Linux安全运维理念和实战》
- 查看账户安全审核失败日志事件
- WCF安全
- iOS app被审核拒绝后如何打开解决方案中心的记录
- WCF之安全
- WCF搭建企业通用架构(创建安全的、可靠的、跨平台的的分布式解决方案)视频教程下载
- WCF 安全之自定义的用户名/密码身份验证
- WCF的传输安全(读书笔记)
- WCF分布式安全开发实践(6):传输安全模式之自定义X509Certificate证书验证:Transport_X509Certificate_WSHttpBinding