创建指南针View的例子 android canvas compass
2011-07-18 17:49
295 查看
在接下来的例子里,你将通过扩展View类创建一个指南针View。它使用传统的指南针上升箭头来指示方向。当完成时,应该和图4-3看起来一样。 指南针是一个UI控件的例子,它需要完全不同的视觉显示,不同于SDK工具箱中的TextView和Button,让我们从无到有使它成为一个出色的控件。 在第10章,你将使用这个指南针View和设备内建的重力加速计来显示用户当前的方向。在11章中,你将学习更高级的Canvas绘制技巧来戏剧性地改进它的外观。
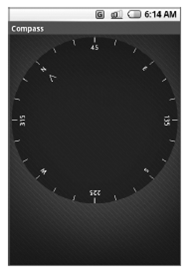
图4-3
1. 创建一个新的指南针工程,包含指南针View和拥有它的Activity。现在创建CompassView类来扩展View。创建构造函数来运行View可以在代码中实例化,或者通过资源layout的膨胀。添加一个新的initCompassView方法来初始化控件,并在每个构造函数中调用它。
2. 指南针控件应该总是一个圆的方式占据画布允许的尽可能多的空间。重写onMeasure方法来计算最小的边,使用setMeasuredDimension来设置高度和高度值。
3. 创建两个你将在绘制指南针时用到的资源文件:颜色和字符串。3.1. 创建文本字符串资源 /res/values/strings.xml.
3.2. 创建颜色资源 /res/values/colors.xml.
4. 现在回到CompassView类中。创建一个用来显示方向的属性并为它创建get和set方法。
5. 接下来,返回到initCompassView方法中,获取第3步中创建的资源的引用。以类作用域的方法存储字符串值和由颜色值创建的Paint对象。你将在下一步中用这些对象来绘制指南针。
6. 最后一步就是用第5步中创建的字符串和Paint对象来绘制指南针。接下来的代码片段只给出了有限的提示。你可以在第11章找到更多关于如何在Canvas上绘制和使用高级的Paint效果的细节。
6.1. 首先重写onDraw方法。
6.2. 找到控件的中心,存储最小边的长度作为指南针的半径。
6.3. 使用drawCircle方法绘制外边框,背景的颜色使用第5步中创建的circlePaint对象。
6.4. 指南针通过旋转面板来显示当前的指向,所以当前的方向总是在设备的顶端。为了达到这个效果,沿着当前指向的相反方向来旋转画布。
6.5. 现在剩下来的就是绘制表盘。旋转画布一周,每隔15°绘制一个标记,每隔45°绘制一个方向字符串。
7. 为了查看指南针,修改main.xml资源,使用你的CompassView来替换TextView。这个过程将在下个章节中有更加详细的解释。
Sample Code:
http://files.cnblogs.com/xirihanlin/DL090723@cc-CompassView.zip
Sample图示:
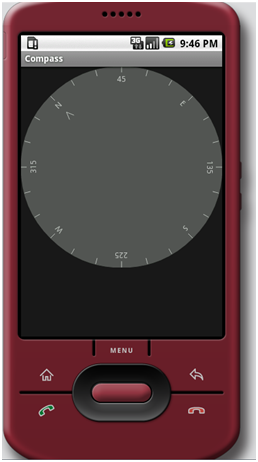
图4-3
1. 创建一个新的指南针工程,包含指南针View和拥有它的Activity。现在创建CompassView类来扩展View。创建构造函数来运行View可以在代码中实例化,或者通过资源layout的膨胀。添加一个新的initCompassView方法来初始化控件,并在每个构造函数中调用它。
package com.paad.compass;

import android.content.Context;
import android.graphics.*;
import android.graphics.drawable.*;
import android.view.*;
import android.util.AttributeSet;
import android.content.res.Resources;

public class CompassView extends View {

public CompassView(Context context) {
super(context);
initCompassView();
}

public CompassView(Context context, AttributeSet attrs) {
super(context, attrs);
initCompassView();
}

public CompassView(Context context, AttributeSet ats, int defaultStyle) {
super(context, ats, defaultStyle);
initCompassView();
}

protected void initCompassView() {
setFocusable(true);
}
}
2. 指南针控件应该总是一个圆的方式占据画布允许的尽可能多的空间。重写onMeasure方法来计算最小的边,使用setMeasuredDimension来设置高度和高度值。
@Override
protected void onMeasure(int widthMeasureSpec, int heightMeasureSpec) {
// The compass is a circle that fills as much space as possible.
// Set the measured dimensions by figuring out the shortest boundary,
// height or width.
int measuredWidth = measure(widthMeasureSpec);
int measuredHeight = measure(heightMeasureSpec);
int d = Math.min(measuredWidth, measuredHeight);
setMeasuredDimension(d, d);
}

private int measure(int measureSpec) {
int result = 0;
// Decode the measurement specifications.
int specMode = MeasureSpec.getMode(measureSpec);
int specSize = MeasureSpec.getSize(measureSpec);

if (specMode == MeasureSpec.UNSPECIFIED) {
// Return a default size of 200 if no bounds are specified.
result = 200;
} else {
// As you want to fill the available space
// always return the full available bounds.
result = specSize;
}
return result;
}
3. 创建两个你将在绘制指南针时用到的资源文件:颜色和字符串。3.1. 创建文本字符串资源 /res/values/strings.xml.
<?xml version=”1.0” encoding=”utf-8”?>
<resources>
<string name=”app_name”>Compass</string>
<string name=”cardinal_north”>N</string>
<string name=”cardinal_east”>E</string>
<string name=”cardinal_south”>S</string>
<string name=”cardinal_west”>W</string>
</resources>
3.2. 创建颜色资源 /res/values/colors.xml.
<?xml version=”1.0” encoding=”utf-8”?>
<resources>
<color name=”background_color”>#F555</color>
<color name=”marker_color”>#AFFF</color>
<color name=”text_color”>#AF00</color>
</resources>
4. 现在回到CompassView类中。创建一个用来显示方向的属性并为它创建get和set方法。
private float bearing;
public void setBearing(float _bearing) {
bearing = _bearing;
}

public float getBearing() {
return bearing;
}
5. 接下来,返回到initCompassView方法中,获取第3步中创建的资源的引用。以类作用域的方法存储字符串值和由颜色值创建的Paint对象。你将在下一步中用这些对象来绘制指南针。
private Paint markerPaint;
private Paint textPaint;
private Paint circlePaint;
private String northString;
private String eastString;
private String southString;
private String westString;
private int textHeight;

protected void initCompassView() {
setFocusable(true);

circlePaint = new Paint(Paint.ANTI_ALIAS_FLAG);
circlePaint.setColor(R.color. background_color);
circlePaint.setStrokeWidth(1);
circlePaint.setStyle(Paint.Style.FILL_AND_STROKE);

Resources r = this.getResources();

northString = r.getString(R.string.cardinal_north);
eastString = r.getString(R.string.cardinal_east);
southString = r.getString(R.string.cardinal_south);
westString = r.getString(R.string.cardinal_west);

textPaint = new Paint(Paint.ANTI_ALIAS_FLAG);
textPaint.setColor(r.getColor(R.color.text_color));

textHeight = (int)textPaint.measureText(“yY”);

markerPaint = new Paint(Paint.ANTI_ALIAS_FLAG);
markerPaint.setColor(r.getColor(R.color.marker_color));
}
6. 最后一步就是用第5步中创建的字符串和Paint对象来绘制指南针。接下来的代码片段只给出了有限的提示。你可以在第11章找到更多关于如何在Canvas上绘制和使用高级的Paint效果的细节。
6.1. 首先重写onDraw方法。
@Override
protected void onDraw(Canvas canvas) {
// TODO Auto-generated method stub
super.onDraw(canvas);
}
6.2. 找到控件的中心,存储最小边的长度作为指南针的半径。
int px = getMeasuredWidth() / 2;
int py = getMeasuredHeight() /2 ;
int radius = Math.min(px, py);
6.3. 使用drawCircle方法绘制外边框,背景的颜色使用第5步中创建的circlePaint对象。
// Draw the background
canvas.drawCircle(px, py, radius, circlePaint);
6.4. 指南针通过旋转面板来显示当前的指向,所以当前的方向总是在设备的顶端。为了达到这个效果,沿着当前指向的相反方向来旋转画布。
// Rotate our perspective so that the ‘top’ is
// facing the current bearing.
canvas.save();
canvas.rotate(-bearing, px, py);
6.5. 现在剩下来的就是绘制表盘。旋转画布一周,每隔15°绘制一个标记,每隔45°绘制一个方向字符串。
int textWidth = (int)textPaint.measureText(“W”);
int cardinalX = px-textWidth/2;
int cardinalY = py-radius+textHeight;

// Draw the marker every 15 degrees and text every 45.
for (int i = 0; i < 24; i++) {
// Draw a marker.
canvas.drawLine(px, py-radius, px, py-radius+10, markerPaint);
canvas.save();
canvas.translate(0, textHeight);

// Draw the cardinal points
if (i % 6 == 0) {
String dirString = “”;
switch (i)
{
case(0) :
{
dirString = northString;
int arrowY = 2*textHeight;
canvas.drawLine(px, arrowY, px-5, 3*textHeight, markerPaint);
canvas.drawLine(px, arrowY, px+5, 3*textHeight, markerPaint);
break;
}
case(6) : dirString = eastString; break;
case(12) : dirString = southString; break;
case(18) : dirString = westString; break;
}
canvas.drawText(dirString, cardinalX, cardinalY, textPaint);
} else if (i % 3 == 0) {
// Draw the text every alternate 45deg
String angle = String.valueOf(i*15);
float angleTextWidth = textPaint.measureText(angle);
int angleTextX = (int)(px-angleTextWidth/2);
int angleTextY = py-radius+textHeight;
canvas.drawText(angle, angleTextX, angleTextY, textPaint);
}
canvas.restore();
canvas.rotate(15, px, py);
}

canvas.restore();
7. 为了查看指南针,修改main.xml资源,使用你的CompassView来替换TextView。这个过程将在下个章节中有更加详细的解释。
<?xml version="1.0" encoding="utf-8"?>
<LinearLayout xmlns:android="http://schemas.android.com/apk/res/android"
android:orientation="vertical"
android:layout_width="fill_parent"
android:layout_height="fill_parent"
>
<com.pad.compass.view.CompassView
android:id="@+id/compass"
android:layout_width="fill_parent"
android:layout_height="fill_parent"
/>
</LinearLayout>
8. 运行Activity,你会看到指南针显示出来了。第10章中,你将了解如何绑定CompassView到设备的指南针。
Sample Code:
http://files.cnblogs.com/xirihanlin/DL090723@cc-CompassView.zip
Sample图示:

相关文章推荐
- 创建指南针View的例子
- 创建指南针View的例子
- 创建指南针View的例子
- Android Canvas 实现指南针(Compass)
- 深入理解View知识系列三-Window机制、Canvas的由来、Android事件的由来
- android2.3 View视图框架源码分析之一:android是如何创建一个view的?
- Android自定义View基础之Canvas、Paint介绍
- Android自定义View工具:Paint&Canvas(一)
- android TextView 例子代码(文字中划线、文字下划线)
- Android从零开搞系列:自定义View(8)Canvas解析
- Android 7.0 虚拟按键(NavigationBar)源码分析(一) 之 View的创建流程
- Android有关surfaceView重新创建的问题。
- RN调用android原生UI组建--kenBurnView组件(已分装)的例子
- Android SurfaceView SurfaceHoder 和 Canvas
- Android 漫游之路------ListView入门、Layout的Inflater创建View对象、常用数据适配器
- Android进阶学习-使用Canvas自定义ProgressView(3)
- Android应用程序窗口(Activity)的视图对象(View)的创建过程分析
- 图解Android - Android GUI 系统 (2) - 窗口管理 (View, Canvas, Window Manager)
- android Tab和ViewPager结合的例子
- Android官方开发文档Training系列课程中文版:创建自定义View之View的交互