Web Service框架XFire与Tomcat集成
2010-07-07 20:43
323 查看
Web Service框架XFire与Tomcat集成
刘岩
虽然XFire已经过时,但是无奈上个公司的项目用的是jdk1.4,所以我只能选择了老战车XFire进行Web Service的开发。
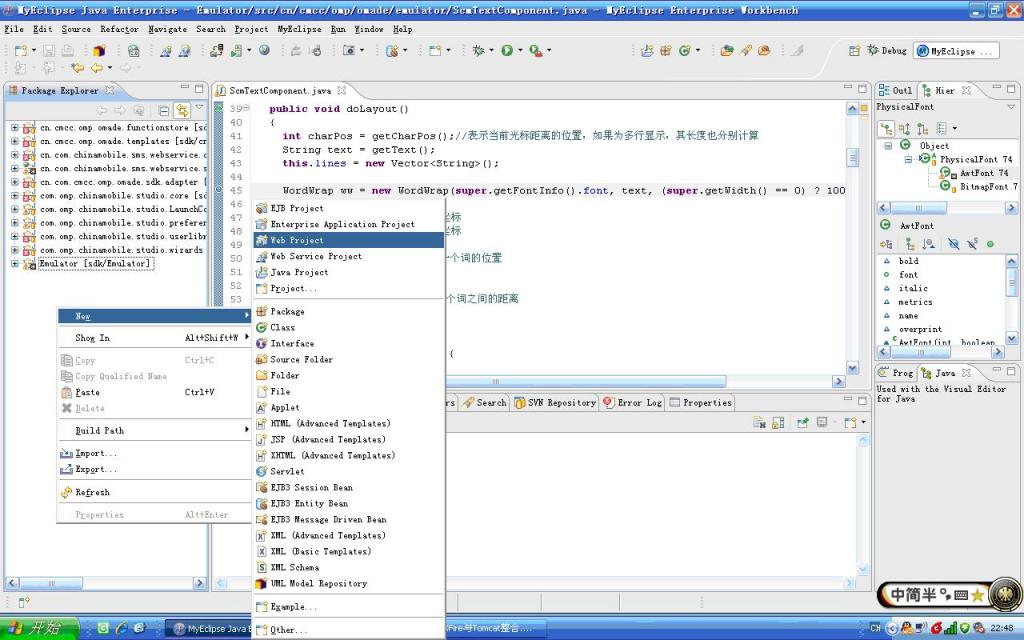
首先先用MyEclipse建立一个web项目,如图所示:
利用myeclipse为web项目添加xfire的支持,如图。
利用myeclipse为web项目添加xfire的支持,如图

一直点击默认即可,虽然这里是利用myeclipse插件进行的辅助添加,但是我们还是有必要看一下myeclipse为我们做了什么,添加了哪些jar包。
有关xfire的核心jar包如下图:
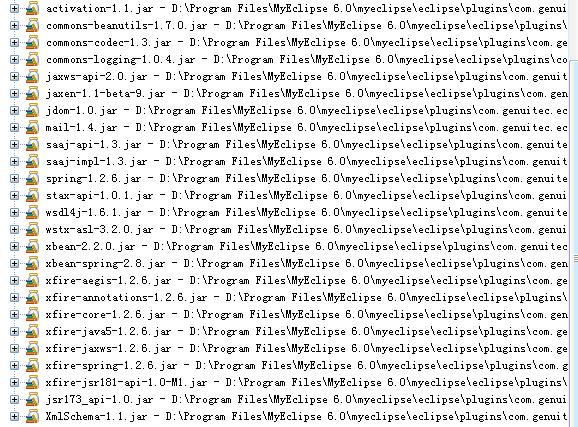
您最好还是看看都有哪些jar包,要不你的项目经理哪天该说了:“小X啊?你看看哪些jar包是不必要的,咱们的服务器空间可不够啊…………”。连服务器的空间都放不下几十兆的jar包,我只能汗了。
再来看/WebServices/services.xml,这个文件在真正环境中是会被放到到/WebRoot/WEB-INF/classes/META-INF/xfire下面,这个类似于Spring在web项目中的配置文件。
这个文件是配置你要暴露的web service的文件的,稍后还会详细阐述。
下面我们看看web.xml修改了些什么东西,web.xml内容如下:
声明了一个Servlet,此XFireServlet拦截了所有关于/services/*的请求,所以对外系统开放的web service的url基本上都是” http;//127.0.0.1:端口/项目/services/服务名”的形式。
下面编写一个接口和一个实现类
接口代码如下:
实现类代码如下:
之后配置一下刚才提到的/WebServices/services.xml文件,将刚刚编写的一般的Java类暴露成Web Service即可。
services.xml文件内容如下:
说明:
name是暴露的接口方法名,比如你的方法名就是sayHello
serviceClass是接口类路径
implementationClass是借口实现类路径
scope是服务在web容器中的作用域
style是绑定到wsdl的类型,这是以包装的形式绑定到soap
use:不解………………
好了让我们发布到Tomcat上面试一下吧。
发布成功后启动Tomcat服务器,输入地址” http://127.0.0.1:8080/xfireClient/services”就能看到所有的web服务项目

点击那个wsdl链接或者直接在地址栏输入” http://127.0.0.1:8080/xfireClient/services/sayHello?wsdl”就可以看到相应的wsdl了。
Wsdl内容如下
到此,一个小小的web service已经发布成功。下次有时间在写XFire客户端的代码和实例。
刘岩
虽然XFire已经过时,但是无奈上个公司的项目用的是jdk1.4,所以我只能选择了老战车XFire进行Web Service的开发。
首先先用MyEclipse建立一个web项目,如图所示:
利用myeclipse为web项目添加xfire的支持,如图。
利用myeclipse为web项目添加xfire的支持,如图
一直点击默认即可,虽然这里是利用myeclipse插件进行的辅助添加,但是我们还是有必要看一下myeclipse为我们做了什么,添加了哪些jar包。
有关xfire的核心jar包如下图:
您最好还是看看都有哪些jar包,要不你的项目经理哪天该说了:“小X啊?你看看哪些jar包是不必要的,咱们的服务器空间可不够啊…………”。连服务器的空间都放不下几十兆的jar包,我只能汗了。
再来看/WebServices/services.xml,这个文件在真正环境中是会被放到到/WebRoot/WEB-INF/classes/META-INF/xfire下面,这个类似于Spring在web项目中的配置文件。
这个文件是配置你要暴露的web service的文件的,稍后还会详细阐述。
下面我们看看web.xml修改了些什么东西,web.xml内容如下:
| <?xml version="1.0" encoding="UTF-8"?> <web-app xmlns="http://java.sun.com/xml/ns/j2ee" xmlns:xsi="http://www.w3.org/2001/XMLSchema-instance" version="2.4" xsi:schemaLocation="http://java.sun.com/xml/ns/j2ee http://java.sun.com/xml/ns/j2ee/web-app_2_4.xsd"> <servlet> <servlet-name>XFireServlet</servlet-name> <servlet-class> org.codehaus.xfire.transport.http.XFireConfigurableServlet </servlet-class> <load-on-startup>0</load-on-startup> </servlet> <servlet-mapping> <servlet-name>XFireServlet</servlet-name> <url-pattern>/services/*</url-pattern> </servlet-mapping> <welcome-file-list> <welcome-file>index.jsp</welcome-file> </welcome-file-list> </web-app> |
下面编写一个接口和一个实现类
接口代码如下:
| package webservice; /** * 暴露成web服务的接口类 * @author liuyan */ public interface WebServiceable { /** * * @param name * @return */ public String sayHello(String name); } |
| package webservice.impl; import webservice.WebServiceable; /** * 暴露成web服务的接口实现类 * @author liuyan */ public class WebServiceImpl implements WebServiceable { /** * * @param name * @return */ public String sayHello(String name) { String message = "加油"+name; System.out.println(message); return message; } } |
services.xml文件内容如下:
| <?xml version="1.0" encoding="UTF-8"?> <beans xmlns="http://xfire.codehaus.org/config/1.0"> <service> <name>sayHello</name> <serviceClass>webservice.WebServiceable</serviceClass> <implementationClass> webservice.impl.WebServiceImpl </implementationClass> <style>wrapped</style> <use>literal</use> <scope>request</scope> </service> </beans> |
name是暴露的接口方法名,比如你的方法名就是sayHello
serviceClass是接口类路径
implementationClass是借口实现类路径
scope是服务在web容器中的作用域
style是绑定到wsdl的类型,这是以包装的形式绑定到soap
use:不解………………
好了让我们发布到Tomcat上面试一下吧。
发布成功后启动Tomcat服务器,输入地址” http://127.0.0.1:8080/xfireClient/services”就能看到所有的web服务项目
点击那个wsdl链接或者直接在地址栏输入” http://127.0.0.1:8080/xfireClient/services/sayHello?wsdl”就可以看到相应的wsdl了。
Wsdl内容如下
| <?xml version="1.0" encoding="UTF-8"?> <wsdl:definitions targetNamespace="http://webservice" xmlns:soapenc12="http://www.w3.org/2003/05/soap-encoding" xmlns:tns="http://webservice" xmlns:wsdl="http://schemas.xmlsoap.org/wsdl/" xmlns:xsd="http://www.w3.org/2001/XMLSchema" xmlns:soap11="http://schemas.xmlsoap.org/soap/envelope/" xmlns:wsdlsoap="http://schemas.xmlsoap.org/wsdl/soap/" xmlns:soapenc11="http://schemas.xmlsoap.org/soap/encoding/" xmlns:soap12="http://www.w3.org/2003/05/soap-envelope"> <wsdl:types> <xsd:schema xmlns:xsd="http://www.w3.org/2001/XMLSchema" attributeFormDefault="qualified" elementFormDefault="qualified" targetNamespace="http://webservice"> <xsd:element name="sayHello"> <xsd:complexType> <xsd:sequence> <xsd:element maxOccurs="1" minOccurs="1" name="in0" nillable="true" type="xsd:string" /> </xsd:sequence> </xsd:complexType> </xsd:element> <xsd:element name="sayHelloResponse"> <xsd:complexType> <xsd:sequence> <xsd:element maxOccurs="1" minOccurs="1" name="out" nillable="true" type="xsd:string" /> </xsd:sequence> </xsd:complexType> </xsd:element> </xsd:schema> </wsdl:types> <wsdl:message name="sayHelloResponse"> <wsdl:part name="parameters" element="tns:sayHelloResponse"> </wsdl:part> </wsdl:message> <wsdl:message name="sayHelloRequest"> <wsdl:part name="parameters" element="tns:sayHello"></wsdl:part> </wsdl:message> <wsdl:portType name="sayHelloPortType"> <wsdl:operation name="sayHello"> <wsdl:input name="sayHelloRequest" message="tns:sayHelloRequest"> </wsdl:input> <wsdl:output name="sayHelloResponse" message="tns:sayHelloResponse"> </wsdl:output> </wsdl:operation> </wsdl:portType> <wsdl:binding name="sayHelloHttpBinding" type="tns:sayHelloPortType"> <wsdlsoap:binding style="document" transport="http://schemas.xmlsoap.org/soap/http" /> <wsdl:operation name="sayHello"> <wsdlsoap:operation soapAction="" /> <wsdl:input name="sayHelloRequest"> <wsdlsoap:body use="literal" /> </wsdl:input> <wsdl:output name="sayHelloResponse"> <wsdlsoap:body use="literal" /> </wsdl:output> </wsdl:operation> </wsdl:binding> <wsdl:service name="sayHello"> <wsdl:port name="sayHelloHttpPort" binding="tns:sayHelloHttpBinding"> <wsdlsoap:address location="http://127.0.0.1:8080/xfireClient/services/sayHello" /> </wsdl:port> </wsdl:service> </wsdl:definitions> |

相关文章推荐
- 使用MyEclipse构建Web Service(Xfire框架)
- Spring集成xfire 启动tomcat报错
- 使用MyEclipse构建Web Service(Xfire框架) (转)
- Web service之一 框架比较CXF xfire aixs2 aixs
- 基于Maven在Spring中集成CXF Web Service框架
- XFire+Spring整合构建Web Service的框架搭建实例代码下载
- xfire框架,搭建web service实例
- UserDao找不到,框架集成,springMVC和hibernate和Spring 保错。tomcat保错。。UserDao 找不到在spring-servlet.xml配置
- 基于Maven在Spring中集成CXF Web Service框架
- CXF简单实例--MyEclipse, Junit, Maven--Xfire升级版,Web Service框架
- Java Web整合开发(36) -- Web Service框架XFire
- MyEclipse构建Web Service(Xfire框架)
- 使用MyEclipse构建Web Service(Xfire框架)
- XFire+Spring整合构建Web Service的框架搭建实例代码下载
- 将jdk集成到tomcat里面(不用客户安装JRE) 或者 tomcat使用指定的jdk
- 使用Spring来实现任务计划服务三:集成quartz任务调度框架
- 基于Jmeter+Maven+Jenkins持续集成接口测试框架
- JEESZ分布式框架--单点登录集成方案
- ssm(spring+springMVC+Mybatis)框架 集成Quartz(定时任务框架)
- tomcat发布web service教程