使用ActiveX控件实现批量文件上传
2009-11-27 22:28
597 查看
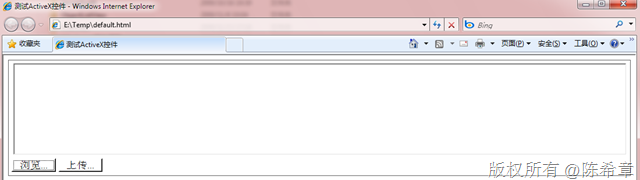
接上面两篇,我把这个ActiveX控件实际地完善了一下,实现了一个简单的批量上传的功能。大致效果看起来如下

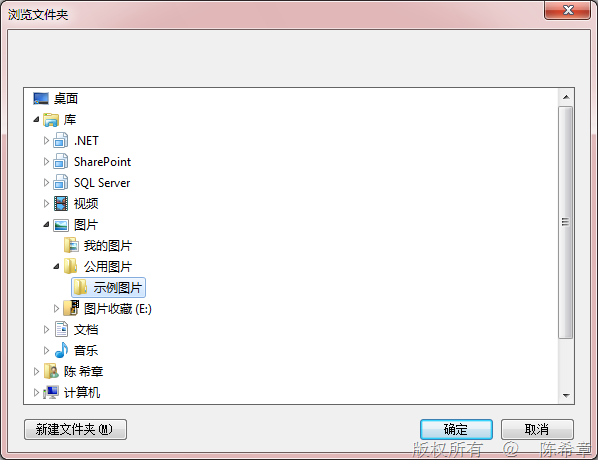
点击浏览按钮,会弹出一个对话框,让我们选择一个文件夹

选择某个文件夹之后,点击“确定”,此时会把该目录下面的图片文件读取出来一个列表。如下面所示

那么大致是怎么实现的呢?
首先,让我们的那个类型继承 System.Windows.Forms.UserControl类型
其次,在这个UserControl上面设计一些子控件

我们在拖拽控件的时候,设计器会帮助生成一个方法:InitializeComponent,类似下面这样
.csharpcode, .csharpcode pre
{
font-size: small;
color: black;
font-family: consolas, "Courier New", courier, monospace;
background-color: #ffffff;
/*white-space: pre;*/
}
.csharpcode pre { margin: 0em; }
.csharpcode .rem { color: #008000; }
.csharpcode .kwrd { color: #0000ff; }
.csharpcode .str { color: #006080; }
.csharpcode .op { color: #0000c0; }
.csharpcode .preproc { color: #cc6633; }
.csharpcode .asp { background-color: #ffff00; }
.csharpcode .html { color: #800000; }
.csharpcode .attr { color: #ff0000; }
.csharpcode .alt
{
background-color: #f4f4f4;
width: 100%;
margin: 0em;
}
.csharpcode .lnum { color: #606060; }
接下来编写代码,与windows Forms里面编程没有任何区别。为按钮绑定事件处理程序等等
这里要注意的是,需要手工地添加一个构造函数,在构造函数中调用InitializeComponent
.csharpcode, .csharpcode pre
{
font-size: small;
color: black;
font-family: consolas, "Courier New", courier, monospace;
background-color: #ffffff;
/*white-space: pre;*/
}
.csharpcode pre { margin: 0em; }
.csharpcode .rem { color: #008000; }
.csharpcode .kwrd { color: #0000ff; }
.csharpcode .str { color: #006080; }
.csharpcode .op { color: #0000c0; }
.csharpcode .preproc { color: #cc6633; }
.csharpcode .asp { background-color: #ffff00; }
.csharpcode .html { color: #800000; }
.csharpcode .attr { color: #ff0000; }
.csharpcode .alt
{
background-color: #f4f4f4;
width: 100%;
margin: 0em;
}
.csharpcode .lnum { color: #606060; }
至于选择文件夹的代码,大致如下
.csharpcode, .csharpcode pre
{
font-size: small;
color: black;
font-family: consolas, "Courier New", courier, monospace;
background-color: #ffffff;
/*white-space: pre;*/
}
.csharpcode pre { margin: 0em; }
.csharpcode .rem { color: #008000; }
.csharpcode .kwrd { color: #0000ff; }
.csharpcode .str { color: #006080; }
.csharpcode .op { color: #0000c0; }
.csharpcode .preproc { color: #cc6633; }
.csharpcode .asp { background-color: #ffff00; }
.csharpcode .html { color: #800000; }
.csharpcode .attr { color: #ff0000; }
.csharpcode .alt
{
background-color: #f4f4f4;
width: 100%;
margin: 0em;
}
.csharpcode .lnum { color: #606060; }
点击浏览按钮,会弹出一个对话框,让我们选择一个文件夹
选择某个文件夹之后,点击“确定”,此时会把该目录下面的图片文件读取出来一个列表。如下面所示

那么大致是怎么实现的呢?
首先,让我们的那个类型继承 System.Windows.Forms.UserControl类型
其次,在这个UserControl上面设计一些子控件

我们在拖拽控件的时候,设计器会帮助生成一个方法:InitializeComponent,类似下面这样
private void InitializeComponent()
{
this.components = new System.ComponentModel.Container();
this.listView1 = new System.Windows.Forms.ListView();
this.imageList1 = new System.Windows.Forms.ImageList(this.components);
this.btBrowser = new System.Windows.Forms.Button();
this.btUpload = new System.Windows.Forms.Button();
this.SuspendLayout();
//
// listView1
//
this.listView1.Anchor = ((System.Windows.Forms.AnchorStyles)((((System.Windows.Forms.AnchorStyles.Top | System.Windows.Forms.AnchorStyles.Bottom)
| System.Windows.Forms.AnchorStyles.Left)
| System.Windows.Forms.AnchorStyles.Right)));
this.listView1.LargeImageList = this.imageList1;
this.listView1.Location = new System.Drawing.Point(8, 5);
this.listView1.Name = "listView1";
this.listView1.Size = new System.Drawing.Size(790, 195);
this.listView1.TabIndex = 0;
this.listView1.UseCompatibleStateImageBehavior = false;
//
// imageList1
//
this.imageList1.ColorDepth = System.Windows.Forms.ColorDepth.Depth8Bit;
this.imageList1.ImageSize = new System.Drawing.Size(64, 64);
this.imageList1.TransparentColor = System.Drawing.Color.Transparent;
//
// btBrowser
//
this.btBrowser.Anchor = ((System.Windows.Forms.AnchorStyles)((System.Windows.Forms.AnchorStyles.Bottom | System.Windows.Forms.AnchorStyles.Left)));
this.btBrowser.Location = new System.Drawing.Point(5, 206);
this.btBrowser.Name = "btBrowser";
this.btBrowser.Size = new System.Drawing.Size(76, 23);
this.btBrowser.TabIndex = 1;
this.btBrowser.Text = "浏览...";
this.btBrowser.UseVisualStyleBackColor = true;
this.btBrowser.Click += new System.EventHandler(this.btBrowser_Click);
//
// btUpload
//
this.btUpload.Anchor = ((System.Windows.Forms.AnchorStyles)((System.Windows.Forms.AnchorStyles.Bottom | System.Windows.Forms.AnchorStyles.Left)));
this.btUpload.Location = new System.Drawing.Point(86, 206);
this.btUpload.Name = "btUpload";
this.btUpload.Size = new System.Drawing.Size(75, 23);
this.btUpload.TabIndex = 2;
this.btUpload.Text = "上传...";
this.btUpload.UseVisualStyleBackColor = true;
//
// MyActiveXControl
//
this.BackColor = System.Drawing.Color.White;
this.BorderStyle = System.Windows.Forms.BorderStyle.FixedSingle;
this.Controls.Add(this.btUpload);
this.Controls.Add(this.btBrowser);
this.Controls.Add(this.listView1);
this.Name = "MyActiveXControl";
this.Padding = new System.Windows.Forms.Padding(5);
this.Size = new System.Drawing.Size(806, 237);
this.ResumeLayout(false);

}
.csharpcode, .csharpcode pre
{
font-size: small;
color: black;
font-family: consolas, "Courier New", courier, monospace;
background-color: #ffffff;
/*white-space: pre;*/
}
.csharpcode pre { margin: 0em; }
.csharpcode .rem { color: #008000; }
.csharpcode .kwrd { color: #0000ff; }
.csharpcode .str { color: #006080; }
.csharpcode .op { color: #0000c0; }
.csharpcode .preproc { color: #cc6633; }
.csharpcode .asp { background-color: #ffff00; }
.csharpcode .html { color: #800000; }
.csharpcode .attr { color: #ff0000; }
.csharpcode .alt
{
background-color: #f4f4f4;
width: 100%;
margin: 0em;
}
.csharpcode .lnum { color: #606060; }
接下来编写代码,与windows Forms里面编程没有任何区别。为按钮绑定事件处理程序等等
这里要注意的是,需要手工地添加一个构造函数,在构造函数中调用InitializeComponent
public MyActiveXControl() {
InitializeComponent();
}
.csharpcode, .csharpcode pre
{
font-size: small;
color: black;
font-family: consolas, "Courier New", courier, monospace;
background-color: #ffffff;
/*white-space: pre;*/
}
.csharpcode pre { margin: 0em; }
.csharpcode .rem { color: #008000; }
.csharpcode .kwrd { color: #0000ff; }
.csharpcode .str { color: #006080; }
.csharpcode .op { color: #0000c0; }
.csharpcode .preproc { color: #cc6633; }
.csharpcode .asp { background-color: #ffff00; }
.csharpcode .html { color: #800000; }
.csharpcode .attr { color: #ff0000; }
.csharpcode .alt
{
background-color: #f4f4f4;
width: 100%;
margin: 0em;
}
.csharpcode .lnum { color: #606060; }
至于选择文件夹的代码,大致如下
private void btBrowser_Click(object sender, EventArgs e)
{
FolderBrowserDialog dialog = new FolderBrowserDialog();
dialog.SelectedPath = Environment.GetFolderPath(Environment.SpecialFolder.MyPictures);
if (dialog.ShowDialog() == DialogResult.OK)
{
listView1.Items.Clear();

DirectoryInfo dir = new DirectoryInfo(dialog.SelectedPath);

foreach (FileInfo file in dir.GetFiles("*.jpg"))
{
ListViewItem item = new ListViewItem(file.Name);
imageList1.Images.Add(Image.FromFile(file.FullName));
item.ImageIndex = imageList1.Images.Count - 1;
listView1.Items.Add(item);
}
}

}
.csharpcode, .csharpcode pre
{
font-size: small;
color: black;
font-family: consolas, "Courier New", courier, monospace;
background-color: #ffffff;
/*white-space: pre;*/
}
.csharpcode pre { margin: 0em; }
.csharpcode .rem { color: #008000; }
.csharpcode .kwrd { color: #0000ff; }
.csharpcode .str { color: #006080; }
.csharpcode .op { color: #0000c0; }
.csharpcode .preproc { color: #cc6633; }
.csharpcode .asp { background-color: #ffff00; }
.csharpcode .html { color: #800000; }
.csharpcode .attr { color: #ff0000; }
.csharpcode .alt
{
background-color: #f4f4f4;
width: 100%;
margin: 0em;
}
.csharpcode .lnum { color: #606060; }

相关文章推荐
- 使用ActiveX控件实现批量文件上传
- 使用jQuery Uploadify借助Dorado平台实现批量上传文件动态显示实时上传文件状态
- 文件批量上传的工具,要实现暂停继续、断点续传等功能(使用QtNetwork和QHttpMultiPart,和定时器检查超时)
- Android网络编程之使用HttpClient批量上传文件(二)AsyncTask+HttpClient并实现上传进度监听
- Struts2使用FlashFileUpload.swf实现批量文件上传
- 使用Ext js和SwfUpload实现批量文件上传(有上传进度条)
- Android网络编程之使用HttpClient批量上传文件(二)AsyncTask+HttpClient并实现上传进度监听
- 使用ext实现java文件批量上传
- 使用ajaxFileupload实现多文件批量上传
- Android网络编程之使用HttpClient批量上传文件(二)AsyncTask+HttpClient并实现上传进度监听
- 使用commons-fileupload实现单个和多个文件上传
- Java中使用多线程实现文件上传和下载
- django1.8使用表单上传文件的实现方法
- 使用jQuery ajaxupload插件实现无刷新上传文件
- AJAX与JSF实现带进度条的批量上传文件实例
- 在Servlet中使用开源fileupload包实现文件上传功能
- 使用 JavaScript File API 实现文件上传
- 使用HttpClient实现百度PCS文件上传
- NodeJS使用formidable实现文件上传
- SpringMVC+Ajax实现文件批量上传和下载功能实例代码