QuickFlow Aspx Form example deploy wizard
2009-09-21 23:31
302 查看
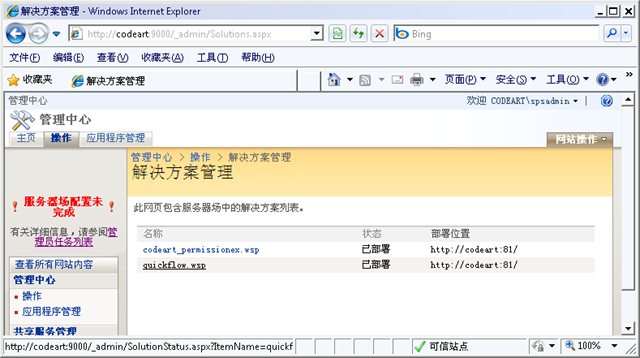
1)Deploy QuickFlow solution
download QuickFlow2
wsp,copy it to SharePonit server and unzip it ,click the wsp_install.cmd
file,this will automatically install the solution to the sharepoint farm.
Then login on to Administration Center,install the solution to Web Application.

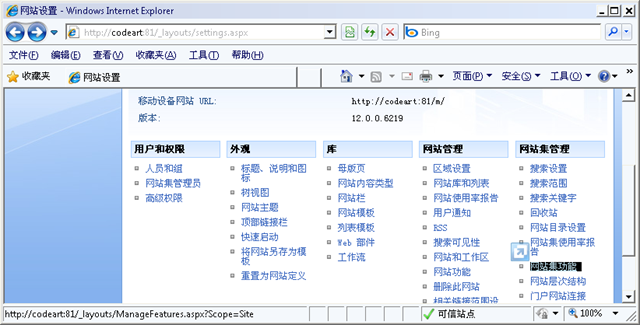
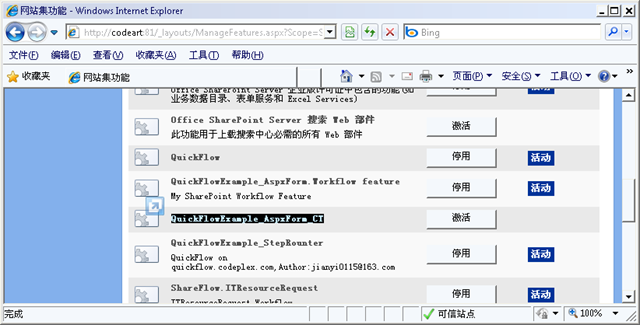
2)Activate QuickFlow Feature
Go to Site Collecton Features , activate QuickFlow Feature.


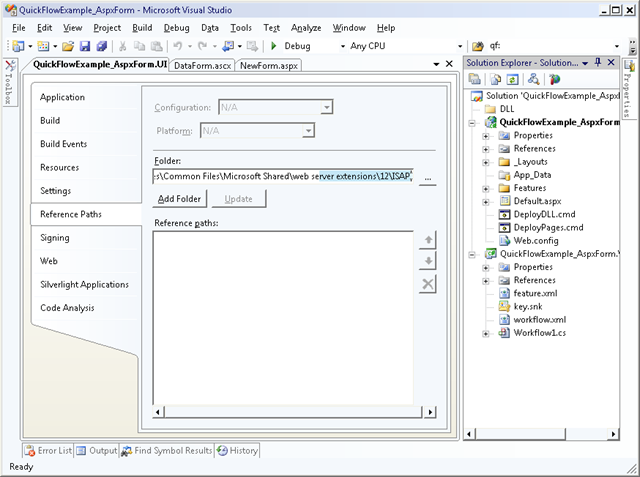
3)Download the example project - http://cid-7f5a25cdf47d03e6.office.live.com/self.aspx/QuickFlow/Examples/QuickFlowExample^_AspxForm.zip
unzip it and compile,You'll find there less a reference of Microsoft.SharePoint.dll,this dll is big,so I didn't package it,you can set the reference Path to C:\Program Files\Common Files\Microsoft Shared\web server extensions\12\ISAPI

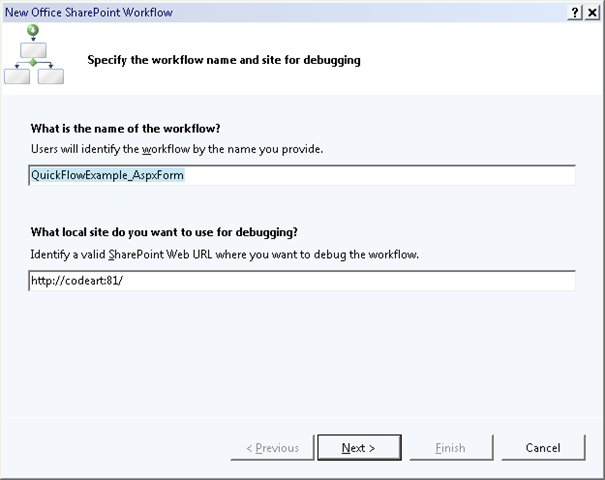
4)Change the list that the workflow associate

Click the Workflow project , the property panel contains "TargetSite" will appear。

Do follow the wizard , you need to choose a list , If there no a list , you can create a new custom list first.
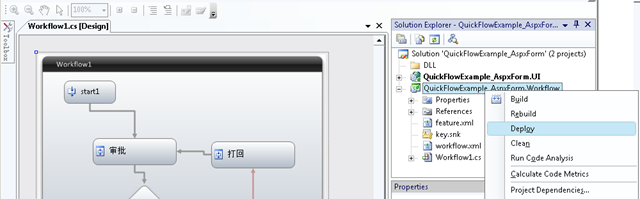
5)compile and deploy the workflow project.

before deploy the workflow, you need change some code:
private void task1_TaskCreating(object sender, QuickFlow.TaskEventArgs e)
{
e.TaskProperties.AssignedTo = "codeart\\spsadmin";
}
codeart\\spsadmin is a user of my enviroment , you should use your user.
6)Deploy aspx Form
Modify the bin path of DeployDLL.cmd file,and then run DeployDLL.cmd and DeployPages,cmd to deploy the dll and pages.。
(You can also deploy they by xcopy )

7)Install and activate contentType Feature
There is a feature contains a contentType , this content type define the new form URL and edit form URL, as follows:

copy QuickFlowExample_AspxForm_CT folder to C:\Program Files\Common Files\Microsoft Shared\web server extensions\12\TEMPLATE\FEATURES, then run the install.cmd to install the Feature。
activate Feature:

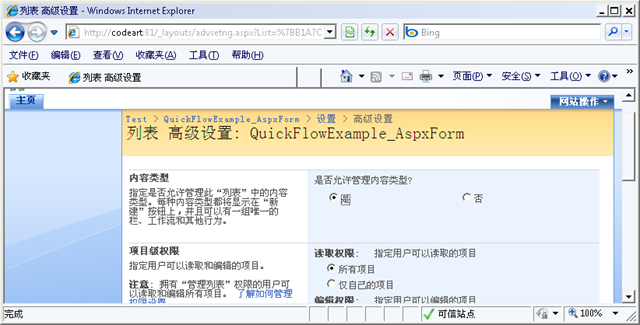
8)add the contenttype to list
first , allow the list to manage contentType:

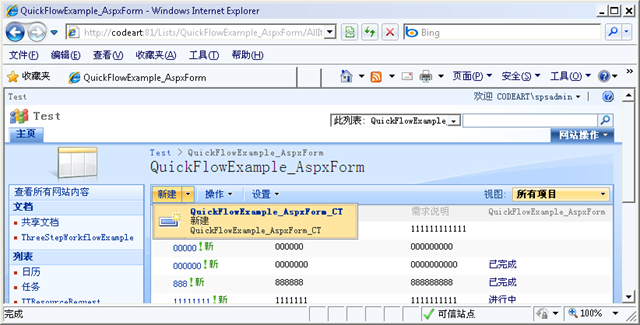
Go to list settings,Click “Add from exist content types”,add QuickFlowExamples_AspForm_CT ,then delete the default one.

back to the default View of list, check the new Menu.

wizard
Now , you can test it!
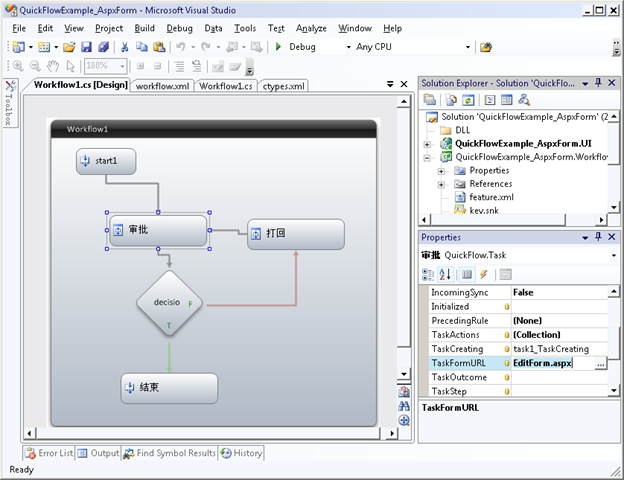
PS:the task form url is config in the WF designer:

download QuickFlow2
wsp,copy it to SharePonit server and unzip it ,click the wsp_install.cmd
file,this will automatically install the solution to the sharepoint farm.
Then login on to Administration Center,install the solution to Web Application.
2)Activate QuickFlow Feature
Go to Site Collecton Features , activate QuickFlow Feature.

3)Download the example project - http://cid-7f5a25cdf47d03e6.office.live.com/self.aspx/QuickFlow/Examples/QuickFlowExample^_AspxForm.zip
unzip it and compile,You'll find there less a reference of Microsoft.SharePoint.dll,this dll is big,so I didn't package it,you can set the reference Path to C:\Program Files\Common Files\Microsoft Shared\web server extensions\12\ISAPI
4)Change the list that the workflow associate

Click the Workflow project , the property panel contains "TargetSite" will appear。
Do follow the wizard , you need to choose a list , If there no a list , you can create a new custom list first.
5)compile and deploy the workflow project.
before deploy the workflow, you need change some code:
private void task1_TaskCreating(object sender, QuickFlow.TaskEventArgs e)
{
e.TaskProperties.AssignedTo = "codeart\\spsadmin";
}
codeart\\spsadmin is a user of my enviroment , you should use your user.
6)Deploy aspx Form
Modify the bin path of DeployDLL.cmd file,and then run DeployDLL.cmd and DeployPages,cmd to deploy the dll and pages.。
(You can also deploy they by xcopy )

7)Install and activate contentType Feature
There is a feature contains a contentType , this content type define the new form URL and edit form URL, as follows:

copy QuickFlowExample_AspxForm_CT folder to C:\Program Files\Common Files\Microsoft Shared\web server extensions\12\TEMPLATE\FEATURES, then run the install.cmd to install the Feature。
activate Feature:
8)add the contenttype to list
first , allow the list to manage contentType:
Go to list settings,Click “Add from exist content types”,add QuickFlowExamples_AspForm_CT ,then delete the default one.

back to the default View of list, check the new Menu.
wizard
Now , you can test it!
PS:the task form url is config in the WF designer:

相关文章推荐
- QuickFlow之ListForm字段初始值控制
- QuickFlow ListForm之父子表
- QuickFlow ListForm之父子表
- QuickFlow2.0 Aspx表单示例运行方法
- 浅谈SpringMVC中的AbstractWizardFormController
- JAX-RS @FormParam example
- PHP PEAR/HTML/QuickForm实现用户注册表单界面
- 如何把html(form1)中的值用Submit传给serch.aspx页面,在serch.aspx又如何获取呢?(收集)
- 定制Sharepoint 2010表单页面(DispForm.aspx)
- QuickFlow UI 控件之 NamedFormAttachment
- WebForm.aspx 页面通过 AJAX 访问WebForm.aspx.cs类中的方法,获取数据(转)
- javafx fxml form javascript css Example
- 如何改变WizardForm鼠标光标
- vs2008 vsess 建立的listDefinition 自定义NewForm.aspx等页面的方法
- CAS (4) —— CAS浏览器SSO访问顺序图详解(CAS Web Flow Diagram by Example)
- SharePoint:修改FormServer.aspx页面实现自定义逻辑
- QuickFlowDesigner教程(4)如何用代码控制活动操作人
- Spring Validation Example – Spring MVC Form Validator
- 第13款插件:formToWizard向导式表单插件
- Quickstart for Python/WSGI applications This quickstart will show you how to deploy simple WSGI appl