ASP.NET MVC Preview 4 学习笔记 Membership Authorization
2008-07-20 00:15
465 查看
本来想写Preview 3中使用Membership的,结果Preview 4
已经集成了,真郁闷。就随便写写吧

。
Membership的好处和不足在这里就不多说了。在中小项目中,使用它还是非常方便的。
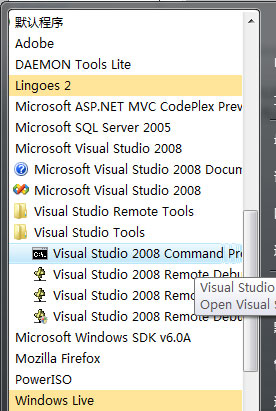
不废话,首先运行Visual Studio 2008 Command Prompt:
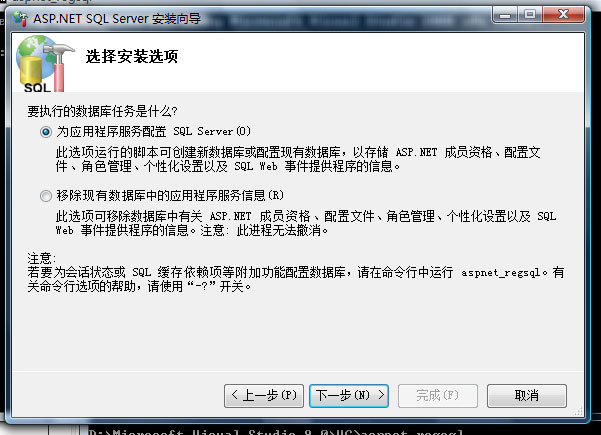
输入aspnet_regsql

然后根据向导:
选择数据库:
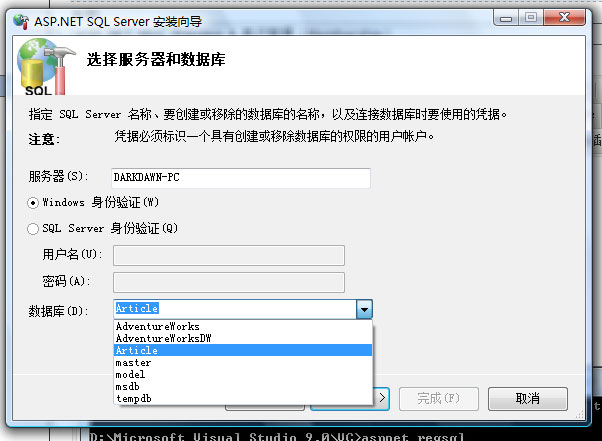
然后一路下一步,完成向导,这时候数据库中就已经有了Membership所需要的表、视图和存储过程。
记得修改web.config文件。用这个数据库的ConnectionString代替默认的SqlExpress的。就可以正常使用了。
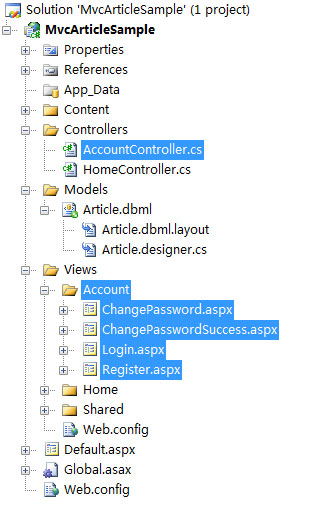
ASP.NET MVC PREVIEW4把Membership的使用已经集成了,并且做了默认的Controller和Views:
首先看看注册用户部分的代码:
1 public ActionResult Register(string username, string email, string password, string confirmPassword)
2 {
3
4 ViewData["Title"] = "Register";
5 ViewData["PasswordLength"] = Provider.MinRequiredPasswordLength;
6
7 // Non-POST requests should just display the Register form
8 if (Request.HttpMethod != "POST")
9 {
return View();
}
// Basic parameter validation
List<string> errors = new List<string>();
if (String.IsNullOrEmpty(username))
{
errors.Add("You must specify a username.");
}
if (String.IsNullOrEmpty(email))
{
errors.Add("You must specify an email address.");
}
if (password == null || password.Length < Provider.MinRequiredPasswordLength)
{
errors.Add(String.Format(CultureInfo.InvariantCulture,
"You must specify a password of {0} or more characters.",
Provider.MinRequiredPasswordLength));
}
if (!String.Equals(password, confirmPassword, StringComparison.Ordinal))
{
errors.Add("The password and confirmation do not match.");
}
if (errors.Count == 0)
{
// Attempt to register the user
MembershipCreateStatus createStatus;
MembershipUser newUser = Provider.CreateUser(username, password, email, null, null, true, null, out createStatus);
if (newUser != null)
{
FormsAuth.SetAuthCookie(username, false /* createPersistentCookie */);
return RedirectToAction("Index", "Home");
}
else
{
errors.Add(ErrorCodeToString(createStatus));
}
}
// If we got this far, something failed, redisplay form
ViewData["errors"] = errors;
ViewData["username"] = username;
ViewData["email"] = email;
return View();
}
首先是判断在页面没有提交的时候,输出视图;
然后根据提交的内容,做了一大堆验证,错误信息存储在List<string> errors里面;
然后创建用户,并登录。
说实在的,比俺自己写的,要好

。
这个基本上改改视图就可以直接用了,默认的视图:

再看看登录的Controller Action:
public ActionResult Login(string username, string password, bool? rememberMe)
{
ViewData["Title"] = "Login";
// Non-POST requests should just display the Login form
if (Request.HttpMethod != "POST")
{
return View();
}
// Basic parameter validation
List<string> errors = new List<string>();
if (String.IsNullOrEmpty(username))
{
errors.Add("You must specify a username.");
}
if (errors.Count == 0)
{
// Attempt to login
bool loginSuccessful = Provider.ValidateUser(username, password);
if (loginSuccessful)
{
FormsAuth.SetAuthCookie(username, rememberMe ?? false);
return RedirectToAction("Index", "Home");
}
else
{
errors.Add("The username or password provided is incorrect.");
}
}
// If we got this far, something failed, redisplay form
ViewData["errors"] = errors;
ViewData["username"] = username;
return View();
}
和注册大同小异。
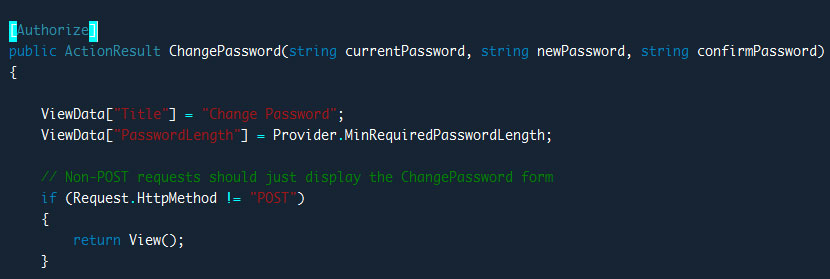
最后看看修改密码的Action,前面加了个Attribute:[Authorize],限制访问用户必须是已登录用户。
唉,啥都弄好了,叫俺以后咋混啊:
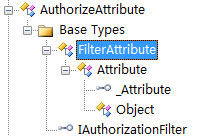
仍然是一个FilterAttribute,可以指定Roles和Users,

,俺以前也写过一个类似的,看来得废掉了。
注册、登录、验证还可以稍微改进,比如加进验证码、AJAX等等特性。
初看了一下,算是学习笔记吧,明天读读源代码,再写写心得。
已经集成了,真郁闷。就随便写写吧
。
Membership的好处和不足在这里就不多说了。在中小项目中,使用它还是非常方便的。
不废话,首先运行Visual Studio 2008 Command Prompt:
输入aspnet_regsql
然后根据向导:
选择数据库:
然后一路下一步,完成向导,这时候数据库中就已经有了Membership所需要的表、视图和存储过程。
记得修改web.config文件。用这个数据库的ConnectionString代替默认的SqlExpress的。就可以正常使用了。
ASP.NET MVC PREVIEW4把Membership的使用已经集成了,并且做了默认的Controller和Views:
首先看看注册用户部分的代码:
1 public ActionResult Register(string username, string email, string password, string confirmPassword)
2 {
3
4 ViewData["Title"] = "Register";
5 ViewData["PasswordLength"] = Provider.MinRequiredPasswordLength;
6
7 // Non-POST requests should just display the Register form
8 if (Request.HttpMethod != "POST")
9 {
return View();
}
// Basic parameter validation
List<string> errors = new List<string>();
if (String.IsNullOrEmpty(username))
{
errors.Add("You must specify a username.");
}
if (String.IsNullOrEmpty(email))
{
errors.Add("You must specify an email address.");
}
if (password == null || password.Length < Provider.MinRequiredPasswordLength)
{
errors.Add(String.Format(CultureInfo.InvariantCulture,
"You must specify a password of {0} or more characters.",
Provider.MinRequiredPasswordLength));
}
if (!String.Equals(password, confirmPassword, StringComparison.Ordinal))
{
errors.Add("The password and confirmation do not match.");
}
if (errors.Count == 0)
{
// Attempt to register the user
MembershipCreateStatus createStatus;
MembershipUser newUser = Provider.CreateUser(username, password, email, null, null, true, null, out createStatus);
if (newUser != null)
{
FormsAuth.SetAuthCookie(username, false /* createPersistentCookie */);
return RedirectToAction("Index", "Home");
}
else
{
errors.Add(ErrorCodeToString(createStatus));
}
}
// If we got this far, something failed, redisplay form
ViewData["errors"] = errors;
ViewData["username"] = username;
ViewData["email"] = email;
return View();
}
首先是判断在页面没有提交的时候,输出视图;
然后根据提交的内容,做了一大堆验证,错误信息存储在List<string> errors里面;
然后创建用户,并登录。
说实在的,比俺自己写的,要好
。
这个基本上改改视图就可以直接用了,默认的视图:
再看看登录的Controller Action:
public ActionResult Login(string username, string password, bool? rememberMe)
{
ViewData["Title"] = "Login";
// Non-POST requests should just display the Login form
if (Request.HttpMethod != "POST")
{
return View();
}
// Basic parameter validation
List<string> errors = new List<string>();
if (String.IsNullOrEmpty(username))
{
errors.Add("You must specify a username.");
}
if (errors.Count == 0)
{
// Attempt to login
bool loginSuccessful = Provider.ValidateUser(username, password);
if (loginSuccessful)
{
FormsAuth.SetAuthCookie(username, rememberMe ?? false);
return RedirectToAction("Index", "Home");
}
else
{
errors.Add("The username or password provided is incorrect.");
}
}
// If we got this far, something failed, redisplay form
ViewData["errors"] = errors;
ViewData["username"] = username;
return View();
}
和注册大同小异。
最后看看修改密码的Action,前面加了个Attribute:[Authorize],限制访问用户必须是已登录用户。
唉,啥都弄好了,叫俺以后咋混啊:
仍然是一个FilterAttribute,可以指定Roles和Users,
,俺以前也写过一个类似的,看来得废掉了。
注册、登录、验证还可以稍微改进,比如加进验证码、AJAX等等特性。
初看了一下,算是学习笔记吧,明天读读源代码,再写写心得。

相关文章推荐
- ASP.NET MVC Preview 4 源代码学习笔记 FilterAttribute
- 《Pro ASP.NET MVC 3 Framework》学习笔记之二十【URL和Routing】
- 【转载】ASP.NET MVC Web API 学习笔记---第一个Web API程序
- 精通 ASP.NET MVC 4 学习笔记(一)
- 蛙蛙推荐:ASP.NET MVC学习笔记
- ASP.Net MVC开发基础学习笔记(3):Razor视图引擎、控制器与路由机制学习
- ASP.Net MVC开发基础学习笔记(9):查看详情、编辑数据、删除数据
- ASP.NET MVC 学习笔记(1)
- 【总结】Asp.net MVC1.0 学习笔记索引
- 学习ASP.NET MVC5框架揭秘笔记-ASP.NET MVC是如何运行的(五)
- ASP.Net MVC开发基础学习笔记(1):走向MVC模式
- 《Pro ASP.NET MVC 3 Framework》学习笔记之六【C#部分特性】
- ASP.Net MVC开发基础学习笔记(4):校验、AJAX与过滤器
- Asp.net MVC 学习笔记 (3) --Controller 与View 之间的数据传递
- ASP.NET MVC Web API 学习笔记---第一个Web API程序
- 【jqGrid for ASP.NET MVC Documentation】.学习笔记.7.搜索过滤数据
- ASP.Net MVC开发基础学习笔记:三、Razor视图引擎、控制器与路由机制学习
- 《ASP.NET MVC 4 实战》学习笔记 1:第一个MVC用程序(上)
- 【ASP.NET MVC 学习笔记】- 10 Controller和Action(1)
- ASP.NET MVC 个人学习笔记之 提交表单