PyQt4-(2) 第一印象
2008-06-22 10:27
330 查看
来自:杂家杂谈
在这个部分,我们开始学习一些PyQt4的基本功能,解释会比较详细,就像教孩子说话一样。
最简单的example
下面的示例会非常的简单,仅仅显示一个小窗口,但是将来我们可以通过这个小窗口做很多事情。我们可以对它进行缩放,最大化,最小化。而这些就需要比较多的 代码了。但是开发人员已经帮我们完成了这些功能,因为这些功能在大多场合都会使用到,所以没有必要让我们重复。PyQt是一个高级别的工具库,如果使用级 别相对较低的库开发下面的功能,就非常可能需要更多的代码了。
1#!/usr/bin/python 2 3# simple.py 4 5import sys
6from PyQt4 import QtGui
7 8app = QtGui.QApplication(sys.argv)
9 10widget = QtGui.QWidget()
11widget.resize(250, 150)
12widget.setWindowTitle('simple')
13widget.show()
14 15sys.exit(app.exec_())
下面对代码进行分析
import sys
from PyQt4 import QtGui
这里,我们导入了必要的模块,PyQt4的基本模块都在QtGui中。
app = QtGui.QApplication(sys.argv)
每一个PyQt4程序都必须创建一个application对象,application类位于QtGui模块中。sys.argv传入命令行参数。Python脚本可以通过shell运行,这样我们就可以对程序的启动进行控制。
widget = QtGui.QWidget()
QWidget是PyQt4中所有用户接口对象的基类,我们使用QWidget默认的构造方法来创建QWidget对象,默认的构造方法没有指定父控件,如果一个widget没有指定父控件,那么我们就称他为一个window。
widget.resize(250, 150)
resize()方法调整widget的大小,在这里我们设定宽度为250px,高度为150px。
widget.setWindowTitle('simple')
setWindowTitle()方法设置了窗口的title,title在titlebar中显示。
widget.show()
调用show()方法将窗口显示出来。
sys.exit(app.exec_())
最 后,就会进入application的事件循环。事件处理就从这里开始,循环不断的从窗口接受需要处理的事件,然后将其分发给相应的时间处理方法。通过调 用exit()方法或者销毁widget来终止事件循环,调用sys.exit()方法确保了程序可以明确的退出,也就是程序退出后会告知系统。
也许你会问,为什么exec_()方法最后会有一个下划线?问得非常好,这完全是因为exec是python的一个关键字,所以我们不得不使用exec_来代替。

图1:simple
添加图标
应用程序的图标一般就是一个在程序标题栏左上角显示的小图片,下面的例子我们展示如何使用PyQt4来显示图标,同时引入一些新的方法。
Code highlighting produced by Actipro CodeHighlighter (freeware)
http://www.CodeHighlighter.com/
1 #!/usr/bin/python 2 3 # icon.py 4 5 import sys
6 from PyQt4 import QtGui
7 8 class Icon(QtGui.QWidget):
9 def __init__(self, parent=None):
10 QtGui.QWidget.__init__(self, parent)
11 12 self.setGeometry(300, 300, 250, 150)
13 self.setWindowTitle('Icon')
14 self.setWindowIcon(QtGui.QIcon('icons/web.png'))
15 16 app = QtGui.QApplication(sys.argv)
17 icon = Icon()
18 icon.show()
19 sys.exit(app.exec_())
程序使用的是类似C语言的过程式风格,Python同时支持过程式和面向对象式的编程风格。需要注意的是,在使用PyQt4时,意味着面向对象编程。
Code highlighting produced by Actipro CodeHighlighter (freeware)
http://www.CodeHighlighter.com/
class Icon(QtGui.QWidget):
def __init__(self, parent=None):
QtGui.QWidget.__init__(self, parent)
面向对象编程中最重要的三个要素就是类(classes),数据(data)和方法(methods)。首先我们建立一个类叫做Icon,他从QtGui.QWidget继承而来。这就意味着,我们必须要两次调用构造方法,一个是Icon类的,另一个是父类的。
Code highlighting produced by Actipro CodeHighlighter (freeware)
http://www.CodeHighlighter.com/
self.setGeometry(300, 300, 250, 150)
self.setWindowTitle('Icon') self.setWindowIcon(QtGui.QIcon('icons/web.png'))
上面三个方法都是从父类继承而来,即QtGui.QWidget。setGeometry()在这里做两件事情,一是指定了窗口在屏幕中的位置,二就是指 定了窗口的大小。前面两个参数是x和y坐标,后面两个是窗口的width和height。最后一个方法给窗口指定了一个图标,我们需要首先创建一个 QIcon对象,而QIcon接受一个参数指明图标的路径。
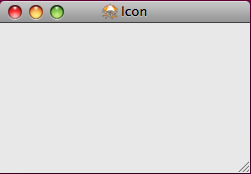
图2:Icon
展示信息提示(tooltip)
我们可以使用PyQt4给任何的部件添加信息提示功能。
Code highlighting produced by Actipro CodeHighlighter (freeware)
http://www.CodeHighlighter.com/
1 #!/usr/bin/python 2 3 # tooltip.py 4 5 import sys
6 from PyQt4 import QtGui
7 from PyQt4 import QtCore
8 9 class Tooltip(QtGui.QWidget):
10 def __init__(self, parent=None):
11 QtGui.QWidget.__init__(self, parent)
12 13 self.setGeometry(300, 300, 250, 150)
14 self.setWindowTitle('Tooltip')
15 16 self.setToolTip('This is a <b>QWidget</b> widget')
17 QtGui.QToolTip.setFont(QtGui.QFont('OldEnglish', 10))
18 19 app = QtGui.QApplication(sys.argv)
20 tooltip = Tooltip()
21 tooltip.show()
22 app.exec_()
在这个例子中,我们给QWidget提供了信息提示。
Code highlighting produced by Actipro CodeHighlighter (freeware)
http://www.CodeHighlighter.com/
self.setToolTip('This is a <b>QWidget</b> widget')
使用setTooltip()来创建一个tooltip,值得高兴的是,我们可以使用富文本格式(rich text formatting)。
Code highlighting produced by Actipro CodeHighlighter (freeware)
http://www.CodeHighlighter.com/
QtGui.QToolTip.setFont(QtGui.QFont('Courier New', 10))
由于QToolTip默认的字体看起来很糟糕,所以我们对之进行一些改进。
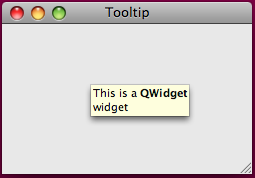
图3:Tooltip
关闭窗口
之前的例子中,我们关闭程序都是使用标题栏上的X按钮进行关闭的。下面的例子里,我们使用编程的方式来关闭窗口。而在这里,我们就要开始了解一些Qt中非常重要的概念了,信号(signals)和槽(slots)。
下面一行是QPushButton的构造方法。
Code highlighting produced by Actipro CodeHighlighter (freeware)
http://www.CodeHighlighter.com/
QPushButton(string text, QWidget parent = None)
参数text是在按钮上显示的文本,parent是按钮的父容器。
Code highlighting produced by Actipro CodeHighlighter (freeware)
http://www.CodeHighlighter.com/
1 #!/usr/bin/python 2 3 # quitbutton.py 4 5 import sys
6 from PyQt4 import QtGui, QtCore
7 8 class QuitButton(QtGui.QWidget):
9 def __init__(self, parent=None):
10 QtGui.QWidget.__init__(self, parent)
11 12 self.setGeometry(300, 300, 250, 150)
13 self.setWindowTitle('Icon')
14 15 quit = QtGui.QPushButton('Close', self)
16 quit.setGeometry(10, 10, 60, 35)
17 18 self.connect(quit, QtCore.SIGNAL('clicked()'), \
19 QtGui.qApp, QtCore.SLOT('quit()'))
20
21 app = QtGui.QApplication(sys.argv)
22 qb = QuitButton()
23 qb.show()
24 sys.exit(app.exec_())
Code highlighting produced by Actipro CodeHighlighter (freeware)
http://www.CodeHighlighter.com/
quit = QtGui.QPushButton('Close', self)
quit.setGeometry(10, 10, 60, 35)
在QWidget上我们创建了一个按钮,就像在屏幕中创建一个QWidget一样。
Code highlighting produced by Actipro CodeHighlighter (freeware)
http://www.CodeHighlighter.com/
self.connect(quit, QtCore.SIGNAL('clicked()'), \
QtGui.qApp, QtCore.SLOT('quit()'))
正如前面所说,PyQt4的事件处理时间里在信号(signals)和槽(slots)机制上的。如果我们点击了按钮,就发射了信号clicked()方 法。槽可以是PyQt槽,也可以是任何python中可调用的方法。通过使用QtCore.QObject.connect()方法将信号和槽链接起来。 在我们的例子中,使用的槽是PyQt中预先定义的quit()槽。就好象sender和receiver一样,在两个对象之间进行交流。在上面的例子 里,sender就是按钮,receiver就是application对象。
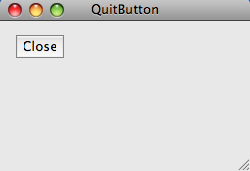
图4:quit button
对话框
默认情况下,如果我们点击了标题栏的X按钮,就会将窗口关闭,而有些时候,需要修改这样的行为。比如说在文本编辑器中,如个要关闭一个正在修改的文件,就会弹出一个对话框来确认。
Code highlighting produced by Actipro CodeHighlighter (freeware)
http://www.CodeHighlighter.com/
1 #!/usr/bin/python 2 3 # messagebox.py 4 5 import sys
6 from PyQt4 import QtGui
7 8 class MessageBox(QtGui.QWidget):
9 def __init__(self, parent=None):
10 QtGui.QWidget.__init__(self, parent)
11 12 self.setGeometry(300, 300, 250, 150)
13 self.setWindowTitle('message box')
14 15 def closeEvent(self, event):
16 reply = QtGui.QMessageBox.question(self, 'Message', \
17 'Are you sure to quit?',\
18 QtGui.QMessageBox.Yes, QtGui.QMessageBox.No)
19 if reply == QtGui.QMessageBox.Yes:
20 event.accept()
21 else:
22 event.ignore()
23
24
25 app = QtGui.QApplication(sys.argv)
26 mb = MessageBox()
27 mb.show()
28 sys.exit(app.exec_())
如果要关闭QWidget,QCloseEvent时间就会产生。要修改QWidget的默认行为,就需要重载父类中的closeEvent()方法。
Code highlighting produced by Actipro CodeHighlighter (freeware)
http://www.CodeHighlighter.com/
reply = QtGui.QMessageBox.question(self, 'Message', \
'Are you sure to quit?',\
QtGui.QMessageBox.Yes, QtGui.QMessageBox.No)
在这里,显示了两个按钮的对话框,Yes和No。第一个string参数出现在标题栏上,第二个string参数显示在对话框中。在reply中保存了返回值。
Code highlighting produced by Actipro CodeHighlighter (freeware)
http://www.CodeHighlighter.com/
if reply == QtGui.QMessageBox.Yes:
event.accept()
else:
event.ignore()
对返回值进行比较,如果点击了Yes按钮,就接受事件,关闭窗口,相反就忽略事件。
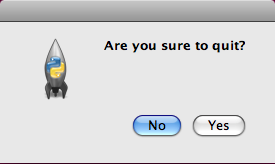
图5:message box
窗口居中
下面的代码展示了如何将创建的窗口在屏幕中居中。
Code highlighting produced by Actipro CodeHighlighter (freeware)
http://www.CodeHighlighter.com/
1 #!/usr/bin/python 2 3 # center.py 4 5 import sys
6 from PyQt4 import QtGui
7 8 class Center(QtGui.QWidget):
9 def __init__(self, parent=None):
10 QtGui.QWidget.__init__(self, parent)
11
12 self.setWindowTitle('center')
13 self.resize(250, 150)
14 self.center()
15 16 def center(self):
17 screen = QtGui.QDesktopWidget().screenGeometry()
18 size = self.geometry()
19 self.move((screen.width()-size.width())/2, (screen.height()-size.height())/2)
20
21
22 app = QtGui.QApplication(sys.argv)
23 c = Center()
24 c.show()
25 sys.exit(app.exec_())
Code highlighting produced by Actipro CodeHighlighter (freeware)
http://www.CodeHighlighter.com/
self.resize(250, 150)
将窗口大小调整为宽250px,高150px。
Code highlighting produced by Actipro CodeHighlighter (freeware)
http://www.CodeHighlighter.com/
screen = QtGui.QDesktopWidget().screenGeometry()
获得显示器的分辨率。
Code highlighting produced by Actipro CodeHighlighter (freeware)
http://www.CodeHighlighter.com/
size = self.geometry()
获得QWidget的大小。
Code highlighting produced by Actipro CodeHighlighter (freeware)
http://www.CodeHighlighter.com/
self.move((screen.width()-size.width())/2, (screen.height()-size.height())/2)
将窗口移动到屏幕中央。
在这个部分,我们开始学习一些PyQt4的基本功能,解释会比较详细,就像教孩子说话一样。
最简单的example
下面的示例会非常的简单,仅仅显示一个小窗口,但是将来我们可以通过这个小窗口做很多事情。我们可以对它进行缩放,最大化,最小化。而这些就需要比较多的 代码了。但是开发人员已经帮我们完成了这些功能,因为这些功能在大多场合都会使用到,所以没有必要让我们重复。PyQt是一个高级别的工具库,如果使用级 别相对较低的库开发下面的功能,就非常可能需要更多的代码了。
1#!/usr/bin/python 2 3# simple.py 4 5import sys
6from PyQt4 import QtGui
7 8app = QtGui.QApplication(sys.argv)
9 10widget = QtGui.QWidget()
11widget.resize(250, 150)
12widget.setWindowTitle('simple')
13widget.show()
14 15sys.exit(app.exec_())
下面对代码进行分析
import sys
from PyQt4 import QtGui
这里,我们导入了必要的模块,PyQt4的基本模块都在QtGui中。
app = QtGui.QApplication(sys.argv)
每一个PyQt4程序都必须创建一个application对象,application类位于QtGui模块中。sys.argv传入命令行参数。Python脚本可以通过shell运行,这样我们就可以对程序的启动进行控制。
widget = QtGui.QWidget()
QWidget是PyQt4中所有用户接口对象的基类,我们使用QWidget默认的构造方法来创建QWidget对象,默认的构造方法没有指定父控件,如果一个widget没有指定父控件,那么我们就称他为一个window。
widget.resize(250, 150)
resize()方法调整widget的大小,在这里我们设定宽度为250px,高度为150px。
widget.setWindowTitle('simple')
setWindowTitle()方法设置了窗口的title,title在titlebar中显示。
widget.show()
调用show()方法将窗口显示出来。
sys.exit(app.exec_())
最 后,就会进入application的事件循环。事件处理就从这里开始,循环不断的从窗口接受需要处理的事件,然后将其分发给相应的时间处理方法。通过调 用exit()方法或者销毁widget来终止事件循环,调用sys.exit()方法确保了程序可以明确的退出,也就是程序退出后会告知系统。
也许你会问,为什么exec_()方法最后会有一个下划线?问得非常好,这完全是因为exec是python的一个关键字,所以我们不得不使用exec_来代替。
图1:simple
添加图标
应用程序的图标一般就是一个在程序标题栏左上角显示的小图片,下面的例子我们展示如何使用PyQt4来显示图标,同时引入一些新的方法。
Code highlighting produced by Actipro CodeHighlighter (freeware)
http://www.CodeHighlighter.com/
1 #!/usr/bin/python 2 3 # icon.py 4 5 import sys
6 from PyQt4 import QtGui
7 8 class Icon(QtGui.QWidget):
9 def __init__(self, parent=None):
10 QtGui.QWidget.__init__(self, parent)
11 12 self.setGeometry(300, 300, 250, 150)
13 self.setWindowTitle('Icon')
14 self.setWindowIcon(QtGui.QIcon('icons/web.png'))
15 16 app = QtGui.QApplication(sys.argv)
17 icon = Icon()
18 icon.show()
19 sys.exit(app.exec_())
程序使用的是类似C语言的过程式风格,Python同时支持过程式和面向对象式的编程风格。需要注意的是,在使用PyQt4时,意味着面向对象编程。
Code highlighting produced by Actipro CodeHighlighter (freeware)
http://www.CodeHighlighter.com/
class Icon(QtGui.QWidget):
def __init__(self, parent=None):
QtGui.QWidget.__init__(self, parent)
面向对象编程中最重要的三个要素就是类(classes),数据(data)和方法(methods)。首先我们建立一个类叫做Icon,他从QtGui.QWidget继承而来。这就意味着,我们必须要两次调用构造方法,一个是Icon类的,另一个是父类的。
Code highlighting produced by Actipro CodeHighlighter (freeware)
http://www.CodeHighlighter.com/
self.setGeometry(300, 300, 250, 150)
self.setWindowTitle('Icon') self.setWindowIcon(QtGui.QIcon('icons/web.png'))
上面三个方法都是从父类继承而来,即QtGui.QWidget。setGeometry()在这里做两件事情,一是指定了窗口在屏幕中的位置,二就是指 定了窗口的大小。前面两个参数是x和y坐标,后面两个是窗口的width和height。最后一个方法给窗口指定了一个图标,我们需要首先创建一个 QIcon对象,而QIcon接受一个参数指明图标的路径。
图2:Icon
展示信息提示(tooltip)
我们可以使用PyQt4给任何的部件添加信息提示功能。
Code highlighting produced by Actipro CodeHighlighter (freeware)
http://www.CodeHighlighter.com/
1 #!/usr/bin/python 2 3 # tooltip.py 4 5 import sys
6 from PyQt4 import QtGui
7 from PyQt4 import QtCore
8 9 class Tooltip(QtGui.QWidget):
10 def __init__(self, parent=None):
11 QtGui.QWidget.__init__(self, parent)
12 13 self.setGeometry(300, 300, 250, 150)
14 self.setWindowTitle('Tooltip')
15 16 self.setToolTip('This is a <b>QWidget</b> widget')
17 QtGui.QToolTip.setFont(QtGui.QFont('OldEnglish', 10))
18 19 app = QtGui.QApplication(sys.argv)
20 tooltip = Tooltip()
21 tooltip.show()
22 app.exec_()
在这个例子中,我们给QWidget提供了信息提示。
Code highlighting produced by Actipro CodeHighlighter (freeware)
http://www.CodeHighlighter.com/
self.setToolTip('This is a <b>QWidget</b> widget')
使用setTooltip()来创建一个tooltip,值得高兴的是,我们可以使用富文本格式(rich text formatting)。
Code highlighting produced by Actipro CodeHighlighter (freeware)
http://www.CodeHighlighter.com/
QtGui.QToolTip.setFont(QtGui.QFont('Courier New', 10))
由于QToolTip默认的字体看起来很糟糕,所以我们对之进行一些改进。
图3:Tooltip
关闭窗口
之前的例子中,我们关闭程序都是使用标题栏上的X按钮进行关闭的。下面的例子里,我们使用编程的方式来关闭窗口。而在这里,我们就要开始了解一些Qt中非常重要的概念了,信号(signals)和槽(slots)。
下面一行是QPushButton的构造方法。
Code highlighting produced by Actipro CodeHighlighter (freeware)
http://www.CodeHighlighter.com/
QPushButton(string text, QWidget parent = None)
参数text是在按钮上显示的文本,parent是按钮的父容器。
Code highlighting produced by Actipro CodeHighlighter (freeware)
http://www.CodeHighlighter.com/
1 #!/usr/bin/python 2 3 # quitbutton.py 4 5 import sys
6 from PyQt4 import QtGui, QtCore
7 8 class QuitButton(QtGui.QWidget):
9 def __init__(self, parent=None):
10 QtGui.QWidget.__init__(self, parent)
11 12 self.setGeometry(300, 300, 250, 150)
13 self.setWindowTitle('Icon')
14 15 quit = QtGui.QPushButton('Close', self)
16 quit.setGeometry(10, 10, 60, 35)
17 18 self.connect(quit, QtCore.SIGNAL('clicked()'), \
19 QtGui.qApp, QtCore.SLOT('quit()'))
20
21 app = QtGui.QApplication(sys.argv)
22 qb = QuitButton()
23 qb.show()
24 sys.exit(app.exec_())
Code highlighting produced by Actipro CodeHighlighter (freeware)
http://www.CodeHighlighter.com/
quit = QtGui.QPushButton('Close', self)
quit.setGeometry(10, 10, 60, 35)
在QWidget上我们创建了一个按钮,就像在屏幕中创建一个QWidget一样。
Code highlighting produced by Actipro CodeHighlighter (freeware)
http://www.CodeHighlighter.com/
self.connect(quit, QtCore.SIGNAL('clicked()'), \
QtGui.qApp, QtCore.SLOT('quit()'))
正如前面所说,PyQt4的事件处理时间里在信号(signals)和槽(slots)机制上的。如果我们点击了按钮,就发射了信号clicked()方 法。槽可以是PyQt槽,也可以是任何python中可调用的方法。通过使用QtCore.QObject.connect()方法将信号和槽链接起来。 在我们的例子中,使用的槽是PyQt中预先定义的quit()槽。就好象sender和receiver一样,在两个对象之间进行交流。在上面的例子 里,sender就是按钮,receiver就是application对象。
图4:quit button
对话框
默认情况下,如果我们点击了标题栏的X按钮,就会将窗口关闭,而有些时候,需要修改这样的行为。比如说在文本编辑器中,如个要关闭一个正在修改的文件,就会弹出一个对话框来确认。
Code highlighting produced by Actipro CodeHighlighter (freeware)
http://www.CodeHighlighter.com/
1 #!/usr/bin/python 2 3 # messagebox.py 4 5 import sys
6 from PyQt4 import QtGui
7 8 class MessageBox(QtGui.QWidget):
9 def __init__(self, parent=None):
10 QtGui.QWidget.__init__(self, parent)
11 12 self.setGeometry(300, 300, 250, 150)
13 self.setWindowTitle('message box')
14 15 def closeEvent(self, event):
16 reply = QtGui.QMessageBox.question(self, 'Message', \
17 'Are you sure to quit?',\
18 QtGui.QMessageBox.Yes, QtGui.QMessageBox.No)
19 if reply == QtGui.QMessageBox.Yes:
20 event.accept()
21 else:
22 event.ignore()
23
24
25 app = QtGui.QApplication(sys.argv)
26 mb = MessageBox()
27 mb.show()
28 sys.exit(app.exec_())
如果要关闭QWidget,QCloseEvent时间就会产生。要修改QWidget的默认行为,就需要重载父类中的closeEvent()方法。
Code highlighting produced by Actipro CodeHighlighter (freeware)
http://www.CodeHighlighter.com/
reply = QtGui.QMessageBox.question(self, 'Message', \
'Are you sure to quit?',\
QtGui.QMessageBox.Yes, QtGui.QMessageBox.No)
在这里,显示了两个按钮的对话框,Yes和No。第一个string参数出现在标题栏上,第二个string参数显示在对话框中。在reply中保存了返回值。
Code highlighting produced by Actipro CodeHighlighter (freeware)
http://www.CodeHighlighter.com/
if reply == QtGui.QMessageBox.Yes:
event.accept()
else:
event.ignore()
对返回值进行比较,如果点击了Yes按钮,就接受事件,关闭窗口,相反就忽略事件。
图5:message box
窗口居中
下面的代码展示了如何将创建的窗口在屏幕中居中。
Code highlighting produced by Actipro CodeHighlighter (freeware)
http://www.CodeHighlighter.com/
1 #!/usr/bin/python 2 3 # center.py 4 5 import sys
6 from PyQt4 import QtGui
7 8 class Center(QtGui.QWidget):
9 def __init__(self, parent=None):
10 QtGui.QWidget.__init__(self, parent)
11
12 self.setWindowTitle('center')
13 self.resize(250, 150)
14 self.center()
15 16 def center(self):
17 screen = QtGui.QDesktopWidget().screenGeometry()
18 size = self.geometry()
19 self.move((screen.width()-size.width())/2, (screen.height()-size.height())/2)
20
21
22 app = QtGui.QApplication(sys.argv)
23 c = Center()
24 c.show()
25 sys.exit(app.exec_())
Code highlighting produced by Actipro CodeHighlighter (freeware)
http://www.CodeHighlighter.com/
self.resize(250, 150)
将窗口大小调整为宽250px,高150px。
Code highlighting produced by Actipro CodeHighlighter (freeware)
http://www.CodeHighlighter.com/
screen = QtGui.QDesktopWidget().screenGeometry()
获得显示器的分辨率。
Code highlighting produced by Actipro CodeHighlighter (freeware)
http://www.CodeHighlighter.com/
size = self.geometry()
获得QWidget的大小。
Code highlighting produced by Actipro CodeHighlighter (freeware)
http://www.CodeHighlighter.com/
self.move((screen.width()-size.width())/2, (screen.height()-size.height())/2)
将窗口移动到屏幕中央。

相关文章推荐
- PyQt4 - (2) 第一印象 (pyqt的入门)
- PyQt4 - (2) 第一印象
- PyQt4 - (2) 第一印象
- PyQt4 - (2) 第一印象
- SQLServer2012第一印象【多图】
- 由第一印象引发的联想
- 怎样留下好的第一印象
- 上大第一印象
- SpringBoot的RabbitMQ消息队列: 一、消息发送接收第一印象
- 怎样给人良好的第一印象
- Rancher 2.0 的第一印象
- google chrome第一印象
- 对ubuntu的第一印象
- 如何留下美好的第一印象
- 中美大都会第一印象
- 【转】爱因斯坦对美国的第一印象
- 让你提前知道软件开发(45):第一印象的代码
- rest第一印象
- 【转】四色原型-第一印象
- 第一印象